Why You’ll Love These Witch Finger Cookies
Halloween is three weeks out, and if you’re anything like me, you’ve already said yes to class treats, a trunk-or-treat table, and one costume party. That’s a lot of spooky desserts to deliver on one night.
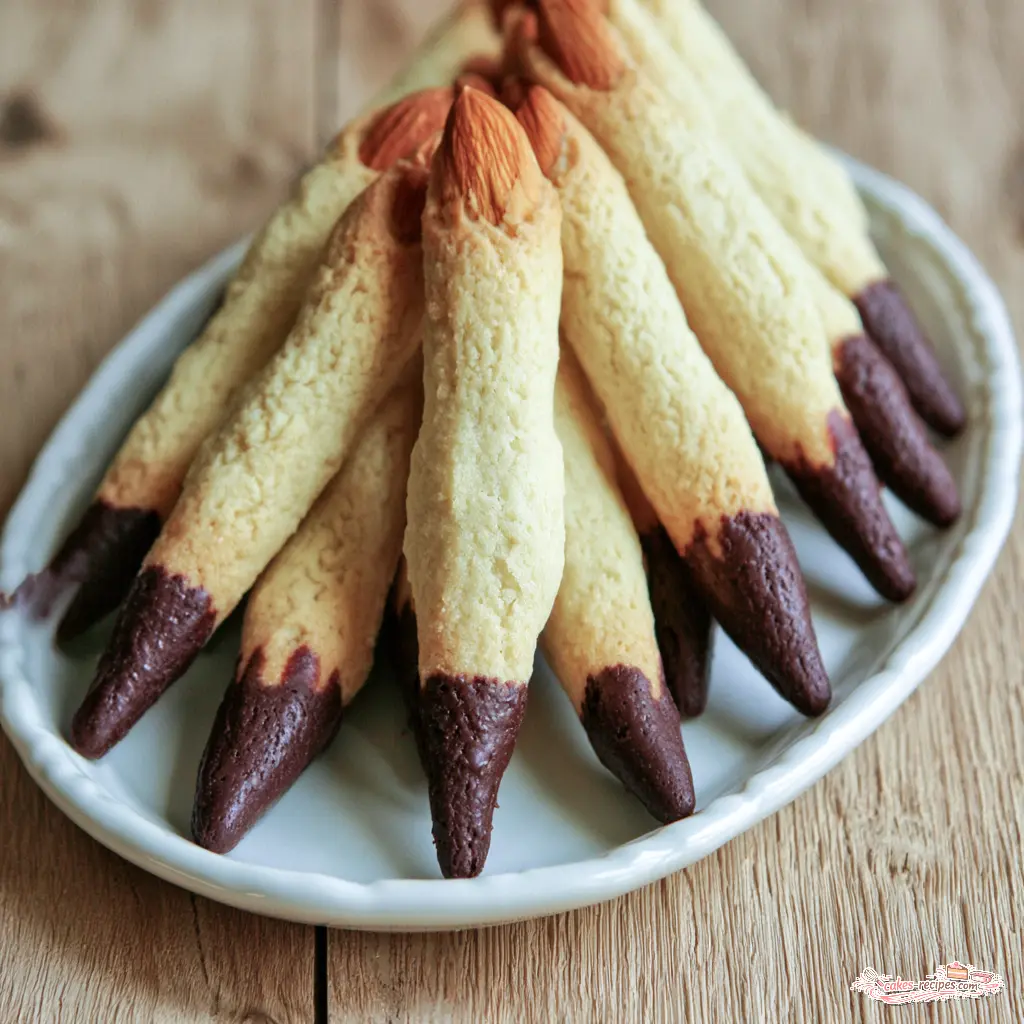
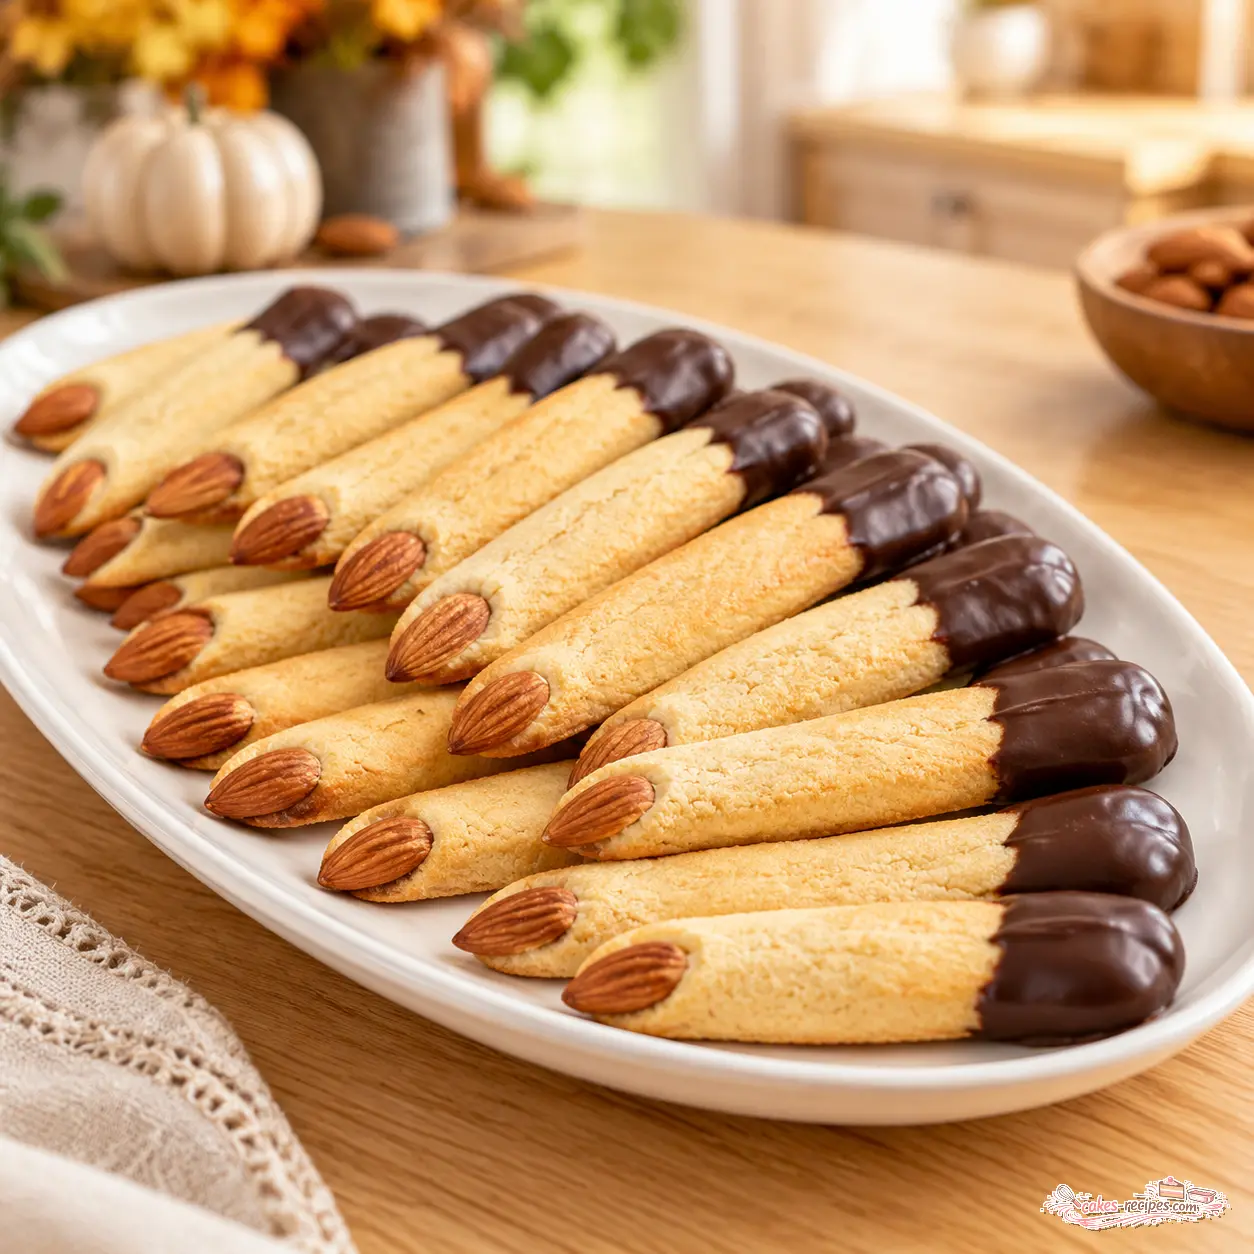
These witch finger Halloween sugar cookies are the recipe I come back to every October. They’re creepy-cute, they need zero Halloween cookie cutters, and one batch makes about 50 cookies. A whole almond goes into one end for the nail. The other end gets dipped in chocolate.
Here’s why they’ve become a crowd favorite in my kitchen:
- 45 minutes total, and most of that is hands-off oven time
- No royal icing for cookies, no flooding, no meringue powder, no decorating marathon
- Simple pantry ingredients (you probably have seven of the ten right now)
- Freezer-friendly, so you can bake this weekend and serve on the 31st
- Genuinely fun for kids to help shape and dip
My mom catered for a hundred people at a time, and her rule still runs my kitchen: always make more than they asked for. Fifty cookies covers a class party with plenty left over for the neighbors.
Ingredients & Easy Swaps
Everything here comes from a normal grocery run. Nothing fancy, nothing you’ll buy once and forget about.
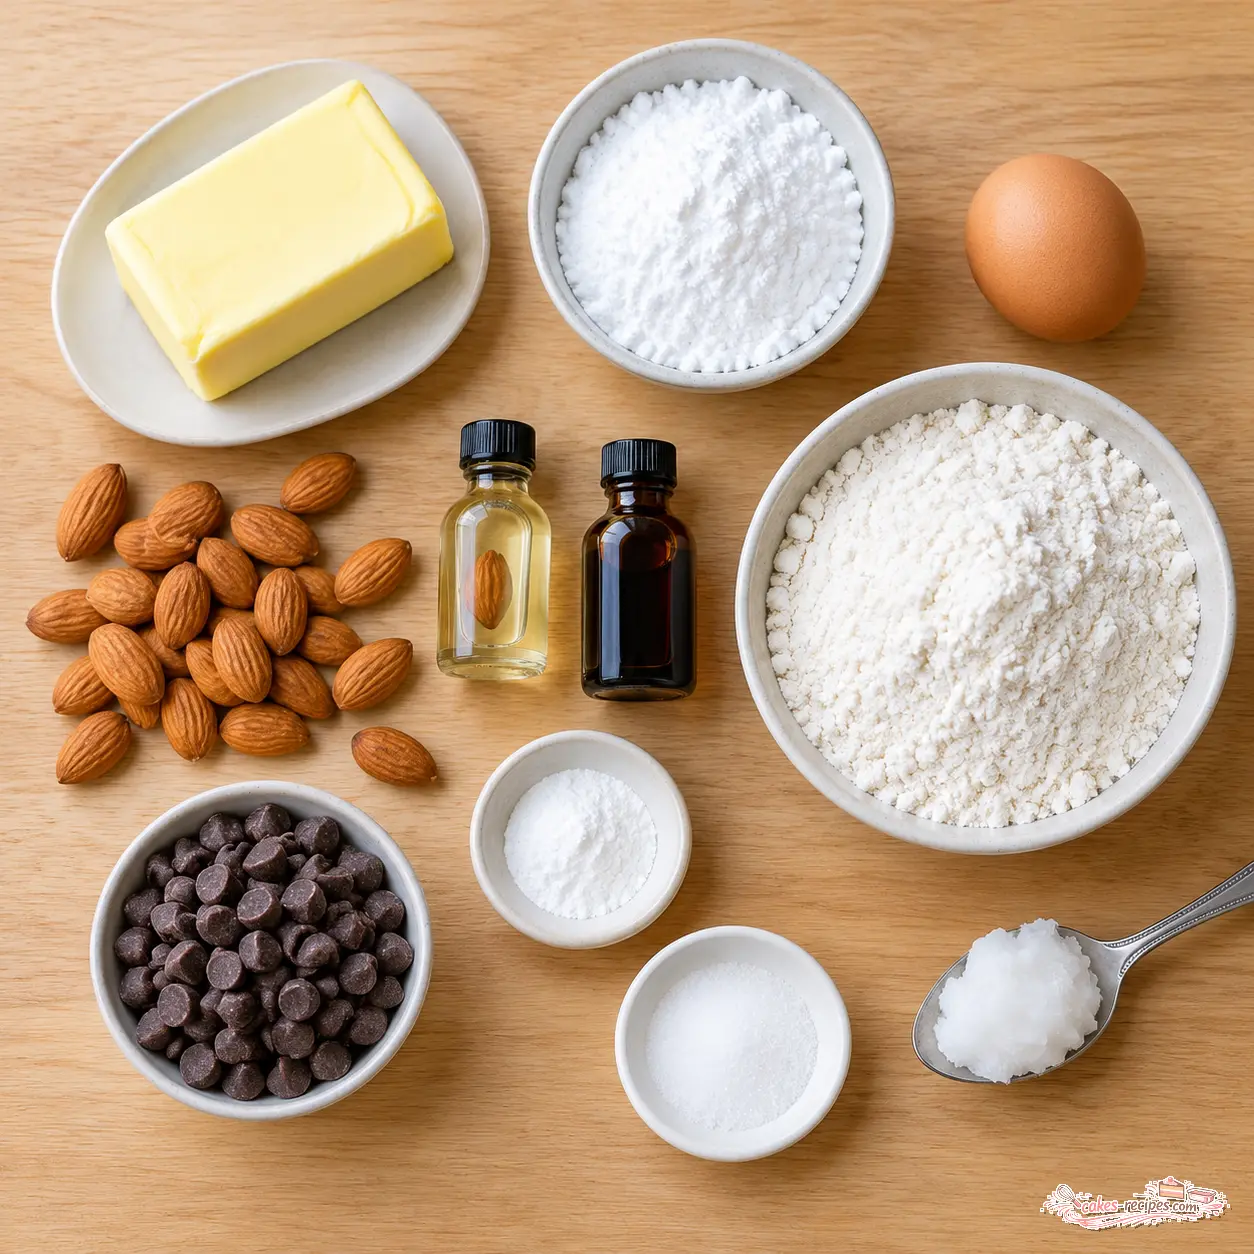
Two ingredients do the heavy lifting on flavor and texture. Powdered sugar, not granulated, is what gives these Halloween sugar cookies that soft, tender crumb instead of a crunchy snap. And almond extract paired with vanilla is what makes people ask what’s in them.
Texture targets are simple. The dough should feel like soft Play-Doh. The baked cookie should be pale gold at the edges with a barely-there firmness in the middle. If your kitchen smells like toasted butter and vanilla when you open the oven, you’re right on track.
Easy Swaps That Actually Work
- Flavor: swap the almond extract for orange or lemon extract. Same amount, completely different cookie.
- Nuts: hazelnuts work in place of whole almonds. Same press-and-bake method.
- Salted butter: fine in a pinch. Just cut the added salt down to about a quarter teaspoon.
- Nut-free: skip the almond and press a semisweet chocolate chip into the tip instead. It melts into a little rounded nail and nobody misses a thing.
Shopping Notes
Almonds: whole, raw, unsalted. Slivered almonds sit too flat. You want that rounded whole almond shape for the nail.
Chocolate: semisweet chips plus a teaspoon of coconut oil or shortening gives you a glossy dip that sets firm and snaps when you bite it.
How to Make Witch Finger Cookies
There are four stages: make the dough, shape it, bake it, dip it. Preheat the oven to 350°F (175°C) and line two baking sheets with parchment paper before you start.
Stage 1: Cream the Butter and Sugar
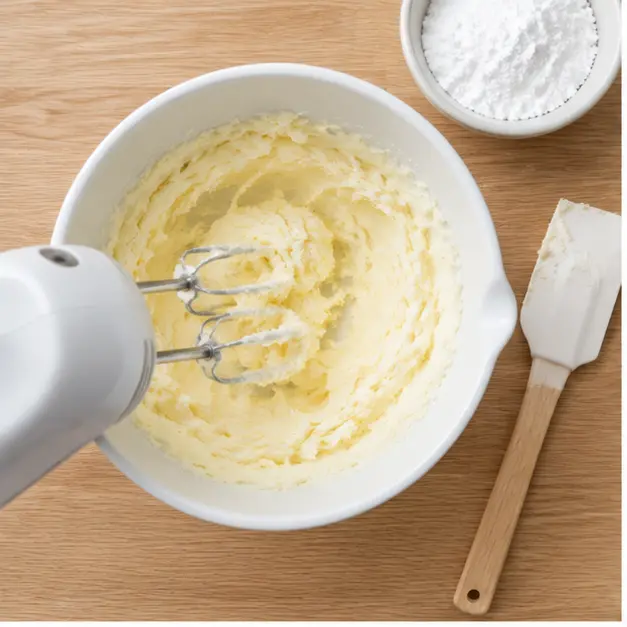
Beat the softened butter and powdered sugar with an electric mixer for about 2 minutes, until the mixture turns pale and fluffy. Scrape down the sides and bottom of the bowl with a rubber spatula. Trust me on this one. An unscraped bowl leaves streaks of butter that never fully blend, and you’ll taste it later.
Beat in the egg, almond extract, and vanilla extract. Then whisk the flour, baking powder, and salt together in a separate bowl and add it gradually on low speed. Stop as soon as the dough pulls together.
Stage 2: Shaping the Dough Into Fingers
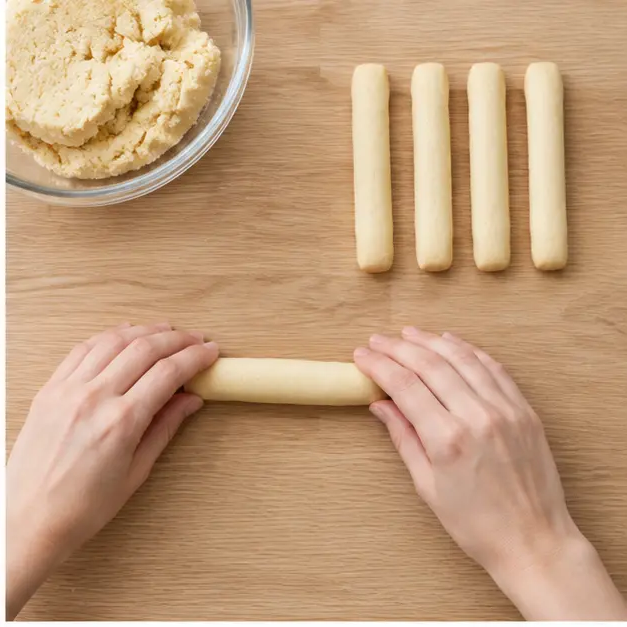
Scoop about 1 tablespoon of dough and roll it between your palms into a log roughly 3 inches long and 1/2 inch thick. Slightly tapered ends look more convincing. Place them 2 inches apart on the prepared sheets.
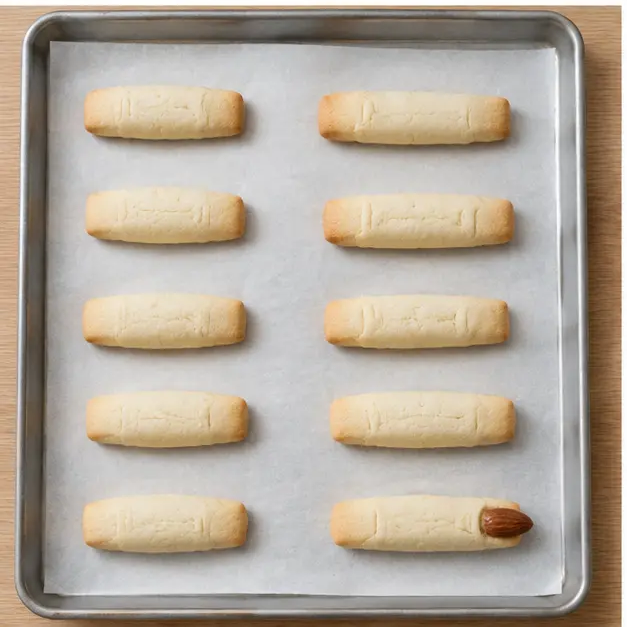
Then press one whole almond into one end of each cookie, flat side down, so it sits like a nail. Push it in deep enough that about a third of the almond is buried. That’s what keeps the nail attached through baking and dipping.
If your dough feels too soft to hold a shape, chill it for 20 to 30 minutes. This is the step people skip, and it’s the reason their Halloween sugar cookies turn into blobs on the tray.
Stage 3: Bake Until Just Set
Bake for 20 to 25 minutes, until the cookies are set and only very lightly golden at the edges. Let them cool completely on the baking sheet. They firm up as they cool, which is exactly what you want.
If you’re baking two sheets at once, rotate them front to back and top to bottom halfway through. My first-ever batch for a school fundraiser had one burned corner and one raw corner because I ignored that. Learned it the hard way.
Stage 4: Almond Nails and Chocolate Dips
Melt the semisweet chocolate chips with the coconut oil in a microwave-safe bowl in 30-second bursts, stirring between each one, until smooth and glossy. The coconut oil isn’t optional in my book. It thins the chocolate enough for a clean dip and gives you that snap when it sets.
Dip the end opposite the almond into the chocolate, let the excess drip back into the bowl, and lay the cookie on wax paper. Chill for about 15 minutes until the coating hardens.
Want a bloodier look? Stir a few drops of red gel food coloring into the melted chocolate, or drizzle a little red-tinted chocolate over the tips after they set. Same flavor, way more drama.

Tips for Perfect Witch Finger Cookies
These are the details that separate good Halloween sugar cookies from the ones people photograph before they eat them.
- Chill the dough if it’s warm. Twenty to thirty minutes firms the butter and keeps your shapes sharp. A cool October kitchen helps, but a warm house needs the fridge.
- Pull them early, not late. The cookies should be set but not browned. Overbaking turns them crisp and dry instead of soft.
- Check your baking powder. Drop half a teaspoon into hot water. If it fizzes, it’s good. If nothing happens, toss it and buy new.
- Use an oven thermometer. Most home ovens run 25 degrees off in one direction or another, and a hot oven means spread.
- Keep them uniform. A level tablespoon scoop gives you even cookies that bake at the same rate.
- Go easy on the dip. A thin chocolate coat sets faster and looks cleaner than a thick one.
One more thing: parchment paper does more than save cleanup. It gives the dough a slick surface so the cookies slide instead of gripping, which helps this no-spread sugar cookie dough hold its shape on the baking sheet.
Common Mistakes to Avoid
I’ve made every single one of these. You don’t have to.
- ❌ Overbaking until browned. ✅ Pull them when they’re set with just a hint of gold at the edges. They finish setting as they cool.
- ❌ Shaping with warm, sticky dough. ✅ Chill it 20 to 30 minutes first. Cold dough holds a log shape; warm dough slumps.
- ❌ Rolling fat, uneven fingers. ✅ Keep them around 1/2 inch thick. Thick middles bake raw while thin tips dry out.
- ❌ Crowding the baking sheet. ✅ Leave at least 2 inches between cookies so heat circulates evenly.
- ❌ Barely pressing the almond in. ✅ Bury about a third of it. A shallow almond pops off the second you dip.
- ❌ Melting chocolate in long bursts. ✅ Thirty seconds at a time, stirring in between. Chocolate scorches fast and there’s no fixing it.
Storage & Make-Ahead
Storage is where these Halloween sugar cookies really shine, because you can do almost all of the work in advance.
- Room temperature: airtight container for up to 5 days. Cool completely first, or trapped steam makes them soggy.
- Freezer, baked: up to 2 months. Layer with parchment between the dipped cookies so the coating doesn’t smear, then thaw at room temperature.
- Freezer, unbaked: shape the dough, press in the almonds, and freeze the cookies on a tray until solid. Then bake straight from frozen, adding 3 to 5 minutes.
This is my favorite kind of party prep. Bake a tray three weeks early, stack it in the freezer, pull it out the morning of. No 11 p.m. frosting emergencies.
One note on the chocolate coating. If it develops a chalky white film in the freezer, that’s just cocoa butter bloom, and it’s harmless. It disappears once the cookies come back to room temperature.
Serving & Presentation Ideas
How you plate these matters more than you’d think, because the whole joke is the severed-hand look.
Arrange them on a platter in a loose fan with the chocolate-dipped ends pointing outward, like a row of fingers reaching for the edge. It takes ten seconds and gets a reaction every time.
- Class party treats: tuck two or three into cellophane bags tied with orange ribbon.
- Halloween party food table: set out a small bowl of Halloween sprinkles for anyone who wants to add more chaos.
- Movie night: serve them on a dark plate next to warm cocoa. The contrast makes the pale cookies pop.
- Trick-or-treat treats for neighbors you actually like: a small plate at the door gets you the good kind of reputation.
And if you’d rather make classic cutout Halloween sugar cookies instead, this same dough rolls beautifully. Use Halloween cookie cutters for pumpkin shaped cookies, ghost cookies, and bat cookies, roll to about 1/4 inch, and decorate with buttercream frosting, royal icing for cookies, edible eyes, or tinted icing. Same recipe, different costume.
Go Make Some Halloween Magic
When you make these for your Halloween party, you’ll get the moment I look forward to all year. The tray comes out of the kitchen, someone laughs, someone reaches for a second cookie before they’ve finished the first.
If you want more crowd-friendly dessert ideas and easy cookie decorating ideas saved to one very organized Pinterest board, come find me there. Tag me in your spooky cookie photos too. I love seeing what everyone creates.
Go make some Halloween magic, one sugar cookie at a time.
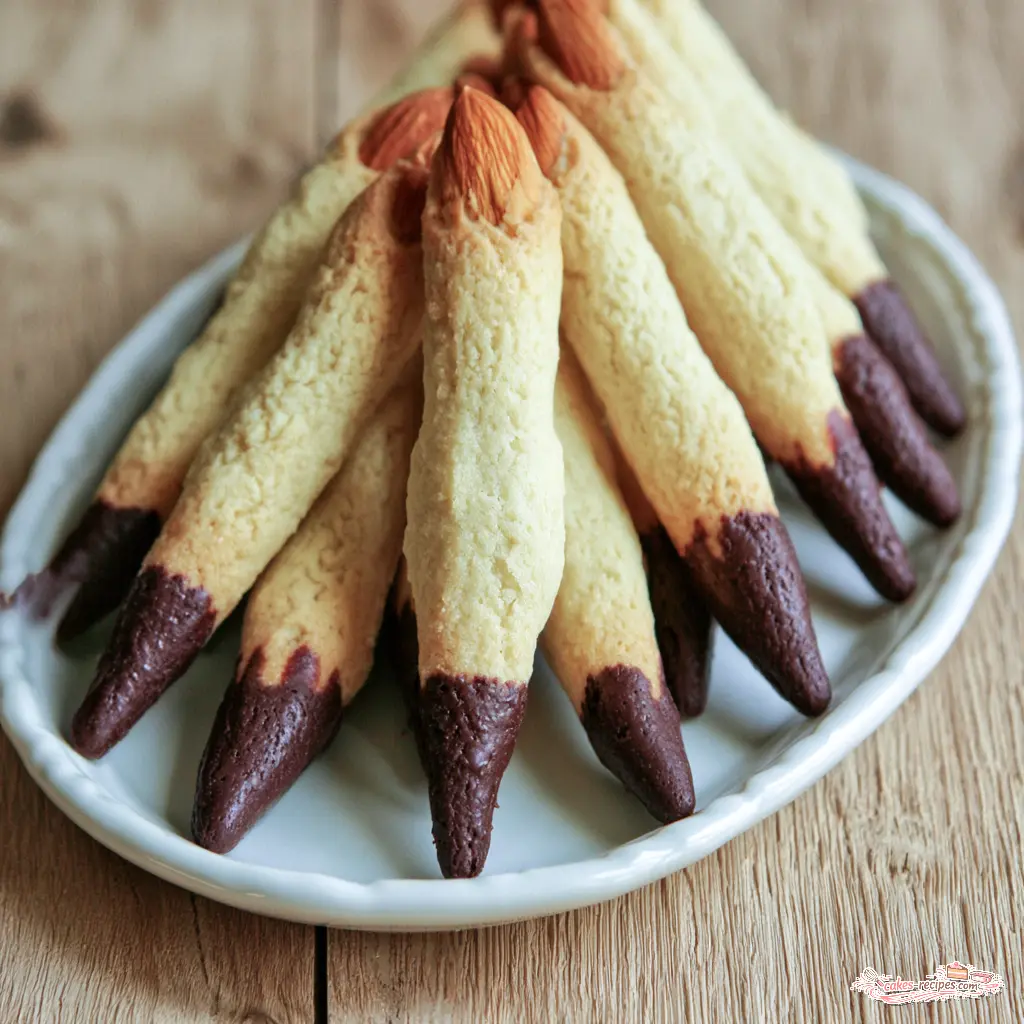
Halloween Sugar Cookies: Witch Finger Treats
Ingredients
Method
- Preheat oven to 350°F (175°C). Line two baking sheets with parchment paper.
- In a large bowl, beat the softened butter and powdered sugar with an electric mixer until pale and fluffy, about 2 minutes.
- Beat in the egg, almond extract, and vanilla extract until fully incorporated.
- In a separate bowl, whisk together the flour, baking powder, and salt.
- Gradually add the dry ingredients to the butter mixture, mixing on low speed until a soft dough forms.
- Scoop out about 1 tablespoon of dough and roll it into a finger shape, roughly 3 inches long and 1/2 inch thick.
- Place the shaped dough on the prepared baking sheets, spacing them 2 inches apart. Press a whole almond into one end of each cookie to resemble a fingernail.
- Bake for 20 to 25 minutes, until the cookies are set and very lightly golden at the edges. Let cool completely on the baking sheet.
- Melt the chocolate chips with the coconut oil in a microwave-safe bowl in 30-second bursts, stirring until smooth.
- Dip the end opposite the almond into the melted chocolate, then place on wax paper to set. Chill until chocolate hardens, about 15 minutes.
Nutrition
Notes
Tried this recipe?
Let us know how it was!Frequently Asked Questions
Source: Learn More About This Dish
How long do Halloween sugar cookies last?
Stored in an airtight container at room temperature, these cookies stay fresh for up to 5 days. In the freezer they hold for up to 2 months. Cool them completely before storing, and layer parchment between chocolate-dipped cookies so the coating doesn’t smear.