

Samoa Macaroons
Ingredients
Method
- Preheat your oven to 310°F. Line a baking sheet with parchment paper and fit a pastry bag with a 1/2-inch plain tip.
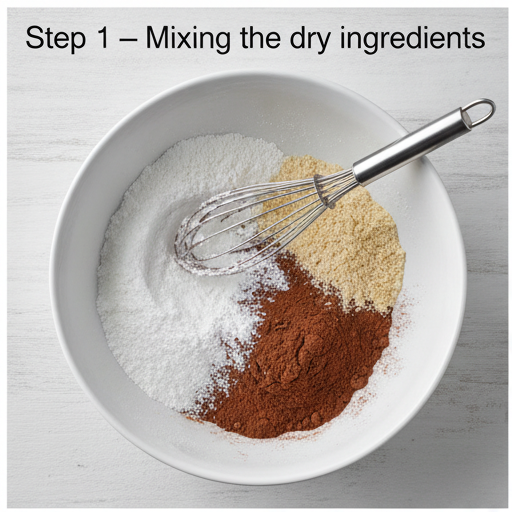
- In a medium bowl, whisk together the powdered sugar, cocoa powder, and almond flour.
- Using an electric mixer, beat the egg whites until foamy. Gradually add the granulated sugar and continue beating until stiff peaks form.
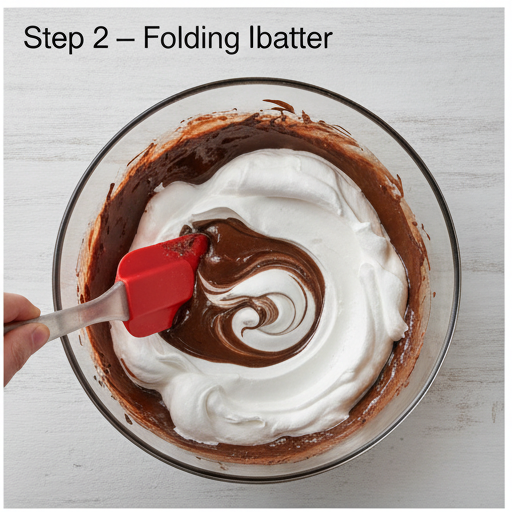
- Gently fold the dry ingredients into the egg whites in two additions using a rubber spatula. Stop when the batter is smooth, thick, glossy, and slowly drips off the spatula. Do not overmix.
- Spoon the batter into the prepared pastry bag. Pipe 1-inch circles (about 1 tablespoon each) onto the lined baking sheet, spacing them evenly.
- Hold the baking sheet with both hands and tap it firmly on the counter a few times to flatten the macarons. Let them sit uncovered for 15 minutes, then bake for 15 to 20 minutes. They are done when set but not firm; a gentle shake with your finger should not jiggle. Slightly undercook for a chewy texture.
- Let the macarons cool completely on the baking sheet before removing.
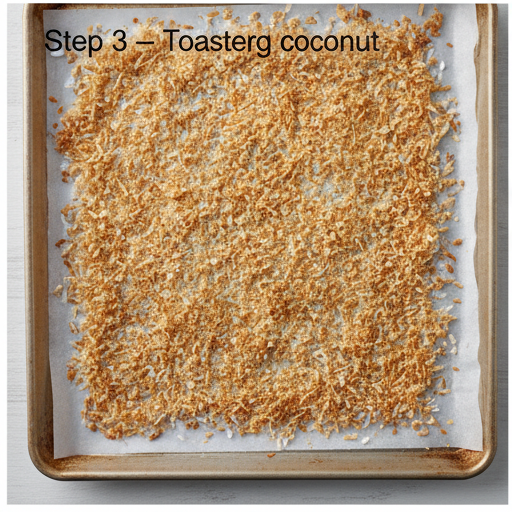
- Preheat the oven to 300°F. Spread the shredded coconut evenly on a parchment-lined baking sheet. Toast for 10 to 20 minutes, stirring every 5 minutes, until golden. Let cool on the sheet, stirring occasionally. Set aside.
- Place the unwrapped caramels, milk, and salt in a large microwave-safe bowl. Microwave on high for 1 to 2 minutes, stirring every 30 seconds, until smooth. Fold in the toasted coconut with a spatula.
- Using two teaspoons lightly coated with nonstick spray, drop a rounded teaspoon of the filling onto one macaron shell and gently sandwich with another shell.
Nutrition
Notes
Tried this recipe?
Let us know how it was!Why You’ll Love These Samoa Macaroons
I don’t know about you, but I have a very specific relationship with Girl Scout cookies. It’s a seasonal thing, you know? I stock up on Samoas every spring, freeze half the boxes, and then ration them like they’re precious jewels. But by mid-July, when the craving hits and the freezer stash is just a memory, I get desperate. That’s where these samoa macaroons come in.
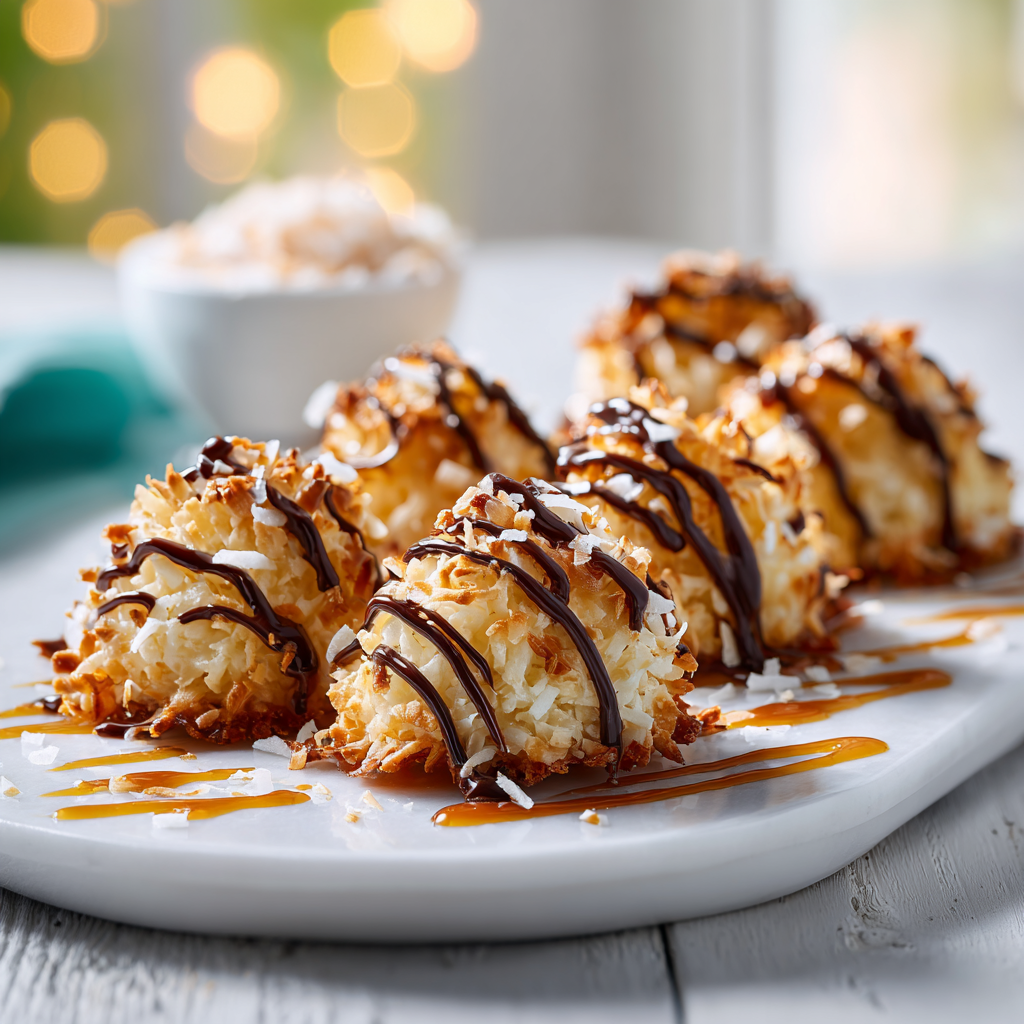
Let me walk you through this. These aren’t your average coconut macaroons. They’re a copycat that nails every single component: the chewy toasted coconut, the gooey caramel layer, and that dark chocolate dip. I promise you can do this. No candy thermometer required. No fancy equipment. Just a little patience and a lot of love.
And here’s the thing they’re actually easier than you think. The macaron shells come together in under an hour, and the coconut caramel filling is practically foolproof. I’ve tested this method more times than I can count (including one spectacular failure where I forgot to toast the coconut and ended up with a soggy mess). But that’s a story for later.
These samoa macaroons are perfect for summer. They’re light enough that you don’t feel heavy after eating one (okay, maybe two), and they travel beautifully to BBQs and potlucks. Plus, they’re gluten-free, which means everyone at the July 4th picnic can enjoy them. Win-win.
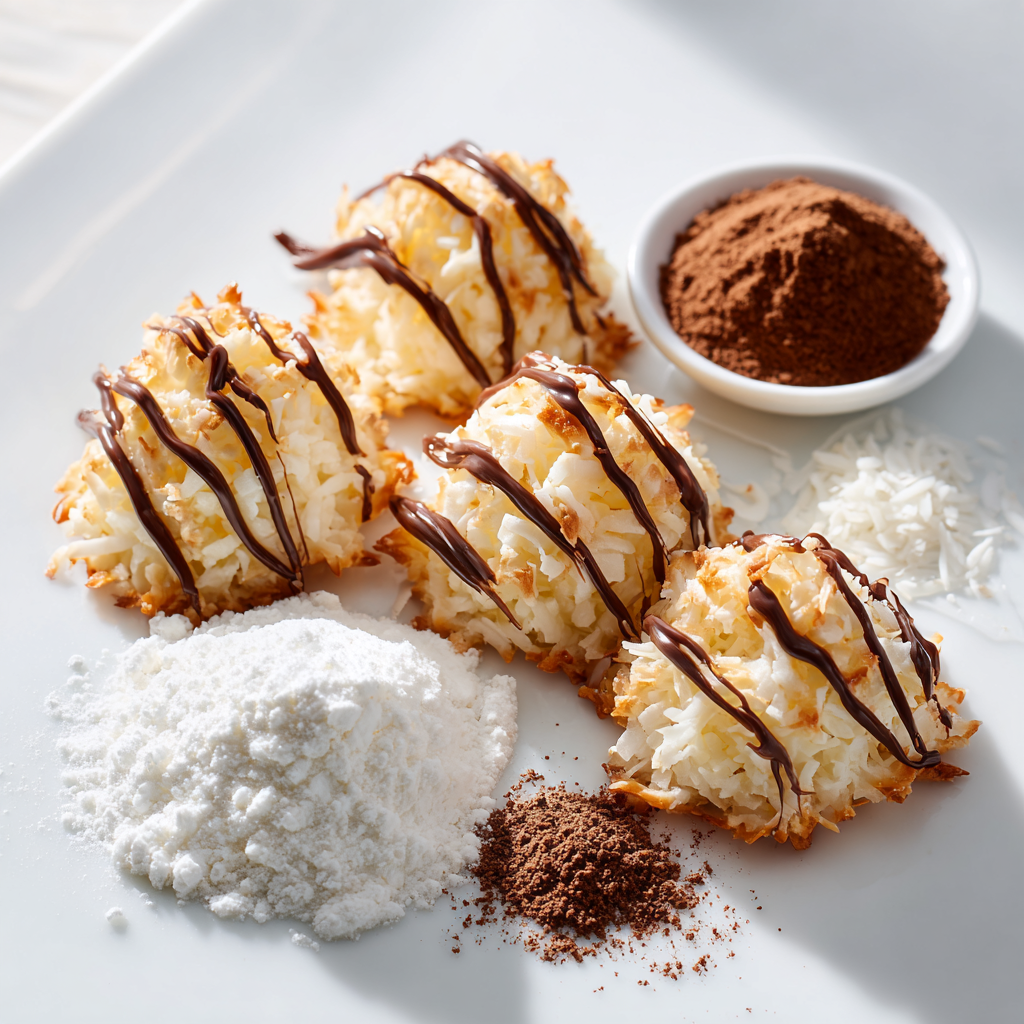
Ingredients for Samoa Macaroons
Before we get into the nitty-gritty, let’s talk about what you’ll need. The ingredient list is short and sweet, which is exactly what I love about this recipe. You probably have most of these in your pantry already.
For the macaron shells, you’ll need powdered sugar, almond flour, unsweetened Dutch-process cocoa powder, egg whites, and granulated sugar. That’s it. The cocoa powder gives them that rich, dark color and flavor that mimics the chocolate base of a Samoa. If you’ve never worked with almond flour before, don’t worry. It’s easy to find at any grocery store these days (Whole Foods, Ralphs, Trader Joe’s they all carry it).
For the coconut caramel filling, you’ll need sweetened shredded coconut, chewy caramels, milk, and a pinch of salt. I know, I know using store-bought caramels feels like cheating. But honestly? It works beautifully. The milk helps thin the caramel to just the right consistency, and the salt balances all that sweetness. You could make your own caramel from scratch if you’re feeling ambitious, but this is the shortcut that makes these samoa macaroons accessible on a busy summer afternoon.
Pro tip: Make sure your caramels are fresh and soft. If they’ve been sitting in the pantry for months, they might be too hard to melt smoothly. I learned that the hard way.
How to Make Samoa Macaroons
Alright, let’s get into the actual process. I’m going to walk you through this step by step, but I’ll keep it high-level. The full detailed instructions are in the recipe card below. Here, I want to focus on the why and the how the little tricks that make these samoa macaroons turn out perfectly every time.
The process breaks down into four main stages: making the macaron batter, baking the shells, toasting the coconut, and assembling everything. Each stage has its own little quirks, but nothing you can’t handle. I promise.
Stage 1: Making the Macaron Batter
This is the part that scares most people. Macarons have a reputation for being finicky, but I’ve found that if you follow a few simple rules, they’re totally manageable. Start by sifting the powdered sugar, almond flour, and cocoa powder together. This removes any lumps and ensures a smooth shell. Then, whip the egg whites with the granulated sugar until they form stiff peaks. You want them glossy and firm like a cloud that holds its shape.
Here’s the trick: fold the dry ingredients into the meringue in two additions. Use a rubber spatula and cut through the center, then scrape around the bowl. Stop when the batter is smooth, thick, and glossy. It should slowly drip off the spatula in a ribbon. Overmixing is the enemy. Undermixing is also bad. You’re looking for that sweet spot where the batter flows like lava. That’s exactly right.
Stage 2: Piping and Baking the Shells
Spoon the batter into a piping bag fitted with a 1/2-inch plain tip. Pipe 1-inch circles onto a parchment-lined baking sheet. Don’t worry if they’re not perfect you can use a toothpick to gently nudge any peaks into shape. Then, here’s the critical part: tap the baking sheet firmly on the counter a few times. This releases any air bubbles and helps the macarons develop their signature feet.
Let the piped macarons sit uncovered for 15 minutes before baking. This allows a skin to form on the surface, which helps them rise evenly. Bake at 310°F for 15 to 20 minutes. They’re done when they’re set but not firm a gentle shake with your finger should not jiggle. I slightly undercook mine for a chewier texture, which works perfectly with the soft caramel filling.
Stage 3: Toasting the Coconut and Making the Filling
While the macarons cool, preheat your oven to 300°F. Spread the shredded coconut on a parchment-lined baking sheet and toast for 10 to 20 minutes, stirring every 5 minutes. Watch it carefully coconut can go from golden to burnt in seconds. The smell when it toasts is incredible. It fills your kitchen with this warm, nutty aroma that instantly makes you feel like you’re at the beach.
For the filling, place the unwrapped caramels, milk, and salt in a microwave-safe bowl. Microwave on high for 1 to 2 minutes, stirring every 30 seconds, until smooth. Then fold in the toasted coconut. The mixture will be thick and sticky that’s what we want. If it seems too thick, add a splash more milk. Totally fixable.
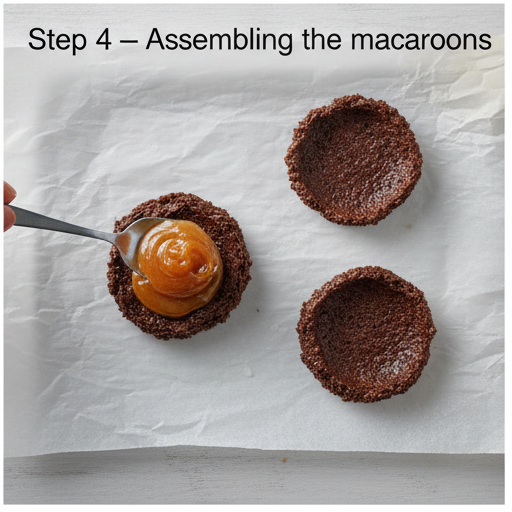
Stage 4: Assembling the Samoa Macaroons
This is the fun part. Lightly coat two teaspoons with nonstick spray (trust me on this the filling is sticky). Drop a rounded teaspoon of the coconut caramel filling onto one macaron shell, then gently sandwich with another shell. Press lightly until the filling spreads to the edges. The caramel will be warm and gooey, so work quickly but carefully.
I like to let the assembled macaroons rest in the fridge for about 15 minutes before serving. This sets the caramel and makes them easier to handle. Plus, they taste amazing chilled. The contrast between the crisp shell and the soft, chewy filling is everything.
Tips for Perfect Macarons
I’ve made my fair share of macaron mistakes. My first attempt ended up as a flat, cracked mess that looked more like cookies than macarons. It was heartbreaking. But every failure taught me something. Here are the tips I wish I’d known from the start.
Common Macaron Mistakes and How to Fix Them
❌ Not letting macarons rest before baking → ✅ Always let them sit for 15 minutes. This prevents cracking and helps form the feet.
❌ Overcooking the caramel → ✅ Microwave in 30-second bursts and stir well. If it gets too hard, add a little more milk.
❌ Not toasting coconut evenly → ✅ Stir every 5 minutes and watch closely. Coconut burns fast.
❌ Overmixing or undermixing the batter → ✅ Fold until the batter flows like lava. Do the figure-8 test: if it forms a ribbon that slowly disappears, you’re good.
❌ Not using an oven thermometer → ✅ Ovens lie. An accurate temperature is crucial for macarons.
Another thing: use a kitchen scale if you have one. Weighing your egg whites ensures consistency. I know it feels extra, but it makes a real difference. Also, make sure your bowl and whisk are completely clean and grease-free. Any fat will prevent the egg whites from whipping properly.
Storage and Shelf Life
These samoa macaroons are best enjoyed within a day or two, but they’ll keep in the fridge for up to 3 days in an airtight container. The macaron shells stay crisp, and the filling stays soft and chewy. If you’re planning ahead, you can store the unassembled shells and filling separately for up to a week.
Here’s a trick I learned from my Oma: layer the macaroons between sheets of parchment paper to prevent them from sticking together. And if you’re taking them to a summer BBQ, keep them chilled until you’re ready to serve. The caramel can get a little melty in hot weather, but that’s not necessarily a bad thing. Sticky fingers are part of the experience.
You can also freeze the assembled macaroons for up to a month. Just wrap them tightly in plastic wrap and place them in a freezer-safe container. Thaw in the fridge overnight before serving. They’ll taste almost as fresh as the day you made them.
Frequently Asked Questions
I really hope you give these samoa macaroons a try. They’re the kind of dessert that makes you feel like a rockstar at any gathering. And honestly? They taste even better than the original. There’s something so satisfying about making a beloved treat from scratch, knowing exactly what went into it.
If you make them, I’d love to see how they turn out. Tag me when you make them – I want to see your Samoa macaroons! And if you’re looking for more inspiration, check out my Pinterest board where I share all my favorite summer dessert recipes. Trust me, you’ll want to pin this one.
Source: Nutritional Information














6 Responses
I’m a macaron newbie and these were way easier than I expected. The instructions are clear and I didn’t have any issues with sticking. However, my caramel got a bit too thick when I added the coconut. Is there a trick to keeping it spreadable?
Great question, Sarah! If the caramel seizes up, try warming it gently over a double boiler or in 10-second bursts in the microwave, stirring in a splash more milk until it’s loose again. The key is to work quickly once you add the coconut, as it cools fast.
I love Samoa cookies, so I had to try these. The flavor is spot on! My only suggestion would be to add a bit more salt to the caramel to balance the sweetness, but that’s just my preference. Will definitely make again.
I subbed dark chocolate for the dip and added a sprinkle of sea salt on top. They were divine! My family couldn’t tell the difference from the real Girl Scout cookies. This is a keeper.
These were amazing! I made them for a 4th of July party and they disappeared in minutes. The coconut caramel filling is genius. I did have a bit of trouble with the macaron shells cracking, but they still tasted great. Any tips for getting a smoother top?
Hi Emily, so glad they were a hit! For smoother tops, make sure your egg whites are at room temperature and that you’re folding the batter just until it flows like lava. Over-mixing can cause spreading, but under-mixing leaves peaks that crack. Letting the piped shells rest for 30 minutes until they’re dry to the touch also helps prevent cracking.