

Why You’ll Love These Baklava Blondies
I have a confession. I absolutely love baklava. That sticky, flaky, nutty, honey-soaked pastry? Yes please, every single time. But making it? That’s a whole other story. All those delicate layers of phyllo, the careful brushing, the precise cutting. I’ve done it exactly twice in my life, and both times I stood there wondering if there was a better way.
So I started thinking. What if I could take everything I love about baklava the toasted nuts, the warm cinnamon, that glorious honey syrup and turn it into something I could actually make on a Tuesday night? Something that travels well to a potluck? Something my kids would actually eat without asking what the weird flaky stuff is?
That’s how these baklava blondies were born. They’re exactly what you’re looking for if you want the flavor of traditional baklava without the fuss. A buttery sugar cookie crust, a spiced nut filling studded with pecans and pistachios, and a warm honey glaze that soaks into everything. And here’s the best part: they come together in about an hour, and they feed a crowd.
Let me show you how it works.
Ingredients for Baklava Blondies
One of the things I love most about this recipe is that it uses a lot of pantry staples. You probably have most of these on hand already. Let’s walk through what you’ll need.
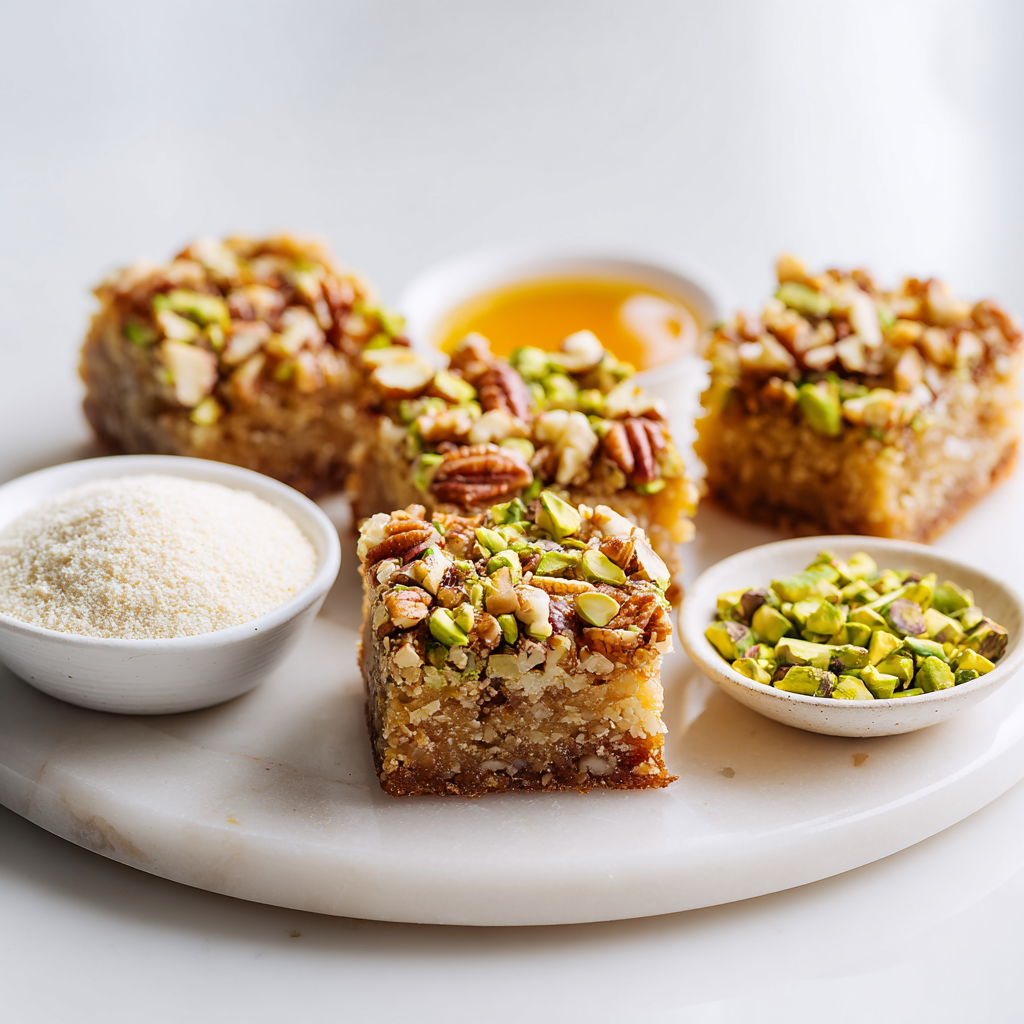
For the crust: You’ll start with a box of sugar cookie mix. I know, I know using a mix feels like cheating. But trust me on this one. It gives you a perfectly tender, buttery base without any of the guesswork. You’ll also need melted butter, an egg, and some fresh Meyer lemon zest. That lemon zest is a little touch that brightens everything up and keeps the blondies from being too heavy.
For the filling: This is where the magic happens. You’ll need chopped pecans and pistachios. I like to use both because the pecans bring that classic baklava warmth while the pistachios add that beautiful green color and slightly sweet flavor. You’ll mix them with sugar, melted butter, cinnamon, and a pinch of salt. Then you’ll crumble some mini phyllo shells on top for that signature flaky texture.
For the glaze: Honey is the star here. You’ll use it in two stages first to make a warm, buttery glaze that you pour over the hot bars, and then a final drizzle before serving to get that gorgeous sticky finish. A little brown sugar, lemon juice, cinnamon, and vanilla round it all out.
Fair enough, let’s talk about what makes these work.
Tips for Perfect Baklava Blondies
After testing this recipe a few times (okay, more than a few), I’ve learned a couple things that make a real difference. Here’s what I’ve found works.
Tip 1: Don’t overmix the crust dough
This is a big one. When you stir together the sugar cookie mix, butter, egg, and lemon zest, mix just until a soft dough forms. Overmixing will develop the gluten and make the crust tough. You want it tender and crumbly, like a good shortbread.
Tip 2: Chop your nuts by hand
Go ahead and skip the food processor. Hand-chopping gives you varied textures some bigger pieces for crunch, some smaller ones that meld into the filling. It takes an extra five minutes, but the result is worth it.
Tip 3: Don’t rush the honey glaze
This is where people go wrong. You want to make sure your honey glaze is thick enough that it sets on top of the blondies, not so thin it soaks in and disappears. Microwave it until it’s bubbly and the butter is fully melted. It should look like a warm, syrupy caramel.
Tip 4: Let the bars set completely before slicing
I know it’s hard. The kitchen smells amazing, and you want to dig in. But trust me on this one. If you slice too soon, the glaze will run everywhere and your beautiful clean squares will turn into a sticky mess. Let them cool completely in the pan, then slice.
How to Make Baklava Blondies Step by Step
Now let’s get into the actual process. I’ll walk you through the four main stages. Think of these as the big picture the full ingredient list and exact times are in the recipe card below.
Stage 1: Make the Crust
Start by preheating your oven to 350°F. Line a 9×13-inch baking pan with parchment paper, letting the edges hang over the sides. This makes lifting the bars out later so much easier. Lightly spray the parchment with nonstick spray.
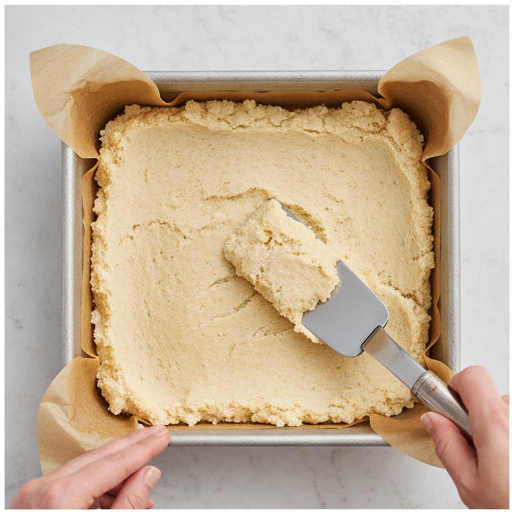
In a large bowl, stir together the sugar cookie mix, melted butter, lemon zest, and egg. You’ll get a soft, crumbly dough that looks a little like wet sand. Press it evenly into the bottom of the prepared pan. Don’t worry if it seems thin it’ll puff up a bit as it bakes. Bake for 12 to 15 minutes, just until the edges are set. The center might still look a little soft, and that’s exactly what you want.
Stage 2: Prepare the Nut Filling
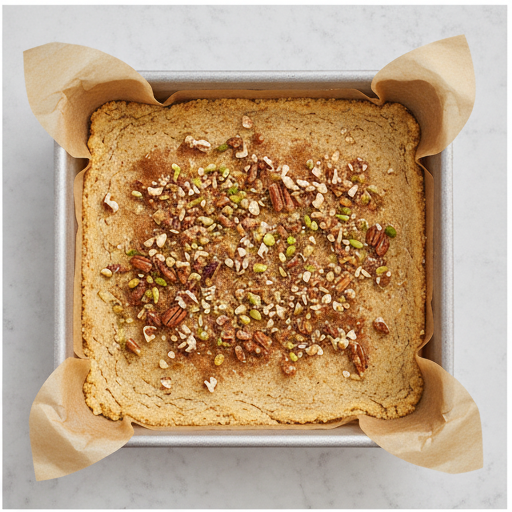
While the crust bakes, get your filling ready. In a medium bowl, combine the chopped pecans, pistachios, granulated sugar, melted butter, cinnamon, and salt. Stir until everything is well coated and the mixture looks crumbly. The butter should coat every piece of nut, and the cinnamon should smell warm and inviting.
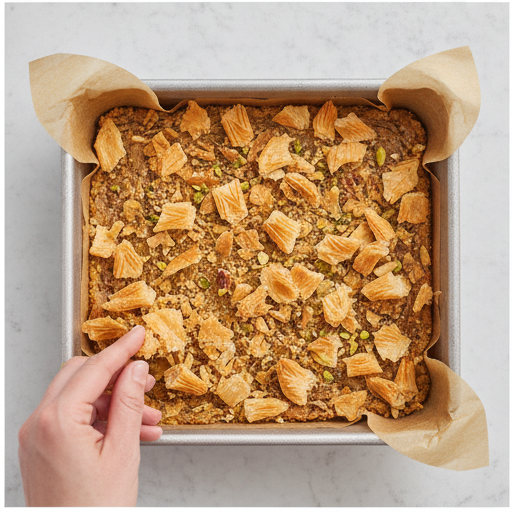
Once the crust comes out of the oven, sprinkle the nut mixture evenly over the top. Then crumble the mini phyllo shells over the nuts. Those little shells add such a lovely flaky texture without having to deal with full sheets of phyllo. Return the pan to the oven and bake for another 18 to 20 minutes. You’re looking for the topping to be golden brown and the edges to be bubbly.
Stage 3: Make the Honey Glaze
This is where the baklava magic really happens. In a microwave-safe bowl, combine 1/3 cup of the honey, 2 tablespoons butter, brown sugar, lemon juice, and cinnamon. Microwave on high for 40 to 60 seconds, until the butter melts and the mixture is bubbly. Stir in the vanilla extract.
The glaze should be warm and fragrant, with the honey and butter creating a rich, golden syrup. It’s going to smell like heaven. Drizzle this warm mixture evenly over the hot bars right when they come out of the oven. You’ll hear it sizzle as it hits the hot pan.
Stage 4: Cool and Finish
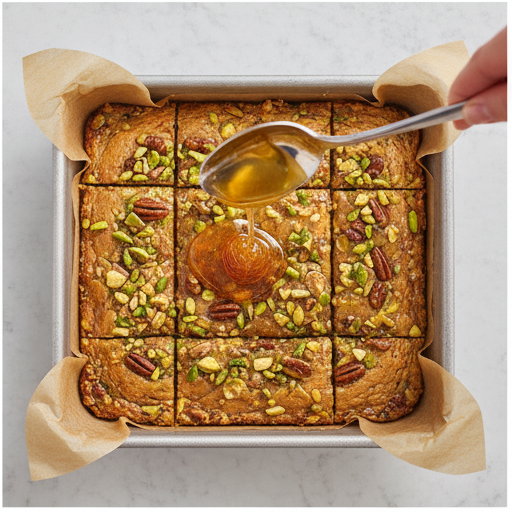
This is the hardest part: waiting. Let the bars cool completely in the pan on a wire rack. It takes about an hour, maybe a little more. Before you slice, warm the remaining 1/3 cup of honey and drizzle it over the cooled bars. This final layer gives you that gorgeous sticky finish that makes these look like a bakery display.
Use the parchment paper to lift the whole block out of the pan, then cut into 24 squares. A sharp knife helps here wipe it clean between cuts for the neatest edges.
Variations and Substitutions
One of the things I love about this recipe is how flexible it is. Here are some swaps that work well.
- Nut swaps: If you don’t have pistachios or pecans, walnuts are a great substitute. You can also use all pecans or all pistachios if that’s what you have. The flavor will shift a little, but it’ll still be delicious.
- Lemon zest: Regular lemon zest works perfectly if you can’t find Meyer lemons. The flavor is a little sharper, but it still brightens the crust beautifully.
- Phyllo shells: If you can’t find mini phyllo shells, you can skip them entirely. The bars will still be amazing they’ll just be a little less flaky. You could also use a sheet of thawed phyllo dough, brushed with butter and crumbled.
- Gluten-free: Use a gluten-free sugar cookie mix. Everything else in the recipe is naturally gluten-free, so that’s the only swap you need.
- Dairy-free: Use a plant-based butter substitute. I’ve tested this with a few different brands, and they all work fine.
I tend to prefer the original combination, but that’s personal. Worth trying whatever works for you.
Storage and Make-Ahead Tips
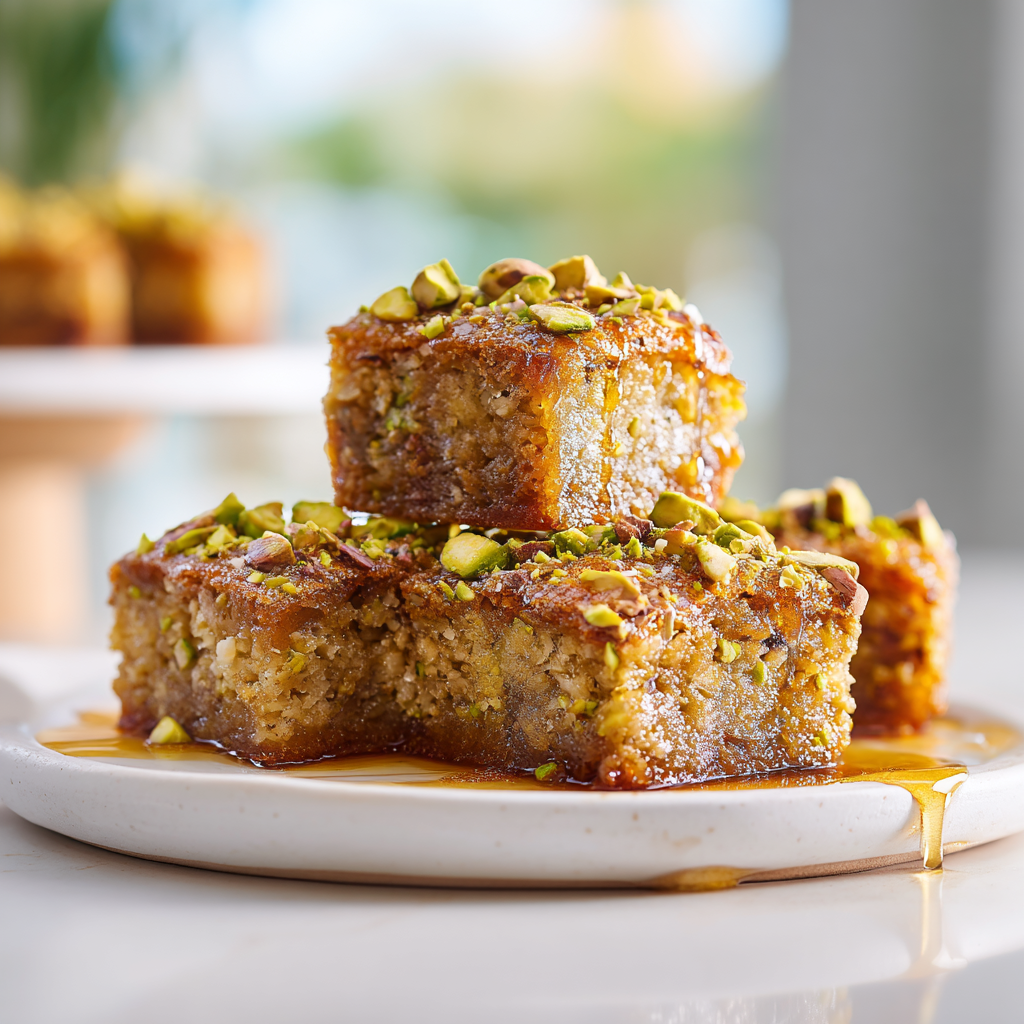
These baklava blondies actually get better after a day. The honey glaze soaks into the bars, making everything even more tender and flavorful. Here’s how to store them.
At room temperature: Store in an airtight container for up to 5 days. I like to layer them with parchment paper between the squares so they don’t stick together.
In the fridge: If your kitchen runs warm, or if you want them to last a little longer, pop them in the fridge. They’ll keep for up to a week. Let them come to room temperature before serving for the best texture.
To freeze: These freeze beautifully. Wrap the whole slab (or individual squares) tightly in plastic wrap, then foil. Freeze for up to 3 months. Thaw overnight in the fridge, then bring to room temperature before serving.
To reheat: If you want that just-baked warmth, pop a square in a 300°F oven for about 5 minutes. Or microwave for 10 to 15 seconds. The glaze will get sticky and lovely again.
Common Mistakes and Troubleshooting
Let’s be real for a second. Not everything goes perfectly every time. Here are the most common issues I’ve seen (and caused) and how to fix them.
❌ Mistake: Overmixing the crust dough
✅ Solution: Mix just until the dough comes together. A few streaks of flour are fine. Overmixing makes the crust tough.
❌ Mistake: Not cooking the honey glaze long enough
✅ Solution: Microwave until the mixture is bubbly and the butter is fully melted. If it’s too thin, it won’t set properly and your bars will be soupy.
❌ Mistake: Slicing before the bars have set
✅ Solution: Wait until they’re completely cool. I know it’s hard, but the glaze needs time to firm up. If you slice too soon, you’ll get a sticky mess.
❌ Mistake: Dry blondies
✅ Solution: Make sure you’re not overbaking. The crust should be just set at the edges, and the nut topping should be golden brown. If the edges look dark, pull them out.
Serving Ideas and Pairings
These bars are perfect on their own, but here are a few ways to dress them up for company.
- With ice cream: A scoop of vanilla bean ice cream on top of a warm square is basically heaven. The cold creaminess against the sticky, nutty bars? Yes.
- With Greek yogurt: For a less indulgent option, a dollop of thick Greek yogurt balances the sweetness beautifully.
- With tea or coffee: These are perfect with a cup of strong black tea or a latte. The honey and nuts pair so well with warm drinks.
- For a summer party: Serve them cold from the fridge on a hot day. The glaze firms up and they’re refreshingly sweet.
I remember standing on a step stool at Grandma Ruth’s bakery counter, watching her level cake layers with a serrated knife and a ruler. She’d measure from the counter up, mark with a toothpick, and cut perfectly level every time. I was seven and thought it was magic. Now I teach the same method, though I use a cake leveler because my hands aren’t as steady as hers were. But this recipe? It doesn’t need that kind of precision. That’s the whole point. It’s baklava made easy, made for sharing, made for real life.
So go ahead. Make these for your next potluck, your Fourth of July barbecue, or just because it’s Tuesday. And when you do, tag me. I want to see your nutty, honeyed squares.
Happy baking, friends.
And if you need more inspiration, I’m always pinning new ideas over on my Pinterest board. Come say hi.
California Baklava Blondies
Ingredients
Method
- Preheat the oven to 350 degrees F. Line a 9x13-inch baking pan with parchment paper, letting the edges hang over the sides. Lightly spray the parchment with nonstick cooking spray.
- In a large bowl, stir together the sugar cookie mix, melted butter, lemon zest, and egg until a soft, crumbly dough forms. Press the dough evenly into the bottom of the prepared pan. Bake for 12 to 15 minutes, until the edges are just set.
- While the crust bakes, combine the chopped pecans, pistachios, sugar, melted butter, cinnamon, and salt in a medium bowl. Stir until the nuts are well coated and the mixture is crumbly.
- Sprinkle the nut mixture evenly over the partially baked crust. Crumble the mini phyllo shells over the top. Return the pan to the oven and bake for 18 to 20 minutes more, until the topping is golden brown and the edges are bubbly.
- In a microwave-safe bowl, combine 1/3 cup of the honey, 2 tablespoons butter, brown sugar, lemon juice, and 1/4 teaspoon cinnamon. Microwave on high for 40 to 60 seconds, until the butter melts and the mixture is bubbly. Stir in the vanilla extract.
- Drizzle the warm honey mixture evenly over the hot bars. Let them cool completely in the pan on a wire rack. Before slicing, warm the remaining 1/3 cup honey and drizzle it over the cooled bars to taste. Cut into 24 squares and serve.
Nutrition
Notes
Tried this recipe?
Let us know how it was!Frequently Asked Questions
Source: Nutritional Information













6 Responses
Made these for a family gathering and they disappeared in minutes! The lemon zest in the crust really brightens up the sweetness. I used walnuts instead of pistachios since that’s what I had, and it worked perfectly.
These are delicious, but mine came out a bit too sticky on top. Is the honey glaze supposed to set firm, or stay syrupy? I might have added too much honey.
Hi David! The glaze should set to a soft, sticky consistency—not hard, but not runny either. If it’s too syrupy, you may have added extra honey or the bars weren’t cooled long enough. Try letting them cool completely on a wire rack for at least 30 minutes before glazing, and use exactly 2/3 cup honey measured carefully. Hope that helps!
I love baklava but hate the phyllo work, so this recipe is a game-changer. The phyllo shells on top add just enough crunch without the fuss. My only complaint is that I wished there were more nuts—I’ll double them next time.
Could I use a gluten-free sugar cookie mix for the crust? My daughter has celiac, and I’d love to make these for her birthday.
Great question, Michael! Yes, a gluten-free sugar cookie mix should work well here—just make sure it’s a 17.5 oz package and follow the same instructions. The crust might be a bit more delicate, so let it cool completely before adding the topping. Let me know how it turns out for her birthday!