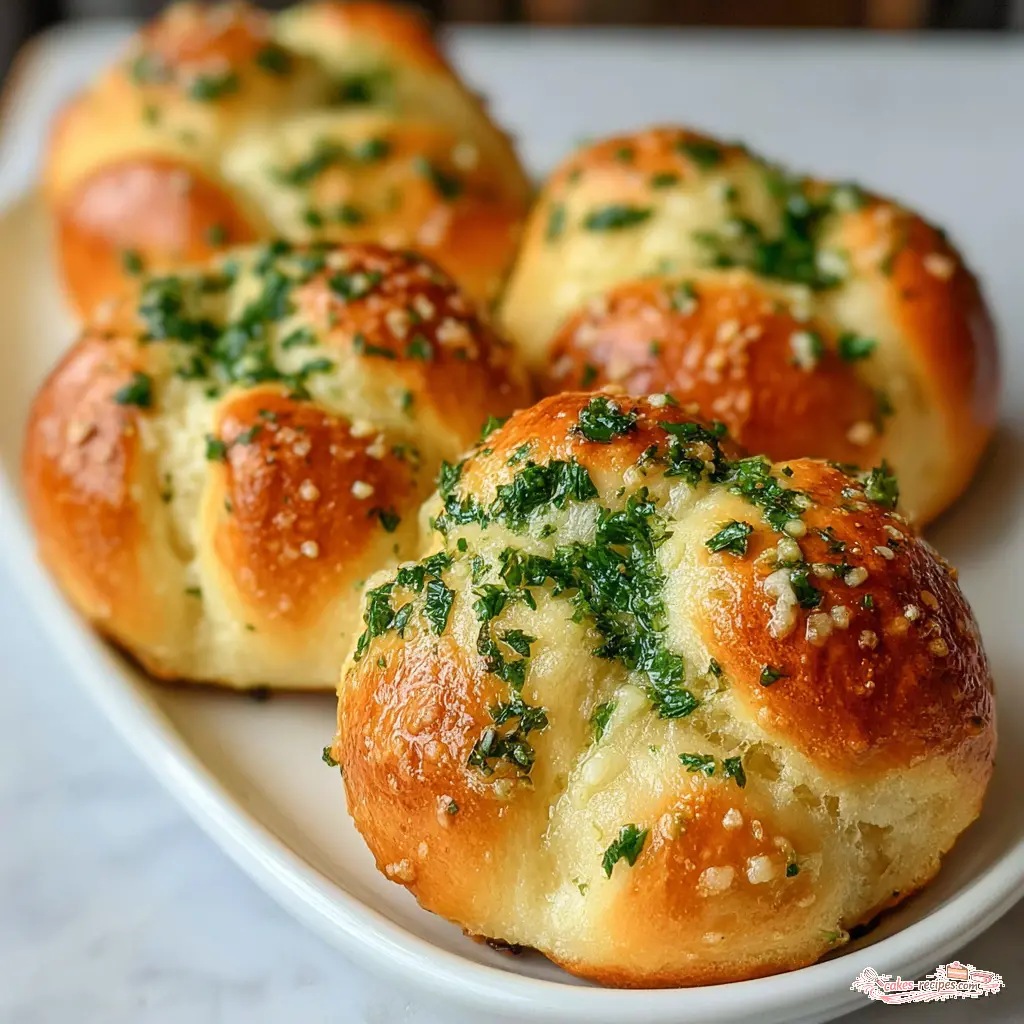
What Are Sourdough Garlic Knots?
Here’s the deal. You’ve got a jar of sourdough discard sitting in your fridge, staring at you every time you grab the milk. I’ve been there. Feels like a commitment, right? Like you need a whole weekend project just to use it up. But these sourdough garlic knots are the opposite of that. They’re quick, they’re forgiving, and they turn that discard into something you’ll actually want to show off.
So what exactly are they? They’re soft, pull-apart bread knots brushed with a garlic butter that’ll make your kitchen smell like a pizzeria. The sourdough gives them a subtle tang, a little complexity that regular dinner rolls just don’t have. And the best part? No yeast, no long rise, no waiting around. From mixing to eating in about 45 minutes. That’s the move.
These are perfect for a summer BBQ side dish, a quick appetizer for game day, or honestly just a Tuesday night when you want bread and garlic and butter. No judgment here.
Why You’ll Love This Recipe
I’m not gonna lie to you. I’ve made a lot of bread in my time. Some of it took two days. Some of it cracked. Some of it looked like a deflated balloon (more on that later). But these quick sourdough garlic knots are different. They’re the kind of recipe that makes you feel like you actually know what you’re doing.
Here’s why they work:
- You use discard. That’s the whole point. No need to feed your starter and wait for it to double. Just scoop it out of the jar and go.
- No yeast. The baking powder does the lifting. That means no proofing, no worrying about water temperature, none of that.
- They’re fast. 20 minutes prep, 25 minutes bake. You can make these after work and still have time to watch a show.
- The texture is soft. Like, pull-apart soft. The kind where you grab one and the whole thing comes apart in a little puff of steam.
- They’re a crowd-pleaser. I brought these to a Fourth of July BBQ last year and they were gone before the burgers came off the grill. People were standing around the plate, just grabbing them one after another.
Real talk: I once had a knot that looked like a deflated balloon. It was flat, it was sad, and I almost threw it away. But I brushed the garlic butter on it anyway, baked it, and you know what? It still tasted amazing. So don’t stress about perfection. These knots are forgiving.
Tools You’ll Need
Nothing fancy here. You probably have all of this already. That’s kind of the point.
- Large mixing bowl for stirring the dough together
- Baking sheet a standard half-sheet pan works great
- Parchment paper makes cleanup a breeze and prevents sticking
- Small bowl for mixing the garlic butter
- Pastry brush for brushing that butter on (you can use a spoon too, but a brush is better)
- Knife or bench scraper for dividing the dough into pieces
- Measuring cups and spoons standard stuff
That’s it. No stand mixer needed. No special equipment. I’ve made these at my sister’s place with her ancient baking sheet and a butter knife. They turned out fine. Fair enough.
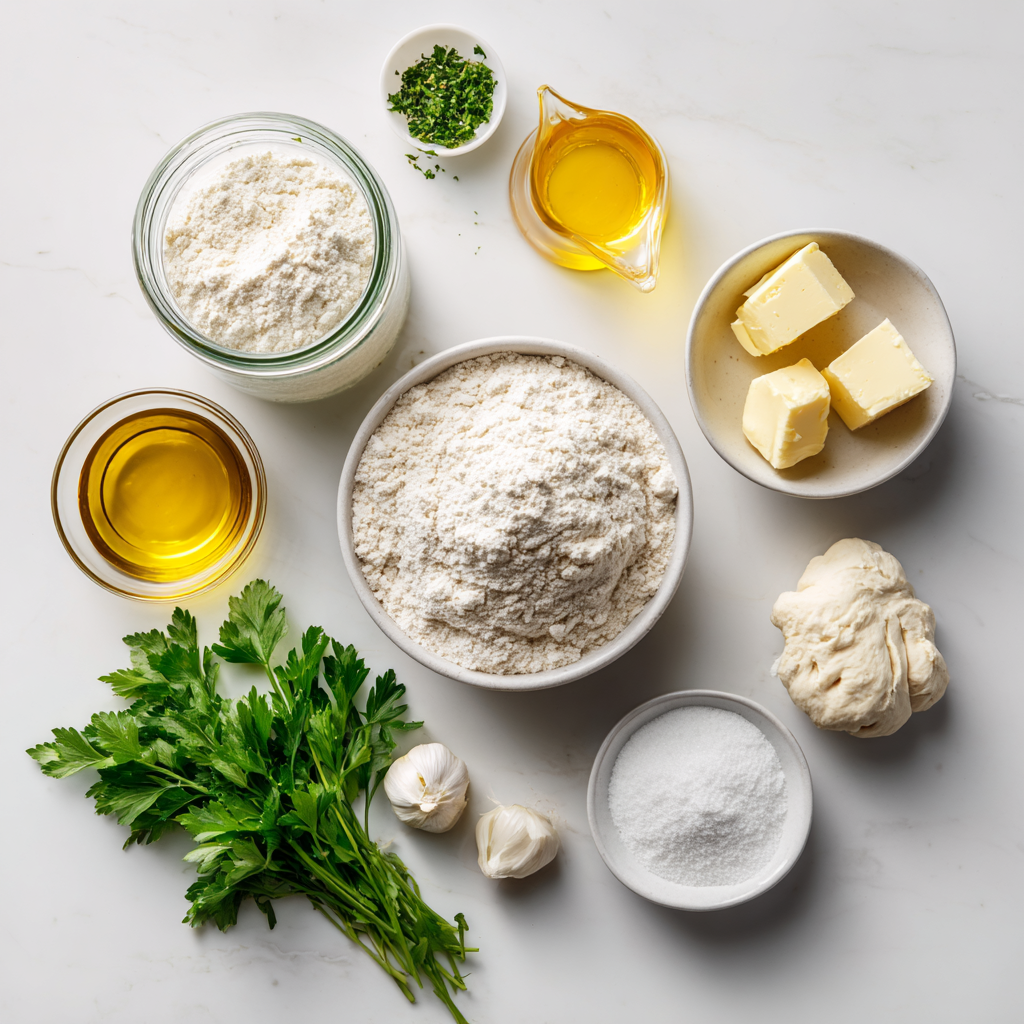
Ingredients for Sourdough Garlic Knots
Let’s talk about what goes into these. The ingredient list is short, which I love. No hunting for obscure stuff at the store. Most of this is probably in your kitchen right now.
You’ll need:
- Sourdough discard 1 cup. Straight from the fridge is fine. Doesn’t need to be room temp or active.
- All-purpose flour 1 cup. Just standard AP flour. Nothing special.
- Baking powder 1 teaspoon. This is what gives the knots their lift. Make sure it’s fresh.
- Salt 1/2 teaspoon. Balances the tang of the sourdough.
- Olive oil 2 tablespoons. I like using a California Napa Valley olive oil if I have it, but any good olive oil works.
- Butter 2 tablespoons, melted. For the garlic butter.
- Garlic 2 cloves, minced. Fresh is best. Pre-chopped from a jar works too. I won’t judge.
- Fresh parsley 1 tablespoon, chopped. For color and freshness.
One thing I’ll say about the garlic: use fresh if you can. The smell when it hits the hot butter is just… that’s what you want. But if you’re in a hurry, the jarred stuff is fine. I’ve done it. No shame.
For substitutions, you can swap the parsley for dried (use 1 teaspoon instead), or use basil or chives. The butter can be replaced with vegan butter or more olive oil for a dairy-free version. Just keep the ratios the same.
How to Make Sourdough Garlic Knots
Alright, let’s get into it. I’m going to walk you through the four main stages. Think of these as the big picture steps. The detailed instructions are in the recipe card below, but here’s the how and why behind each stage.
Stage 1: Mix the Dough
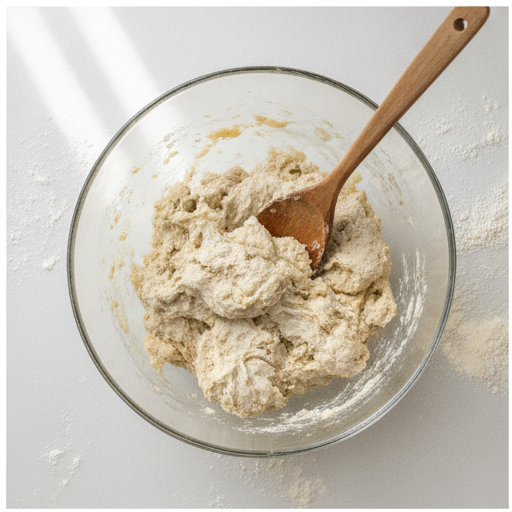
This is the easiest part. In a large bowl, stir together the sourdough discard, flour, baking powder, salt, and olive oil. You’ll get a shaggy, slightly sticky dough. Don’t worry if it looks a little rough. That’s normal. The discard is wet, so the dough will be softer than a standard bread dough. That’s exactly what you want for soft knots.
One thing I learned the hard way: don’t overmix. Just stir until it comes together. A few streaks of flour are fine. Overworking it will make the knots tough, and nobody wants tough knots.
Stage 2: Knead and Shape
Turn the dough out onto a lightly floured surface. Knead it gently for about 2 minutes. You’re not trying to develop gluten like you would for a loaf of bread. Just smooth it out a bit. It should feel soft and pliable, not stiff.
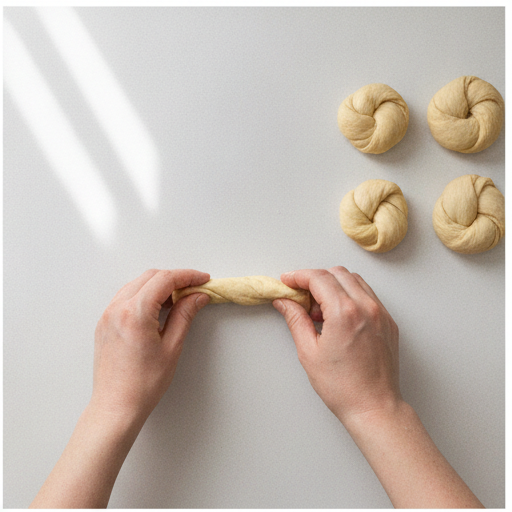
Now for the shaping. Divide the dough into 8 equal pieces. Roll each piece into a rope, about 6-7 inches long. Then tie it into a knot. Here’s the trick: think of it like tying a loose shoelace. Loop one end over, pull it through, and tuck the ends under. It doesn’t have to be perfect. I’ve made knots that looked more like pretzels and they still baked up beautifully.
If you’re struggling, just roll the rope and twist it into a loose circle. Push one end through the center. That’s a knot. Done.
Stage 3: Make the Garlic Butter
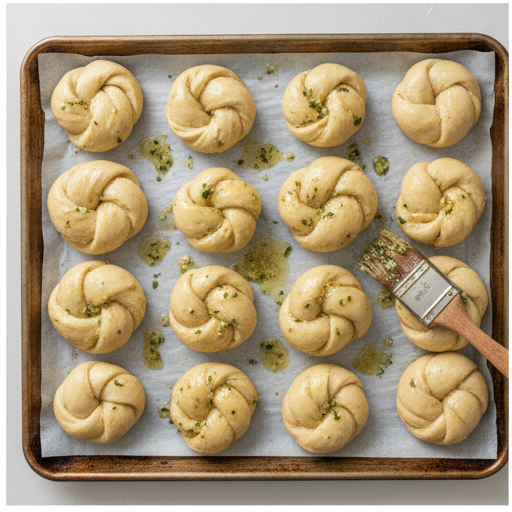
While the knots are sitting on the baking sheet, make the garlic butter. Melt the butter in a small bowl, then stir in the minced garlic and chopped parsley. The smell at this point is incredible. It’s the smell of summer dinners and Sunday afternoons.
Brush the garlic butter generously over the tops of the knots. Don’t be shy. This is where the flavor lives. Every bit of butter that drips down the sides will caramelize in the oven and turn into little crispy bits of garlic goodness.
Stage 4: Bake to Golden Perfection
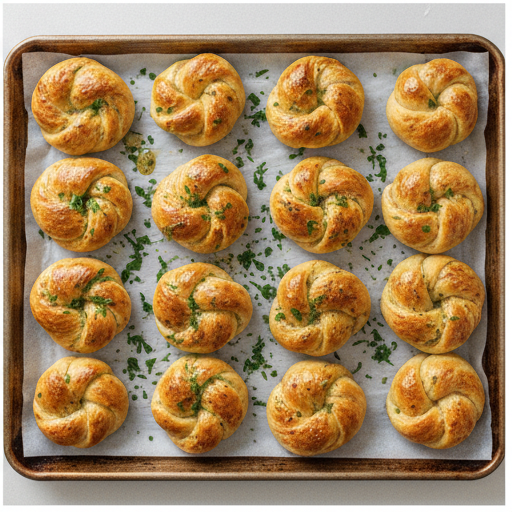
Bake the knots at 400°F for 20 to 25 minutes. You’re looking for a deep golden brown on top. The kitchen will smell like garlic and butter and bread, and you’ll be tempted to open the oven every two minutes. Don’t. Trust the process.
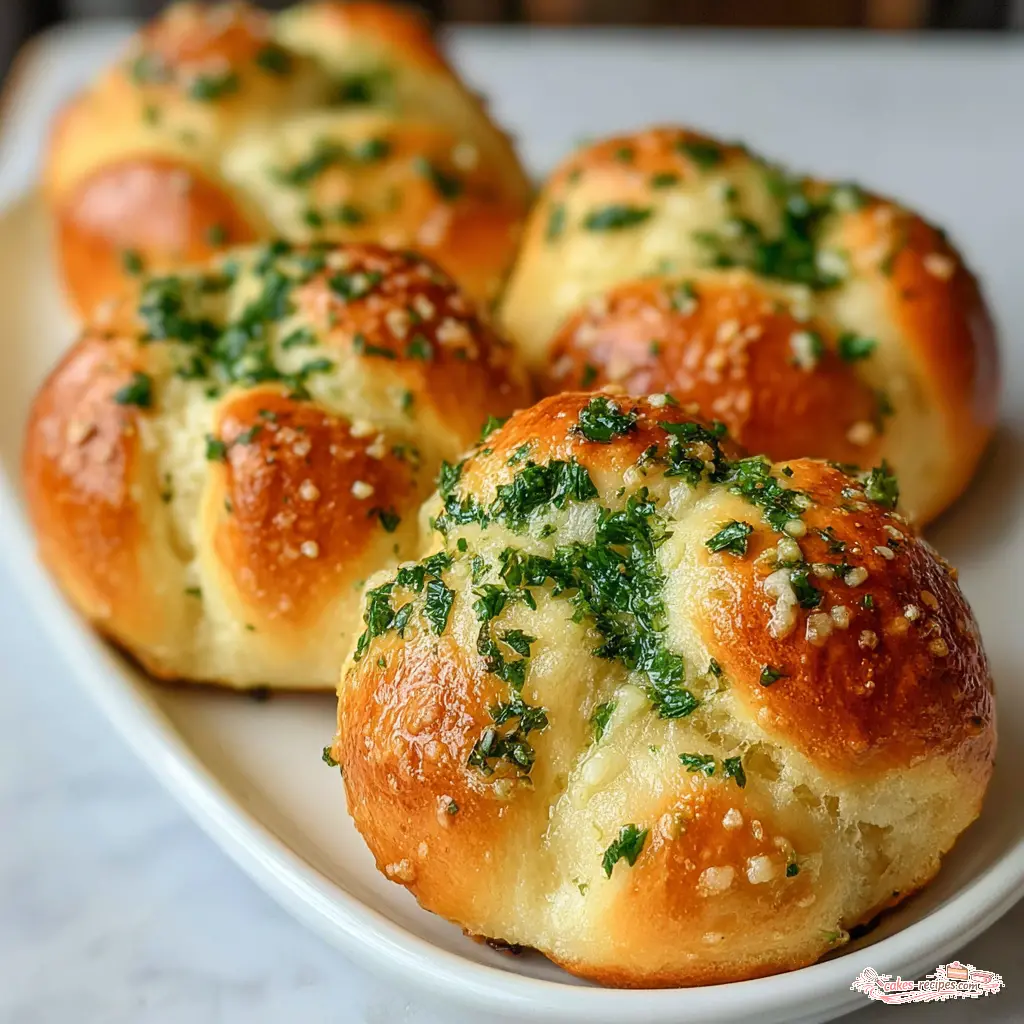
When they come out, they should be puffed up and golden. Let them cool for a minute or two on the baking sheet, then serve them warm. That first pull-apart feels like a tiny victory. The steam rises, the butter glistens, and you know you made something good.
Tips for Perfect Garlic Knots
I’ve made these knots probably a dozen times now. Here’s what I’ve learned along the way.
- Don’t over-knead. Two minutes is plenty. The dough should be smooth, not elastic. Over-kneading activates too much gluten and makes the knots tough.
- Use fresh baking powder. If your baking powder is old, the knots won’t rise as much. Test it by dropping a little in water if it fizzes, it’s good.
- Space them out. Place the knots about 2 inches apart on the baking sheet. They’ll puff up and spread a little. If they’re too close, they’ll bake into each other.
- Brush the butter twice. I like to brush half the butter before baking and the other half right when they come out of the oven. That second brush adds extra shine and flavor.
- Watch the garlic. If you mince the garlic too fine, it can burn in the oven. Aim for small pieces, not a paste.
One more thing: if your dough feels too sticky to shape, just add a little more flour to your work surface. A tablespoon at a time. You want it manageable, not dry.
Storage and Reheating
Let’s be real. These knots are best fresh from the oven. That’s when the butter is still melted and the edges are slightly crispy. But if you have leftovers (unlikely, but possible), here’s what to do.
Room temperature: Store in an airtight container or a bread bag for up to 2 days. They’ll soften a bit, but they’re still good.
Freezer: These freeze really well. Let them cool completely, then wrap them tightly in plastic wrap and place in a freezer bag. They’ll keep for up to a month. When you’re ready, just reheat directly from frozen.
Reheating: The best way is in a 350°F oven for about 5 minutes. A toaster oven works great too. If you’re in a hurry, the microwave will work, but the knots will be softer and less crispy. I’d stick with the oven if you can.
One question I get a lot: should I add the garlic butter before freezing? I’d say no. Freeze the plain baked knots, then brush them with fresh garlic butter when you reheat. The garlic flavor stays brighter that way.

Frequently Asked Questions
Go Make These Knots
Here’s the thing. I’ve given you all the tips, the tricks, the stories about deflated balloon knots and Sunday dinners. But none of that matters if you don’t actually make them. And you should. These sourdough garlic knots are the kind of recipe that makes you feel like a real baker, even when you’re short on time.
They’re perfect for a summer BBQ, a weeknight side, or just a snack when you want something warm and buttery. The discard gets used, the kitchen smells amazing, and everyone who tries one will ask for the recipe.
So go ahead. Preheat that oven. Grab your jar of discard. And make these knots. You’ve got this.
And if you make them, I’d love to hear about it. Share your photos, your knot-shaping victories, your garlic butter mishaps. I’m over on Pinterest sharing more sourdough recipes and baking tips. Come say hi.
Quick Sourdough Garlic Knots
Ingredients
Method
- Preheat your oven to 400°F.
- In a large bowl, stir together the sourdough discard, all-purpose flour, baking powder, salt, and olive oil until a soft dough forms.
- Turn the dough out onto a lightly floured surface and knead gently for about 2 minutes until smooth.
- Divide the dough into 8 equal pieces and roll each piece into a rope, then tie into a knot shape.
- Place the knots on a baking sheet lined with parchment paper, spacing them about 2 inches apart.
- In a small bowl, mix the melted butter, minced garlic, and chopped parsley.
- Brush the garlic butter mixture generously over the tops of the knots.
- Bake for 20 to 25 minutes, until the knots are golden brown and cooked through.
- Serve warm, and enjoy these delicious sourdough garlic knots.
Nutrition
Notes
Tried this recipe?
Let us know how it was!Source: Nutritional Information
What type of bread are garlic knots?
Garlic knots are soft, yeasted bread knots that are brushed with garlic butter and baked until golden. They’re a popular pizzeria appetizer, but this sourdough version uses discard for a quicker, tangier twist. The texture is soft and pull-apart, perfect for dipping.
How should I store garlic knots?
Store leftover garlic knots in an airtight container at room temperature for up to 2 days. For longer storage, freeze them in a freezer-safe bag for up to a month. Reheat in a 350°F oven for about 5 minutes to bring back that fresh-baked texture.
Where did garlic knots originate?
Garlic knots are believed to have originated in pizzerias in the New York metropolitan area, particularly in Brooklyn and Queens. They were a way to use up leftover pizza dough, twisted into knots and baked with garlic butter. They’ve since become a classic American appetizer.
Is sourdough bread good for you?
Sourdough bread is often considered healthier than regular bread because the fermentation process breaks down some of the gluten and phytic acid, making nutrients more available. It also has a lower glycemic index. That said, these knots are still a treat, not a health food.
How can I make garlic knots vegan or dairy-free?
To make these sourdough garlic knots vegan, replace the butter with an equal amount of vegan butter or olive oil. The rest of the ingredients are already plant-based. The texture will be slightly different but still delicious. I’ve made them with olive oil and they come out great.
Are garlic knots Italian?
Garlic knots are an Italian-American creation, not a traditional Italian dish. They were invented in pizzerias in the United States, likely in New York, as a way to use leftover pizza dough. They’ve become a staple of American-Italian cuisine, especially as an appetizer.
What’s the difference between garlic bread and garlic knots?
Garlic bread is typically a sliced loaf of bread topped with garlic butter and broiled. Garlic knots are individual bread rolls shaped into knots, brushed with garlic butter, and baked. The knots have a higher surface area for butter and a chewier texture from the shaping.
Can I make these into sourdough garlic bread bites?
Absolutely. Instead of shaping the dough into knots, divide it into smaller pieces, about 20 grams each, and roll them into bite-sized balls. Bake them the same way and brush with garlic butter. They’re perfect for snacking or dipping in marinara sauce.
Would I be able to rest these in the fridge overnight and bake the next morning?
This recipe uses baking powder instead of yeast, so there’s no fermentation happening. Resting overnight won’t improve the flavor or texture. For best results, make and bake them the same day. If you need to prep ahead, shape the knots and refrigerate for up to 4 hours before baking.
If I add a little instant yeast, can I skip the 2 hour rest?
This recipe doesn’t require any rest at all, so there’s nothing to skip. The baking powder provides all the lift. If you add yeast, you’d need to let the dough rise, which defeats the purpose of a quick recipe. Stick with the baking powder for speed and simplicity.
What would you say is the best way to store these?
Store them in an airtight container at room temperature for up to 2 days. If you want to keep them longer, freeze them in a freezer-safe bag for up to a month. Reheat in a 350°F oven for 5 minutes. Don’t refrigerate them, as that will dry them out and make them hard.
If I am wanting to freeze these – do I still apply the warm garlic butter before I freeze them?
I recommend freezing the plain baked knots without the garlic butter. Then when you reheat them, brush on fresh garlic butter. The garlic flavor stays brighter and the butter won’t get absorbed or go rancid in the freezer. It takes an extra minute but the result is much better.
Wondering if these will freeze well for a week? And do I place just in a ziplock bag?
Yes, they freeze beautifully for a week or even a month. Let them cool completely, then place them in a freezer-safe zip-top bag. Squeeze out as much air as possible before sealing. When you’re ready, reheat directly from frozen in a 350°F oven for 10 minutes. They’ll taste almost fresh.