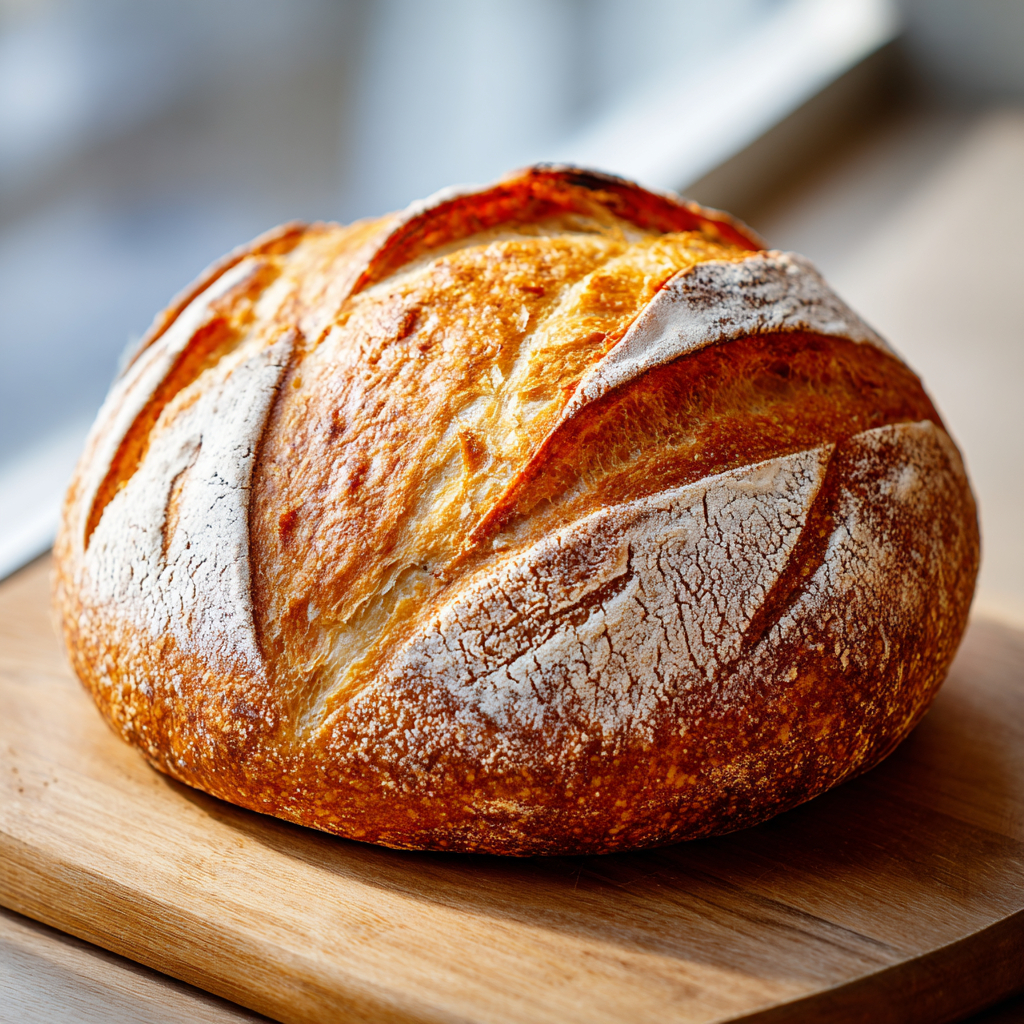
Why This Sourdough Bread Recipe Works
Let me tell you something. I’ve made hundreds of loaves of bread in my time, but my first dozen or so? They were hockey pucks. Dense, pale, sad little things that could’ve doubled as doorstops. Honestly, I almost gave up. But then I figured out the rhythm of sourdough. And this best sourdough bread recipe? It’s the one that finally clicked.
What I’ve found is that sourdough isn’t about perfection. It’s about understanding a few key principles and then letting the dough do its thing. This recipe is built for real life. It works in a hot California kitchen in July. It fits around a busy schedule. And it produces a loaf with a crackling crust, an open, airy crumb, and that perfect tangy flavor that’s not too aggressive.
That’s exactly the texture we’re looking for. A beautiful, bakery-quality loaf that makes you feel like a pro. And the best part? It’s simpler than you think.
What Is Sourdough Bread?
At its heart, sourdough bread is the oldest form of leavened bread. Instead of using commercial yeast, it relies on a natural fermentation process. A sourdough starter, which is a living culture of wild yeast and bacteria, does all the work. That’s what gives the bread its characteristic tang and that complex, slightly nutty flavor you just can’t get from a store-bought loaf.
The magic happens during fermentation. The wild yeast produces carbon dioxide, which makes the dough rise. The bacteria, specifically lactobacillus, produce lactic and acetic acids. Those acids are what create the tangy flavor and also help preserve the bread naturally. It’s a beautiful, ancient partnership.
Compared to bread made with commercial yeast, sourdough has a denser crumb, a thicker crust, and a much more interesting flavor profile. It also has a lower glycemic index and is easier to digest for some people. So when you make this best sourdough bread recipe, you’re not just making bread. You’re making a living, breathing food that’s been nourishing people for thousands of years.
Where to Get a Sourdough Starter
You can’t make this best sourdough bread recipe without a starter. But don’t panic. You have options.
- Make your own: It takes about 7-10 days, but it’s incredibly rewarding. Mix equal parts whole wheat flour and water, feed it daily, and watch it come to life. It’s like having a pet. A hungry, bubbly pet.
- Get one from a friend: This is the most common way. Ask around on social media or in your local baking groups. Someone is always happy to share a bit of their starter. It’s a great way to start a conversation.
- Buy one online: There are many reputable sources that sell dehydrated or active starters. King Arthur Baking Company is a great place to start. They ship nationwide.
- Check at a local bakery: Many artisan bakeries will give you a small amount of their starter for free or for a small fee. It’s worth asking. The starter from a bakery often has a very complex flavor.
I got my starter from my aunt Caroline years ago. She ran an organic bakery in Vermont, and her starter was legendary. It’s been with me through moves, through hot summers and cold winters. It’s part of the family now.
How to Feed Sourdough Starter
Feeding your starter is simple, but it’s the most important part of the whole process. Think of it like this: you’re waking it up and giving it breakfast so it can work for you.
Here’s the basic method I use. I keep my starter in the fridge when I’m not baking. When I want to bake, I take it out the night before. I feed it a 1:1:1 ratio. That means one part starter, one part flour, one part water. For this best sourdough bread recipe, I usually feed it about 60 grams of starter with 60 grams of bread flour and 60 grams of room temperature water.
Stir it all together in a clean jar. Cover it loosely with a lid or a cloth. Then let it sit at room temperature. After about 8-12 hours, it should be very active. It should have doubled in size, be full of bubbles, and smell pleasantly tangy. Like ripe fruit and yogurt. That’s the sweet spot.
If your kitchen is warmer, it will be ready faster. If it’s cooler, it will take longer. You’ll learn to read your starter. It’s a living thing, and it talks to you if you listen.
When Is Sourdough Starter Ready to Use?
This is the million-dollar question. You don’t want to use a sleepy starter. It will give you a flat, dense loaf. So how do you know?
Look for these signs. Your starter should have at least doubled in volume. The top should be domed, not flat or sunken. There should be lots of small and large bubbles throughout. It should look airy and alive. The smell should be pleasant and tangy, not like nail polish remover or alcohol.
There’s also the float test. Take a small spoonful of your starter and drop it into a glass of room temperature water. If it floats, it’s ready. If it sinks, it needs more time. This works for me most of the time, but it’s not foolproof. Some very active starters can still sink depending on the flour you used. So use it as a guide, not a rule.
For this best sourdough bread recipe, I always make sure my starter is at its peak of activity. It’s the single most important factor for a good loaf. A weak starter is the number one reason for failure.
Storing Your Starter
Your starter is a long-term project. You can keep it alive for years with very little effort.
- Short-term (baking every few days): Keep it on the counter. Feed it daily. It will be ready to use whenever you need it.
- Long-term (baking once a week or less): Keep it in the fridge. Feed it once a week. Before you bake, take it out, feed it, and let it come back to life. This is what I do. It’s so much easier.
- Vacation mode: If you’re going away for a few weeks, feed your starter, let it sit for an hour, then put it in the fridge. It will be fine for 2-3 weeks without feeding. When you get back, just feed it a few times to revive it.
- Freezing: You can also freeze a portion of your starter as a backup. Just put it in a freezer-safe bag. It will keep for months.
The key is to not let it starve. A few days without food is fine. A few weeks without food, and you might have to start over. But it’s resilient. I’ve revived starters that looked like they were on their last legs. A few good feeds, and they bounce right back.
Ingredients and Tools You’ll Need
Let’s talk about what you need for this best sourdough bread recipe. The ingredient list is short, but each one matters.
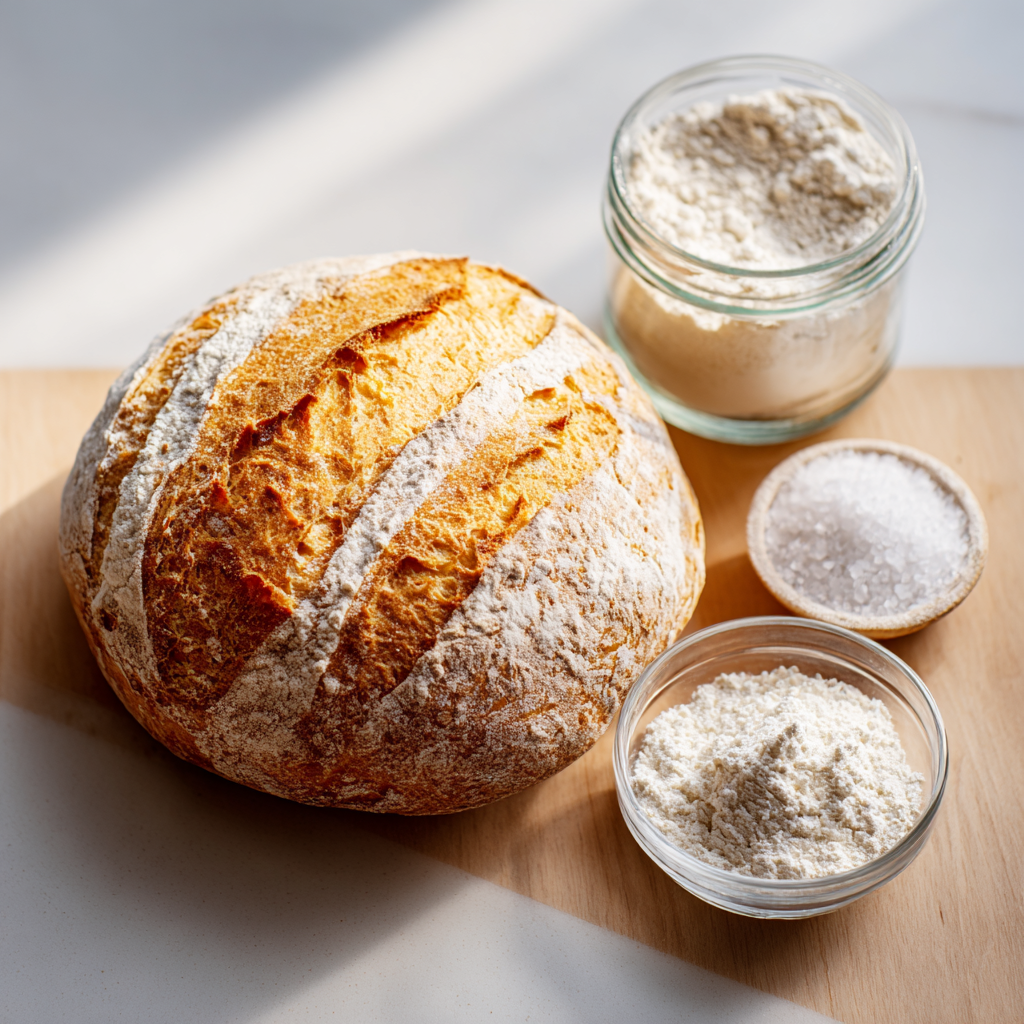
Ingredients:
- Active sourdough starter: About 60 grams, fed and bubbly. This is your leavening agent. It’s the heart of the bread.
- Water: About 340 grams, at room temperature. The temperature of your water is crucial, especially in summer. If your kitchen is warm, use cooler water to slow down fermentation.
- Bread flour: About 490 grams. This is the best choice for structure. It has a higher protein content, which means more gluten development and a better crumb. All-purpose flour will work, but the crumb will be slightly less open.
- Fine sea salt: About 10 grams. Salt is not just for flavor. It strengthens the gluten and controls fermentation. Don’t skip it.
Tools:
- Kitchen scale: This is non-negotiable. Weighing your ingredients is so much more accurate than using cups. It’s the difference between a good loaf and a great one.
- Large mixing bowl: A glass or ceramic bowl works well.
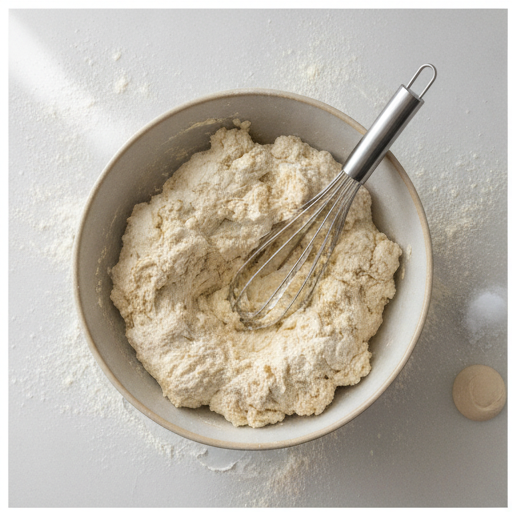
- Dough whisk or fork: For mixing the initial shaggy dough.
- Plastic wrap or a damp towel: To cover the dough during rest periods.
- Banneton basket (proofing basket): This gives the dough its shape and helps it hold its form. You can use a colander lined with a floured towel as a substitute.
- Rice flour: For dusting the banneton. It prevents sticking better than all-purpose flour.
- Dutch oven: This is the best way to create steam for a perfect crust. A 5-6 quart enameled cast iron pot works perfectly.
- Parchment paper: To lift the dough into the hot pot.
- Lame or razor blade: For scoring the dough. A sharp knife will work in a pinch.
- Wire cooling rack: Essential for cooling the bread properly.
You don’t need a lot of fancy equipment. The scale and the Dutch oven are the two most important investments. Everything else can be improvised.
Why Autolyse Matters
Autolyse. It sounds fancy, but it’s just a fancy word for a simple rest. After you mix the flour and water (and starter and salt), you let the dough sit for an hour. That’s it.
During that hour, the flour absorbs the water. The gluten strands start to form naturally. The enzymes in the flour begin breaking down complex sugars into simple ones, which the yeast can then eat. It’s like giving the dough a head start.
In this best sourdough bread recipe, the autolyse makes the dough much easier to handle later. It becomes more extensible and less sticky. It also improves the flavor and the texture of the final crumb. Don’t skip it. It’s one of those small steps that makes a huge difference.
I’ve found that a longer autolyse, up to 2 hours, can be even better. But for this recipe, 1 hour is perfect. It fits into the schedule and does the job beautifully.
How Long Does It Take for Sourdough Bread to Rise?
This is the part that trips most people up. Unlike commercial yeast bread, sourdough doesn’t work on a strict timer. It works on visual cues. The time it takes depends on the temperature of your kitchen, the activity of your starter, and the hydration of your dough.
In a cool kitchen (65-68°F), bulk fermentation can take 8-10 hours. In a warm kitchen (75-80°F), it can be done in 4-6 hours. The key is to watch the dough, not the clock.
For this best sourdough bread recipe, you’re looking for the dough to double in size. It should look puffy and airy. There should be bubbles on the surface. It should feel light and alive, not dense and heavy. A good test is to gently poke the dough with a wet finger. If the indentation springs back slowly, it’s ready. If it springs back immediately, it needs more time. If it doesn’t spring back at all, you’ve overproofed it.
In the summer, your dough will rise much faster. You need to be vigilant. Check on it every hour after the 4-hour mark. It’s better to slightly underproof than to overproof. An underproofed loaf will still be good. An overproofed loaf will be flat and dense.
Stretch and Fold the Dough
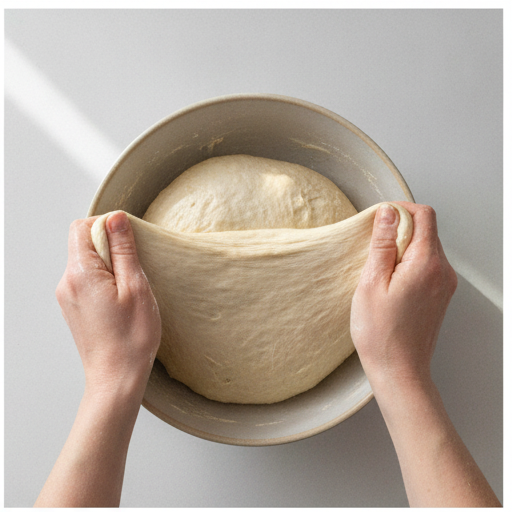
This is the technique that replaces kneading. It’s gentler and more effective for high-hydration doughs. You’re not beating the dough into submission. You’re coaxing it into strength.
Here’s how it works. After the autolyse, wet your fingers. Grab a section of dough from the edge. Gently stretch it upward as far as it will go without tearing. Then fold it over to the opposite side. Turn the bowl a quarter turn and repeat. Do this 3-4 times until the dough forms a smooth ball.
Cover the bowl and let it rest for an hour. Then repeat the process. You’ll do this 3 more times, resting for an hour between each set. After the final fold, you’ll let the dough sit undisturbed for the rest of bulk fermentation.
What you’re doing is building the gluten network. Each stretch and fold aligns the gluten strands, giving the dough structure and strength. You’ll feel the dough change. It will go from a shaggy, sticky mess to a smooth, elastic ball that holds its shape. That’s beautiful work.
The first set of folds is the messiest. The dough will stick to everything. But by the third set, it will be much smoother. Don’t add extra flour. Use wet hands. The water will prevent sticking without affecting the hydration of the dough.
How to Shape a Round Sourdough Boule
Shaping is where you give the dough its final form. It’s also where you build surface tension, which is crucial for a good oven spring. A properly shaped loaf will rise up, not spread out.
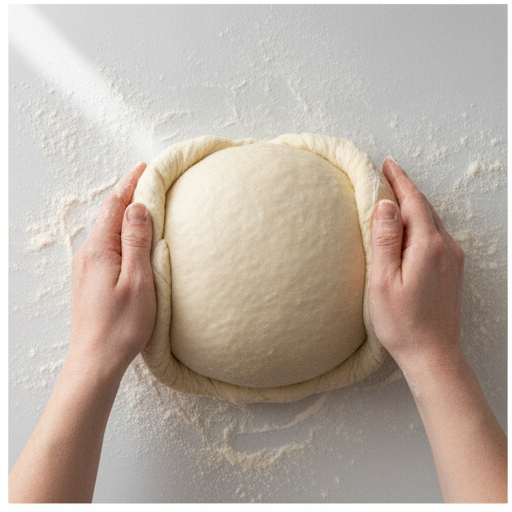
First, dust your work surface lightly with flour. Gently turn the risen dough out onto the surface. Try not to deflate it too much. You want to preserve those gas bubbles.
Now, gently shape it into a round. Fold the edges of the dough toward the center, one at a time. Think of it like gathering up the corners of a blanket. Then, flip the dough over so the seam is on the bottom. Cup your hands around the dough and gently rotate it in a circular motion, pulling it toward you. This creates tension on the surface. The dough should form a smooth, taut ball.
It takes practice. My first few shapes were lopsided and lumpy. But you’ll get a feel for it. The dough should feel like a soft earlobe. Smooth and slightly springy.
Then, place the dough seam-side up into your prepared banneton. Sprinkle the top with rice flour. Cover it with plastic wrap or a shower cap.
Don’t stress about making it perfect. Even a slightly messy shape will still produce a beautiful loaf. The most important thing is to build that surface tension.
Choose the Right Baking Pot
The vessel you bake in makes a huge difference. The best option is a Dutch oven. It traps steam, which is essential for a good crust. The steam keeps the crust soft during the first part of baking, allowing the bread to expand fully. Then, when you remove the lid, the crust dries out and becomes crispy and golden.
For this best sourdough bread recipe, a 5-6 quart enameled cast iron Dutch oven is ideal. Brands like Le Creuset, Staub, or Lodge are all excellent. You can also use a cast iron skillet with a metal bowl inverted over it, or a heavy-duty baking dish with a lid.
The key is that the pot needs to be preheated. Place it in the cold oven, then turn the oven on. Let it heat for at least 30 minutes at 450°F. This ensures that the dough hits a hot surface immediately, which gives you that initial burst of oven spring.
If you don’t have a Dutch oven, you can use a baking stone or a steel. You’ll need to create steam by placing a pan of hot water on the bottom rack or by spritzing the oven with water. It’s not as effective, but it works.
Step 5: Second Rise (Proofing)
After shaping, the dough goes into the fridge for its final proof. This is called a cold proof or cold retard. It’s a game-changer.
The cold proof does several things. First, it slows down fermentation, which gives the bread a more complex, tangy flavor. Second, it makes the dough firmer and easier to handle. Cold dough is much easier to score. Third, it improves the oven spring. The cold dough hits the hot oven and expands dramatically.
For this best sourdough bread recipe, I recommend a cold proof of 3-4 hours minimum. Overnight is even better, up to 12-24 hours. The longer it goes, the tangier it gets. You’ll see the dough puff up slightly in the fridge, but it won’t double. That’s fine. The main rise happens in the oven.
When you’re ready to bake, take the dough out of the fridge. Don’t let it come to room temperature. You want it cold. It will be easier to score and will spring better in the oven.
Step 6: Score the Dough
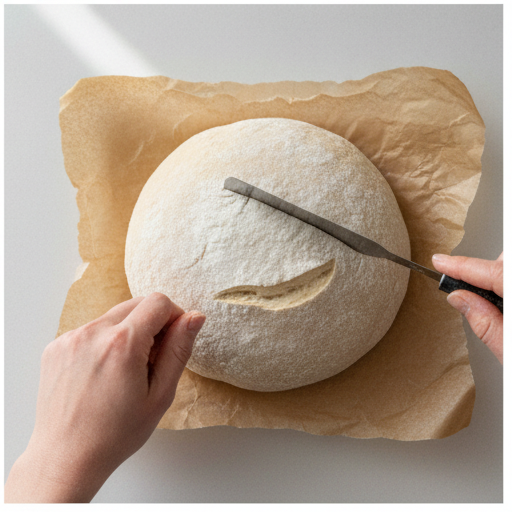
Scoring is more than just decoration. It’s a functional cut that controls where the bread expands during baking. Without a score, the bread will burst open in a random, uncontrolled way. With a score, you get a beautiful, intentional ear.
Use a sharp lame or a razor blade. Hold it at a 45-degree angle to the dough. Make a single deep slash, about 1/2 inch deep, along the top of the loaf. You can also make a cross or a simple pattern. The key is to be confident and swift. A hesitant cut will drag the dough and ruin the pattern.
The dough should be cold and firm. If it’s too sticky, you can dust the top with a little more rice flour before scoring. The flour will also create a nice contrast against the dark crust.
Don’t worry if your first scores look messy. The bread will still taste amazing. The ear is a nice touch, but it’s not the point. The point is a delicious loaf of bread.
Step 7: Bake the Bread
This is the moment of truth. The oven is hot. The dough is scored. It’s time to bake.
Carefully remove the hot Dutch oven from the oven. Using the parchment paper, lower the dough into the pot. It should be seam-side down. Cover with the lid and place it back in the oven.
Bake for 50 minutes with the lid on. Do not open the oven during this time. The steam is doing its work. After 50 minutes, remove the lid. Check the crust. It should be a deep golden brown. If it’s not, bake uncovered for another 5-10 minutes. The internal temperature should be around 205-210°F.
The smell that fills your kitchen at this point is incredible. It’s the smell of success. The crust will be crackling and singing as it cools. That’s the sound of a perfect loaf.
For a no-preheat method, you can place the scored dough in the cold Dutch oven, cover it, put it in the cold oven, then set it to 450°F. Bake for 55 minutes with the lid on, then uncover and bake 5-15 minutes more. This is a great option if you’re worried about handling a hot pot.
Step 8: Cool and Slice
This is the hardest part of the whole process. You have to wait. The bread needs to cool completely before you slice it. At least 1 hour. I know it’s torture, but it’s necessary.
If you slice into a hot loaf, the interior will be gummy and sticky. The steam inside the bread needs time to redistribute. Cutting too soon will ruin the crumb. The bread will feel wet and dense. Trust me on this. I’ve made that mistake more times than I can count.
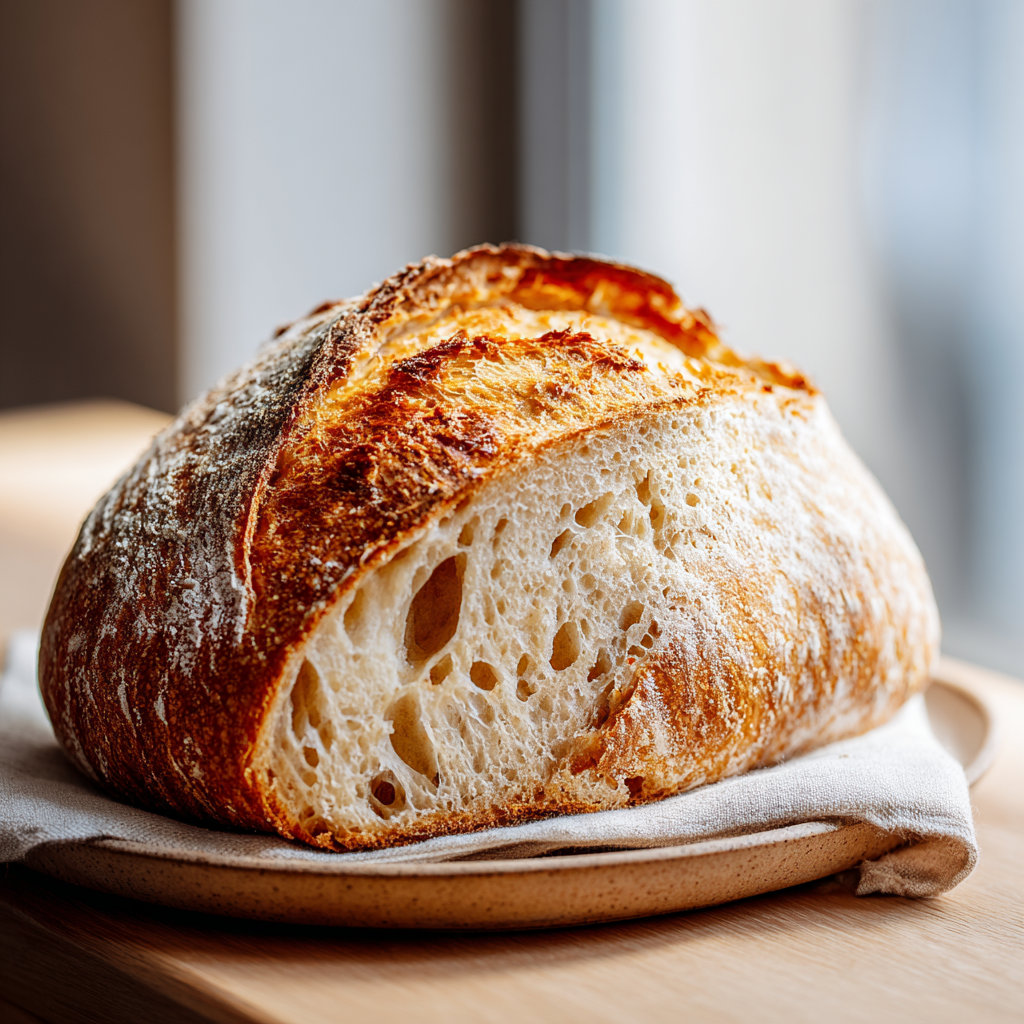
Transfer the loaf to a wire rack and let it cool completely. The crust will continue to crisp up as it cools. The interior will set. When it’s cool, you’ll hear a hollow sound when you tap the bottom. That’s the sound of a fully baked loaf.
Then, and only then, can you slice it. Use a serrated bread knife. Listen to that crust crackle. Look at that open, airy crumb. That’s exactly the texture we were aiming for. Perfect balance.
Tips for the Best Sourdough Bread
Here are some tips I’ve learned over the years. They’ll help you avoid the common mistakes and get consistent results.
Common Mistakes and Quick Fixes
❌ Using a weak starter: This is the number one cause of dense, flat bread. Always use your starter at its peak of activity. Do the float test.
✅ Solution: Feed your starter twice before baking if it’s been in the fridge for a while. Make sure it’s very bubbly and doubled.
❌ Over-fermentation: Letting bulk fermentation go too long. The dough will become slack and sticky, and it won’t hold its shape.
✅ Solution: Watch the dough, not the clock. In a warm kitchen, check it after 4 hours. It should be doubled, not tripled.
❌ Not letting the bread cool completely: This is a classic mistake. The interior will be gummy and unappealing.
✅ Solution: Be patient. Let it cool for at least 1 hour on a wire rack. The wait is worth it.
❌ Over-flouring the banneton: Too much flour will create a thick, floury crust that’s unpleasant.
✅ Solution: Use rice flour. It’s less absorbent and won’t create a paste. Use a light, even coating.
❌ Adding too much water: A high-hydration dough is harder to handle. Stick to the recipe’s ratios until you’re more experienced.
✅ Solution: Weigh your ingredients. 340 grams of water and 490 grams of flour is a 69% hydration, which is perfect for beginners.
Here are a few more tips that make a difference:
- Use a kitchen scale. It’s the single best investment you can make for consistent baking.
- Keep a baking journal. Write down the temperature of your kitchen, the time of each step, and how the dough looked. You’ll learn to predict how your dough behaves in different conditions.
- Don’t be afraid of a sticky dough. High-hydration doughs are sticky by nature. Use wet hands, and you’ll be fine.
- If your kitchen is very warm (above 80°F), use ice water. It will slow down the fermentation and give you more control.
- If your kitchen is very cold (below 65°F), use warm water. It will wake up the fermentation and keep things moving.
Flavor Variations to Try
Once you’ve mastered the basic best sourdough bread recipe, you can start experimenting. Here are some of my favorite variations.
- Roasted Garlic: Roast a head of garlic until soft and sweet. Squeeze the cloves out and fold them into the dough during the stretch and fold stage. The flavor is incredible.
- Fresh or Dried Herbs: Rosemary, thyme, or oregano. Add about 2 tablespoons of fresh herbs or 1 tablespoon of dried herbs during the final stretch and fold.
- Seeds or Nuts: Toasted pepitas, sesame seeds, sunflower seeds, or chopped walnuts. Add about 1/2 cup during the final fold. They add great texture and flavor.
- Cheese: Fold in 1 cup of shredded cheddar, parmesan, or gruyere during the final stretch. It gets all melty and delicious inside the bread.
- Dried Fruit: Raisins, cranberries, or chopped apricots. Add about 1/2 cup during the final fold. They pair beautifully with the tangy sourdough.
- Jalapeño and Cheddar: A classic combination. Add 1/2 cup of diced pickled jalapeños and 1 cup of shredded cheddar. It’s a crowd-pleaser.
These are all optional additions. The base recipe is already perfect. But these variations are a fun way to change things up.
How to Store and Freeze Sourdough Bread
Sourdough bread stays fresh longer than commercial bread because of its natural acidity. But it will still go stale eventually. Here’s how to keep it at its best.
Short-term storage: Store the bread in a paper bag at room temperature. It will stay fresh for up to 3 days. The paper bag allows the crust to stay crispy. Do not store it in a plastic bag. That will make the crust soft and chewy, which is not what you want.
Long-term storage: Sourdough freezes beautifully. Let the bread cool completely. Then slice it. Place the slices in a single layer on a baking sheet and freeze for 1 hour. This prevents them from sticking together. Then transfer the slices to a freezer-safe bag or container. They will keep for up to 3 months.
Reheating: To revive a loaf that’s gone a bit stale, sprinkle it with a little water and place it in a 350°F oven for 5-10 minutes. It will crisp right up. For frozen slices, just pop them in the toaster. They’ll come out perfectly.
Serving suggestions: This bread is perfect for everything. Toast it for breakfast with butter and jam. Use it for sandwiches. Serve it alongside soup or salad. Make bruschetta or crostini. It’s incredibly versatile.
Sourdough Baking Schedule
Here’s a sample schedule that works for me. It fits around a normal workday. Adjust it based on your own schedule.
Day 1 (Morning): Take your starter out of the fridge. Feed it. Let it become active.
Day 1 (Evening): Mix the dough. Do the stretch and folds. Let it bulk ferment overnight at cool room temperature.
Day 2 (Morning): Shape the dough. Place it in the banneton. Put it in the fridge for a cold proof.
Day 2 (Evening or Next Day): Preheat the oven. Score and bake the bread. Let it cool completely. Enjoy!
This schedule gives you a slow, controlled fermentation. The long bulk ferment develops the flavor. The cold proof makes it easy to handle and improves the oven spring. It’s a beautiful rhythm.
Frequently Asked Questions
Expert Notes & Data Insights
After years of testing and learning from hundreds of loaves, I’ve come to understand that sourdough is as much about observation as it is about following a recipe. The data from my baking journal shows that consistent results come from three things: a predictable starter, a controlled environment, and patience.
I’ve found that using a 1:1:1 feeding ratio for my starter, with bread flour and room temperature water, gives me the most reliable results. My kitchen averages 72°F, so my bulk fermentation usually takes about 6 hours. In the summer, when it hits 80°F, I cut that time by an hour. In the winter, I add an hour. The dough tells you what it needs.
One insight that surprised me: the cold proof is not just for flavor. It’s for structure. When I skip the cold proof or shorten it to less than 4 hours, the dough is much harder to score and the oven spring is weaker. The cold proof firms up the dough, making it easier to handle and giving it that dramatic rise in the oven.
Another thing I’ve learned is that hydration matters more than you think. At 69% hydration, this dough is forgiving. It’s sticky but manageable. If you increase the water to 75% or higher, the crumb becomes more open and airy, but the dough becomes much harder to handle. For beginners, stick with the 69% hydration in this recipe. It’s the sweet spot between ease of handling and a beautiful crumb.
The most common mistake I see in my comments section is people using a starter that’s not at its peak. They feed it, wait a few hours, and then use it when it’s barely bubbly. That’s a recipe for a dense loaf. The float test is your friend. If your starter sinks, wait another hour or two. It’s worth the wait.
Finally, don’t underestimate the power of a good baking schedule. The slow, cold proof is what gives this bread its complex flavor. It’s not about rushing. It’s about letting the fermentation do its magic. The best sourdough bread comes from a patient baker. And that’s exactly what this recipe is designed to help you become.
So go ahead. Give it a try. Your first loaf might not be perfect, but it will be delicious. And with practice, you’ll be making loaves that rival anything from a bakery. That’s the promise of this best sourdough bread recipe. It’s simple, it’s forgiving, and it’s absolutely worth it.
What is sourdough bread?
Sourdough bread is a naturally leavened bread made using a fermented starter of wild yeast and bacteria, rather than commercial yeast. It has a characteristic tangy flavor, a chewy crumb, and a crisp crust. It’s one of the oldest forms of bread.nnough starter is a living culture of wild yeast and bacteria. It’s what gives sourdough bread its unique flavor and rise. You feed it flour and water, and it becomes bubbly and active. It’s like a pet that you keep alive.
How do I know if my starter is ready?
Your starter is ready when it has doubled in size, is full of bubbles, and has a pleasant tangy smell. It should pass the float test: drop a small spoonful into a glass of water, and if it floats, it’s ready to use. It should also look domed on top, not flat or sunken.
Why is my sourdough bread dense?
Dense sourdough bread is usually caused by one of three things: a weak or underfed starter, under-fermentation, or over-fermentation. Make sure your starter is very active before you begin. Watch the dough carefully during bulk fermentation, and don’t let it go too long. Also, be sure to build enough surface tension during shaping.
How long does it take for sourdough bread to rise?
It depends on your kitchen temperature. In a cool kitchen (65-68°F), bulk fermentation can take 8-10 hours. In a warm kitchen (75-80°F), it can be done in 4-6 hours. The cold proof in the fridge adds another 3-24 hours. Watch the dough, not the clock. It should double in size and feel puffy and light.
Can I speed up the sourdough process?
Yes. Use warmer water (80-85°F) when mixing the dough. Keep the dough in a warm spot, like near a sunny window or on top of the refrigerator. You can also use a proofing box or an oven with the light on. Just be careful not to let it get too hot. Above 90°F, the yeast will start to die.
Can I bake sourdough without a Dutch oven?
Yes. You can use a baking stone or steel with a pan of hot water on the bottom rack to create steam. You can also use a heavy-duty baking dish with a lid. The key is to trap steam during the first part of baking. Without steam, the crust will set too quickly and the bread won’t rise as much.
How do I store sourdough bread?
Store it in a paper bag at room temperature for up to 3 days. The paper bag keeps the crust crispy. Do not store it in plastic, as that will make the crust soft. For longer storage, slice the bread and freeze it in a freezer-safe bag for up to 3 months. Reheat slices in the toaster or oven.
What if my dough doesn’t rise at all?
This usually means your starter is not active enough. Make sure your starter is bubbly and passes the float test before you use it. Also, check the temperature of your kitchen. If it’s too cold, the fermentation will be very slow. Try placing the dough in a warmer spot.