Why You’ll Love This Hatch Green Chili Cornbread Casserole
I still remember the first time I tasted a real Hatch chile. It was at a farmers market in Portland, late August, and this older gentleman was roasting them in a giant wire drum over an open flame. The smell that smoky, almost sweet aroma stopped me in my tracks. I bought a whole bag, not really knowing what to do with them. That night, I threw some into a cornbread casserole, and honestly? It was a bit of a mess. Too dry, not enough heat, the cheese sank to the bottom. But the flavor was there. That smoky, earthy, slightly sweet thing that only Hatch chiles do.
So I kept working on it. This hatch green chili cornbread casserole is the result of maybe a dozen attempts over two summers. It’s the one that finally works. It’s hearty enough to be a side dish for chili or grilled meats, but honestly? I’ve eaten it for breakfast with a fried egg on top and called it dinner. It’s gluten-free, thanks to the cornmeal, and the layers of roasted chiles, sweet corn, and sharp cheddar make every bite different. Let’s think this through together.
Key Ingredients for Hatch Green Chili Cornbread Casserole
Here’s what I’ve found works best. The ingredients list is short, but each one does a specific job. Trust me, skipping or swapping too much changes the whole thing.
- Roasted Hatch green chiles: The star. You need 12 whole roasted and peeled chiles. They’re smoky, mildly spicy, and nothing else tastes quite like them. If you can’t find fresh, frozen or canned fire-roasted green chiles work in a pinch.
- Fresh corn kernels: 2 cups, cut straight off the cob. Summer corn is sweet and juicy. Frozen corn (thawed and drained) works, but fresh is better.
- Red onion and garlic: Sautéed until soft and lightly browned. They add sweetness and depth.
- Smoked paprika: Just 3/4 teaspoon, but it reinforces that smoky chile flavor beautifully.
- Cornmeal: 2 cups of plain yellow cornmeal. Not self-rising, not corn flour. It gives the casserole its signature texture.
- Buttermilk: 1 3/4 cups. This is the moisture secret. The acidity tenderizes the cornmeal and keeps the casserole from being dry or crumbly.
- Sharp cheddar cheese: 2 cups, grated. Use a good sharp cheddar it melts beautifully and doesn’t get lost in the other flavors.
Texture Targets
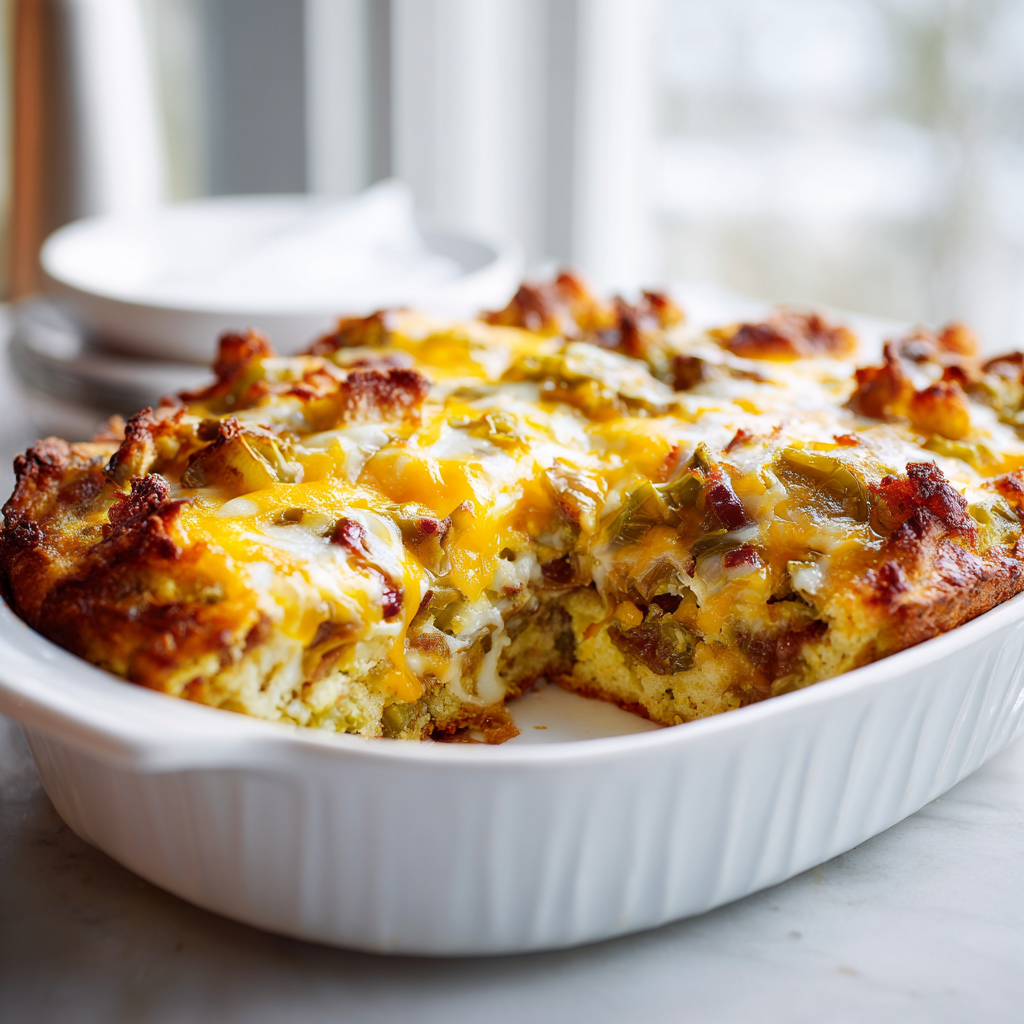
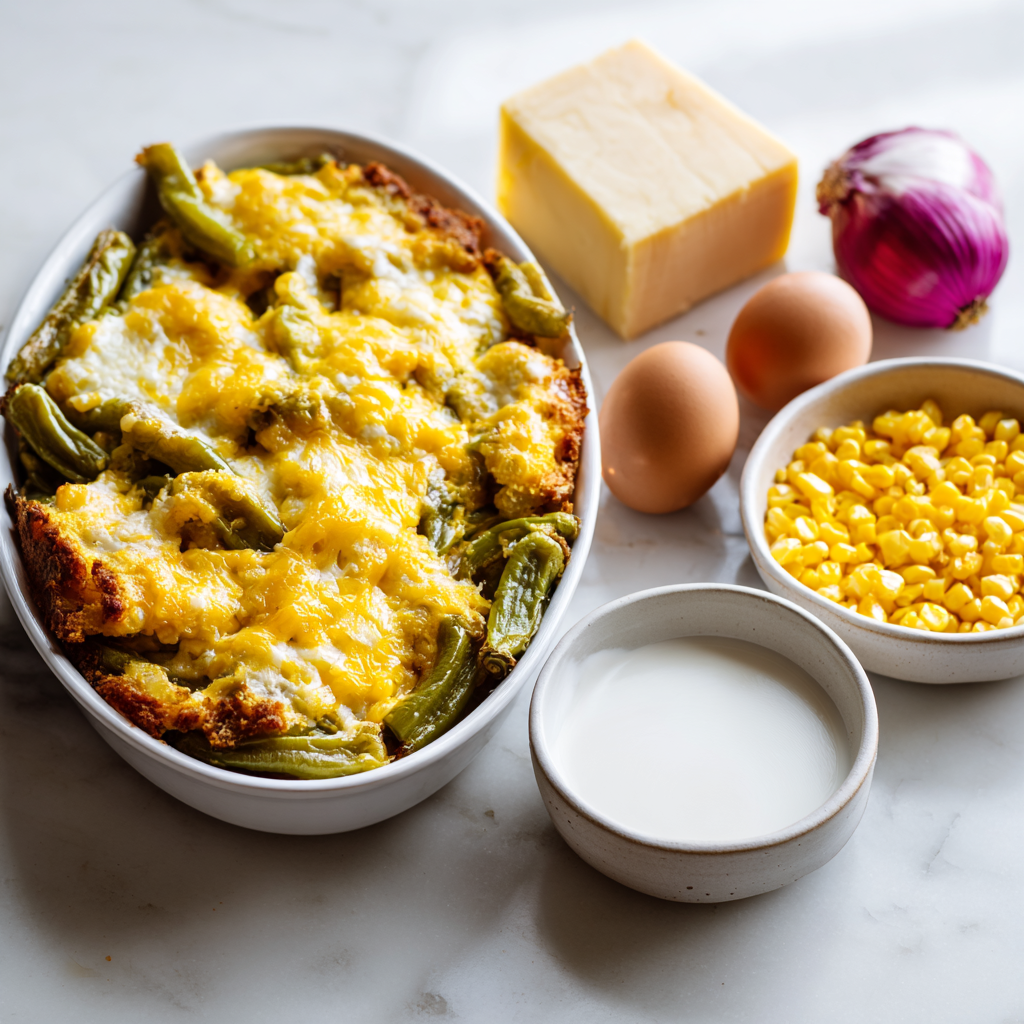
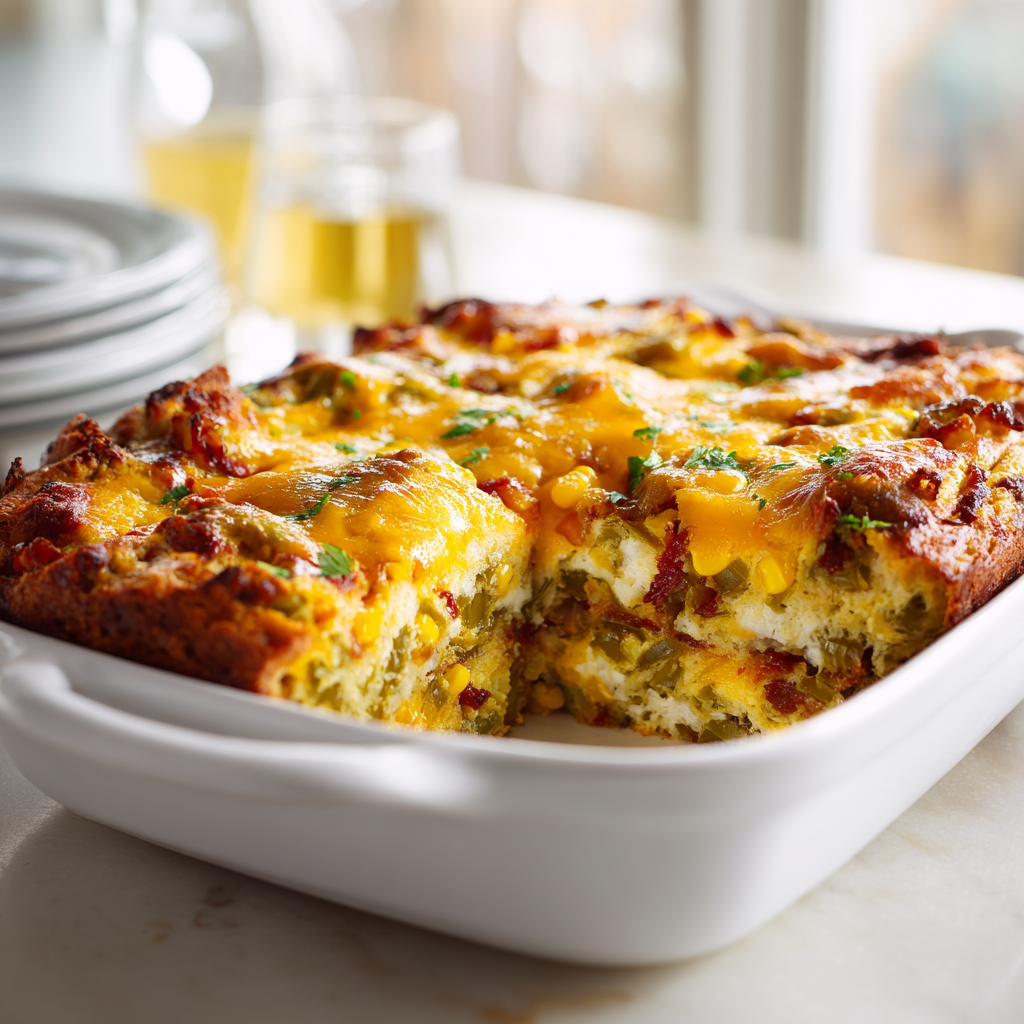
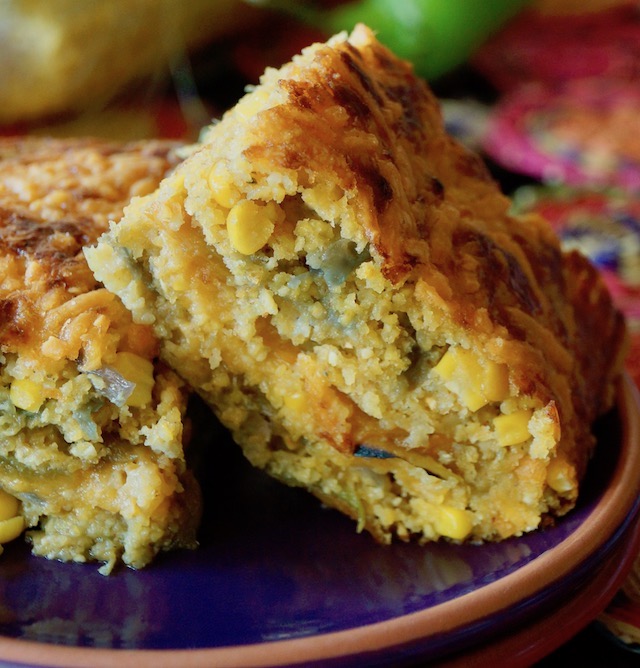
What to look for: The top should be deep golden brown with visible melted cheese. The edges will be slightly darker and a little crispy. When you press the center gently, it should feel set not jiggly. A toothpick inserted in the middle should come out clean or with just a few moist crumbs. Let it cool for at least 20 minutes before slicing. This is crucial. It needs that time to set up so you get clean slices instead of a crumbly mess.
Substitutions and Variations
Fair enough if you can’t find fresh Hatch chiles or need to adjust for what’s in your pantry. Here are the swaps I’ve tested and trust.
- Hatch chiles substitute: Use 1 cup of chopped canned green chiles (drained) or a 4-ounce can with juices. Anaheim or Poblano chiles work too Anaheim is mildest, Poblano has more flavor.
- Cheese swap: Monterey Jack or a Mexican blend melts beautifully. White cheddar works too. Avoid strongly flavored cheeses like blue cheese they’ll overpower the chiles.
- Red onion substitute: Yellow onion works fine. Same amount, same prep.
- Fresh corn substitute: Frozen corn (thawed and drained) or canned corn (drained well). This is important excess moisture makes the casserole soggy.
- Buttermilk substitute: Mix 1 2/3 cups milk with 1 tablespoon plus 2 teaspoons lemon juice or white vinegar. Let it sit for 5 minutes before using.
- Spicy version: Use Pepper Jack cheese and leave some seeds in the chiles. This is the one that wakes you up.
How to Roast and Peel Hatch Chiles
If you’re using fresh Hatch chiles, here’s the method. It’s easier than you think, and the smell alone is worth the effort.
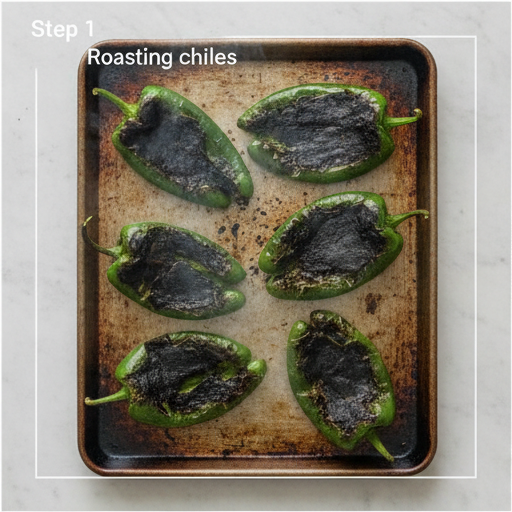
Char the skins directly over a gas flame or under the broiler. Turn them with tongs until the skin is blackened and blistered all over about 5 to 8 minutes. Drop the charred chiles into a bowl and cover tightly with plastic wrap. Let them steam for 10 minutes. This loosens the skin so it slips right off. Once they’re cool enough to handle, peel off the blackened skin. Cut off the stems and slit each chile open to remove the seeds. That’s it. You’ve got roasted Hatch chiles ready to go.
Step-by-Step Instructions
I’m going to walk you through the four major stages. The recipe card at the end has the full details, but here’s the why behind each step.
Stage 1: Cook the Vegetables
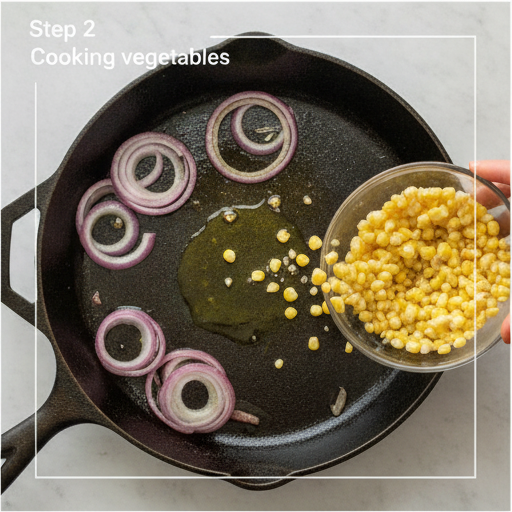
Heat olive oil in a large skillet over medium heat. Add the sliced red onion and minced garlic, and cook until soft and lightly browned about 7 minutes. Then stir in the fresh corn kernels and smoked paprika. Cook for another 2 minutes. The corn should still have a little bite. You’re building flavor here, not cooking everything to mush. The smoked paprika is the secret it adds that campfire quality that makes this taste like it came from a Southwest kitchen.
Stage 2: Make the Cornbread Batter
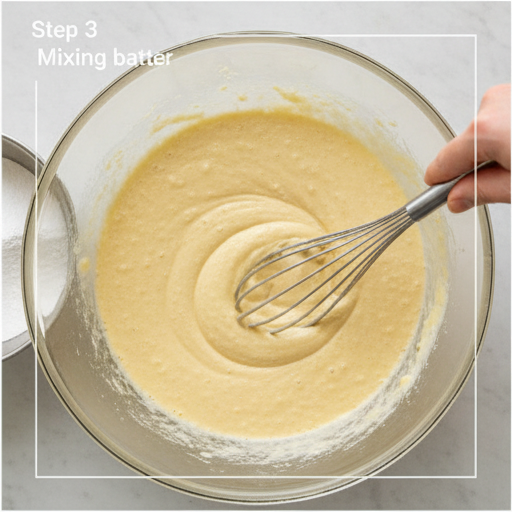
In a large mixing bowl, whisk together the cornmeal, baking soda, sugar, and sea salt. Make a well in the center. Add the buttermilk and eggs, and stir until the batter is smooth. Fold in the melted butter and the cooked onion-corn mixture. The batter will be thick that’s normal. If it looks too dry, add a splash of buttermilk. Cornmeal is thirsty stuff.
Stage 3: Layer the Casserole
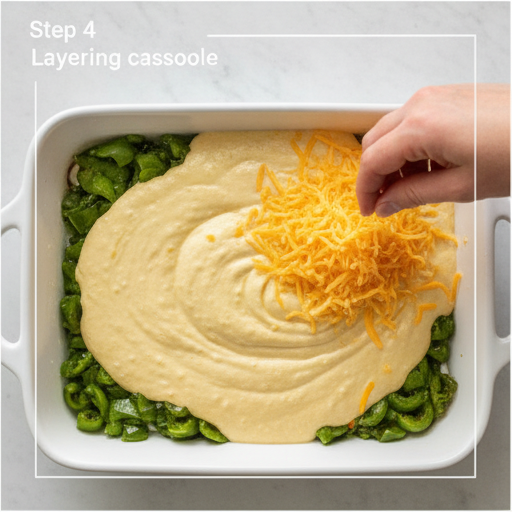
Lightly oil a 9×13-inch baking dish. Place 6 of the prepared chiles, smooth side down, in a single layer. Pour about 2 cups of batter evenly over the chiles. Sprinkle with 3/4 cup of the grated cheddar. Arrange the remaining 6 chiles on top of the cheese, smooth side down. Pour the remaining batter over the top, and sprinkle with the remaining 1 1/4 cups of cheese. This layering is what makes every bite interesting you get pockets of chile throughout, not just a single layer on top.
Stage 4: Bake and Rest
Bake at 375°F until the top is golden brown and the batter is set about 25 minutes. If the top isn’t brown enough, broil for 30 seconds. Watch it carefully. The cheese can go from golden to burnt fast. Let the casserole cool in the pan for at least 20 minutes before slicing. I know it’s hard to wait, but this rest period is essential. It lets the structure set so you get clean slices instead of a crumbly pile.
Troubleshooting Common Mistakes
❌ Too dry: You probably added too little liquid or overbaked it. Next time, add a splash of buttermilk to the batter. Check doneness at 22 minutes.
❌ Too wet: Your corn or chiles had too much moisture. Drain frozen corn thoroughly. Pat roasted chiles dry with paper towels.
❌ Not set in the center: Your oven might run cool. Bake for 5-10 more minutes, then let it rest longer up to 30 minutes.
Serving Suggestions
This hatch green chili cornbread casserole is incredibly versatile. Here are my favorite ways to serve it.
- Alongside chili: A bowl of red or green chili with a thick slice of this casserole on the side. It’s a classic combo for a reason.
- With grilled meats: Burgers, steak, chicken, or fish. The smoky chiles and sweet corn complement anything off the grill.
- For brunch: Serve it with a crisp green salad and sliced ripe tomatoes. Or top a slice with a fried egg and call it breakfast.
- With field peas: A Southern-style plate with field peas, collard greens, and this casserole. Simple and satisfying.
- With a pat of butter: Honestly, a little sweet butter melting into a warm slice is all you need.
Storage and Reheating Tips
Leftovers keep well in the fridge for up to 4 days. Store them in an airtight container or tightly covered with foil. To reheat, place slices in a 350°F oven for about 10 minutes, or until warmed through. The microwave works in a pinch, but the oven keeps the texture better. This casserole also freezes well. Wrap the cooled casserole tightly in plastic wrap and foil, then freeze for up to 3 months. Thaw overnight in the fridge before reheating.
If you’re making this for a potluck, you can assemble the whole thing the night before (without baking), cover it, and refrigerate. Add about 10 minutes to the bake time when you’re ready to cook. This makes it a great make-ahead casserole for busy weekends.
Frequently Asked Questions
More Hatch Chile Recipes to Try
If you love this hatch green chili cornbread casserole, you might also enjoy Hatch chile mac and cheese, Hatch chile chicken enchiladas, or Hatch chile and corn chowder. The smoky flavor works beautifully in so many dishes. I’ll be sharing more soon.
Make this for your 4th of July BBQ and let me know how it disappears! Tag me on social media I love seeing your creations. And if you have questions, drop them in the comments. I’m here to help.
Hatch Green Chili Cornbread Casserole
Ingredients
Method
- Roast and peel the Hatch chiles: char the skins over a gas flame or under a broiler, then steam in a bowl covered with plastic wrap for 10 minutes. Peel off the blackened skin, cut off the stems, and slit each chile open to remove the seeds. Set aside.
- Preheat the oven to 375°F. In a large skillet, heat the olive oil over medium heat. Add the sliced red onion and garlic, and cook until soft and lightly browned, about 7 minutes. Stir in the corn and smoked paprika, and cook for another 2 minutes to blend flavors. Remove from heat and set aside.
- In a large mixing bowl, whisk together the cornmeal, baking soda, sugar, and salt. Make a well in the center, then add the buttermilk and eggs. Stir until the batter is smooth. Fold in the melted butter and the cooked onion-corn mixture.
- Lightly oil a 9×13-inch baking dish. Place 6 of the prepared chiles, smooth side down, in a single layer in the dish. Pour about 2 cups of the batter evenly over the chiles. Sprinkle with 3/4 cup of the grated cheddar. Arrange the remaining 6 chiles, smooth side down, on top of the cheese. Pour the remaining batter (about 2 1/2 cups) over the top, and sprinkle with the remaining 1 1/4 cups of cheese.
- Bake in the preheated oven until the top is golden brown and the batter is set, about 25 minutes. If the top isn't brown enough, broil for 30 seconds. Let the casserole cool in the pan for at least 20 minutes before slicing and serving.
Nutrition
Notes
Tried this recipe?
Let us know how it was!Source: Nutritional Information
What is corn casserole?
Corn casserole is a baked side dish made with corn, cornmeal, eggs, and dairy. It’s softer and more spoonable than traditional cornbread, with a creamy, almost pudding-like interior. This version layers in roasted Hatch chiles and sharp cheddar for a Southwestern twist.
What are Hatch chile peppers?
Hatch chiles are a variety of New Mexico chile grown in the Hatch Valley. They have a distinct smoky, earthy flavor with mild to medium heat. Compared to other peppers, they’re fruitier than Anaheims and less intense than jalapeños. Their season is short typically August through September.
What is so special about Hatch chiles?
It’s the terroir. The soil and climate of the Hatch Valley produce chiles with a unique balance of sweetness and heat. When roasted, they develop a deep, smoky flavor that’s unlike any other green chile. People get obsessive about them because nothing else tastes quite the same.
Are Hatch peppers hot?
It depends on the variety. Hatch chiles range from mild (about 1,000 Scoville units) to hot (up to 8,000). Most grocery store Hatch chiles are medium heat warm but not fiery. If you’re sensitive, remove all seeds. If you want more kick, leave some seeds in or use hotter varieties.
Can I make hatch green chili cornbread casserole ahead of time?
Yes. Assemble the casserole without baking, cover it tightly, and refrigerate for up to 24 hours. When ready to bake, add about 10 minutes to the cooking time. You can also bake it fully, cool it, and reheat slices in a 350°F oven. This makes it perfect for holiday prep or potlucks.
What would I need to do to adjust the cooking time if I make these in mini cupcake/muffin pans?
Start checking mini muffin pans after 15 minutes. They’ll bake faster because of the smaller size. Look for golden edges and a set center. A toothpick should come out clean. Let them cool in the pan for 5 minutes before removing to a wire rack.
What kind of chile is best for green chile cornbread?
Hatch chiles are the gold standard for their smoky, fruity flavor. If you can’t find them, Anaheim chiles are the closest mild substitute. Poblano chiles offer more depth but less heat. Canned fire-roasted green chiles work well too just drain them before using.
How do you keep green chile cornbread from being dry or crumbly?
The key is moisture. Buttermilk, eggs, and melted butter all help. Don’t overbake check for doneness at 22 minutes. Let the casserole rest for 20 minutes after baking so the structure sets. If your batter looks thick, add a splash of buttermilk before baking.
Can you make green chile cornbread sweeter?
Yes. This recipe uses just 1 1/2 tablespoons of sugar for a subtle sweetness. If you prefer a sweeter cornbread, increase the sugar to 3 tablespoons. You can also substitute honey for the sugar use 2 tablespoons of honey instead. The sweetness balances the smoky heat of the chiles.
Where can I buy Hatch green chile for cornbread?
During late summer, look for fresh Hatch chiles at farmers markets or specialty grocery stores like Whole Foods and Trader Joe’s. Many stores also sell frozen roasted Hatch chiles year-round. Canned fire-roasted green chiles are available in most supermarkets just check the label for Hatch origin.