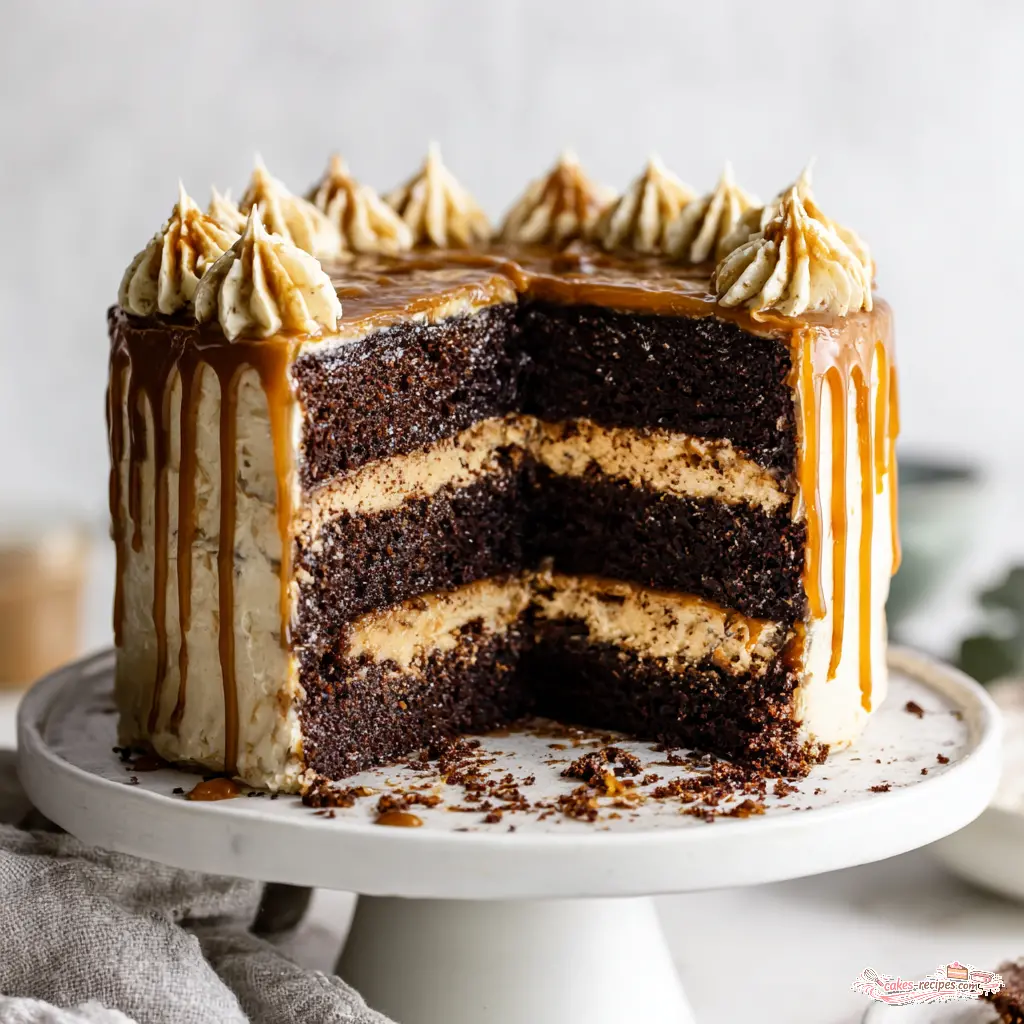
Why You’ll Love This Salted Caramel Chocolate Layer Cake
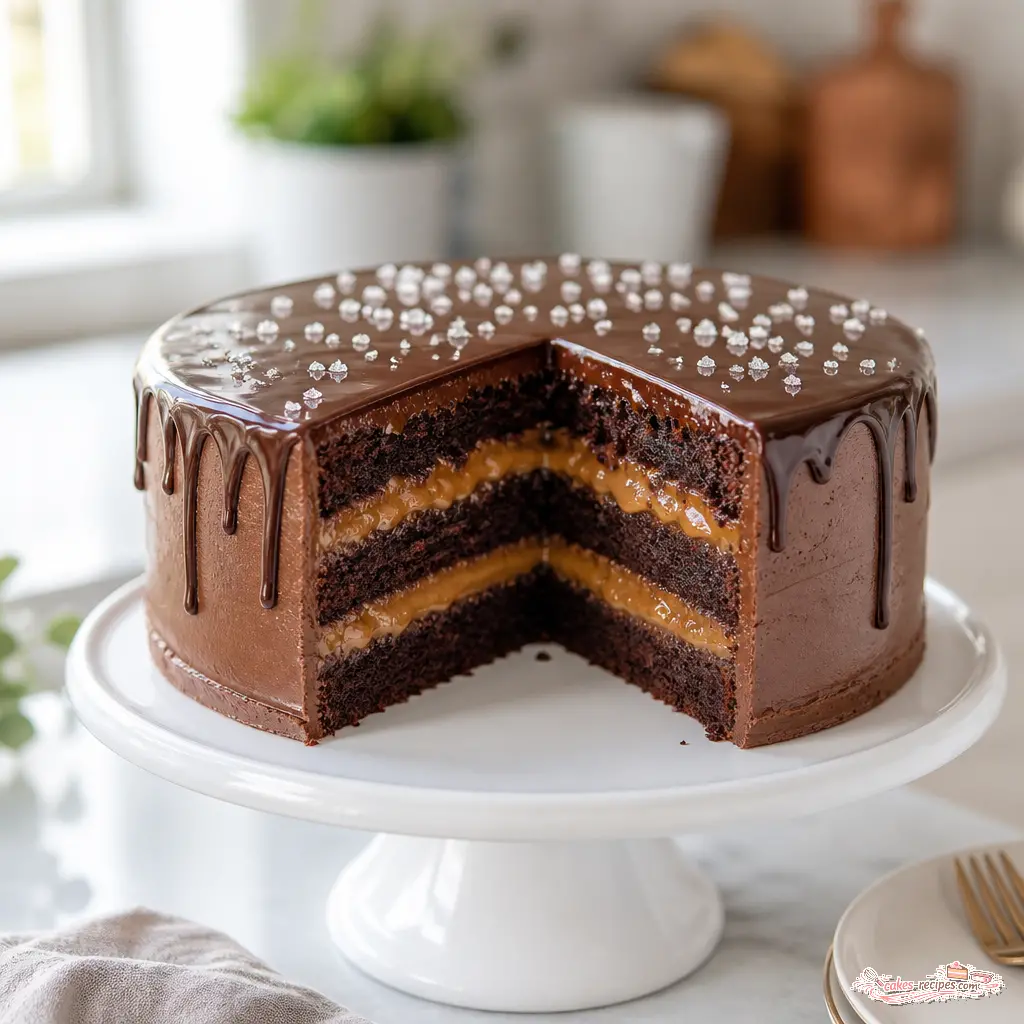
Imagine slicing into a tower of moist chocolate cake, creamy salted caramel frosting, and a glossy caramel drip that catches the light. That’s what we’re making today. And honestly? It’s easier than you think.
I didn’t grow up baking cakes like this. I came to it through coffee roasting, actually. I spent a year in Colombia learning from Rosa, and she’d make these simple coffee cakes using beans she’d roasted that morning. The coffee flavor was so clean and bold it changed my understanding of what dessert could be. When I came back to Portland, every ‘chocolate cake’ I tasted was disappointingly one-note.
This salted caramel chocolate layer cake is the opposite of one-note. It’s deep, it’s rich, it’s perfectly balanced between sweet and salty. The cake layers are incredibly moist thanks to buttermilk and a little instant coffee (Rosa’s trick for deepening chocolate flavor). The buttercream is light and fluffy, with just enough salted caramel to make you go back for another bite. And that caramel drip on top?
Totally worth the extra step.
Here’s the thing this recipe is designed for real people in real kitchens. You don’t need a pastry degree. You need good ingredients, a little patience, and the willingness to trust the process. I’ve included every tip I’ve learned from years of testing (and from my fair share of caramel failures). So whether you’re baking for a birthday, a holiday, or just because it’s Tuesday, this cake delivers.
Ingredients for Chocolate Cake Layers
Let’s talk about what makes these layers so good. The secret is in the combination of ingredients each one plays a specific role.
You’ll need all-purpose flour, Dutch-processed cocoa powder, baking soda, baking powder, salt, and granulated sugar for the dry ingredients. The sugar here is key it’s not just for sweetness. It also helps with tenderness and browning.
For the wet ingredients: buttermilk, vegetable oil, eggs, vanilla extract, and instant coffee granules dissolved in hot water. That coffee is the game-changer. It doesn’t make the cake taste like coffee. It makes the chocolate taste more like chocolate. Trust me on this.
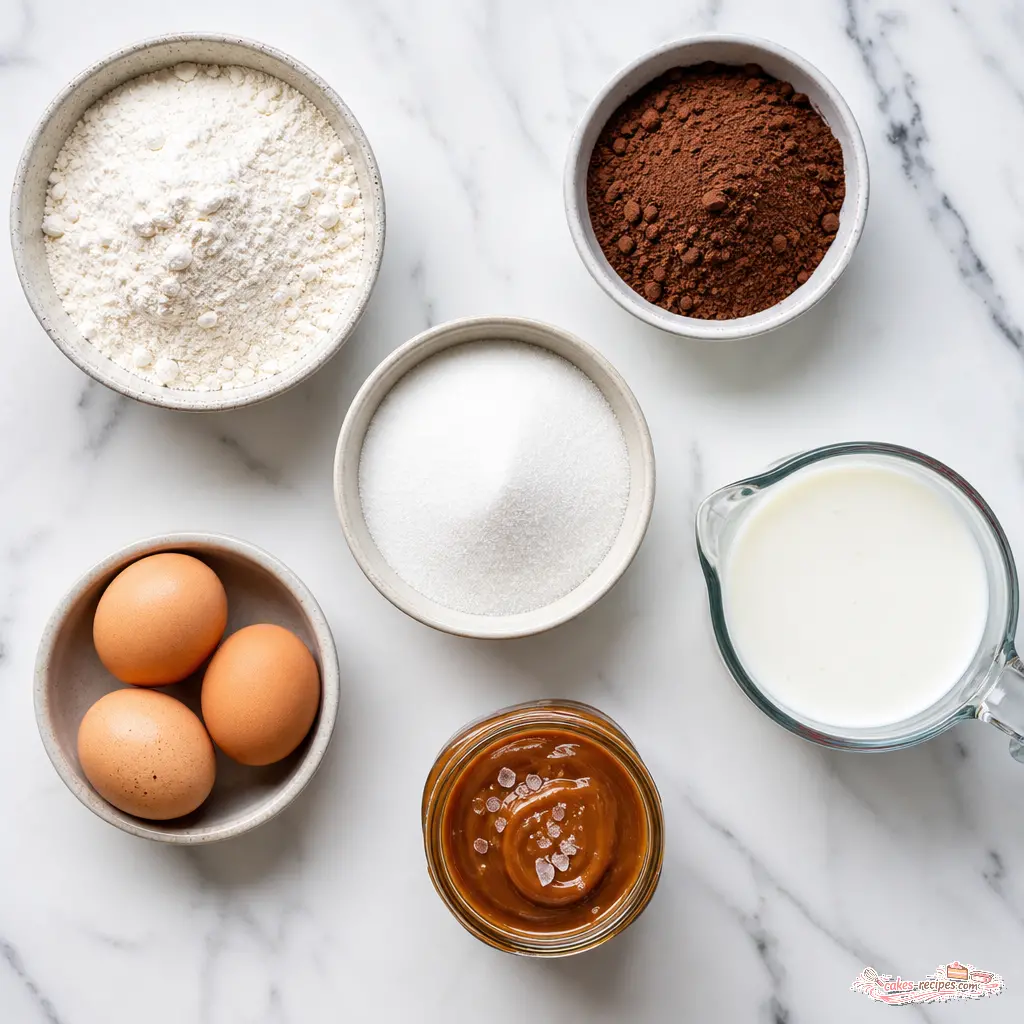
A few notes on what to look for:
- Dutch-processed cocoa powder This gives a darker, richer color and a smoother flavor. If you only have natural cocoa, you can use it, but the cake will be lighter in color and slightly more acidic.
- Buttermilk The acidity reacts with the baking soda to create a tender crumb. No buttermilk? No problem. Add 1 tablespoon of lemon juice to 1 1/2 cups of milk and let it sit for 5 minutes.
- Instant coffee granules Use a good quality one. It dissolves completely and adds depth without bitterness.
- Vegetable oil This keeps the cake moist for days. Butter adds flavor, but oil adds moisture. We’re going with oil here.
Ingredients for Salted Caramel Buttercream
The buttercream is where the magic happens. It’s simple, but the quality of your ingredients matters.
You’ll need unsalted butter (softened to room temperature), powdered sugar, and salted caramel sauce. That’s it. Three ingredients for a frosting that tastes like heaven.
Here’s what I’ve learned: use good quality caramel sauce. You can make your own (I’ll share my method below) or use a store-bought one you love. The caramel is the star, so don’t skimp. I’ve tested this with both homemade and store-bought, and honestly, both work beautifully. The key is that the caramel is thick and salty, not watery.
For the butter, make sure it’s truly at room temperature. Cold butter will give you lumps. Soft butter that yields when you press it that’s what you want.
How to Make Salted Caramel Chocolate Layer Cake
This is where the fun begins. I’ll walk you through the four main stages. Each one is straightforward, but I’ll share the little tricks that make a big difference.
Stage 1: Bake the Cake Layers
Preheat your oven to 350°F. Line the bottoms of three 8-inch round cake pans with parchment paper, grease the sides, and dust with cocoa powder. This prevents sticking and gives you clean edges.
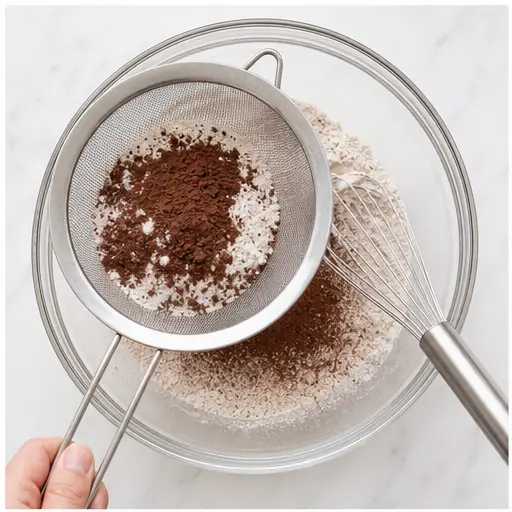
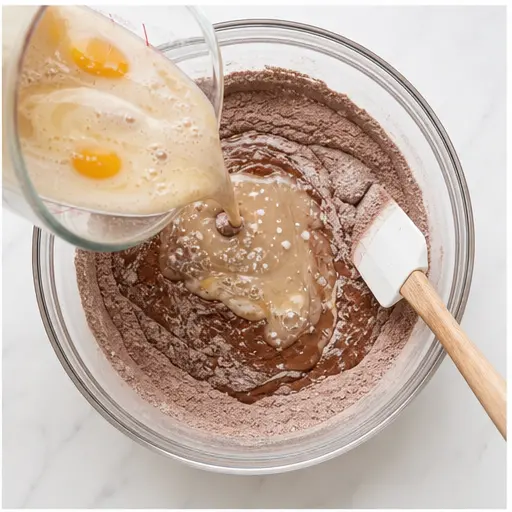
In a large bowl, sift together the flour, cocoa powder, baking soda, baking powder, and salt. Whisk in the granulated sugar. Make a well in the center. Add the coffee mixture (instant coffee dissolved in hot water), buttermilk, oil, eggs, and vanilla extract. Beat with an electric mixer on medium speed for 90 seconds until smooth. Don’t overmix just until it comes together.
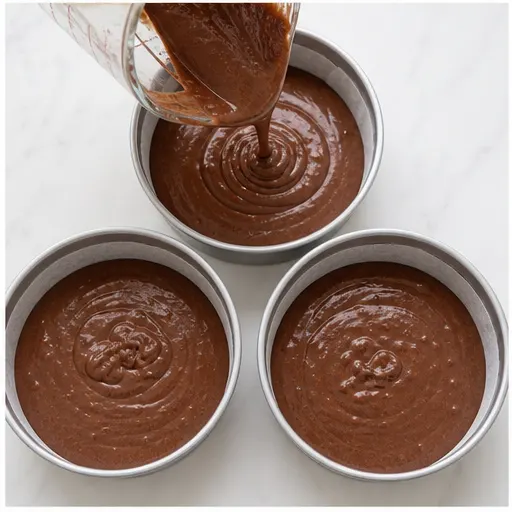
Divide the batter evenly among the prepared pans. I use a kitchen scale for accuracy, but a measuring cup works too. Bake for 27 to 30 minutes, rotating the pans halfway through. The cake is done when a toothpick inserted in the center comes out with a few moist crumbs not clean, but not wet batter either.
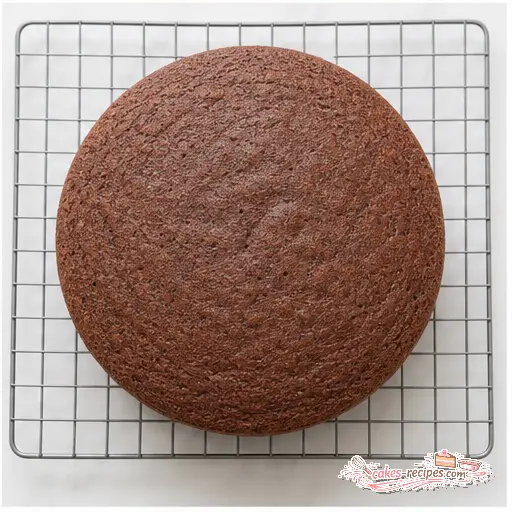
Here’s a trick I learned: immediately after removing the cakes from the oven, gently press down on the domed tops with the bottom of another pan. This flattens them slightly, making assembly easier. Let them cool in the pans for 10 minutes, then turn out onto a wire rack to cool completely.
Stage 2: Make the Buttercream
In a stand mixer fitted with the paddle attachment, beat the softened butter, powdered sugar, and 2/3 cup of caramel sauce on low speed until combined. Then increase to high and beat for 4 to 5 minutes until light and fluffy. Scrape down the sides as needed.
Taste it. Add a pinch of salt if you want a stronger salted caramel flavor. I usually do. Transfer all but about 3/4 cup of the buttercream to a piping bag fitted with a large star tip. The reserved buttercream will go between the layers.
Stage 3: Assemble the Layers
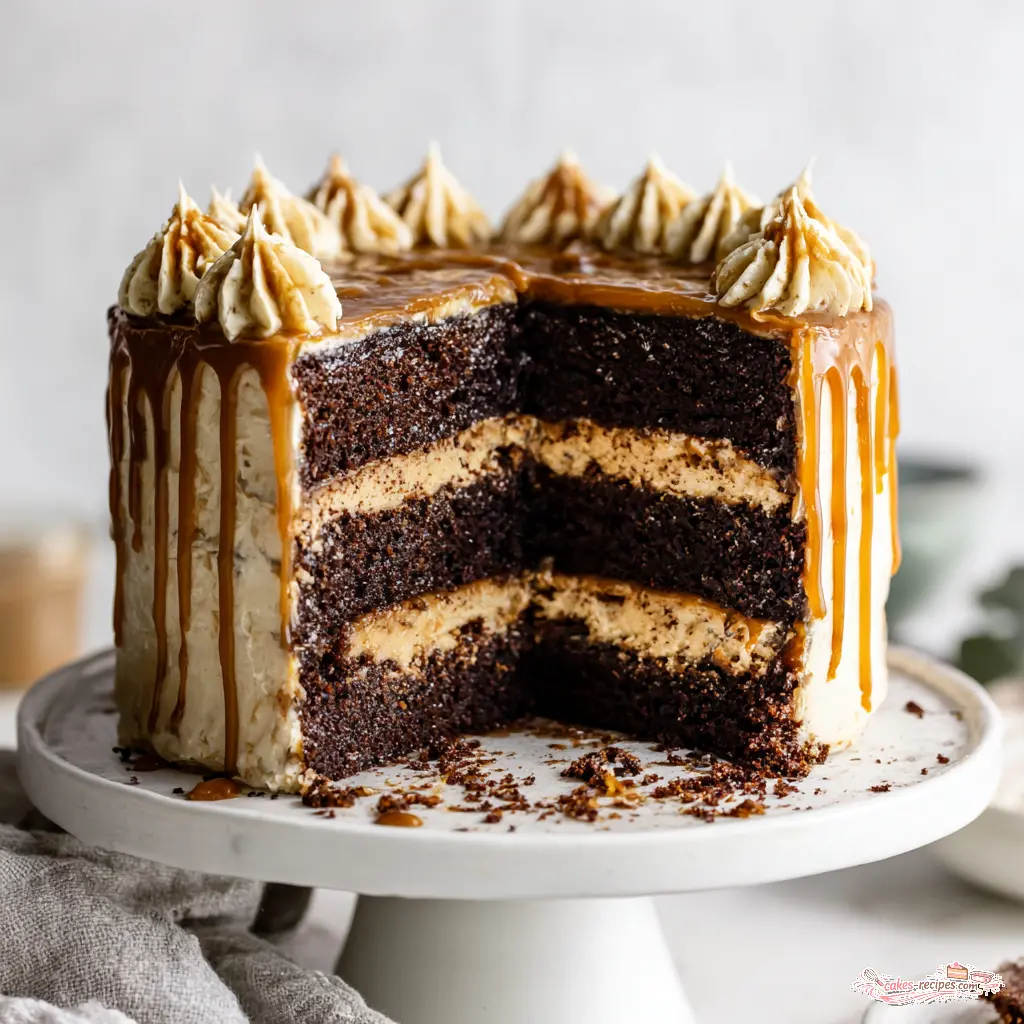
Place one cake layer on a serving plate, domed side up. Pipe a ring of stars around the edge of the cake. This creates a wall that holds the filling. Spread half of the reserved plain buttercream in the center. Drizzle about 2 1/2 tablespoons of the extra caramel sauce over the buttercream.
Top with a second cake layer, domed side down. Repeat the piping, spreading, and drizzling steps. Place the third cake layer on top, flat side up. Pipe stars of buttercream all over the top, or spread the remaining buttercream in swirls.
Stage 4: Add the Caramel Drip
Drizzle the remaining caramel sauce over the top of the cake, letting it drip down the sides. Use a spoon to guide the drips where you want them. If the caramel is too thick, warm it slightly. If it’s too thin, chill it first.
Sprinkle with flaky sea salt if you have it. It adds that perfect crunch and saltiness that makes the whole thing sing.
Homemade Salted Caramel Sauce
I had a caramel failure early on. The sugar crystallized, the sauce separated, and I ended up with a grainy mess. Rosa told me, “David, you rushed it. Caramel is patient.” She was right.
Here’s my foolproof method: In a heavy-bottomed saucepan, combine 1 cup granulated sugar with 1/4 cup water. Stir gently until the sugar is moistened. Bring to a boil over medium-high heat. Stop stirring. Let it boil until it turns a deep amber color, swirling the pan occasionally. Remove from heat. Carefully whisk in 1/2 cup heavy cream (it will bubble up). Add 3 tablespoons unsalted butter and 1 teaspoon flaky sea salt. Stir until smooth.
That’s it. The key is not stirring once it starts boiling, and using a clean pan. Any crystals on the sides can cause the whole thing to seize. If you see crystals forming, brush them down with a wet pastry brush.
Make this sauce a day or two ahead. It thickens as it cools and the flavor deepens. Store it in the fridge and bring to room temperature before using.
Expert Tips for Perfect Results
I’ve made this cake more times than I can count. Here are the things that make the biggest difference:
- Room temperature ingredients Eggs and buttermilk should be at room temperature. Cold ingredients don’t emulsify properly, leading to a dense cake.
- Weigh your dry ingredients A kitchen scale is your best friend. 3 cups of flour can vary by ounces depending on how you scoop. Weighing ensures consistency.
- Don’t overmix the batter Mix until just combined. Overmixing develops gluten, which makes the cake tough.
- Use cake strips for even layers Soak fabric cake strips in water and wrap them around your pans. They help the cakes bake flat instead of doming.
- Cool completely before frosting Warm cake will melt your buttercream. Patience pays off.
- Chill the cake before the final drizzle A cold cake gives you cleaner drips. Pop it in the fridge for 15 minutes after frosting.
Recipe Variations
This recipe is flexible. Here are a few ways to change it up:
- Two-layer cake Halve the recipe. Use 2 cups flour, 3/4 cup cocoa, 2 tsp baking soda, 1 tsp baking powder, 1/2 tsp salt, 1 1/4 cups sugar, 1 cup buttermilk, 1/2 cup oil, 2 eggs, 1 tsp vanilla, and 1 tbsp instant coffee in 1 cup hot water. For the frosting, use 8 oz butter, 1/2 cup caramel sauce, 2 cups powdered sugar, and 1/3 cup extra caramel.
- Cupcakes Bake the batter in lined muffin tins for 13-15 minutes at 350°F. Frost with the same buttercream.
- Different frosting Try cream cheese frosting for a tangy contrast. Or use Swiss meringue buttercream for a lighter, less sweet option.
- Gluten-free option Substitute the all-purpose flour with a good quality 1:1 gluten-free baking blend.
Frequently Asked Questions
Storage & Make-Ahead Tips
This cake is a great make-ahead dessert. Here’s how to plan ahead:
- Bake the cake layers up to 2 days in advance. Wrap them individually in plastic wrap and store at room temperature. Do not refrigerate the fridge dries them out.
- Make the caramel sauce up to 1 week ahead. Store it in a jar in the fridge. Bring to room temperature before using. If it’s too thick, warm it gently.
- Make the buttercream up to 3 days ahead. Store it in an airtight container in the fridge. When you’re ready to use it, let it come to room temperature and re-whip in the mixer until smooth.
- Assemble the cake the day before serving. It actually tastes better the next day the flavors meld and the cake becomes even more moist.
- Freeze the whole cake for up to 1 month. Wrap it well in plastic wrap and foil. Thaw overnight in the fridge, then bring to room temperature before serving.
More Decadent Cake Recipes
If you love this salted caramel chocolate layer cake, you’ll enjoy these other recipes too. They all have that same balance of rich flavor and beautiful presentation.
- Classic Chocolate Layer Cake A simpler version with chocolate buttercream. Perfect for birthdays.
- Vanilla Bean Butter Cake Light, tender, and packed with real vanilla. A great base for any filling.
- Caramel Apple Spice Cake Fall flavors with a caramel drizzle. Perfect for Thanksgiving.
- Mocha Mud Cake For the coffee lovers. Deep, dark, and intensely chocolatey.
I’d love to see your version of this cake. Share a photo of your masterpiece on Pinterest I’d love to see your caramel drip! Follow me on Pinterest for more baking inspiration.
Ultimate Salted Caramel Chocolate Layer Cake
Ingredients
Method
- Preheat the oven to 350°F. Line the bottoms of three 8-inch round cake pans with parchment paper, grease the sides, and dust with cocoa powder.
- In a large bowl, sift together the flour, cocoa powder, baking soda, baking powder, and salt. Whisk in the granulated sugar.
- Make a well in the center. Add the coffee mixture, buttermilk, oil, eggs, and vanilla extract. Beat with an electric mixer on medium speed for 90 seconds until smooth.
- Divide the batter evenly among the prepared pans (use a kitchen scale for accuracy). Bake for 27 to 30 minutes, rotating pans halfway through, until a toothpick inserted in the center comes out with a few moist crumbs.
- Remove from the oven and gently press down on the domed tops with the bottom of another pan to flatten slightly. Let cool in the pans for 10 minutes, then turn out onto a wire rack to cool completely.
- In a stand mixer fitted with the paddle attachment, beat the softened butter, powdered sugar, and 2/3 cup of caramel sauce on low speed until combined, then increase to high and beat for 4 to 5 minutes until light and fluffy. Scrape down the sides as needed.
- Taste and add a pinch of salt if you want a stronger salted caramel flavor.
- Transfer all but about 3/4 cup of the buttercream to a piping bag fitted with a large star tip.
- Place one cake layer on a serving plate, domed side up. Pipe a ring of stars around the edge, then spread half of the reserved plain buttercream in the center. Drizzle about 2 1/2 tablespoons of the extra caramel sauce over the buttercream.
- Top with a second cake layer, domed side down. Repeat the piping, spreading, and drizzling steps.
- Place the third cake layer on top, flat side up. Pipe stars of buttercream all over the top, or spread the remaining buttercream in swirls. Drizzle the remaining caramel sauce over the top, letting it drip down the sides.
- Serve immediately or refrigerate until ready. Remove from the fridge at least 1 hour before serving for best texture.
Nutrition
Notes
Tried this recipe?
Let us know how it was!Source: Nutritional Information
Can I use natural cocoa powder instead of Dutch processed?
Yes, but the results will vary. Natural cocoa is more acidic and lighter in color. The cake will still taste good, but it won’t be as dark or rich. If you use natural cocoa, make sure your baking soda is fresh to get proper lift.
Can I skip the coffee?
You can, but I wouldn’t recommend it. The coffee doesn’t make the cake taste like coffee it deepens the chocolate flavor. If you really want to skip it, use hot water instead. The cake will still be good, just less complex.
How can I make my own buttermilk?
Easy. Add 1 tablespoon of lemon juice or white vinegar to 1 1/2 cups of milk. Stir and let it sit for 5 minutes. It will thicken and curdle slightly. That’s exactly what you want. Use it as you would regular buttermilk.
Can I substitute the buttermilk?
Yes. Use full-fat plain Greek yogurt or sour cream thinned with a little milk. The acidity is important for the chemical reaction with baking soda, so don’t use sweetened yogurt or milk alone.
Why is my cake dry or crumbly?
Two likely culprits: overbaking or overmixing. Check your cake at 25 minutes. A toothpick should come out with a few moist crumbs, not clean. And mix the batter just until combined no more.
Why is my frosting runny or hard?
Runny frosting usually means the butter was too warm or the caramel sauce was warm when you added it. Chill the bowl for 10 minutes and re-whip. Hard frosting means too much powdered sugar or cold butter. Add a splash of milk and re-whip.
How to store this salted caramel chocolate layer cake?
Store it in an airtight container in the fridge for up to 5 days. Let it come to room temperature for at least 1 hour before serving. The crumb will be softer and the flavors will shine.
Can you put caramel sauce between cake layers?
Absolutely. That’s exactly what we do in this recipe. The key is to pipe a ring of buttercream around the edge first. This creates a dam that holds the caramel in place so it doesn’t seep out the sides.
Can I make this cake ahead of time?
Yes. Bake the cake layers up to 2 days ahead. Wrap them tightly in plastic wrap and store at room temperature. The buttercream can be made a day ahead and refrigerated. Bring it to room temperature and re-whip before using.
Can I make this in a round pan?
This recipe is designed for three 8-inch round pans. You can use two 9-inch pans, but the layers will be thicker and you’ll need to increase the baking time by 5-7 minutes. Check for doneness with a toothpick.