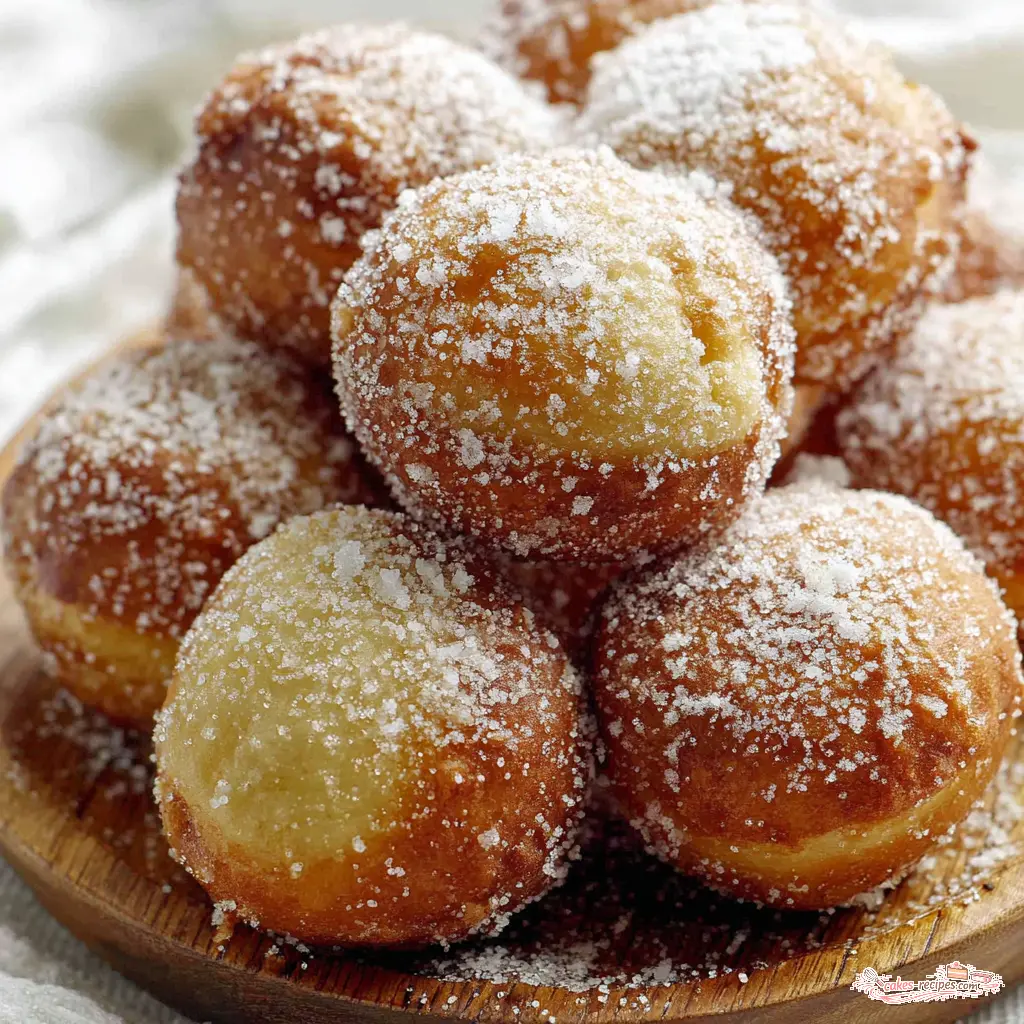
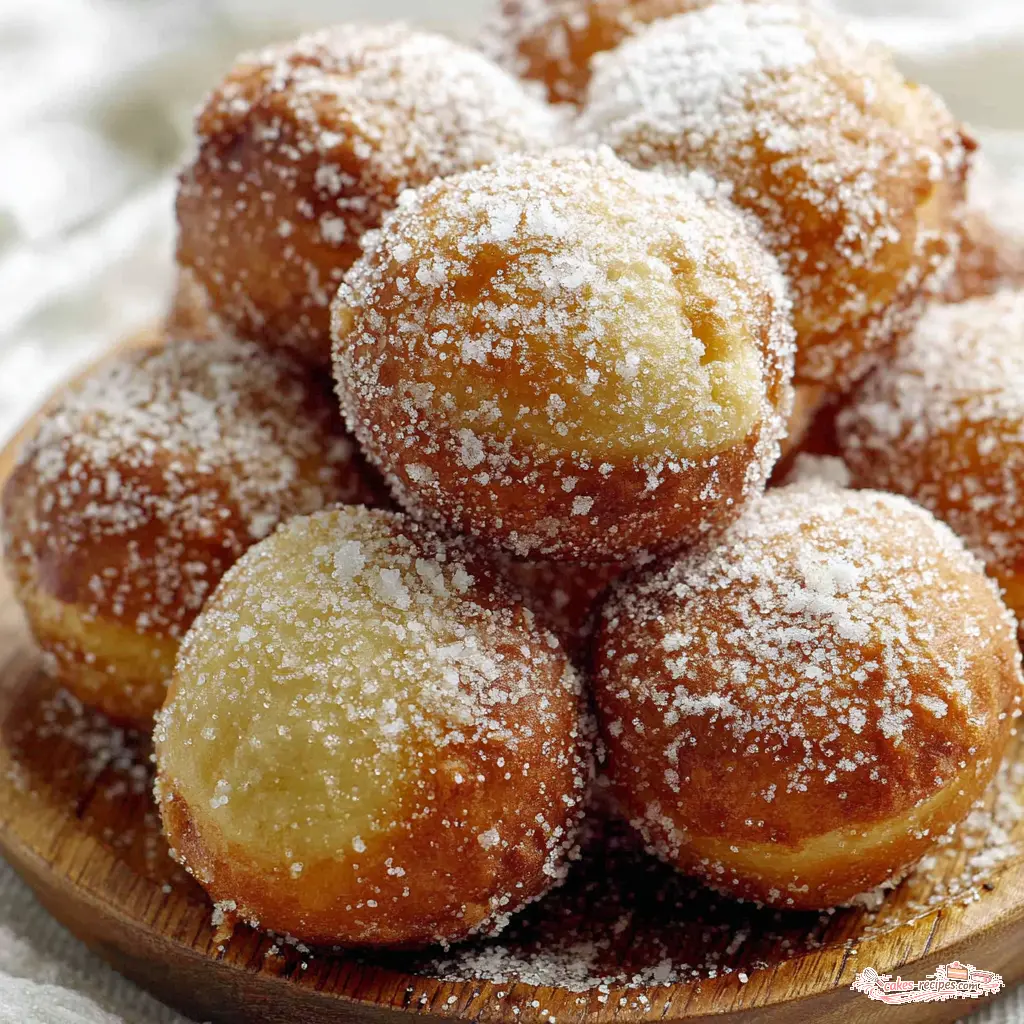
Hawaiian Malasadas: Light and Fluffy Portuguese Donuts
Ingredients
Method
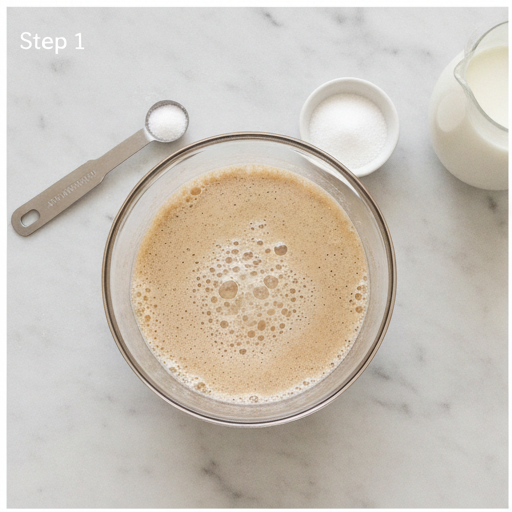
- In a small bowl, dissolve the yeast and 1 tablespoon sugar in the warm water. Let it sit for about 5 minutes until frothy.
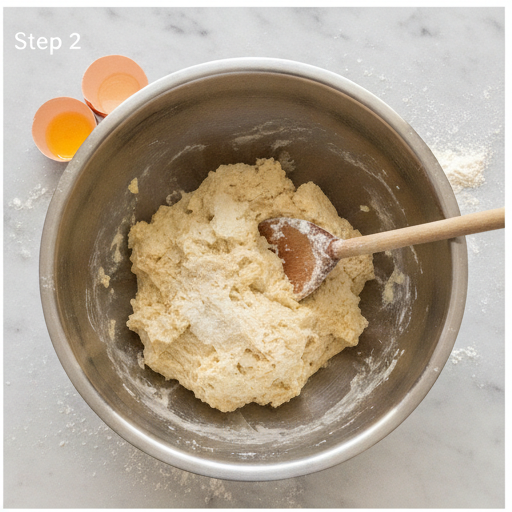
- In a large mixing bowl, whisk together the flour, remaining 1/2 cup sugar, and salt. Make a well in the center and pour in the scalded milk, melted butter, eggs, and yeast mixture. Beat thoroughly until a soft, smooth dough forms. Cover the bowl with a clean towel and let rise in a warm place until doubled in size, about 1 hour.
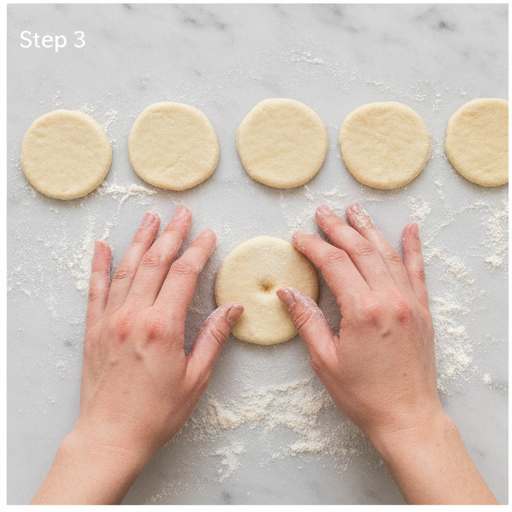
- Heat oil in a deep pot to 350°F (175°C). While the oil heats, shape the dough into flat round discs about 3 inches wide, pulling the dough outward and pressing a small indentation in the center with your thumb.
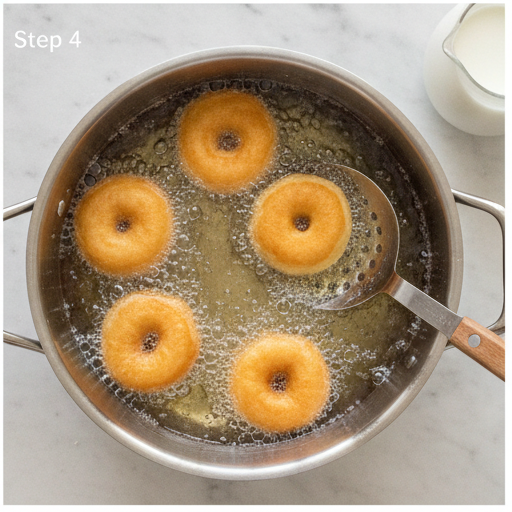
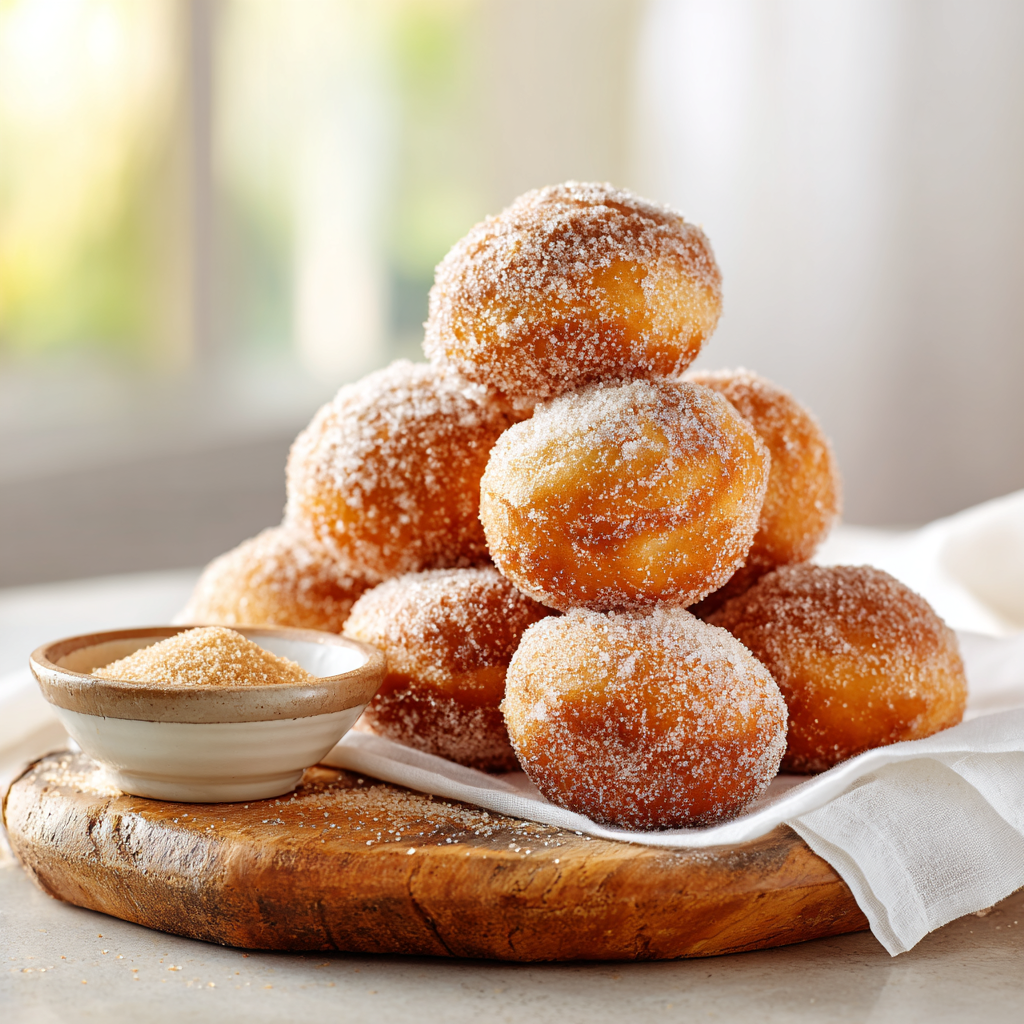
- Carefully place a few dough discs into the hot oil, being careful not to overcrowd. Fry until golden brown on both sides, about 2-3 minutes per side. Drain on paper towels, then immediately toss in a bag with sugar to coat evenly.
Nutrition
Notes
Tried this recipe?
Let us know how it was!What Are Hawaiian Malasadas?
I still remember the first time I bit into a warm malasada. It was on a trip to Oahu, and my husband had dragged me to this little bakery that his cousin swore by. I was expecting a standard doughnut, you know? Something dense and sugary. But what I got was this pillowy, almost ethereal puff of fried dough that practically dissolved on my tongue. The outside was crisp and showered in granulated sugar, and the inside was so light and airy it felt like eating a warm cloud. I was hooked.
So what exactly are these things? Hawaiian malasadas are a type of fried doughnut that’s deeply rooted in Portuguese culinary tradition. Portuguese immigrants brought them to the islands back in the 1800s, and Hawaii just kind of adopted them and made them their own. They’re different from the ring-shaped doughnuts you’re used to. They’re usually round, without a hole, and they get their signature lightness from a yeast-risen dough that’s enriched with eggs and butter. The result is something that’s less cakey and more, well, ethereal.
Think of them as the perfect intersection of a classic yeast doughnut and a beignet, but somehow lighter than both. They’re a staple at Hawaiian bakeries, especially Leonard’s Bakery, which is practically a pilgrimage site for malasada lovers. And the best part? You can absolutely make them at home. It’s not as hard as you might think.
Why You’ll Love This Recipe
Look, I get it. Working with yeast dough can feel intimidating. I’ve been there, staring at a lump of dough that refuses to rise, wondering where I went wrong. But this recipe is different. It’s designed to be forgiving. Let me tell you why it works.
- It’s incredibly light and fluffy. The secret is in the scalded milk and the generous amount of eggs. The milk helps create a tender crumb, and the eggs give the dough structure and richness. You’ll get that airy, almost hollow interior that makes malasadas so special.
- The technique is straightforward. No complicated shaping or laminating. You just mix, let it rise, shape it into flat discs, and fry. That’s it. The dough is soft and a little sticky, but it’s easy to handle once you get the hang of it.
- It’s a crowd-pleaser. I’ve made these for potlucks, birthday parties, and just random Sunday afternoons. They disappear in minutes. People go crazy for that warm, sugary exterior and the pillowy inside. It’s like bringing a little bit of Hawaii to your kitchen.
- You can customize them endlessly. Leave them plain and sugared, or fill them with haupia (coconut pudding), custard, or fruit preserves. The base recipe is a blank canvas.
What I’ve found over the years is that the key to great malasadas is patience. Not rushing the rise, not crowding the pot, and not skipping that second proof after shaping. But once you get it right, it’s a beautiful thing.
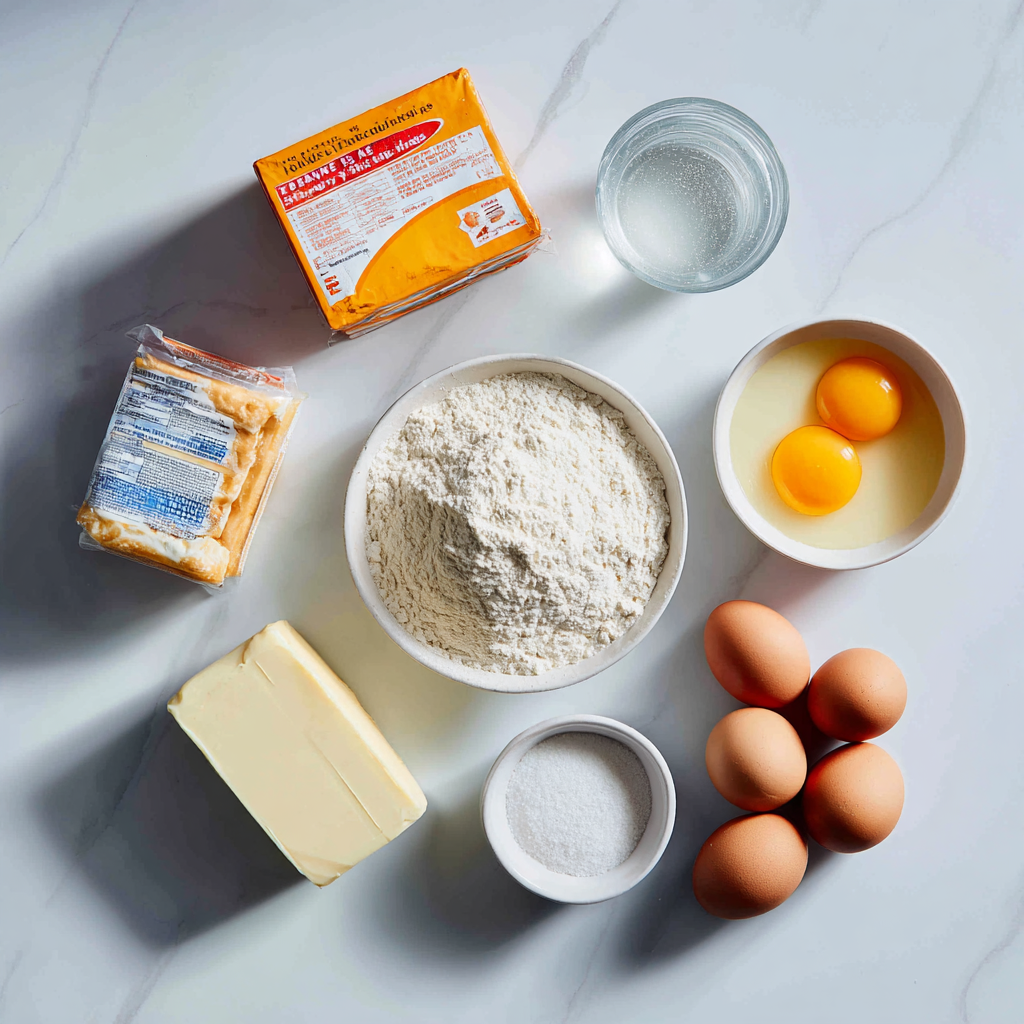
Ingredients You’ll Need
Let’s talk about what goes into these little pillows of joy. The ingredient list is simple, but each one plays a specific role. Take your time gathering them, and make sure everything is at the right temperature.
The Yeast
We’re using active dry yeast here. One packet is all you need. To activate it, you’ll dissolve it in warm water with a little sugar. The water needs to be around 110°F warm to the touch, but not hot. If it’s too hot, it’ll kill the yeast. Too cold, and it won’t wake up. Let it sit for about 5 minutes until it gets frothy. That’s how you know it’s alive and ready to work.
The Flour
All-purpose flour is what I use. It gives the malasadas a tender, soft crumb. You could use bread flour if you want a slightly chewier texture, but I prefer all-purpose for that delicate bite. The recipe calls for 8 cups, which sounds like a lot, but it makes a generous batch.
The Milk
This is where things get interesting. We’re using scalded milk. That means heating it until small bubbles form around the edge, just before it boils. Scalding the milk does two things: it helps the dough absorb the liquid more evenly, and it creates a fluffier, more tender crumb. Let it cool slightly before adding it to the flour mixture. For a richer flavor, you can substitute half the milk with evaporated milk. That’s a trick I picked up from a friend in Honolulu.
The Butter and Eggs
Melted butter adds richness and tenderness. The eggs all 8 of them need to be at room temperature. Cold eggs can shock the dough and slow down the rise. I usually take them out of the fridge about 30 minutes before I start. The combination of butter and eggs is what gives these malasadas that luxurious, almost brioche-like quality.
The Sugar for Coating
You’ll need granulated sugar for the coating. It’s important to toss the malasadas in sugar while they’re still warm, straight out of the oil. The heat helps the sugar stick and creates that signature sweet crust.
Step-by-Step Instructions
Alright, let’s get into the process. I’ll walk you through each stage, and I’ll be honest about where things can go wrong. Because they can. But that’s okay. That’s how we learn.
Stage 1: Activating the Yeast
This is the first step, and it sets the tone for everything. In a small bowl, dissolve the yeast and 1 tablespoon of sugar in the warm water. Give it a gentle stir and let it sit. After about 5 minutes, you should see a layer of foam on top. If you don’t, your yeast might be dead. That happens sometimes. If it doesn’t get frothy, start over with a fresh packet. It’s better to catch it now than to wonder why your dough never rose.
Stage 2: Mixing and Kneading the Dough
In a large mixing bowl, whisk together the flour, the remaining 1/2 cup of sugar, and the salt. Make a well in the center. Pour in the scalded milk (make sure it’s not too hot you don’t want to cook the eggs), the melted butter, the room-temperature eggs, and the frothy yeast mixture. Now, beat everything together until a soft, smooth dough forms. This is where the magic happens. The dough will be shaggy at first, but keep mixing. It should come together into a cohesive, slightly sticky ball. Don’t overmix it, or it’ll get tough. Just mix until it’s smooth.
Cover the bowl with a clean towel and let it rise in a warm place until it’s doubled in size. This usually takes about an hour. I like to put it in my oven with the light on. It’s the perfect cozy spot. The dough should feel bouncy and alive when you poke it.
Stage 3: Shaping the Malasadas
Once the dough has risen, it’s time to shape. Heat your oil in a deep pot to 350°F. While it’s heating, turn the dough out onto a lightly floured surface. Gently deflate it. Now, shape it into flat round discs about 3 inches wide. Pull the dough outward and press a small indentation in the center with your thumb. That little dimple helps the malasadas cook evenly and puff up beautifully. Don’t skip this step. It makes a difference.
Here’s a tip I learned the hard way: let the shaped discs rest for about 10-15 minutes before frying. This second rise is crucial for that airy crumb. If you fry them immediately, they’ll be dense and heavy. Be patient.
Stage 4: Frying to Golden Perfection
This is the most critical part. Carefully place a few dough discs into the hot oil. Don’t overcrowd the pot. If you add too many at once, the oil temperature drops, and you’ll end up with greasy, soggy malasadas. Fry them in batches of 2 or 3 at a time. Cook until golden brown on both sides, about 2-3 minutes per side. They’ll puff up like tiny pillows. Use a slotted spoon to flip them gently.
When they’re done, transfer them to a paper towel-lined plate to drain for just a second. Then, while they’re still hot, toss them in a bag with granulated sugar. Shake to coat evenly. That warm sugar coating is what makes them irresistible.
Tips for Perfect Malasadas
Over the years, I’ve made my share of mistakes. Here’s what I’ve learned so you don’t have to.
Common Mistakes and How to Fix Them
❌ Killing the yeast: If your water or milk is too hot, it’ll kill the yeast. Aim for 110°F. It should feel like warm bath water. If you’re unsure, use a thermometer.
✅ Solution: Always test the temperature with your wrist or a thermometer. If it’s too hot for your finger, it’s too hot for the yeast.
❌ Overcrowding the pot: This is the number one cause of greasy malasadas. When the oil temperature drops, the dough absorbs more oil.
✅ Solution: Fry in small batches. Give the oil time to come back to temperature between batches.
❌ Skipping the second rise: Without that rest after shaping, the malasadas won’t be as airy.
✅ Solution: Let the shaped discs rest for 10-15 minutes. It’s worth the wait.
❌ Not rolling in sugar while warm: If you wait too long, the sugar won’t stick.
✅ Solution: Have your sugar bag ready. Toss them immediately after draining.
Filling Ideas (Optional)
While classic malasadas are perfect just coated in sugar, you can take them to another level by filling them. I love doing a batch with haupia, which is a Hawaiian coconut pudding. It’s creamy and not too sweet, and it pairs beautifully with the fluffy dough.
Other popular fillings include:
- Vanilla custard rich and classic
- Guava jelly tangy and tropical
- Chocolate ganache for the chocolate lovers
- Lemon curd bright and refreshing
To fill them, use a piping bag fitted with a small tip. Poke the tip into the side of the malasada and squeeze gently. You’ll feel it puff up. Don’t overfill, or they’ll burst. I usually fill them right before serving so they stay crisp.
Storage and Reheating
Let’s be real: malasadas are best the day they’re made, preferably within an hour of frying. That warm, crisp exterior is a thing of beauty. But if you have leftovers (which rarely happens in my house), here’s what to do.
Store unfilled malasadas in an airtight container at room temperature for up to 2 days. If you’ve filled them, refrigerate them and eat within 3-5 days. To reheat, pop them in a 350°F oven for about 5 minutes. That’ll restore some of the crispness. You can also microwave them for 10-15 seconds to soften them up, but they won’t be as crispy. If you’ve sugared them, re-roll them in fresh sugar after reheating.
You can also freeze unfilled malasadas. Wrap each one individually in foil, then store them in a freezer bag for up to 2-3 months. Thaw them at room temperature, then warm them briefly in the oven or microwave. It’s not quite the same as fresh, but it’s pretty close.
Frequently Asked Questions
When you serve these warm, you’ll feel like a pastry chef. It’s that simple. And if you want to see more of my baking adventures, I’m always sharing new ideas over on my Pinterest page. Come say hi!
Source: Research Source
What is a malasadas in Hawaii?
In Hawaii, malasadas are a beloved fried doughnut that originated from Portuguese immigrants. They’re made from a yeast-risen dough enriched with eggs and butter, then deep-fried until golden and coated in granulated sugar. They’re known for their light, airy interior and crisp exterior.
What’s the difference between a donut and a malasada?
The main difference is texture and shape. Malasadas are round without a hole, and they’re made from a softer, more enriched yeast dough that produces a lighter, airier crumb. Traditional doughnuts can be cakey or yeasted, but malasadas are always pillowy and delicate.
What kind of food is malasada?
Malasada is a type of fried doughnut, specifically a Portuguese-style doughnut that’s become a staple of Hawaiian cuisine. It’s a dessert or snack food, often served warm and coated in sugar. It can be eaten plain or filled with custards, jellies, or coconut pudding.
What do malasadas taste like?
Malasadas taste like a warm, sugary cloud. The exterior is crisp and sweet from the granulated sugar coating, while the inside is incredibly light, fluffy, and slightly eggy. They’re less dense than a typical doughnut and have a delicate, buttery flavor from the enriched dough.
Are malasadas like beignets?
They’re similar but not the same. Both are fried yeast doughs, but beignets are typically square-shaped and dusted with powdered sugar, while malasadas are round and coated in granulated sugar. Malasadas also have a richer, more buttery dough thanks to the eggs and butter.
Who brought malasadas to Hawaii?
Portuguese immigrants brought malasadas to Hawaii in the late 1800s. They came to work on the sugar plantations and brought their culinary traditions with them, including this beloved fried doughnut. Over time, it became a staple of Hawaiian cuisine.
What is the unhealthiest donut?
That’s a tough one, but filled and glazed doughnuts tend to be the highest in calories and sugar. Malasadas, while fried and sugared, are actually lighter than many cake doughnuts. In my experience, the unhealthiest is usually the one you can’t stop eating.
What is the best malasada?
The best malasada is one that’s fresh, warm, and perfectly crisp on the outside with an airy, tender interior. Leonard’s Bakery on Oahu is famous for them, but honestly, the ones you make at home fresh from the fryer are pretty hard to beat.
Why is a gravy ring called a gravy ring?
That’s a different topic entirely. A gravy ring is a type of doughnut, but it’s not related to malasadas. I’d suggest focusing on the malasada recipe at hand it’s far more rewarding than chasing down odd doughnut names.
Are malasadas good cold?
They’re okay cold, but they lose that wonderful crisp exterior. The texture becomes softer and denser. I always recommend reheating them in a 350°F oven for 5 minutes to restore some of the original magic. They’re really best enjoyed warm.
What is the difference between malasada and brioche donuts?
Both use enriched doughs, but brioche doughnuts are typically made with a higher butter content and are often shaped into rings. Malasadas have a lighter, airier crumb and are always round without a hole. The flavor profile is similar, but the texture is distinct.
Do malasadas have filling?
Not always. Classic malasadas are simply coated in granulated sugar and served plain. However, many bakeries and home cooks fill them with haupia (coconut pudding), vanilla custard, fruit jellies, or chocolate. It’s a delicious variation, but entirely optional.
How long do malasadas last?
Unfilled malasadas will keep in an airtight container at room temperature for up to 2 days. Filled malasadas should be refrigerated and eaten within 3-5 days. For best results, reheat them in a 350°F oven for 5 minutes to restore crispness.
Are malasadas fried in lard?
Traditionally, some recipes use lard for frying, but this recipe uses vegetable or canola oil. It’s a neutral oil that won’t affect the flavor of the malasadas, and it’s easier to find at most grocery stores. You can use any high-smoke-point oil.
Are malasadas good?
Absolutely. They’re one of the most delightful fried treats you can make. The combination of a crisp, sugary exterior and a light, pillowy interior is irresistible. When you serve these warm, you’ll feel like a pastry chef. Trust me on this one.