Why You’ll Love This Classic Birthday Cake
Let me tell you about the smell that defined my childhood birthdays. Vanilla, warm and golden, drifting from the kitchen while my aunt Caroline pulled two perfect yellow layers from the oven. The buttercream bowl, scraped clean with my finger when she wasn’t looking. Sprinkles scattered across the counter like tiny edible confetti.
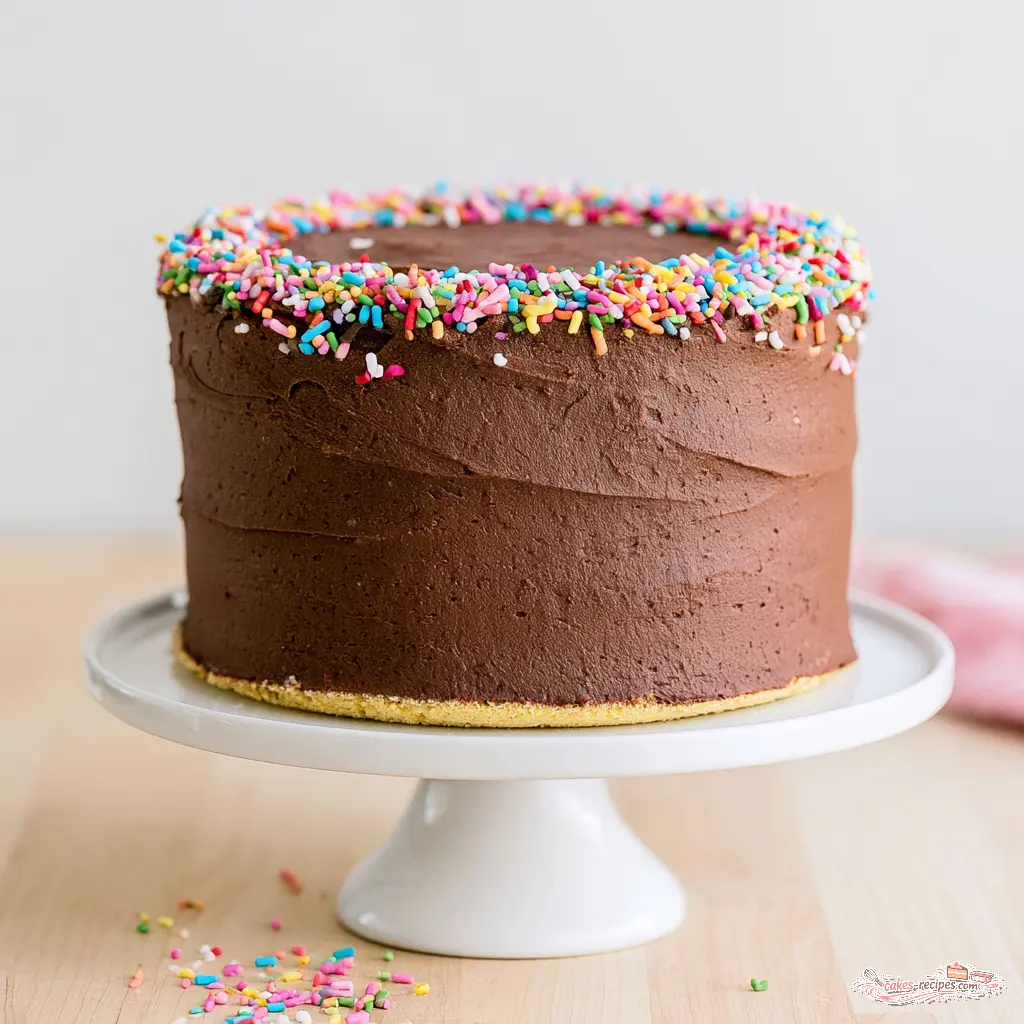
That’s what we’re making today. This classic birthday cake is the one you remember, the one your mom or grandma made, the one that tastes like pure celebration. It’s a moist yellow layer cake with silky chocolate buttercream and rainbow sprinkles piled on top. And honestly? It’s simpler than you think.
August happens to be one of the biggest birthday months in the US, which means summer party season is in full swing. If you’re juggling balloons, party favors, and a kitchen timer right now, I see you. This recipe was made for exactly this moment.
Key Ingredients for Classic Birthday Cake
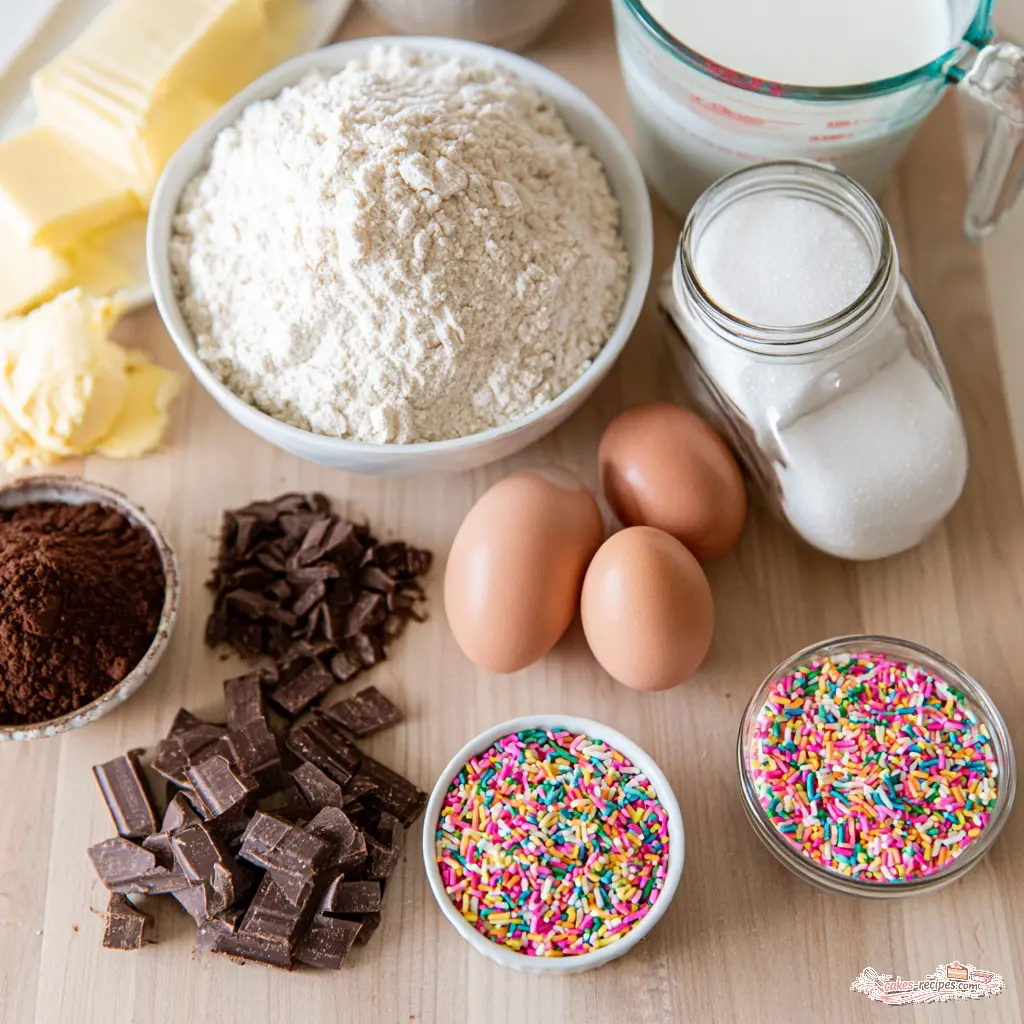
This recipe keeps things beautifully simple. No strange add-ins, no fussy techniques. Just honest ingredients working together the way they’re supposed to.
What I’ve found over years of baking, these choices make the difference between a good cake and a great one:
- Room temperature butter is non-negotiable. Cold butter won’t cream properly with sugar, which means less trapped air and a denser cake. Trust the process here.
- Whole milk gives you that tender, moist crumb. Skim or low-fat will work in a pinch, but whole milk is what makes this a truly moist sponge cake.
- Fresh baking powder matters more than you’d think. Old baking powder loses its lift, and that’s a common reason for sad, flat layers.
- Clear vanilla extract keeps that classic, nostalgic flavor. Regular vanilla works too, we’ll talk about that below.
This is a yellow layer cake, which means the egg yolks do double duty. They add richness and that warm golden color that sets it apart from a white cake. The white cake vs yellow cake debate comes down to texture and flavor, and for birthdays, yellow wins every time.
One note about flour. The recipe uses all-purpose flour, and it’s the right call here. Cake flour would give you a slightly more delicate crumb, but AP holds up beautifully for stacking and frosting.
What Is Clear Vanilla?
Clear vanilla extract is just vanilla that’s been processed to remove the natural dark color. It’s what gives boxed cake mixes that specific, nostalgic flavor so many of us grew up loving. That’s exactly why we use it here.
If you don’t have it around, regular vanilla extract works just as well. The cake will taste slightly more like homemade, which isn’t a bad thing. You’ll see the difference in color more than flavor, the batter won’t be quite as golden.
How to Make Classic Birthday Cake
This is where the magic happens. You’ve got two 8-inch round cake pans, an electric mixer, and about twenty minutes of hands-on time. Let’s walk through the whole process so you feel confident before you even preheat that oven.
Stage one: the batter. You’re creaming softened butter and granulated sugar until pale and fluffy, about three minutes. This is where the air goes in. Then eggs one at a time, so the mixture stays smooth and emulsified. After the vanilla, you’ll alternate adding the flour mixture and milk, starting and ending with flour. Mix on low until just combined.
That’s the most important moment in the whole recipe. Don’t overmix. Once the flour disappears, stop. Overworked gluten makes a tough cake, and that’s what we’re trying to avoid.
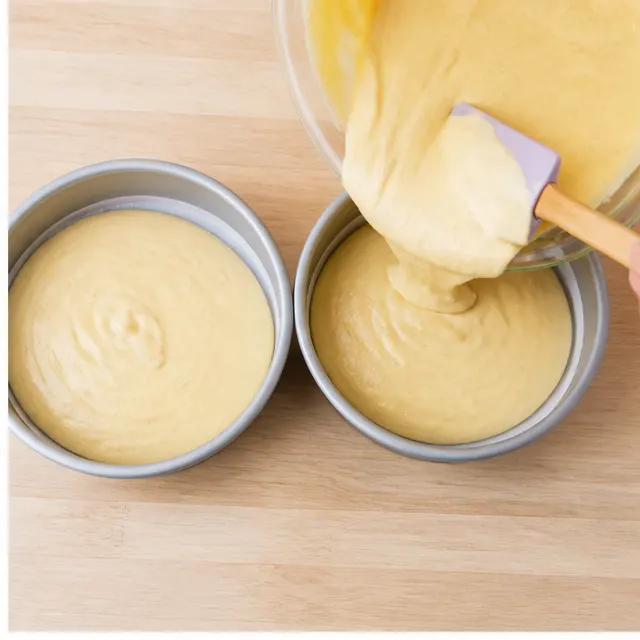
Stage two: baking. Butter and flour your pans, line the bottoms with parchment paper, and divide the batter evenly. The pans go into a 350°F oven for 35 to 40 minutes. You’ll know they’re done when a toothpick inserted in the center comes out mostly clean, with just a few moist crumbs clinging to it.
Full confession here. My first one came out with a slightly sunken middle and I freaked out. I leveled it, frosted it anyway, and nobody said a word. They were too busy eating it. The layers just need to look beautiful enough for the crumb coat to work its magic.
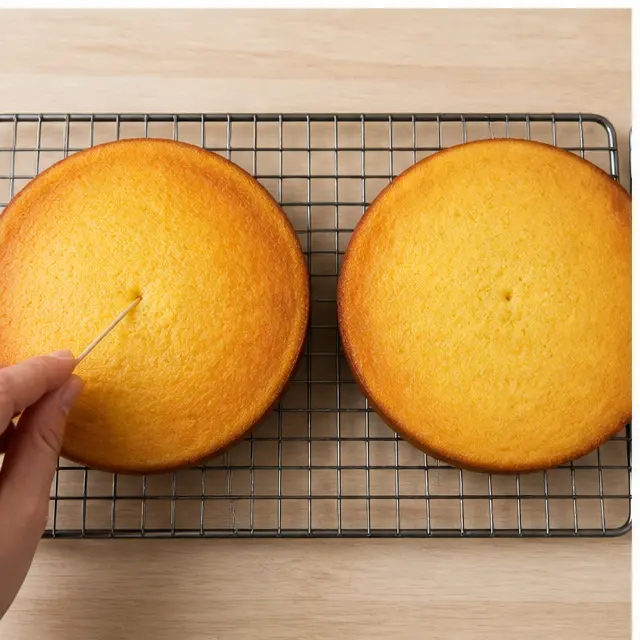
Stage three: cooling. Let the layers rest in the pans on a cooling rack for ten minutes, then turn them out to cool completely. Don’t rush this. Warm cakes crumble under buttercream, and a crumb coat only works if the surface is fully cool. I’ve made that mistake exactly once.
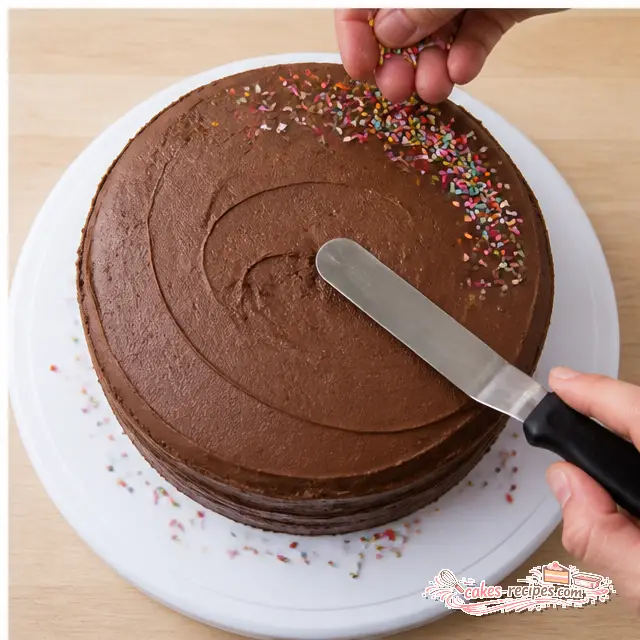
Stage four: assembly. Place one layer on your serving plate, spread about a cup of frosting over the top, and stack the second layer. Then comes the crumb coat, a thin layer of frosting that seals in the crumbs. Refrigerate for twenty minutes, then frost with the rest.
This is the step that takes you from “homemade” to “wow, did you make that?” The crumb coat catches all the loose bits so your final layer stays clean and smooth.
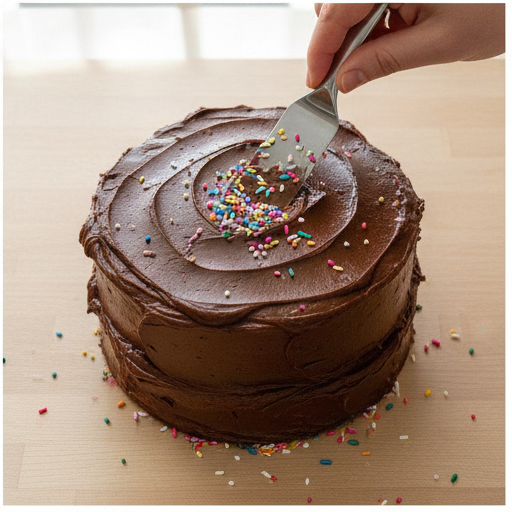
The Secret to Silky Chocolate Buttercream
Now, let’s talk about that frosting. This isn’t your average chocolate buttercream. The recipe calls for Dutch-processed cocoa powder, which gives it a deeper, darker chocolate flavor that reads almost like fudge.
The real trick, though, is the melted semi-sweet chocolate folded into the mix. That’s what gives the frosting its glossy, silky texture. Here’s what I’ve learned about getting it right:
- Sift the powdered sugar and cocoa together. Lumps are your enemy.
- Beat the butter first until smooth and creamy, then add the sugar mixture gradually, about half a cup at a time.
- Keep beating for a full five minutes. That’s the magic number for light, fluffy frosting.
- Add the melted chocolate once it’s cooled slightly, then adjust consistency with milk, a tablespoon at a time.
If the frosting feels too stiff, add that extra milk. If it’s too soft, refrigerate it for a few minutes to firm it up. Frosting consistency is a moving target depending on your kitchen temperature, and that’s normal.
Classic Birthday Cake Variations
Once you’ve mastered the base recipe, the possibilities are genuinely endless. Here are a few of my favorite ways to mix it up, all clearly labeled as optional additions because the original needs nothing:
- Switch the frosting. Vanilla buttercream or cream cheese frosting both pair beautifully with the yellow layers. For a simpler finish, a chocolate ganache glaze poured over the top is gorgeous.
- Change the extract. Swap the vanilla for lemon or almond extract for a different personality entirely. You can even do a mix, like vanilla and almond, for a bakery-style flavor.
- Add a filling. A thin layer of raspberry jam or lemon curd between the layers gives an elegant surprise.
- Go chocolate. A chocolate cake base with the same buttercream makes this a double-chocolate celebration cake.
- Brighten with fruit. Fresh berries on top look stunning against the dark chocolate frosting, especially for a summer birthday party.
For dietary needs, a 1:1 gluten-free all-purpose flour blend works surprisingly well here. Dairy-free butter and milk substitutes also work, though the texture might be slightly less tender. That’s a fair trade for making someone’s day.
Pro Tips for the Perfect Layer Cake
Let’s talk about the mishaps you can avoid, because I’ve hit every single one of these at some point. Here’s how to steer clear:
❌ Over-baking. This is the number one culprit for dry cake. Check at 35 minutes and trust the toothpick test.
✅ Set a timer for 35 minutes. If the toothpick has moist crumbs, pull it. Residual heat finishes the job.
❌ Over-mixing after the eggs go in. This develops gluten and makes a tough, rubbery crumb.
✅ Mix until just combined. It’s okay if you see a few streaks of flour. They’ll disappear.
❌ Using cold ingredients. Cold butter won’t cream properly, and cold eggs can curdle the batter.
✅ Set everything out an hour before baking. Room temperature ingredients are part of the recipe, not a suggestion.
❌ Not sifting the dry ingredients. Baking powder can clump, and those clumps create pockets of uneven rise.
✅ Whisk the flour, baking powder, and salt together first. This takes thirty seconds and distributes everything evenly.
❌ Letting the batter sit before baking. The leavening starts working immediately. Waiting means deflated layers.
✅ Get the batter into the oven right away. Preheat properly so it’s ready when you are.
❌ Using old baking powder. If it’s been six months, it’s probably weak.
✅ Test your baking powder. Drop a teaspoon in hot water. If it bubbles enthusiastically, it’s good to go.
How to Serve and Store Classic Birthday Cake
The best way to serve this cake is at room temperature. That sounds counterintuitive if you’ve refrigerated it, but a chilled cake mutes the flavors. Take it out an hour before you plan to cut it, and the vanilla becomes more pronounced, the chocolate softens, and the texture feels extra tender.
August heat changes the rules a little. If it’s over 80°F in your kitchen, the buttercream will soften and slide. Here’s your beat-the-heat plan:
- Chill the frosted cake for 15 minutes before serving.
- Keep it out of direct sunlight at an outdoor party.
- Store it in the fridge until right before you cut it.
- If you’re transporting it, chill it well first and keep it in the shade.
For cake storage, an airtight container in the fridge keeps it fresh up to four days. Unfrosted layers freeze beautifully for up to three months. Wrap them tightly in plastic wrap, then foil, and they’ll be ready for the next celebration.
To thaw frozen layers, move them to the fridge overnight. Frost straight from the chilled state, and let the finished cake come to room temperature before serving.
One more thing about that first slice. Run your knife under hot water, wipe it dry, and slice. You’ll get those clean, photogenic pieces that look straight out of a bakery case.
Make This Classic Birthday Cake Yours
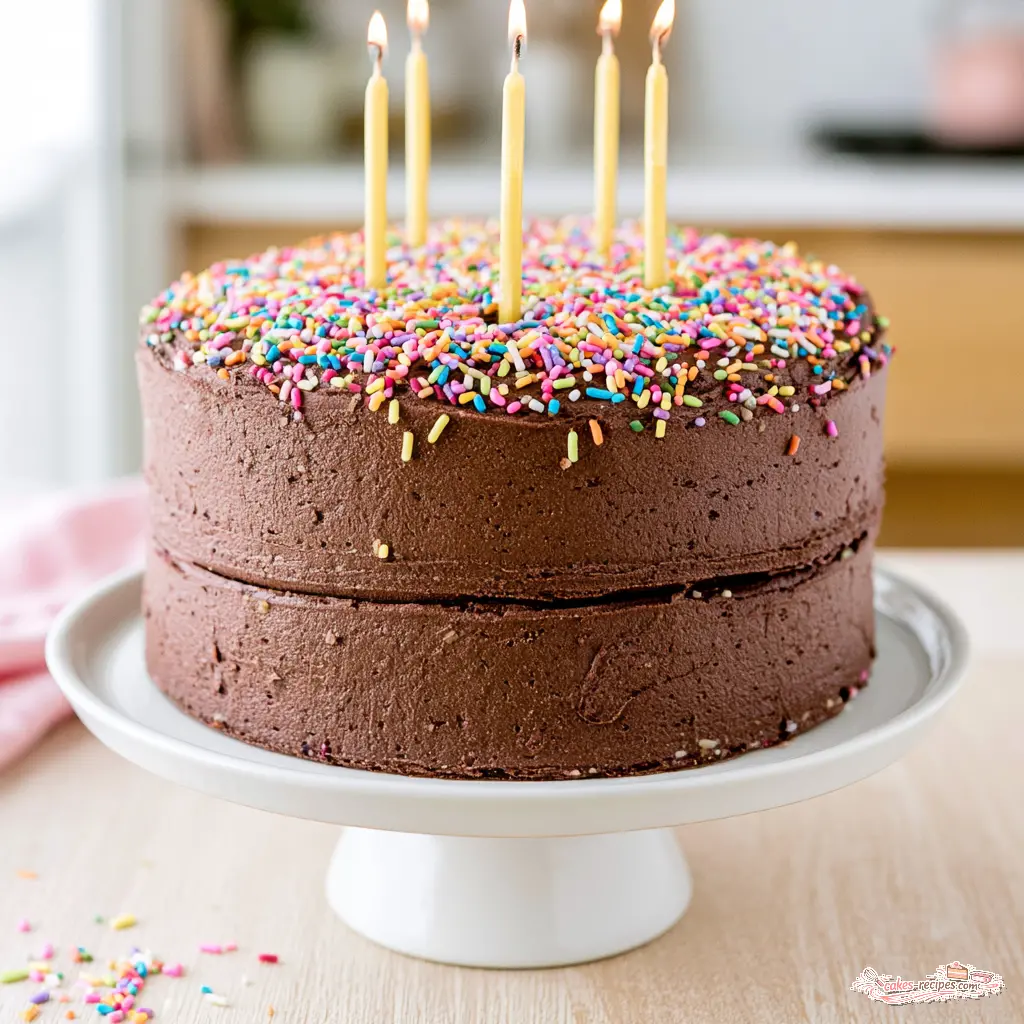
When the candles are lit and the whole room starts singing, that’s the moment this recipe earns its place in your family tradition. The glow on their face, the sweet smell of vanilla and chocolate, the sprinkles stuck to the frosting. That’s what we’re really making here.
This is the homemade birthday cake you’ll reach for every year, the one your kids will remember when they’re grown. And honestly, the tiny imperfections are part of the charm. Homemade love beats bakery perfection every single time.
If you make this cake, I’d love to see it. Come find me on Pinterest and share your creation. There’s nothing quite like scrolling through photos of sprinkles and buttercream to start the birthday season off right.
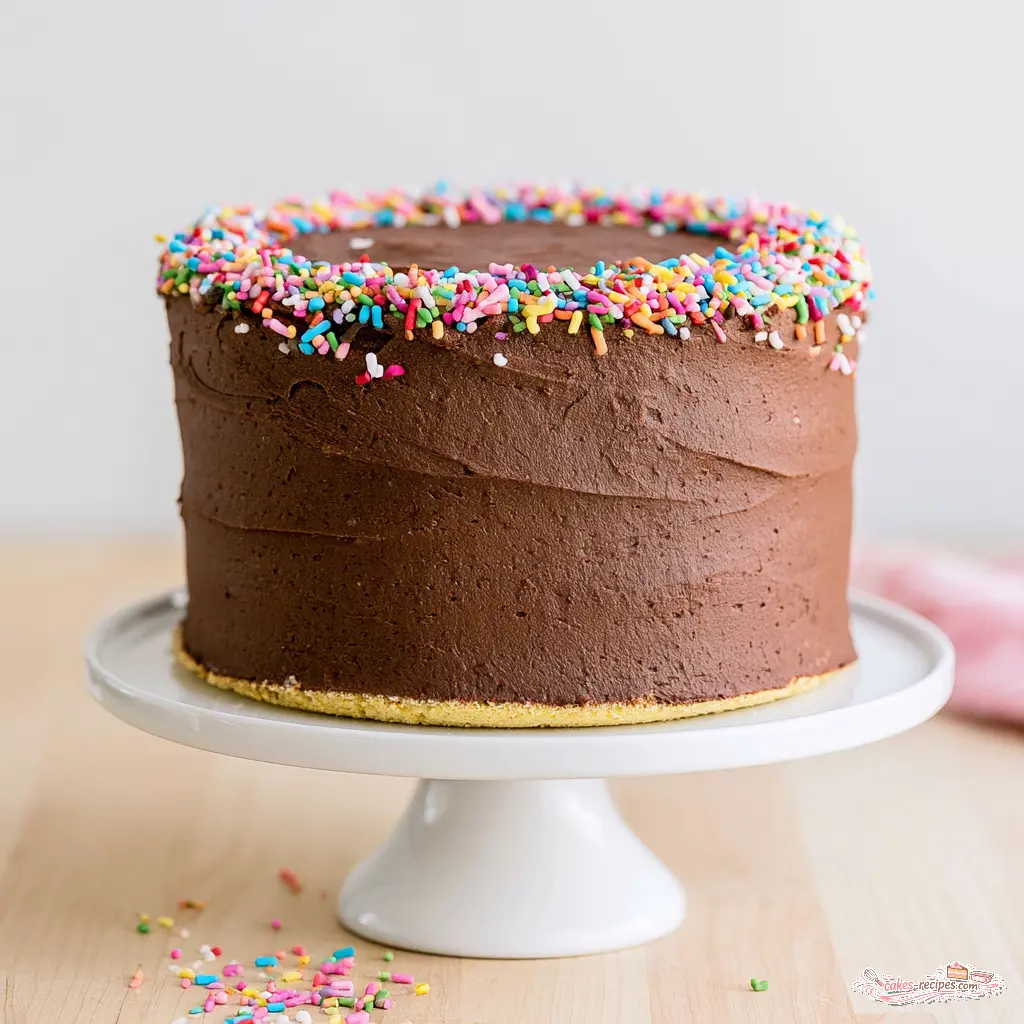
Classic Birthday Cake with Chocolate Buttercream and Rainbow Sprinkles
Ingredients
Method
- Preheat the oven to 350°F. Butter and flour two 8-inch round cake pans, then line the bottoms with parchment paper.
- In a medium bowl, whisk the all-purpose flour, baking powder, and salt together until evenly distributed; set aside.
- Cream the softened butter and granulated sugar in a stand mixer fitted with the paddle attachment on medium-high speed until pale and fluffy, about 3 minutes. Add eggs one at a time, mixing thoroughly after each, then beat in the vanilla.
- With the mixer on low, add the flour mixture and milk in alternating batches, starting and ending with the flour, using three additions of flour and two of milk. Mix just until each addition is incorporated.
- Divide the batter evenly between the prepared pans. Bake for 35 to 40 minutes, until a toothpick inserted in the center comes out mostly clean.
- Let the layers cool in the pans on a wire rack for 10 minutes, then turn them out onto the rack to cool completely.
- In a large bowl, whisk together the sifted powdered sugar and Dutch-processed cocoa powder.
- Beat the butter until smooth and creamy, then gradually beat in the sugar-cocoa mixture about 1/2 cup at a time, beating well after each addition. Continue beating until light and smooth, approximately 5 minutes.
- Pour in the cooled melted chocolate and beat until fully combined. Add milk a tablespoon at a time until the frosting reaches your desired spreading consistency.
- Place one cake layer on a serving plate or cake stand and spread about 1 cup of frosting over the top. Set the second layer on top, then apply a thin crumb coat over the entire cake. Refrigerate for 20 minutes.
- Frost the top and sides with the remaining buttercream using an offset spatula, leaving a rustic finish.
- Finish the top with rainbow sprinkles and decorative birthday flags if you like.
Nutrition
Notes
Tried this recipe?
Let us know how it was!Classic Birthday Cake FAQ
Source: Learn More About This Dish
Can I make this cake in advance?
Absolutely. Bake the layers up to one day ahead and wrap them tightly at room temperature. The frosting can also be made a day ahead and refrigerated. Just bring it back to room temperature and give it a quick re-beat before assembling.
What if I don’t have a stand mixer?
A hand-held electric mixer works perfectly well. You might need to beat the butter and sugar a minute or two longer, but the results are identical. The key is the same: keep beating until the mixture looks pale and fluffy.
What if I don’t have cake pans?
You can bake this batter in a 9×13 pan for a sheet cake. Reduce the bake time to around 30 to 35 minutes. Cupcakes also work, and those bake in 18 to 22 minutes. Just adjust your timer and use the toothpick test.
Can I make this cake gluten or dairy-free?
Yes, with a few swaps. Use a 1:1 gluten-free all-purpose flour blend in place of the regular flour. For dairy, use vegan butter and a plant-based milk like oat or almond. The texture will be slightly different, but the flavor stays wonderful.
Can I make this into cupcakes instead?
Definitely. Line a muffin tin with paper liners and fill each cup about two-thirds full. Bake at 350°F for 18 to 22 minutes. The toothpick test applies here too. You’ll get roughly 24 cupcakes from this batter.
Why does my cake have a spongy or eggy texture?
That usually means the batter was overmixed after the eggs were added. Adding eggs one at a time and mixing just until each is incorporated keeps the structure tender. Overbeating develops the gluten and flattens the air bubbles.
What type of oil is best for vanilla birthday cake?
This recipe actually uses butter for both flavor and texture, which is what gives it that classic taste. If you’re in a pinch and need to substitute, any neutral oil like canola or vegetable works. Just know the flavor won’t be quite as rich.
How do I know when my cakes are finished baking?
Stick a toothpick into the center of a layer. If it comes out mostly clean with a few moist crumbs, the cake is done. The edges should also be golden and just starting to pull away from the pan sides.
What is the secret to super moist cake?
It’s a combination of three things: room temperature ingredients that cream properly, whole milk for richness, and pulling the cake from the oven at the right moment. Over-baking is the quickest way to dry out any cake.
How do you add moisture to cake?
The best approach is prevention. Use whole milk rather than skim, don’t overmix the batter once the flour goes in, and check for doneness around the 35-minute mark. If your layers do come out dry, brush them with a little milk before frosting.
Can I make the cakes in advance?
Yes, unfrosted layers freeze beautifully. Wrap each one tightly in plastic wrap, then a layer of foil, and freeze for up to three months. Thaw in the fridge overnight before frosting. The texture stays remarkably fresh.