Honey Pumpkin Sourdough Bread
Ingredients
Method
- In a jar, combine 1/2 cup bread flour, 1/2 cup whole wheat flour, and 1 cup water; cover loosely and let sit at room temperature for 8 to 12 hours until bubbly. In a large bowl, whisk together 3 3/4 cups (450g) bread flour and 1 3/4 teaspoons (10g) fine sea salt. Add 1 cup (240ml) water, 1/2 cup (120g) of the bubbly fed starter, 3/4 cup (180g) pumpkin puree, and 2 tablespoons (42g) honey. Mix with a spatula until a shaggy dough forms, cover, and rest for 30 minutes. Perform 3 sets of stretch and folds at 30 minute intervals. Let the dough bulk ferment at room temperature (around 75°F) for 3 to 4 hours, or until it has grown by about 40% and feels airy.
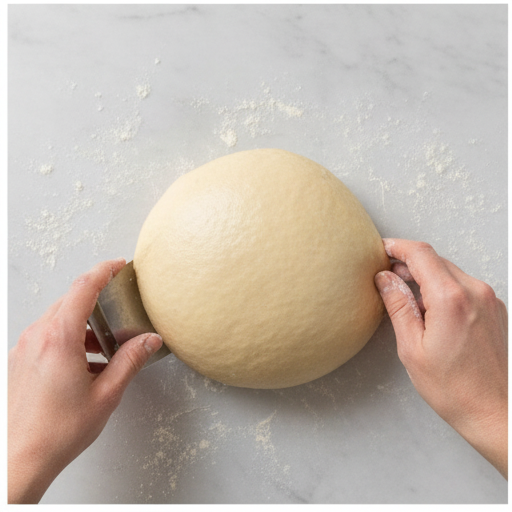
- Turn the fermented dough out onto a lightly floured surface. Gently pre-shape it into a round by folding the edges into the center. Using a bench scraper, rotate the dough in a clockwise (or counterclockwise if you are left handed) motion until the top becomes smooth and taut. Let it rest for 10 to 15 minutes, then tighten the round once more just before proofing.
- Place the shaped dough seam-side up in a banneton basket or a large bowl lined with a tea towel. Cover with a tea towel or a plastic bag and refrigerate for 12 to 15 hours to cold proof.
- Preheat your oven to 420°F and place a Dutch oven with its lid inside to preheat as well.
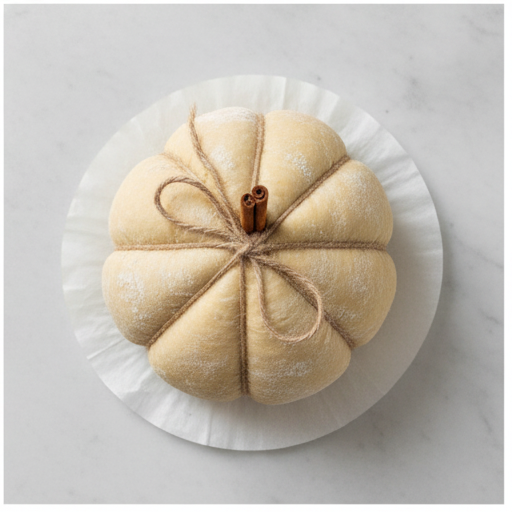
- Cut a large piece of parchment paper, dust it with flour, and lay out 8 pieces of kitchen twine in a spoke pattern radiating from the center, like a pizza cut into 8 slices.
- Place the cold dough seam-side down in the center of the twine. Bring the ends of each twine piece up and over the dough, then tie them firmly into knots, working around the dough to create 8 pumpkin sections.
- Set the twine-wrapped dough on top of the preheating oven or another warm spot to help it come to room temperature more quickly.
- Once the oven is fully preheated, use a lame or sharp knife to score along each twine line, just to one side of the twine so the pumpkin shape holds during baking.
- Transfer the dough on the parchment into the hot Dutch oven, cover, and bake at 420°F for 25 minutes. Remove the lid and bake for another 25 minutes until deep golden brown.
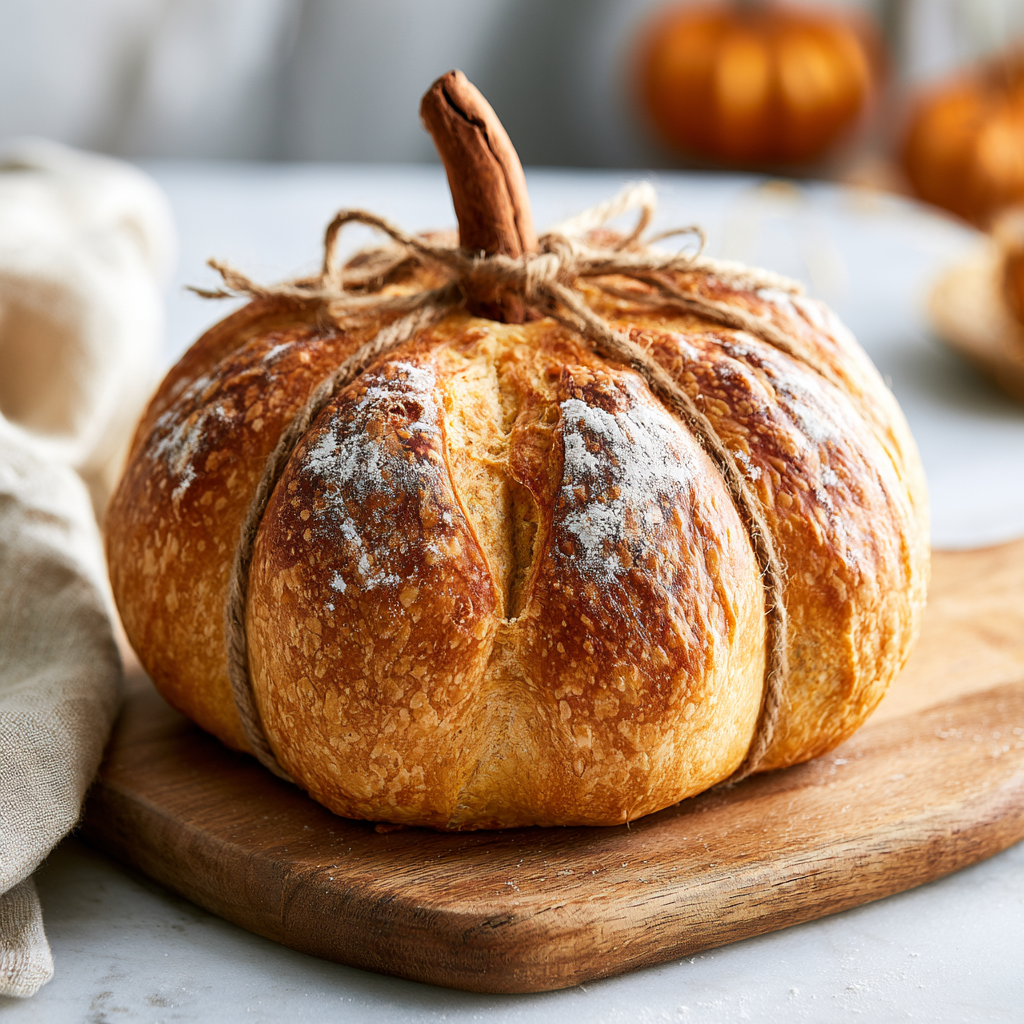
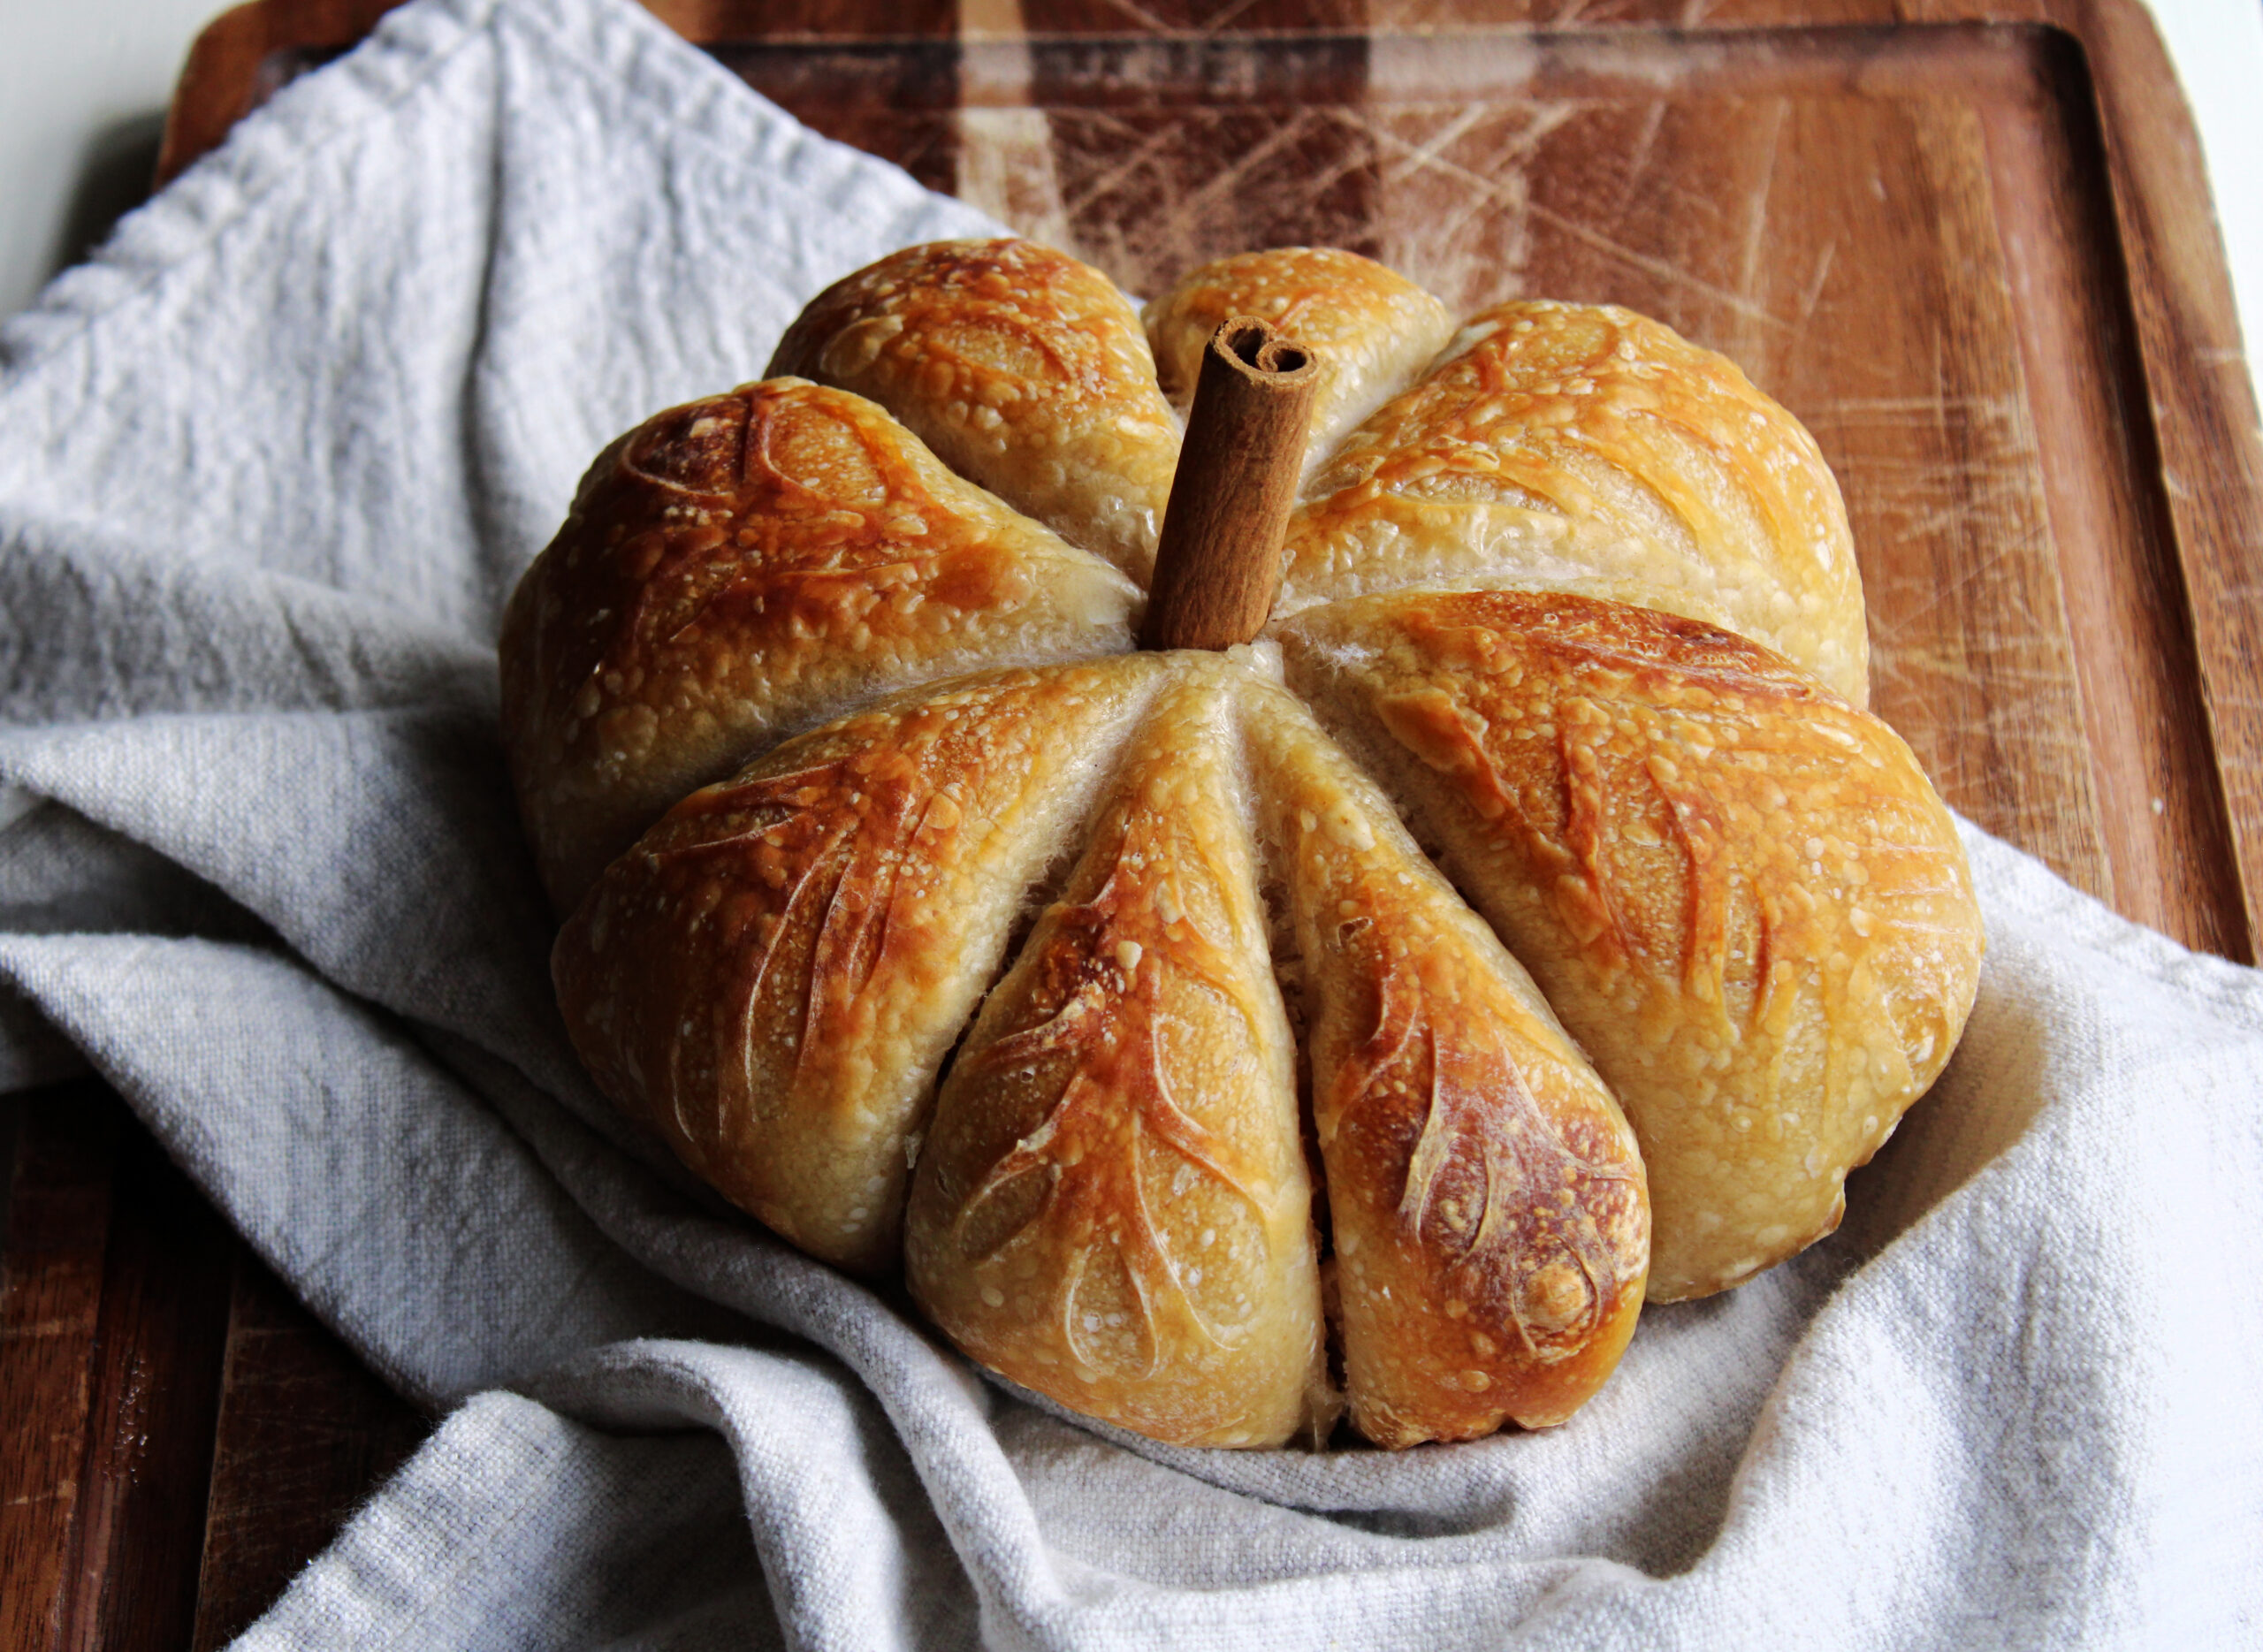
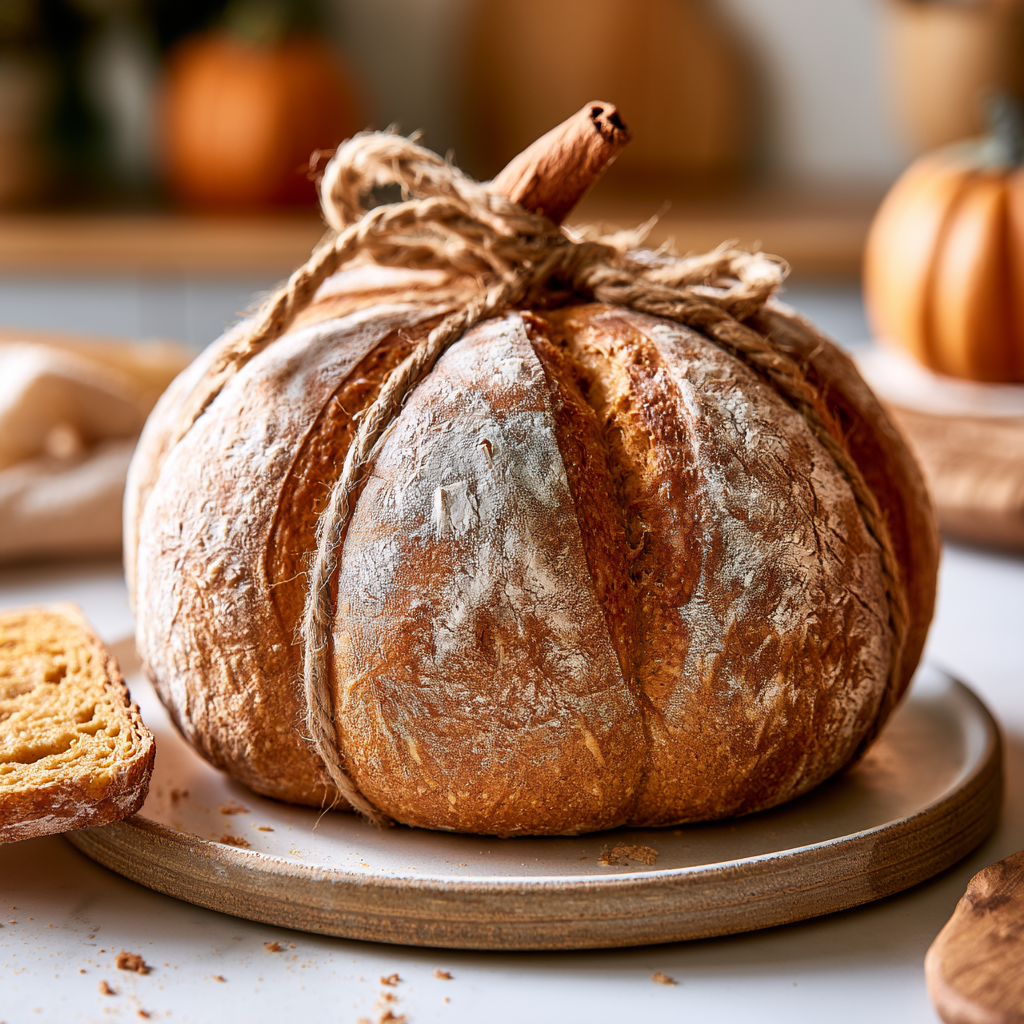
- Cool the loaf completely on a wire rack, then carefully remove the twine and push a cinnamon stick into the top to form the stem.
Nutrition
Notes
Tried this recipe?
Let us know how it was!Why You’ll Love This Honey Pumpkin Sourdough Bread
It’s August, it’s 100 degrees outside, and I’m elbow-deep in pumpkin puree. You’re not crazy for wanting fall flavors right now. In fact, you’re brilliant. This honey pumpkin sourdough bread is the perfect head-start bake for the season.
It has a tender, moist crumb with a subtle sweetness from the honey. The pumpkin gives it that gorgeous golden hue. And the sourdough tang? It balances everything perfectly. Oh my goodness, the smell that fills your kitchen is pure autumn magic.
This isn’t a quick bread. It’s a real artisan sourdough loaf, shaped like a festive pumpkin. It looks stunning on a Thanksgiving table or a cozy fall brunch spread. Trust me, when you pull this deeply bronzed, honey-scented loaf from the oven, you will never wait for fall to start baking again.
Ingredient Notes (The Keys to Success)
This recipe uses simple ingredients, but each one plays a crucial role. Let’s chat about what you need and why it matters. It’s totally doable, I promise.
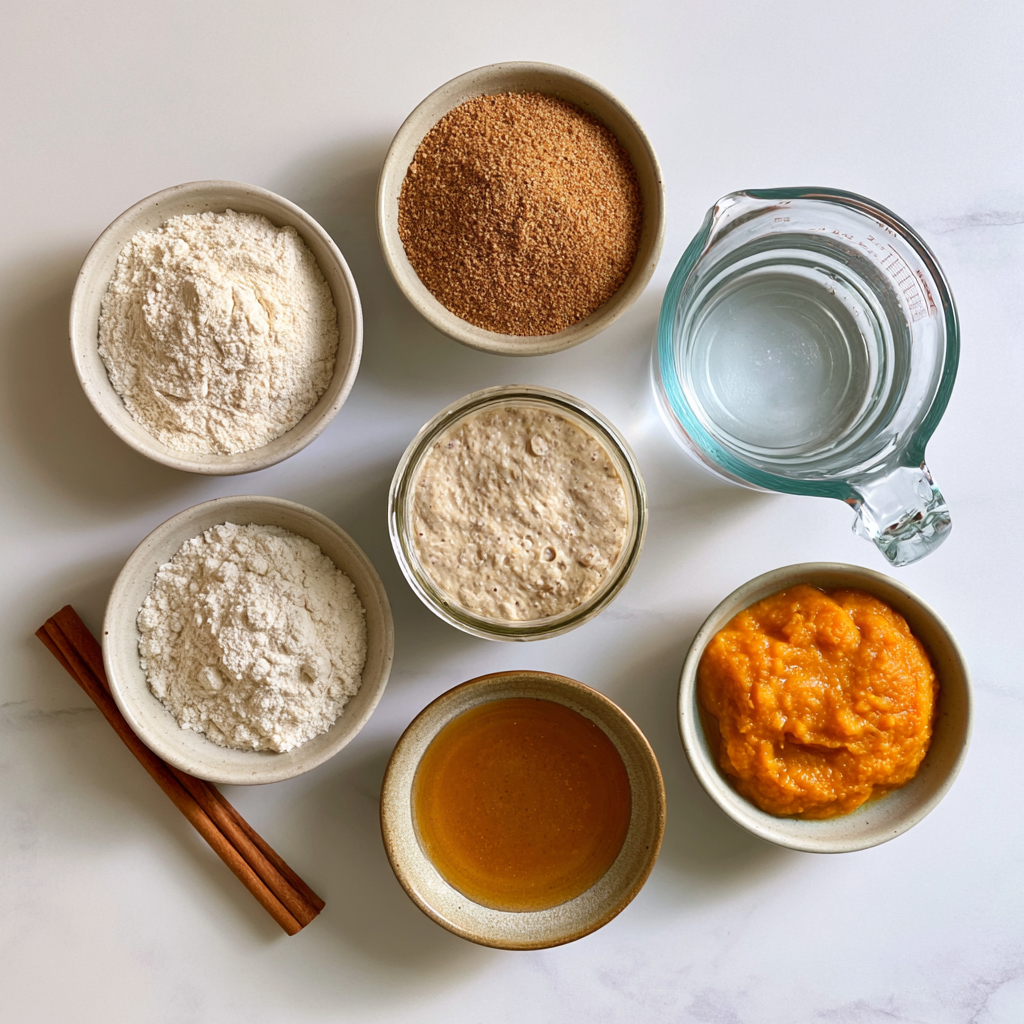
Best Pumpkin Puree for Baking
First things first. You absolutely must use pure pumpkin puree, not pumpkin pie filling. The pie filling is pre-sweetened and spiced, which hinders fermentation and ruins the dough’s balance. You want 100% pumpkin. Canned puree works beautifully and is slightly less watery than homemade. If you’re making your own, cook it down, drain excess liquid, and mash it thick. Patting it dry with a paper towel is a great trick.
How Pumpkin Affects Sourdough Hydration
Here’s the science that matters most, explained simply. Pumpkin puree is mostly water. It raises the dough’s hydration significantly, which is why this dough feels stickier and more slack than your standard sourdough. That’s not a mistake. It’s the pumpkin.
If you’re panicking at how slack this is compared to your plain sourdough, take a breath. It’s supposed to be like this. The honey, meanwhile, is hygroscopic, meaning it attracts and holds onto water. It also feeds the wild yeast, giving fermentation a gentle boost. The dough should feel like cold peanut butter after the second fold, not batter, not stiff bread dough.
Hot Weather Proofing Pivot
Living in a warm climate? If your kitchen hits 85°F+, your bulk fermentation will be much faster. Use cooler water (around 65°F) when mixing, and watch the dough for that 40% rise, not the clock. You can even move the dough to the fridge for the last hour of bulk fermentation to slow it down.
How to Make Honey Pumpkin Sourdough Bread
Alright, let’s walk through the process. This section is about the rhythm of the bake, the feel of the dough, and the little cues that tell you you’re on the right track. You’ve got this.
Mix the Dough
The journey starts with feeding your starter. Combine 1/2 cup bread flour, 1/2 cup whole wheat flour, and 1 cup water in a jar. Let it sit for 8 to 12 hours until it’s bubbly and active. In the meantime, whisk the bread flour and salt in a large bowl. Add the water, your bubbly fed starter, pumpkin puree, and honey. Mix with a spatula until a shaggy dough forms, then cover and let it rest for 30 minutes. This autolyse phase is crucial for gluten development.
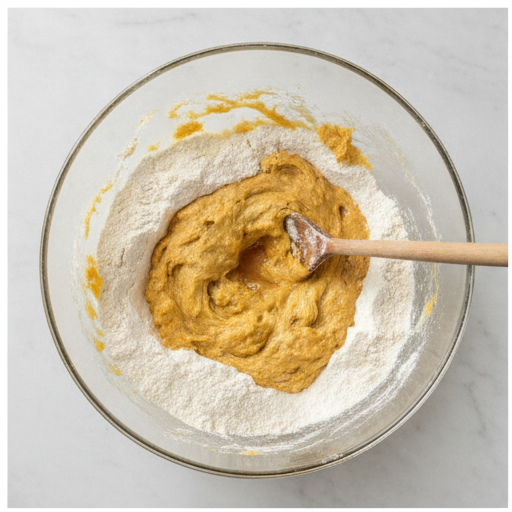
Stretch and Folds
This is where the gluten strength comes from. You’ll perform 3 sets of stretch and folds at 30-minute intervals. Grab a section of the dough, stretch it up, and fold it over the center. Rotate and repeat. After the folds, let the dough bulk ferment at room temperature (around 75°F) for 3 to 4 hours. You’re looking for it to grow by about 40% and feel airy. Don’t rely on fixed times; watch the dough.
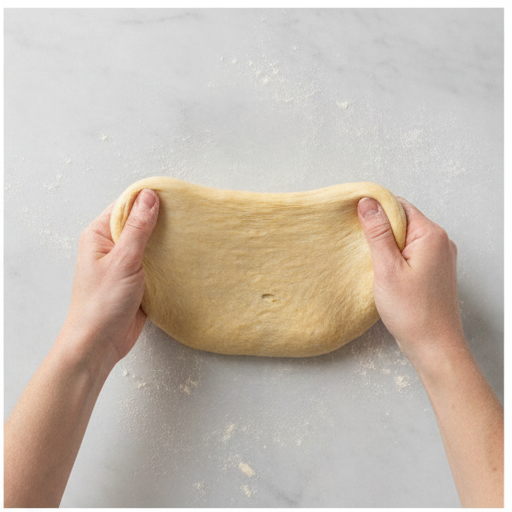
Shape and Cold Proof
Once fermented, turn the dough out onto a lightly floured surface. Gently pre-shape it into a round by folding the edges into the center. Using a bench scraper, rotate the dough until the top becomes smooth and taut. Let it rest for 10 to 15 minutes. Then, tighten the round once more. Place the shaped dough seam-side up in a banneton proofing basket or a bowl lined with a tea towel. Cover it and refrigerate for 12 to 15 hours. This overnight cold proof is essential for a complex flavor and easier handling.
Bake in a Dutch Oven
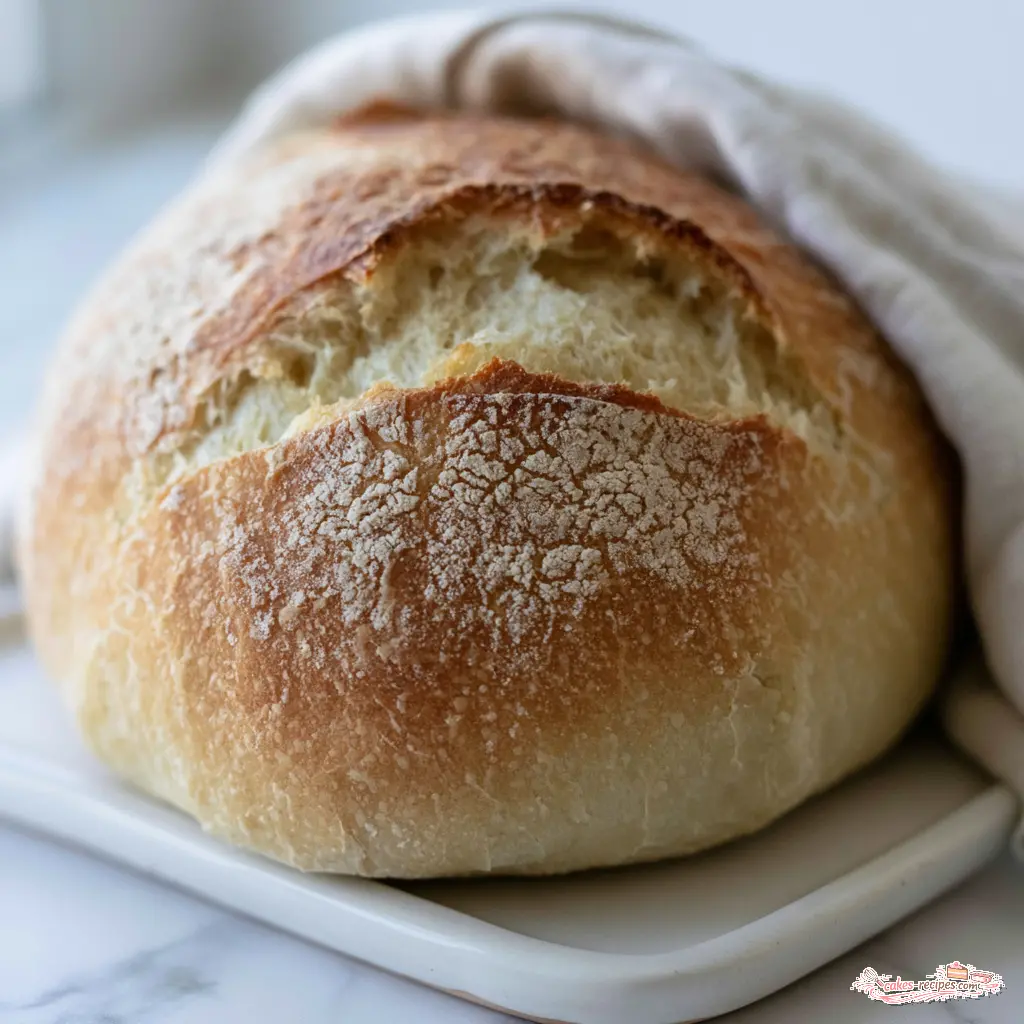
When you’re ready to bake, preheat your oven to 420°F with your Dutch oven and its lid inside. Once hot, place the cold dough seam-side down on a floured piece of parchment paper. Score it deeply with a lame or sharp knife. Then, carefully transfer it into the hot Dutch oven. Cover and bake for 25 minutes. Remove the lid and bake for another 25 minutes until it’s deep golden brown. The trapped steam from the Dutch oven gives you that crackling crust and incredible oven spring.
Flavor Additions and Variations
This honey pumpkin sourdough bread is amazing as-is. But if you want to make it your own, here are some fun ideas. I love playing with different textures and flavors.
- Spiced Version: Add 1 teaspoon of pumpkin pie spice with the flour for a classic fall flavor profile.
- Add-ins: Fold pumpkin seeds, raisins, or chocolate chips into the dough during the 3rd fold of bulk fermentation.
- Herby Twist: Add dried or fresh thyme leaves for a savory, herby flavor.
- Oaty Crust: Line your banneton with rolled oats for a lovely oaty crust.
- Nutty Crunch: Add pecans or walnuts for a more savory, hearty loaf.
Remember, these are optional. The base recipe is already perfect, but it’s fun to experiment once you’ve mastered it. I tend to like the simple version best, slathered with butter.
Shaping a Pumpkin-Shaped Loaf
This is the fun part, and the part no other recipe really explains. How cute is this? To get that festive pumpkin look, you’ll use kitchen twine. It’s simpler than you think. This works for me, but you might prefer a different method, that’s fine.
- Cut a large piece of parchment paper and dust it with flour.
- Lay out 8 pieces of kitchen twine in a spoke pattern radiating from the center, like a pizza cut into 8 slices.
- Place the cold dough seam-side down in the center of the twine.
- Bring the ends of each twine piece up and over the dough, tying them firmly into knots.
- Set the twine-wrapped dough on top of the preheating oven to come to room temperature.
When scoring, score just to one side of the twine so the loaf keeps its pumpkin shape as it expands. After baking and cooling completely, carefully remove the twine and push a cinnamon stick into the top to form the stem. It’s the cutest thing!
Sample Schedule (For a Normal Work Week)
Here’s a realistic timeline that fits a 9-to-5 schedule. The key is to let the dough do the work while you do your thing. This schedule is for a 75°F kitchen. Adjust for your own climate.
- 8:00 AM: Feed your starter for the overnight ferment (or the night before).
- 6:00 PM: Mix the dough. It’s a quick 10 minutes.
- 6:30 PM: Perform the first set of stretch and folds.
- 7:00 PM: Second set of stretch and folds.
- 7:30 PM: Third set of stretch and folds.
- 10:00 PM: Shape the dough and place it in the banneton for its overnight cold proof.
- 7:00 AM (Next Day): Preheat the oven and dutch oven.
- 8:00 AM: Score and bake the bread.
- ❌ Dense and gummy interior? ✅ You might have cut into the loaf too soon. Let it cool completely before slicing. Over-fermenting the dough can also cause this.
- ❌ Dough is too sticky and wet? ✅ That’s the pumpkin and honey. Use lightly floured hands and a bench scraper. If it’s truly unmanageable, add 1 to 2 tablespoons of water during the initial mix if stiff, but don’t add too much flour.
- ❌ Burnt crust from honey’s sugars? ✅ The honey caramelizes quickly. If your crust is browning too fast, tent it with foil for the last 10 minutes of baking.
- ❌ Flat loaf? ✅ The dough may be over-proofed. Watch for the 40% rise and a puffy, airy feel, not a flattened one.
- ❌ Using pie filling instead of puree? ✅ Always use 100% pure pumpkin puree. This is the most common mistake.
See? It fits! And the night before, you can prep the twine spokes so it’s all ready to go in the morning. This is so fun, right?
Storage, Reheating, and Common Troubleshooting
My first honey pumpkin loaf was flat-ish and I ate all of it with butter over three days. Yours will likely be better. Both are wins. Here are some tips for keeping it fresh and fixing common issues.
Storage and Reheating
Store the bread wrapped in a sealed bag or food storage container at room temperature for 4 to 5 days. To reheat, just toast individual slices to bring back the crust. For longer storage, freeze a whole loaf or presliced loaf in a freezer-safe bag, placing parchment between slices to prevent sticking. To refresh a whole loaf, run it quickly under water and bake at 400°F for 10 to 15 minutes until the crust is crispy again.
Common Mistakes and Fixes
Let’s tackle some issues head-on. You’ve got this, and I’ve got you.
Why Is My Sourdough Dense and Gummy?
Usually comes down to two things: cutting too early (which sets the structure) or over-proofing. The cold proof is essential for a complex flavor and a strong crumb structure. Don’t skip it, or you’ll lose that beautiful open crumb.
Frequently Asked Questions
This honey pumpkin sourdough bread is more than just a recipe. It’s a little slice of autumn, ready whenever you are. I’m obsessed with how the twine creates that perfect pumpkin shape, and the cinnamon stick stem is the best finishing touch. It’s perfect for grilled cheese, amazing under poached eggs, or just slathered with butter and a cup of hot tea. Love that for you.
When you pull that deeply bronzed, honey-scented loaf from the oven, you will never wait for fall to start baking again. I’d love to see your beautiful loaves! Feel free to tag me or share your baking adventures. For more inspiration and to see what I’m working on, come say hi on my Pinterest boards. Happy baking, chérie!
Source: Learn More About This Dish
Should I use active sourdough starter or discard?
Use an active, recently fed sourdough starter for this honey pumpkin sourdough bread. The wild yeast needs to be at its peak to leaven this enriched dough, which is heavier than a plain loaf. Discard will result in a dense, flat bread, so feed that starter first!
Can I use all-purpose flour instead of bread flour?
You can, but you’ll get a slightly less chewy crumb. Bread flour has more protein, which is essential for strong gluten development in a high hydration dough. If you use all-purpose flour, reduce the water by about 25 grams to help control the hydration. It will still be lovely!
Can I cold proof longer than 12 hours?
You can, up to about 15 hours. Beyond that, the dough can over-proof and lose its structure. The 12 to 15 hour window is perfect for developing that complex sourdough flavor and making the dough easier to shape. I wouldn’t push it much past that.
Why is my dough sticky and wet?
This is normal! The pumpkin puree is mostly water, and the honey is hygroscopic, which holds onto moisture. It’s a high hydration dough. Use lightly floured hands and a bench scraper. If it feels like batter after the first fold, don’t panic; it will tighten up. Enjoy the process.
Why is my bread dense and gummy after baking?
The most common culprit is cutting into the loaf too soon. The crumb needs time to fully set after coming out of the oven. Let it cool completely on a wire rack. It can also be a sign of over-proofing. Check your dough’s rise and your final proof time.
Can I sub the brown sugar for maple syrup or honey?
Yes, if a recipe asks for brown sugar, you can use a liquid sweetener. Clear honey can be replaced with maple syrup. A good rule of thumb is to use about half the amount of syrup as you would sugar. It will change the flavor and browning nicely.
How Can I Make My Own Pumpkin Puree Thicker?
After making homemade pumpkin puree, you can cook it down in a pan to evaporate some of the water. Let it cool completely before refrigerating to avoid condensation. Patting the puree with a paper towel is another great trick to remove excess moisture before adding it to your dough.
Can I add pumpkin spice to this honey pumpkin sourdough bread?
Absolutely! For a deeper, spiced pumpkin flavor, add 1 teaspoon of pumpkin pie spice along with the flour during the initial mix. Just be aware that an excessive amount of a strong spice like cinnamon can slightly hinder fermentation. A teaspoon is a perfect, safe amount.