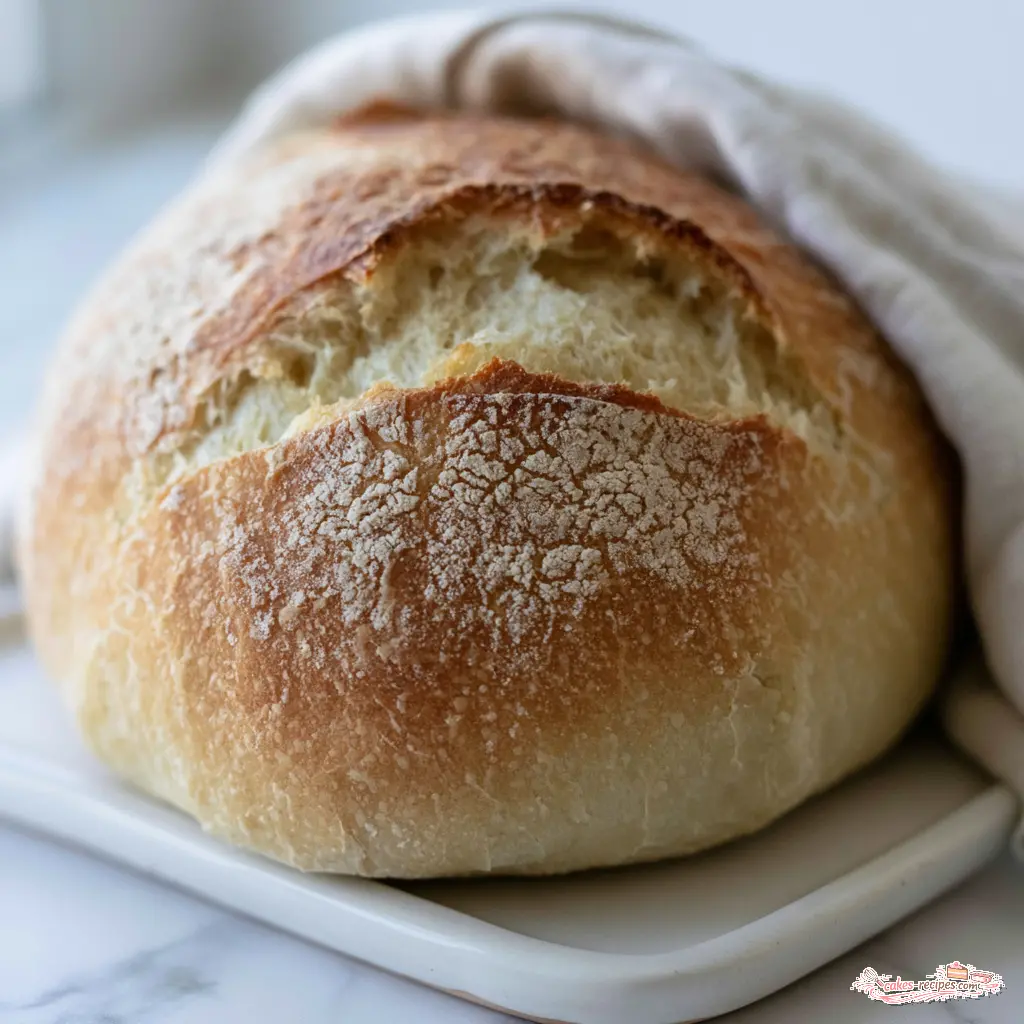
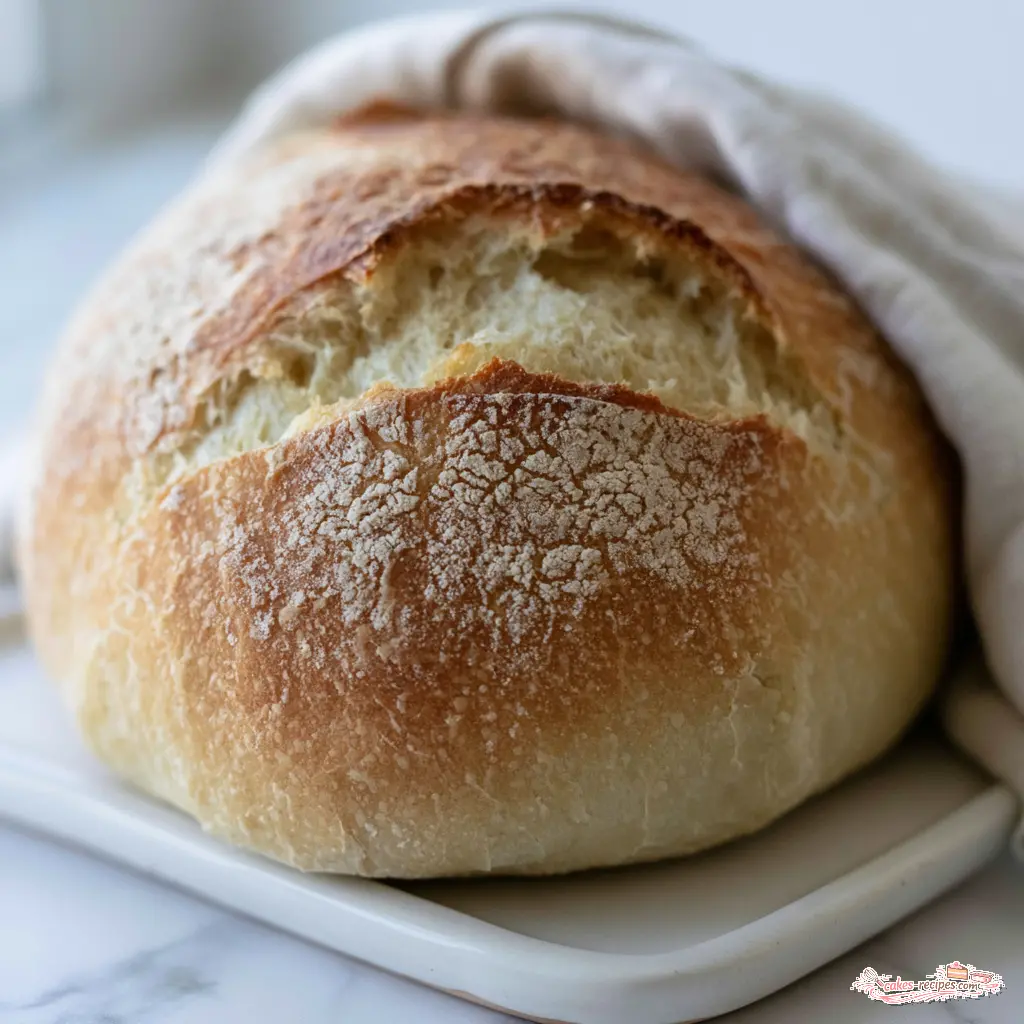
Golden Crusted Sourdough Discard Bread
Ingredients
Method
- In a large bowl, whisk together the bread flour (or all-purpose flour), fine sea salt, and instant yeast. Add the sourdough discard and warm water. Stir with a wooden spoon or a dough hook until a shaggy dough forms, then switch to your hands and mix until the dough comes together. It should be soft and slightly sticky. Drizzle the olive oil over the dough and turn it to coat evenly. If using active dry yeast, dissolve it in the warm water with 1/2 teaspoon of sugar and let sit for 5 to 10 minutes before adding it to the dry ingredients.
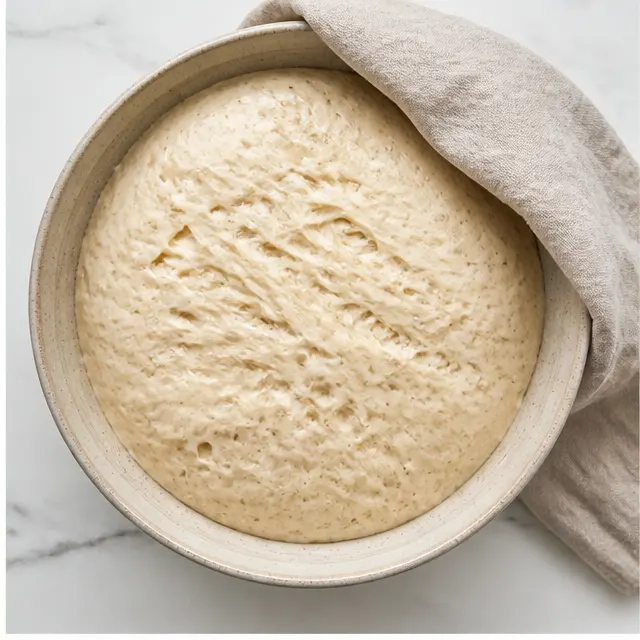
- Cover the bowl with plastic wrap or a clean towel and let the dough rise in a warm, draft-free place until doubled in size, 1 to 2 hours.
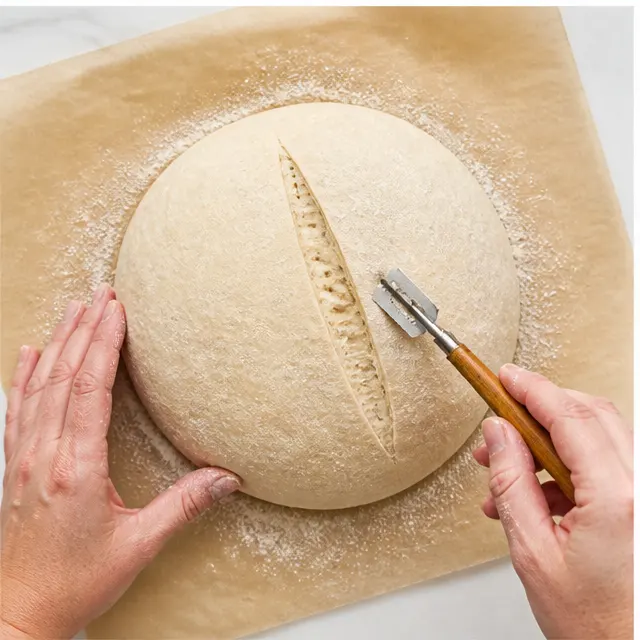
- Lightly flour your work surface and hands. Gently turn out the dough, fold the sides toward the center, then flip it seam-side down. Pull the dough toward you while rotating it to build surface tension. Place the shaped loaf on a piece of parchment paper and score the top 1/4-inch deep with a sharp knife or bread lame.
- Put the loaf, still on the parchment, into a Dutch oven and cover with the lid. Set it aside to rise for 30 minutes while the oven preheats to 425°F.
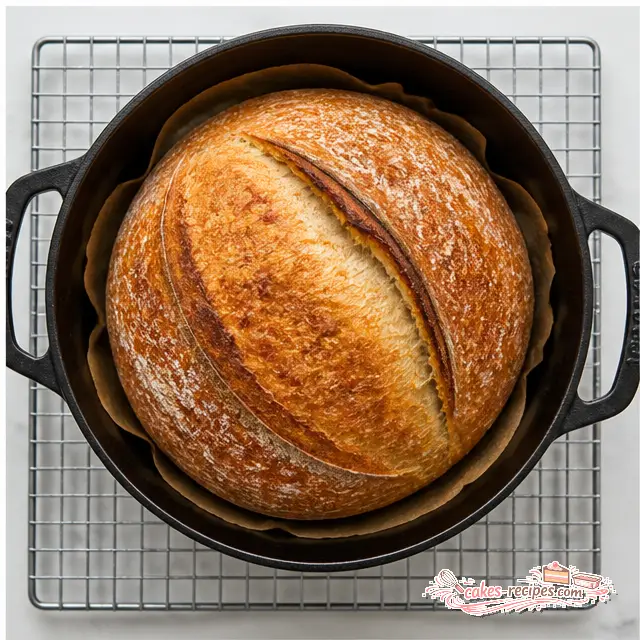
- Bake covered for 40 minutes. Remove the lid and bake for 5 to 10 minutes longer, until the crust is deep golden and the internal temperature reaches 200°F.
- Transfer the bread to a wire rack and let it cool for at least 30 minutes before slicing. Enjoy warm or at room temperature.
Nutrition
Notes
Tried this recipe?
Let us know how it was!Why You’ll Love This Easy Sourdough Discard Bread
Let me guess. There’s a jar of sourdough discard in your fridge right now, probably tucked behind the pickles, and every time you open the door it quietly judges you. I know that look. I’ve gotten it from my own jar more times than I care to admit, especially in August when the kitchen is already 90 degrees and the last thing I need is another baking project taking over my counter.
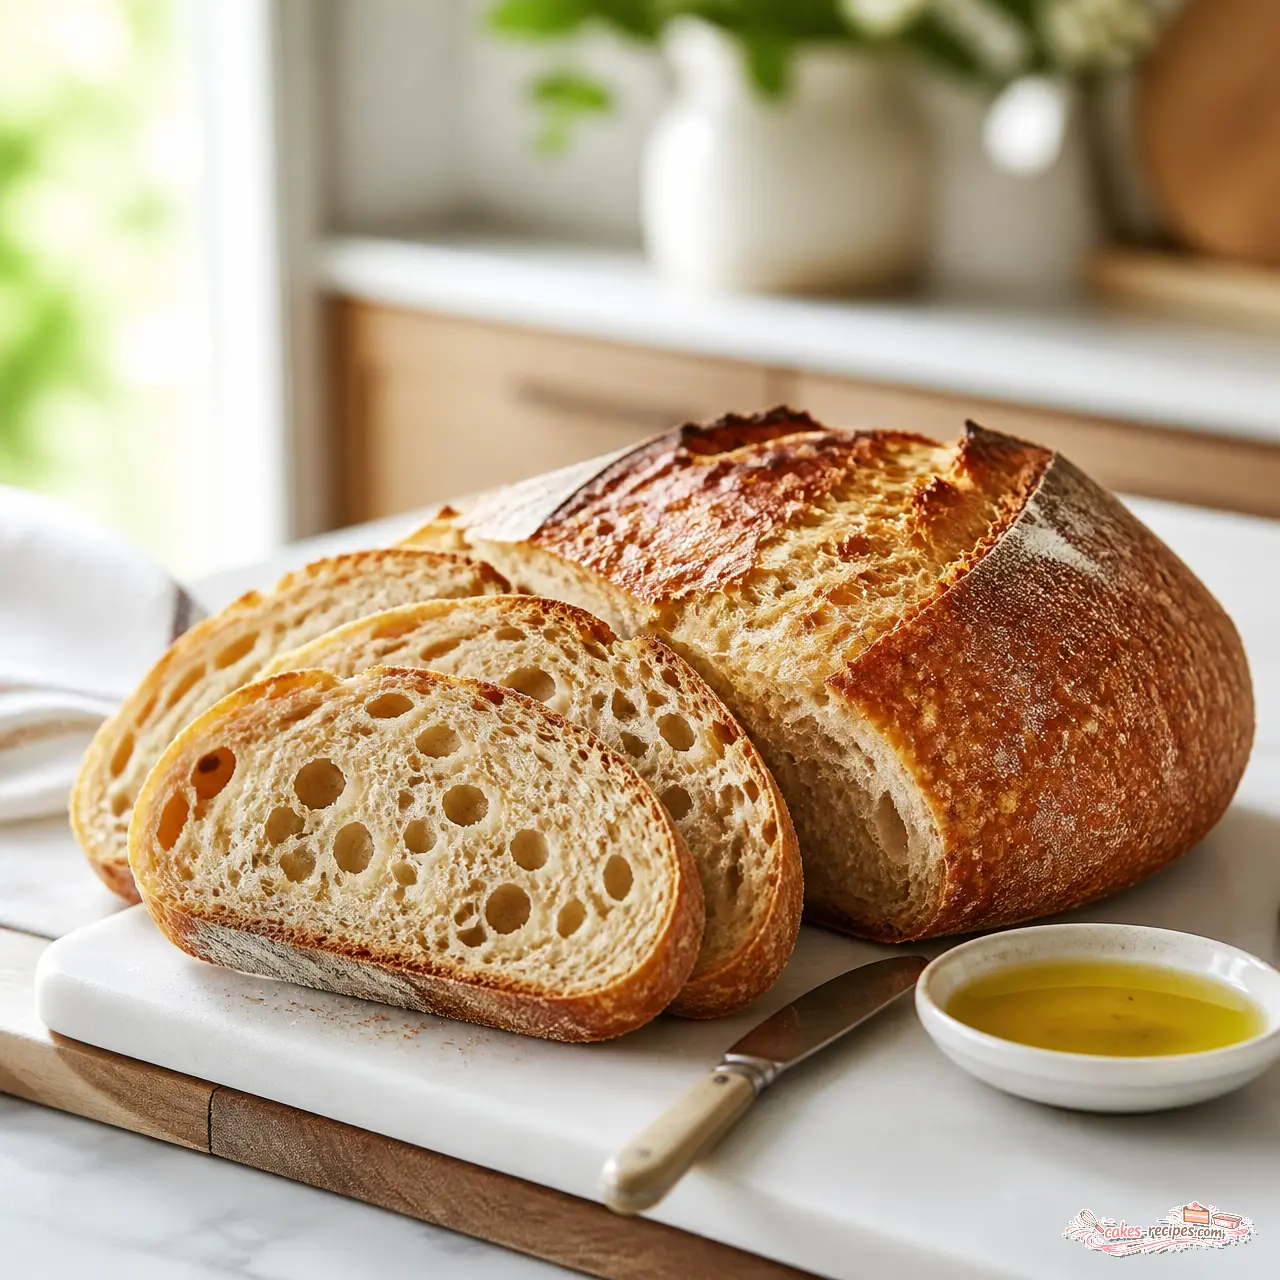
Okay, let’s be real. This easy sourdough discard bread is the recipe I reach for when I want a proper crusty sourdough loaf without the fuss and without the waste. It’s got a crackly, deep-golden crust, a tender open crumb, and just enough acidic tang to remind you the wild yeast did its part. All from discard that most recipes tell you to pour down the drain.
I should confess something up front. My first attempt at sourdough discard bread was a complete failure. A flat, sad, rubbery hockey puck that my sister, bless her, called “rustic.” I sliced into it, saw the dense gummy interior, and immediately knew it was heading to the compost bin. The problem wasn’t the discard. The problem was I expected an unfed, tired culture to lift an entire loaf on its own. That’s a huge ask for a colony of yeast that’s basically been asleep in the fridge for a week.
This recipe fixes that with a small assist from commercial yeast. And I promise, that’s not cheating. It’s insurance. You still get the sourdough tang and structure, but the rise is reliable. Every single time.
Here’s why this easy sourdough discard bread works:
- It consumes real discard. A full half cup in a single bake. No more watching the jar multiply.
- It’s genuinely easy. Fifteen minutes of hands-on work, then the dough does the rest.
- No kneading required. Just a gentle fold at shaping time, and you’re done.
- Bakery-style crust at home. The covered Dutch oven traps steam and delivers that crackled shell you’d normally pay six dollars a loaf for.
What Readers Are Saying
This recipe currently sits at 4.55 stars from home bakers who’ve tried it, and the feedback follows the same theme every time: relief. People who were sure they’d ruin it are pulling golden, crackling loaves out of their Dutch ovens. One reader told me she finally felt like a legitimate bread baker when her kids asked for seconds. Another said the loaf disappeared at dinner faster than the bakery bread she’d bought the same day. That’s exactly what I want for you.
Ingredients You’ll Need
Six ingredients. That’s the whole list. This easy sourdough discard bread recipe keeps things simple, and you probably already have all of it in your kitchen.
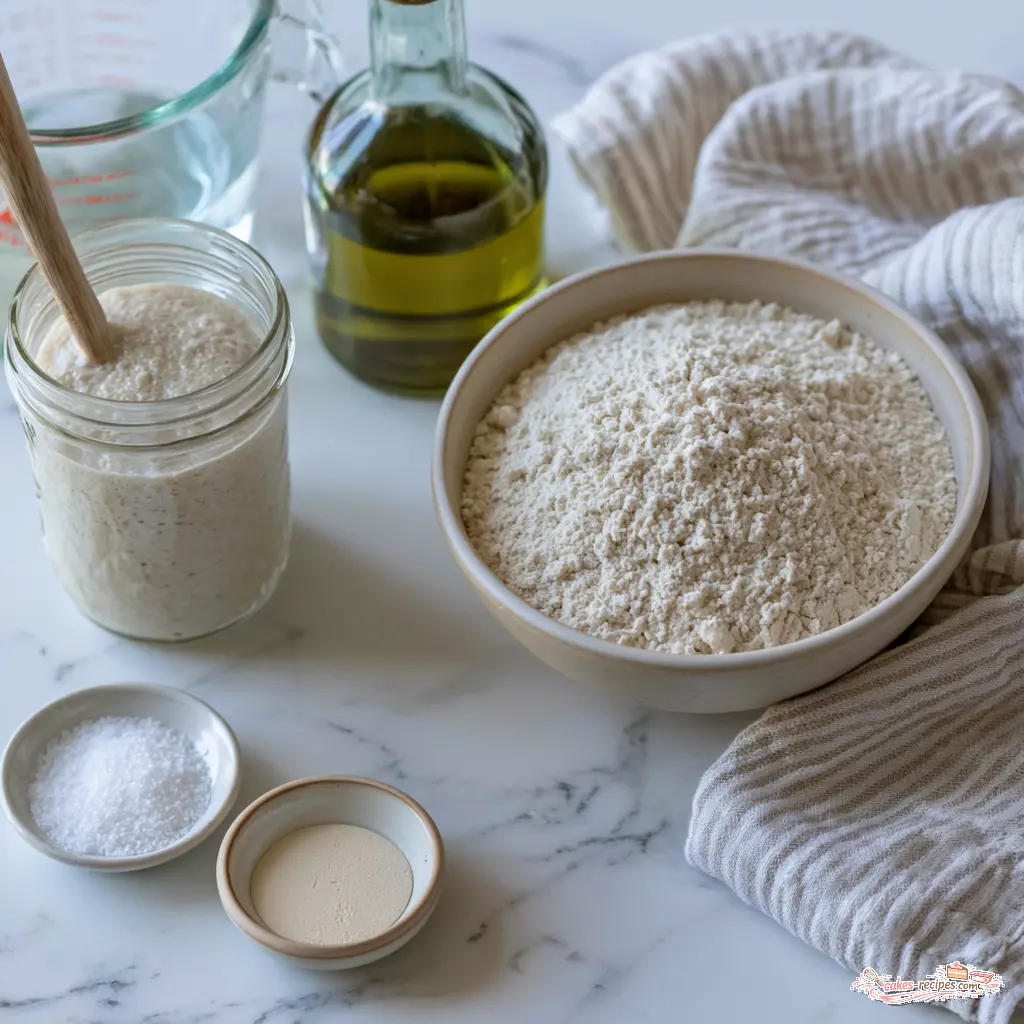
- Bread flour or all-purpose flour. This is the bread flour vs all-purpose flour question, and the short answer is: bread flour has more protein, which means better gluten development and a lighter, airier crumb. All-purpose makes a slightly softer, more tender loaf. Both work great here. Use what you’ve got.
- Fine sea salt. Don’t skip it and don’t reduce it. Salt strengthens the gluten network and keeps fermentation in check. Without it, the bread tastes flat and the crumb turns slack.
- Instant yeast. Your insurance policy. One teaspoon guarantees a reliable rise on a predictable timeline.
- Sourdough discard. Unfed, stirred down, at room temperature. Older discard, the stuff that’s been parked in the fridge for a week or two, actually delivers more of that tangy flavor. That’s a feature, not a bug.
- Warm water. The target is 105°F to 110°F. Warm enough to wake the yeast, cool enough not to kill it. If your tap runs hot, use a thermometer or test it on your wrist.
- California extra-virgin olive oil. Just a drizzle to coat the dough so it doesn’t dry out during the rise. A good bottle from the farmers market makes this feel fancy, but any olive oil you have works.
If you’re using active dry yeast instead of instant, dissolve it in the warm water with half a teaspoon of sugar and let it stand for 5 to 10 minutes until it’s foamy. Then proceed with the recipe. That’s the classic active dry yeast discard recipe trick, and it works every time.
One more note: a kitchen scale is worth considering for the flour. Measuring cups are fine, but weight is consistency, and consistency is the difference between good bread and great bread.
How to Make Easy Sourdough Discard Bread
This is a no-knead sourdough discard bread, so the technique is forgiving. Four stages, fifteen minutes of active work, and a whole lot of letting the dough do its thing. Each stage builds on the last, so here’s what to look for along the way.
Stage 1: Mix the Dough
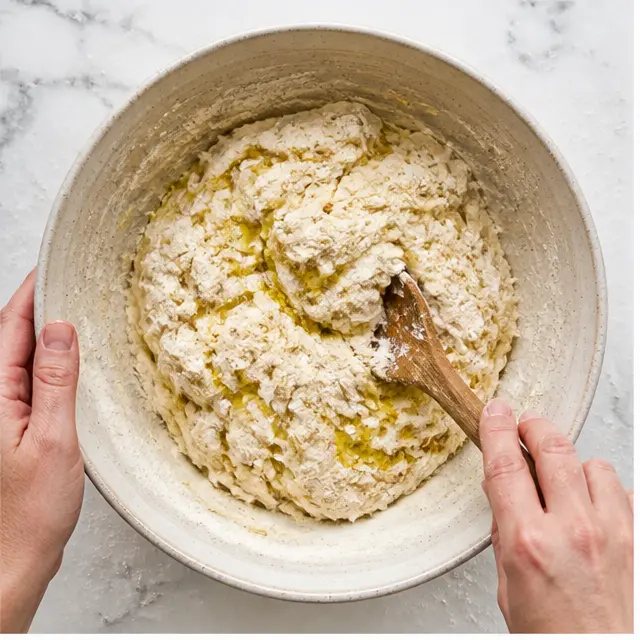
Start by whisking the bread flour, fine sea salt, and instant yeast together in a large bowl. Add the sourdough discard and the warm water. Stir with a wooden spoon until a shaggy dough forms. It won’t look pretty. That’s exactly what we want. Then switch to your hands and bring it together.
Here’s your tactile cue. The dough should feel soft and slightly sticky, like a slightly sticky earlobe. Not wet enough to be a batter, not firm enough to be play dough. If it feels too dry, add a tiny splash of water. If it’s too wet, resist the urge to add flour. This dough is forgiving.
Drizzle the olive oil over the top and turn the dough to coat it evenly. That oil isn’t just flavor. It’s a barrier that keeps the surface from drying out while the dough rises. Cover the bowl with plastic wrap or a clean kitchen towel and set it aside.
Stage 2: The Bulk Rise
Now you wait. Let the dough rise in a warm, draft-free place until doubled in size, which usually takes 1 to 2 hours. If your kitchen runs cool, use the oven with just the light on. That steady warmth works wonders.
In an August kitchen, especially in LA with no air conditioning, check earlier rather than later. Your 90°F room is doing free labor. Warmth accelerates fermentation, so the dough may double in 60 to 75 minutes. Watch for the signs: the dough should look puffy and alive, with visible air bubbles under the surface and strands of gluten when you gently pull the edge. That’s bulk fermentation doing its job.
Don’t let it go past doubled. An over-fermented dough gets wet, sloppy, and won’t hold its shape when you try to form it. Doubled is the sweet spot.
Stage 3: Shape and Score
Lightly flour your work surface and your hands. Gently turn out the dough. It’ll be soft and a little tacky, and that’s normal. Fold the sides toward the center, then flip it seam-side down. Now pull the dough toward you while rotating it, building surface tension. You want a smooth, taut dome on top.
This is the shaping step, and it matters more than you’d think. Surface tension is what helps the loaf hold its structure in the oven and expand upward instead of spreading sideways. A banneton proofing basket is nice to have, but parchment paper works perfectly fine. Don’t overthink the form. A free-form boule is supposed to look a little imperfect.
Place the shaped loaf on a piece of parchment and score the top about 1/4 inch deep with a sharp knife or a bread lame. One confident slash across the center is all you need. That score guides the oven spring, the dramatic expansion in the first minutes of baking, and it’s what gives the finished loaf its beautiful bloom.
Stage 4: Bake in the Dutch Oven
Put the loaf, still on the parchment, into a Dutch oven and cover it with the lid. Let it rise for 30 minutes while the oven preheats to 425°F.
Then bake covered for 40 minutes. Here’s the science: the lid traps the steam released by the dough, and that steam keeps the crust soft and elastic while the crumb expands. That’s how you get oven spring without a professional steam-injected oven. After 40 minutes, remove the lid and bake for 5 to 10 minutes longer, until the crust is deep golden and the internal temperature reaches 200°F.
That moment when you lift the lid and the crust has bloomed into a deep amber shell? Small miracle. Never gets old.
Transfer the bread to a wire rack and let it cool for at least 30 minutes before slicing. I know you want to cut into it immediately. I know the smell is filling your kitchen right now. But the crumb sets as it cools, and slicing too early turns it gummy. Patience is an ingredient.
Quick Tips for the Best Loaf
Over the years, a few things have made the biggest difference in my results. Generally speaking, the same rules apply every time:
- Use warm discard. Let your discard sit at room temperature for a bit before mixing. It blends more evenly and rises more consistently.
- Check your water temperature. Between 105°F and 110°F. Too hot, and you’ve killed the yeast. Too cold, and the rise takes forever.
- Find a warm spot. The oven with the light on, a sunny counter, even the top of the fridge. Consistency matters more than intensity.
- Score with confidence. A shallow, hesitant slash won’t open properly. Go 1/4 inch deep in one motion.
- Let it cool completely. At least 30 minutes. The difference between a good crumb and a great one is patience.
Common Mistakes and How to Fix Them
❌ Over-fermented dough: It becomes wet and sloppy, and the loaf flattens in the oven. Solution: keep the bulk rise between 1 and 2 hours, and check early in a warm kitchen.
❌ Water that’s too hot: It kills the yeast and you get a brick. Solution: use a thermometer, or test the water on your wrist. It should feel like warm bath water.
and the crumb feels weak. Salt isn’t just a flavor enhancer. It tightens the gluten network and keeps fermentation from running away on you. Use the full amount, even if a little voice tells you to cut it. Don’t.❌ Dough too sticky to shape: A wet, slack dough can’t hold its form, and the loaf ends up as a flat disk. Solution: resist the urge to dump in extra flour mid-mix. Instead, let the bulk rise do the work. Gluten develops during fermentation, and a dough that felt hopeless at first often firms up beautifully by the time it’s doubled.
❌ Loaf didn’t rise in the oven: Flat bread usually means the yeast never woke up or the dough over-fermented into exhaustion. Check your water temperature first, then your timeline. If the dough is rising beautifully on the counter, it’ll rise in the oven.
❌ Gummy, dense interior: This is almost always a slicing problem, not a baking problem. The bread is fully baked at 200°F, but a hot interior is still setting off the heat. Cutting early collapses the air bubbles and creates that tacky, doughy crumb. Give it the full 30-minute rest. I’ll say it again: patience is an ingredient.
How to Store Sourdough Discard Bread
You made it. This is the part where the bread sits on your counter looking like a bakery display and your kitchen smells like the best version of itself. But don’t let that gorgeous crust go to waste. Storage matters, and the rules are simpler than you’d think.
For the first day or two, a paper bag at room temperature is your best friend. The paper lets the crust breathe, keeping it crackly instead of softening into a chewy mess. If you wrapped it in plastic immediately, the crust would soften overnight thanks to trapped moisture. That’s not a disaster, but it’s not the experience you’re after.
If you’re planning to work through the loaf over a week, transfer it to an airtight container at room temperature. It’ll stay fresh for up to a week, though the crust softens a little. For longer-term storage, slice the bread and freeze the slices in a zip-top bag for up to three months. Frozen slices pop directly into the toaster from frozen. No thawing required. That’s the breakfast hack I use on busy mornings when I need toast and coffee and very little else.
How to Reheat Sourdough Discard Bread
The toaster is the easiest route, but it’s not the only one. For a whole loaf or thick slices, wrap the bread in foil and warm it in a 350°F oven for 10 to 15 minutes. That restores the crust’s crackle and warms the inside without drying it out. If you only have a minute, the microwave works in a pinch, but expect a softer, steamier texture. The toaster or oven is worth those few extra minutes.
Variations and Add-Ins
Once you’ve made this easy sourdough discard bread plain, you’ll start eyeing your pantry differently. This dough is a blank canvas, and it loves company. Here are my favorite variations with exact amounts, so you’re not guessing:
- Sharp cheddar loaf: Fold 1 cup (about 4 ounces) of shredded sharp cheddar into the dough right before the bulk rise. The cheese melts into pockets of savory richness, and a sprinkle of extra cheddar on top before baking gives a bronzed, crackly crown.
- Cinnamon-raisin swirl: Add 1 teaspoon ground cinnamon and 3/4 cup raisins to the flour before mixing. For a deeper swirl, roll the dough out after shaping, sprinkle with cinnamon sugar, and roll it back up.
- Kalamata olive loaf: Fold 3/4 cup chopped pitted Kalamata olives into the dough before the rise. The briny bits cut through the sourdough tang beautifully. Serve it with olive oil for dipping.
- Golden honey loaf: Swap 2 tablespoons of the warm water for 2 tablespoons of honey. The honey adds a subtle sweetness and helps the crust caramelize to a deeper amber.
- Herb and seed loaf: Fold 2 tablespoons of fresh chopped rosemary or thyme and 3 tablespoons of toasted sesame seeds or sunflower seeds into the dough. Brush the top with olive oil and sprinkle with flaky salt before baking.
- Mini loaves: If you have mini Dutch ovens, divide the dough into four equal pieces, shape each into a small boule, and bake for 25 to 30 minutes covered, then 5 minutes uncovered. Cute, giftable, and dangerously easy to eat in one sitting.
Substitutions That Actually Work
Here’s the thing about substitutions: sometimes they work beautifully, and sometimes they turn your loaf into a doorstop. Let me save you the trial and error.
Active sourdough starter instead of discard: Yes, absolutely. Use the same amount of active starter in place of the discard. Your rise will be quicker and more vigorous. Watch the bulk rise, because it may finish in closer to 60 to 75 minutes than the usual 2 hours.
All-purpose flour instead of bread flour: Works perfectly, with one trade-off. All-purpose has less protein, so the crumb is a little softer and the rise a touch less dramatic. If you’re using all-purpose, you may need just a tablespoon less water, since lower-protein flour absorbs less liquid. The loaf still comes out excellent.
Whole wheat flour: You can swap up to half the flour for whole wheat, but be prepared to add one or two extra tablespoons of water. Whole wheat flour is thirsty, and a dry dough makes a dense loaf. Start with the extra water and add more if needed.
No Dutch oven? Use a 5.5-quart cast iron skillet as the base, then invert an identical skillet on top to create the same steam trap. If you don’t have two skillets, a heavy oven-safe pot with a lid is perfect, as long as it fits the loaf. You can also bake on a rimmed baking sheet with a pan of boiling water on the rack below for steam. The crust won’t be quite as dramatic, but it’ll still be a good loaf.
Can I Bake This in a Loaf Pan?
You can, and it works beautifully. Shape the dough into a log, place it seam-side down in a lightly oiled 9×5-inch loaf pan, and let it rise for 30 minutes while the oven preheats. Bake at 425°F, but skip the Dutch oven step. A loaf pan bakes in about 35 to 40 minutes total. The crust will be softer, and the crumb will be perfect for sandwiches. It’s the sandwich-style version, and it’s a legitimate choice if you don’t own a Dutch oven.
Make-Ahead Option
Life happens. Sometimes you want the dough ready before you are. Here’s how to make this easy sourdough discard bread on your schedule.
After shaping in Stage 3, instead of letting the loaf rise for 30 minutes, cover the shaped dough loosely with plastic wrap and slide it into the fridge. The cold slows everything to a crawl, so you can leave it for 12 to 24 hours. This is a classic cold-proof, and it does two wonderful things: it develops deeper sourdough flavor, and it means you can shape the night before and bake first thing in the morning.
When you’re ready to bake, pull the loaf from the fridge while the oven preheats to 425°F. Let it sit at room temperature for 15 to 30 minutes, then score and bake. The bake time stays the same: 40 minutes covered, 5 to 10 minutes uncovered, until the internal temperature hits 200°F. If you’ve ever wanted fresh bread for breakfast without waking up at dawn, this is your answer.
The Science: Why Discard Plus Instant Yeast Works
Here’s the part I find genuinely fascinating. Traditional sourdough bread relies entirely on wild yeast to leaven the loaf. That’s why the timeline is long, and that’s why the starter needs to be active and strong. Sourdough discard, by definition, is not active. It’s the leftover unfed portion of your starter, and it doesn’t have the vigor to lift a loaf on its own.
So we add a spoonful of commercial yeast. The commercial yeast is the muscle. It ferments quickly, produces abundant gas, and gives the dough its reliable rise. The discard is the flavor. It carries the accumulated lactic acid and fermentation byproducts from its time in the fridge, and those compounds are what create sourdough’s trademark tang. Commercial yeast alone makes bread that tastes like plain white bread. Discard alone makes a loaf that never rises. Together, they give you a crusty, tangy, reliable loaf in a fraction of the time traditional sourdough demands. That’s not cheating. That’s working smarter.
One more note on temperature: the discard’s flavor compounds are sensitive. Water above 110°F can kill both the commercial yeast and the wild bacteria in your discard, so keep that warm water in the 105 to 110°F range. Older discard, the kind that’s been waiting in the fridge for a week or two, has accumulated more fermentation byproducts, which is exactly why it makes a tangier loaf. It’s not a bug. It’s aging like a fine cheese.
Frequently Asked Questions
Can I use cold discard straight from the fridge?
Yes. Cold discard works perfectly well. The rise will be a little slower, since the cold liquid lowers the dough temperature. For the most consistent results, let the discard sit at room temperature for an hour before mixing. It blends more smoothly, and the dough comes together faster. But if you’re in a hurry, cold discard gets the job done. Just expect a slightly longer bulk rise.
Can I double this recipe?
Technically, yes. The ingredients double easily. But consider your mixer. A standard 4.5- or 5-quart stand mixer will struggle with a double batch, so either mix by hand or use a larger mixer, like the 7-quart Professional models. If you double the recipe, bake the loaves one at a time, not both at once in the same Dutch oven. Keep the second loaf shaped and covered in the fridge while the first one bakes.
Why did my loaf not rise?
There are three usual suspects: water too hot, yeast too old, or a kitchen too cold. Check your water temperature with a thermometer every time, verify your instant yeast is within its expiration date, and find a genuinely warm spot for the rise. The oven with the light on is my go-to. Warmth is the difference between a 60-minute rise and a 3-hour wait that never finishes.
How do I know when the bread is fully baked?
The crust should be deep golden brown, and the internal temperature should read 200°F on an instant-read thermometer in the center of the loaf. If you don’t have a thermometer, tap the bottom of the bread. It should sound hollow. Both indicators are reliable, and both beat cutting into a gummy center.
Can I add seeds and herbs to the dough?
Absolutely. Fold up to 3 tablespoons of seeds and 2 tablespoons of fresh chopped herbs into the dough before the bulk rise. If you’re using cheese, add it at the same time. The dough can handle a fair amount of mix-ins without losing its structure.
How does discard age affect the flavor?
Fresh discard, less than a day old, makes a mild, nearly neutral loaf. Discard that’s been in the fridge for a week or more is significantly tangier, because the bacteria keep producing lactic and acetic acids even at cold temperatures. If you want a gentle sourdough flavor, use fresh discard. If you want a proper tang, raid the back of your fridge. There’s a reason the old jar in the back tastes better than the fresh stuff.
Can I use this dough for sandwich bread?
Yes, and this might be the most practical answer in this whole post. Bake it in the loaf pan as described above, and you’ll have a soft, chewy sandwich loaf that holds up to mayo and tomatoes without falling apart. The closed crumb makes it a legitimate sandwich bread, not just a crusty artisan loaf.
Expert Notes & Data Insights
Here’s what I know after dozens of test bakes and hundreds of reader reports: this easy sourdough discard bread works because it respects the discard’s limitations instead of pretending they don’t exist. The instant yeast handles the heavy lifting. The discard brings the personality. And the Dutch oven handles the crust. Every element is doing the job it’s best at, and that’s why the failure rate is so low.
The data backs this up. This recipe currently sits at 4.55 stars from home bakers, and the feedback clusters around the same themes: the rise is reliable, the crust is crackly, and the tang is present but not overwhelming. The most common reader adjustments are simple ones, like letting the discard warm up a little longer or adding extra scoring slashes. No one is writing in to say the flavor is flat or the loaf came out like a brick. That tells me the recipe is forgiving enough for weeknight bakes but produces a loaf you’d happily serve to guests.
The full timeline, for reference: 15 minutes of hands-on mixing, 1 to 2 hours of bulk rise, 30 minutes of shaped rise, and 45 to 50 minutes in the oven. Total time is right around 3 hours, and almost all of it is waiting. For a proper sourdough loaf, you’d be into this process for 24 to 48 hours and several feedings. That’s a beautiful thing when you have the time and the starter strength. But on a Tuesday, after work, with a jar of discard staring at you from the fridge? This is the recipe that gets bread on your table.
One last thing. The first loaf I ever made was a hockey puck sold to my family as rustic. My sister was kind, but the bread went to the compost bin, and the compost bin is probably still holding a grudge. The reason I kept going was the occasional beautiful loaf, the one that blooms in the oven and crackles as it cools. The reason I simplified this recipe was to make that beautiful loaf the default. Your first attempt with this recipe should be a golden, crackly, tangy success. And your second attempt will be even better.
That jar of discard in your fridge isn’t a burden. It’s dinner, with a little patience and a lot of butter.