
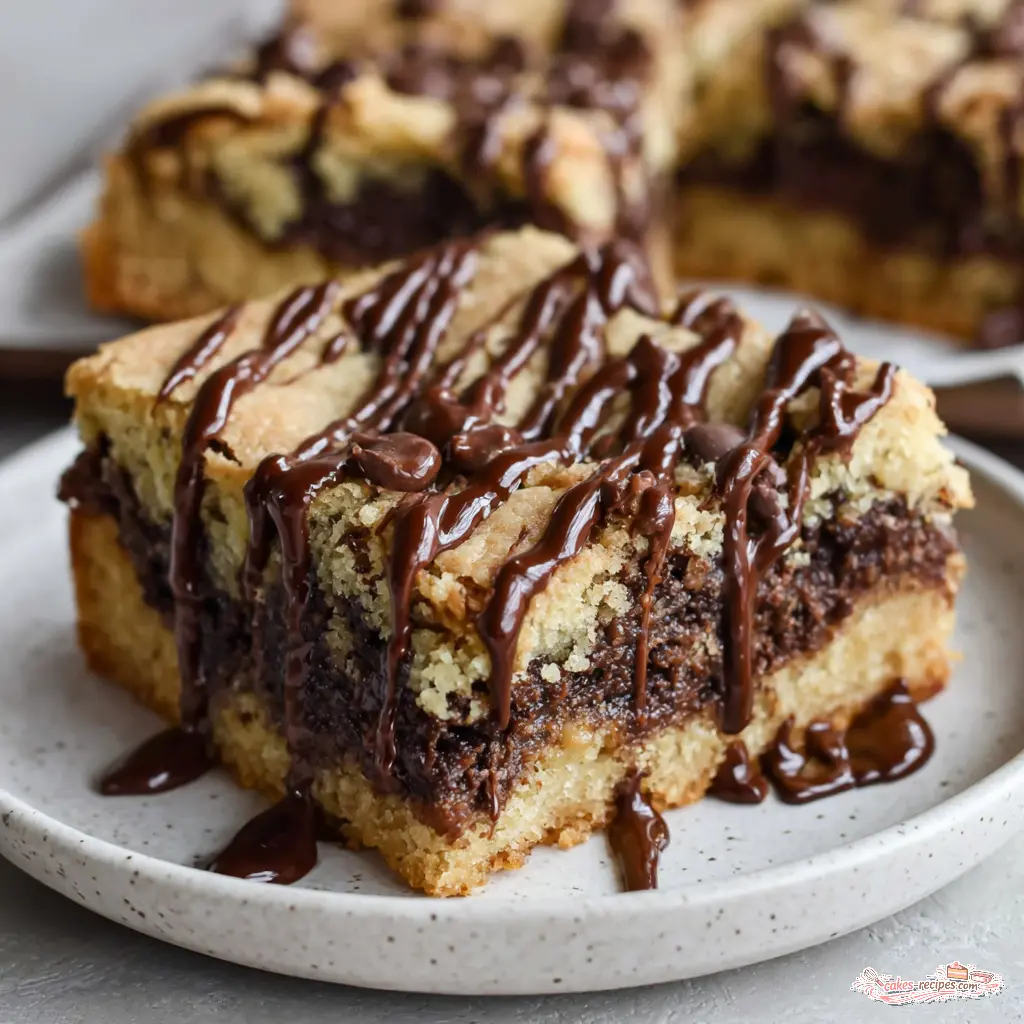
Ultimate Moose Tracks Cookie Bars
Ingredients
Method
- Preheat your oven to 350°F (175°C). Lightly grease a 9x13-inch baking pan with cooking spray or line it with parchment paper for easy removal.
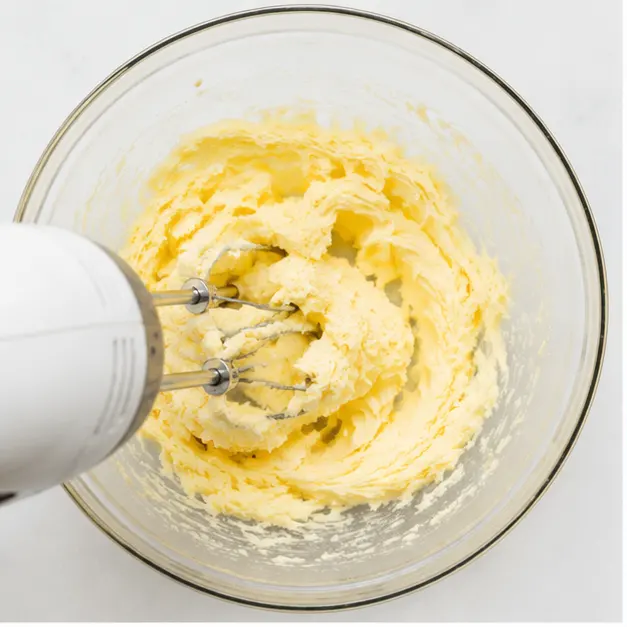
- In a large mixing bowl, use an electric mixer to cream the softened butter, brown sugar, and granulated sugar until the mixture is light and fluffy, about 2-3 minutes.
- Beat in the eggs one at a time, then mix in the vanilla extract until well combined.
- In a separate bowl, whisk together the flour, baking soda, and salt. Gradually add the dry ingredients to the wet mixture, mixing on low speed just until no streaks of flour remain.
- Fold in the chocolate chips, peanut butter chips, and mini marshmallows using a spatula. The dough will be thick.
- Spread the cookie dough evenly into the prepared pan. Drizzle the chocolate syrup over the top in a zigzag pattern.
- Bake for 25-30 minutes, or until the edges are golden brown and the center is just set. Let the bars cool in the pan on a wire rack for at least 10 minutes before cutting into squares.
- Transfer the bars to a wire rack to cool completely, then serve warm or at room temperature.
Nutrition
Notes
Tried this recipe?
Let us know how it was!What Are Moose Tracks Cookie Bars?
You know that moment when you need a dessert that won’t melt and everyone loves? That’s exactly where these moose tracks cookie bars come in. They capture everything you love about that iconic ice cream flavor chocolate, peanut butter, and marshmallow but in a sliceable, portable bar form.
I first made these for a summer potluck when I was tired of watching ice cream melt into a puddle before anyone got a second scoop. My husband suggested I try turning our favorite ice cream flavor into something sturdier. Honestly, I wasn’t sure it would work. But the first batch disappeared in about ten minutes. People kept asking for the recipe.
What I love about these bars is that they’re not fussy. You don’t need any special equipment, and the ingredients are things you probably already have in your pantry. The marshmallow gets gooey, the chocolate gets melty, and the peanut butter chips add that salty crunch that makes moose tracks so addictive.
Why You’ll Love This Recipe
Let’s be real for a second. Summer in Los Angeles means my kitchen turns into a sauna the moment I turn on the oven. But these bars are worth it. Here’s why this recipe works so well:
- No melting worries. Unlike actual ice cream, these bars hold their shape at room temperature. Perfect for picnics and potlucks.
- Make-ahead friendly. You can prep the dough up to 24 hours ahead and bake when you’re ready. Or bake them fully and store for days.
- Crowd pleaser. Kids love them. Adults love them. I’ve yet to meet someone who doesn’t go back for a second bar.
- No fancy techniques. If you can cream butter and sugar, you can make these. Promise.
I remember the first time I brought these to a neighborhood barbecue. My friend Sarah, who’s notoriously picky about desserts, took one bite and said, “These taste like my childhood.” That’s exactly the reaction I was hoping for.
What Flavor Is Moose Tracks?
If you’ve never had moose tracks ice cream, let me paint you a picture. It’s a vanilla base loaded with chocolate chunks, peanut butter cups, and a fudge ripple throughout. The combination is pure magic creamy, crunchy, chocolatey, and salty all at once.
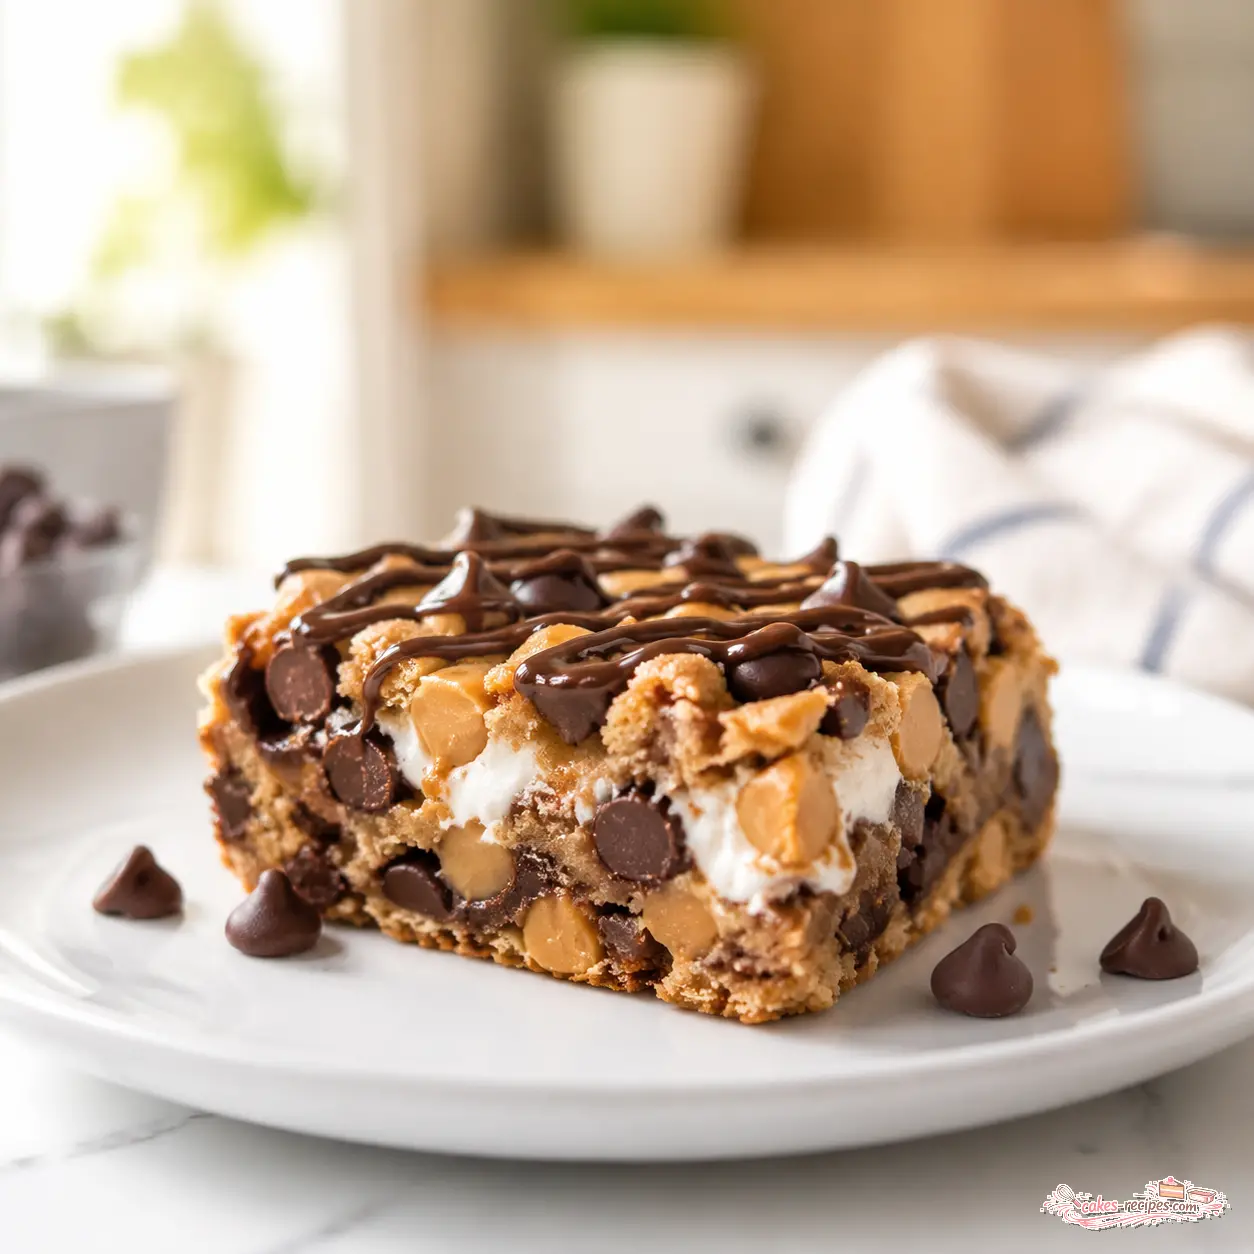
These moose tracks cookie bars recreate that same flavor profile. You get the sweetness of the cookie base, the richness of semisweet chocolate chips, the saltiness of peanut butter chips, and little pockets of gooey marshmallow throughout. Then there’s that chocolate syrup drizzle on top that ties everything together.
What I’ve found is that the key is balance. You don’t want any one flavor to dominate. The peanut butter chips should be noticeable but not overwhelming. The marshmallow should add texture without making things too sweet. And the chocolate syrup? That’s the finishing touch that makes these bars feel special.
Ingredient Notes
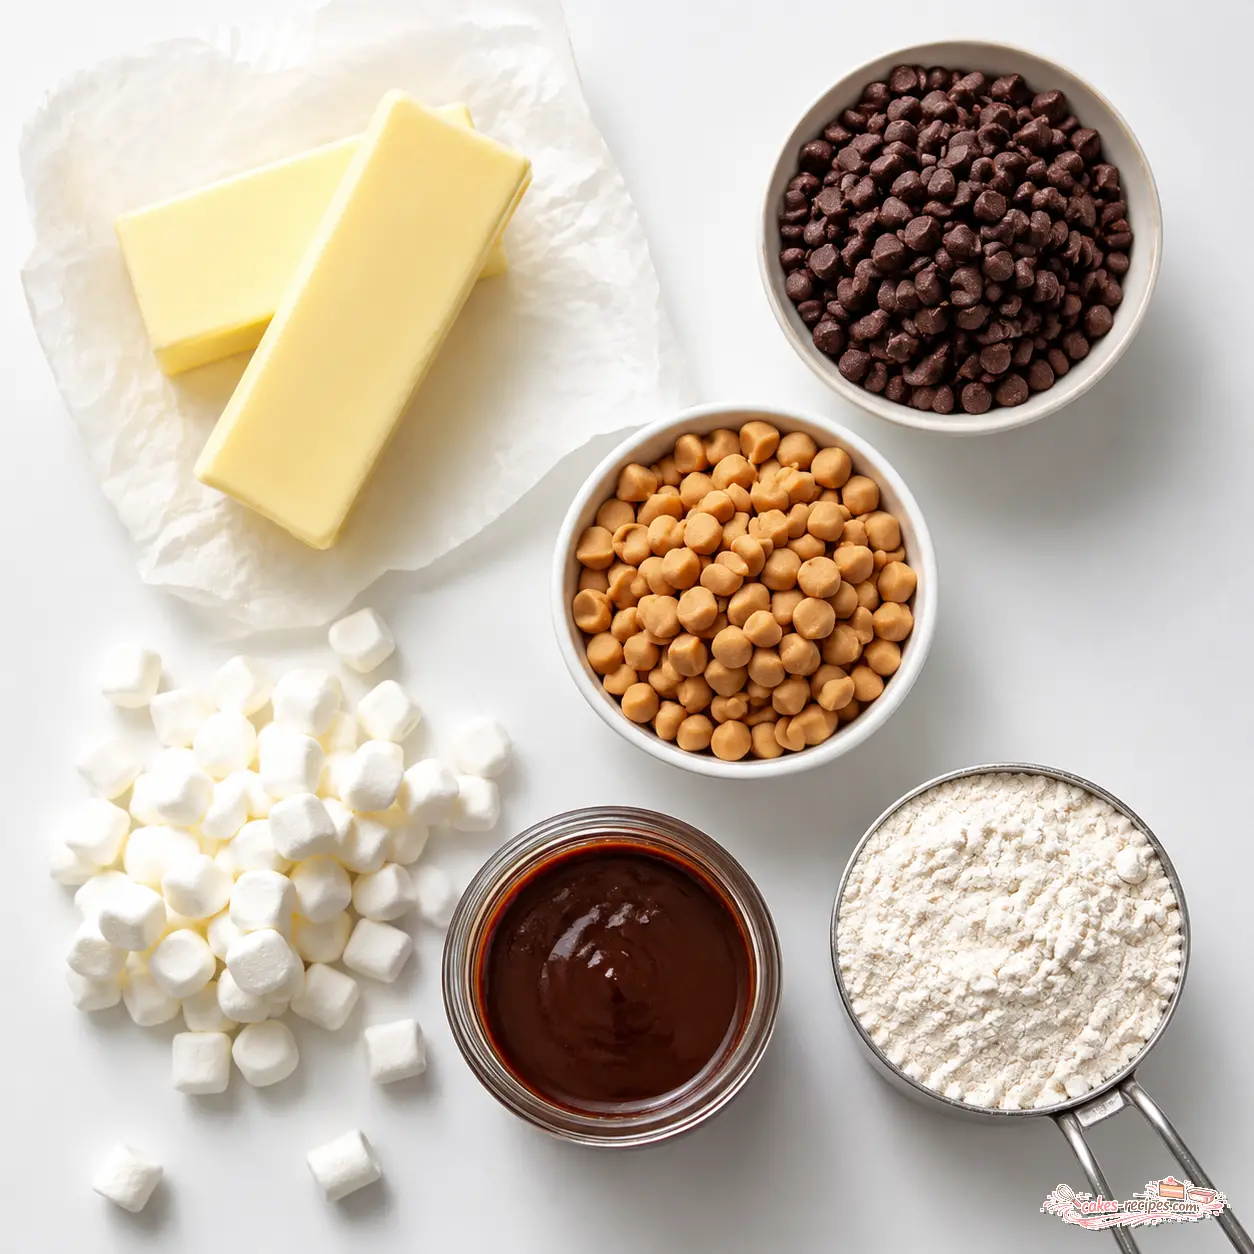
Let’s talk about what goes into these bars. The ingredient list is straightforward, but a few things make a difference. Take your time with these notes, because they’ll help you get the best results.
Butter. Make sure it’s softened, not melted. I usually leave a stick out on the counter for about an hour before I start. If you’re in a hurry, you can microwave it in 10-second bursts. Just don’t melt it completely. Melted butter will make your bars spread too much and turn out greasy.
Brown sugar. I use light brown sugar here because it adds moisture and a subtle caramel flavor. Pack it firmly into your measuring cup for accuracy. Dark brown sugar would work too, but it’ll give a deeper molasses flavor that might overpower the other ingredients.
Peanut butter chips. You can find these in the baking aisle at most grocery stores. I usually grab them at Ralphs or Vons. If you can’t find them, you can chop up peanut butter cups instead. Just be aware that they’ll melt differently.
Marshmallows. Mini marshmallows work best here. They distribute evenly through the dough and create those little pockets of gooeyness. Regular marshmallows cut into pieces would work, but it’s more work than I’d want to do.
Chocolate syrup. Store-bought is totally fine. I use Hershey’s because that’s what I grew up with. But if you want to make your own, go for it. Just make sure it’s thick enough to drizzle without running off the bars.
Equipment Needed
You don’t need much for this recipe. Here’s what I use every time:
- 9×13-inch baking pan. This is the perfect size for these bars. An 8×10 would work too, but your bars will be thicker and可能需要 a few extra minutes of baking time.
- Electric mixer. Hand mixer or stand mixer, either works. I prefer my hand mixer because it’s easier to clean.
- Large mixing bowls. You’ll need one for the wet ingredients and one for the dry ingredients.
- Spatula. A rubber spatula is perfect for folding in the chips and marshmallows.
- Parchment paper. Not strictly necessary, but it makes lifting the bars out of the pan so much easier. I always line my pan with parchment, leaving a little overhang on the sides.
How to Make Moose Tracks Cookie Bars
Alright, let’s get into the actual process. I’ll walk you through the four main stages. Take your time with each one, and you’ll end up with perfect bars.
Stage 1: Cream the butter and sugars. This is where it all starts. In a large bowl, beat the softened butter, brown sugar, and granulated sugar together until the mixture is light and fluffy. This takes about 2-3 minutes with an electric mixer. You’re looking for a pale, airy texture. The sugar should be mostly dissolved into the butter. Be patient with it. This step creates the structure for your bars.
Then beat in the eggs one at a time. Make sure each egg is fully incorporated before adding the next. Finally, mix in the vanilla extract. The mixture will look smooth and glossy at this point.
Stage 2: Add the dry ingredients. In a separate bowl, whisk together the flour, baking soda, and salt. This ensures the leavening agent is evenly distributed. Gradually add the dry ingredients to the wet mixture, mixing on low speed. Stop as soon as you don’t see any more streaks of flour. Overmixing will make your bars tough, and that’s not what we want.
The dough will be thick at this point. That’s normal. It should hold together when you press it but still be slightly crumbly. If it seems too dry, don’t panic. The moisture from the butter and eggs will hydrate the flour as the dough rests.
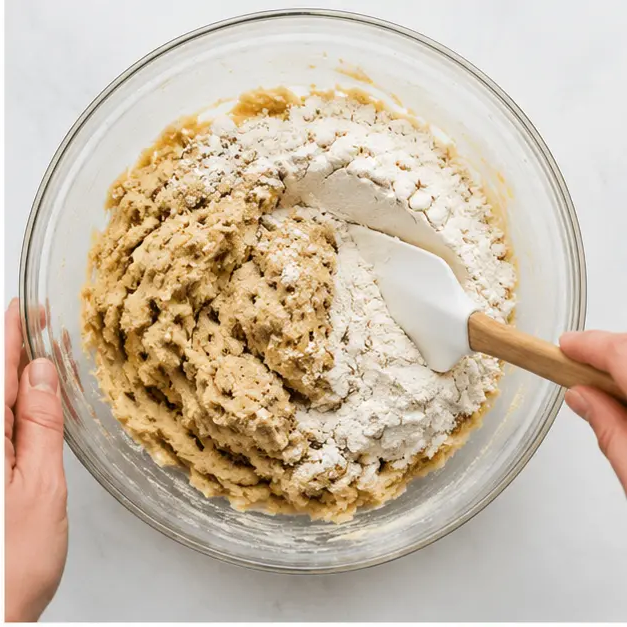
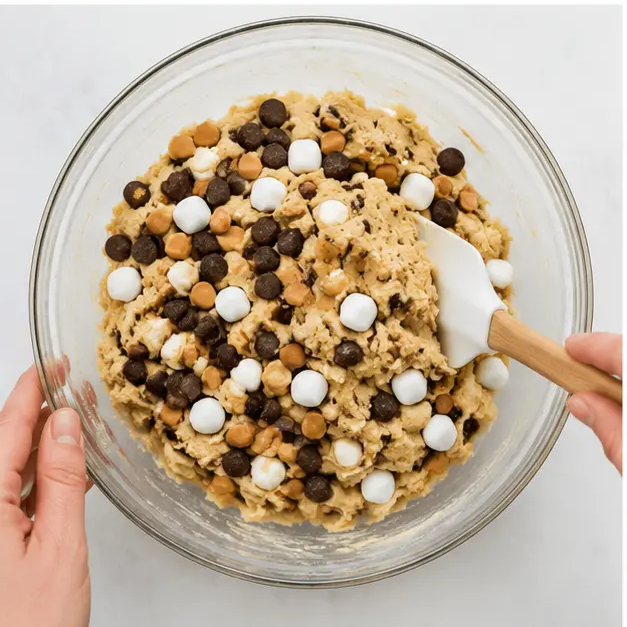
Stage 3: Fold in the mix-ins. This is the fun part. Using a spatula, fold in the chocolate chips, peanut butter chips, and mini marshmallows. I like to reserve a handful of each to sprinkle on top before baking, but that’s optional. The dough will be thick and chunky, studded with colorful chips and marshmallows.
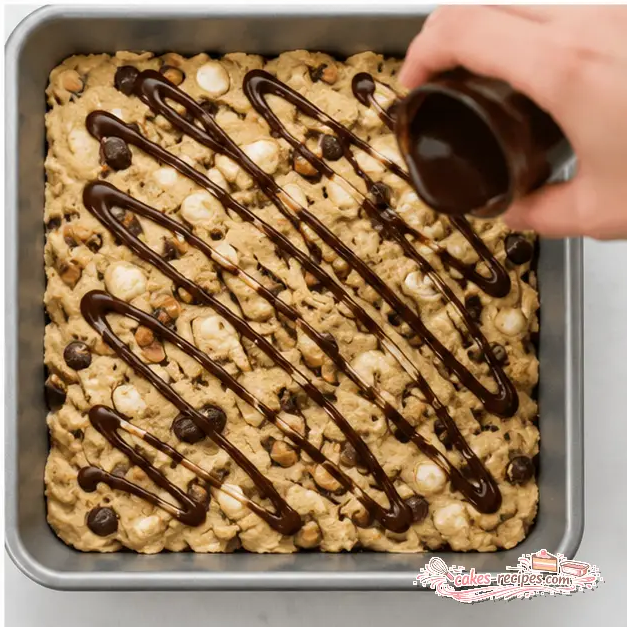
Spread the dough evenly into your prepared pan. I use a spatula to press it into the corners and make sure it’s level. Then drizzle the chocolate syrup over the top in a zigzag pattern. Don’t be shy with it. The syrup will sink into the dough slightly as it bakes, creating those fudge-like pockets.
Stage 4: Bake and cool. Bake at 350°F for 25-30 minutes. The edges should be golden brown and the center should be just set. Here’s the tricky part it’s better to underbake slightly than overbake. The bars will continue to set as they cool. A toothpick inserted in the center should come out with a few moist crumbs, not wet batter.
Let the bars cool in the pan on a wire rack for at least 10 minutes before cutting. If you try to cut them too soon, they’ll fall apart. I know it’s hard to wait, but trust me, those bars need their beauty sleep.
Tips for Perfect Cookie Bars
Over the years, I’ve learned a few things that make these bars turn out perfectly every time. Here are my best tips:
- Soften your butter. Cold butter won’t cream properly with the sugar. Leave it out for an hour, or microwave in 10-second bursts until it’s soft but not melted.
- Chill before cutting. After the bars have cooled, pop them in the fridge for about 20 minutes before slicing. This firms up the chocolate and makes for cleaner cuts.
- Use an 8×10 pan if you want thicker bars. The 9×13 is standard, but a slightly smaller pan will give you taller, more substantial bars.
- Don’t overmix the dough. Mix just until the flour disappears. Overworking the dough develops gluten, which makes the bars tough instead of tender.
- Check for doneness early. Ovens vary. Start checking at 25 minutes. The edges should be golden, and the center should look set but still soft.
One thing I always tell people: don’t stress about perfection. These bars are forgiving. Even if they’re a little underbaked or overbaked, they’ll still taste amazing. That’s the beauty of a recipe like this.
Variations to Try
Once you’ve mastered the basic recipe, feel free to experiment. Here are some variations I’ve tried and loved:
- Add chopped nuts. Walnuts or pecans add a nice crunch. Fold in about 1/2 cup with the chips.
- Swap the chocolate chips. Use milk chocolate for a sweeter bar, or dark chocolate for a richer flavor. White chocolate chips work too, but they’re very sweet.
- Add sprinkles. For a funfetti vibe, fold in 1/4 cup of rainbow sprinkles. Kids love this version.
- Make it a 7-layer bar. Add a layer of graham cracker crumbs on the bottom of the pan before adding the dough. Then top with coconut flakes and chopped nuts before baking.
- Use caramel syrup instead of chocolate. Drizzle caramel over the top for a different flavor profile. It pairs beautifully with the peanut butter chips.
My personal favorite variation is adding chopped Reese’s cups. I chop up about 1/2 cup and fold them in with the other mix-ins. It takes the moose tracks flavor to the next level.
How to Store and Freeze
These bars store beautifully, which makes them perfect for meal prep or making ahead for parties.
Room temperature: Store in an airtight container for up to 3 days. If your kitchen is warm, I’d recommend refrigerating them instead. The chocolate can get a little soft otherwise.
Refrigerator: Store in an airtight container for up to 5 days. The bars will firm up in the fridge, which actually makes them easier to slice. Let them sit at room temperature for about 15 minutes before serving if you want them softer.
Freezer: These freeze beautifully. Wrap the whole slab in plastic wrap, then in foil, or slice them individually and layer them in a freezer-safe container with wax paper between each layer. They’ll keep for up to 3 months. To thaw, let them sit in the fridge overnight or at room temperature for an hour or two.
Frequently Asked Questions
I hope you love these moose tracks cookie bars as much as I do. They’ve become my go-to dessert for summer parties, potlucks, and any time I need a crowd-pleaser that doesn’t require hours in the kitchen. If you make them, I’d love to hear how they turn out. Tag me on Pinterest and let me know what you think.
Source: Nutritional Information
How long do Moose Tracks cookie bars last?
These bars stay fresh for up to 5 days when stored in an airtight container in the fridge. At room temperature, they’ll keep for about 3 days. I usually refrigerate mine because the texture stays nicer that way. Just bring them to room temperature before serving for the best flavor.
Can I freeze this recipe?
Absolutely. These moose tracks cookie bars freeze beautifully for up to 3 months. Wrap the whole slab in plastic wrap and then foil, or slice them individually and layer with wax paper in a freezer-safe container. Thaw in the fridge overnight or at room temperature for an hour or two before serving.
Where can I find peanut butter chips?
Peanut butter chips are usually in the baking aisle at most grocery stores. I find them regularly at Ralphs, Vons, and Target. If you can’t find them, you can substitute chopped peanut butter cups or even butterscotch chips. The flavor will be slightly different, but still delicious.
Can I use gluten-free flour?
I haven’t tested this recipe with gluten-free flour yet, but I’d recommend using a gluten-free flour blend that contains xanthan gum. This will help hold the bars together and prevent them from becoming crumbly. The texture might be slightly different, but it should work.
What’s in Moose Tracks Ice Cream?
Moose Tracks ice cream is a vanilla base loaded with chocolate chunks, peanut butter cups, and a fudge ripple. It’s that combination of creamy, crunchy, and chocolatey that makes it so popular. These cookie bars capture that same flavor profile in a portable, sliceable form.
How do you store Moose Tracks cookies?
Store these bars in an airtight container in the fridge for up to 5 days. The cool temperature helps them hold their shape and keeps the chocolate firm. If you prefer a softer texture, let them sit at room temperature for about 15 minutes before serving.















5 Responses
I made these for a potluck last weekend and they disappeared so fast I barely got one! The texture was perfectly chewy and the marshmallows got wonderfully gooey. I’ll definitely be making these again for our next camping trip—so much easier than dealing with ice cream.
Good recipe overall, but I found the bars a bit too sweet for my taste. I might cut back on the brown sugar next time or use dark chocolate chips instead of milk chocolate. Anyone else tried that?
These were a huge hit at our family reunion! I added a few extra marshmallows on top before baking and they turned into these amazing golden puffs. The peanut butter and chocolate combo is just perfect. Thanks for another winner, Nathan!
I’m planning to bring these to a bake sale next week. Can I substitute the peanut butter chips with something else? My son has a nut allergy, and I’m worried about cross-contamination even with safe brands. Would white chocolate chips work?
Hi Emily, great question! Yes, white chocolate chips or even butterscotch chips would work beautifully as a substitute. Just keep in mind the sweetness level might shift a bit. For nut-free baking, always double-check your chocolate chip labels too. Hope the bake sale goes well!