
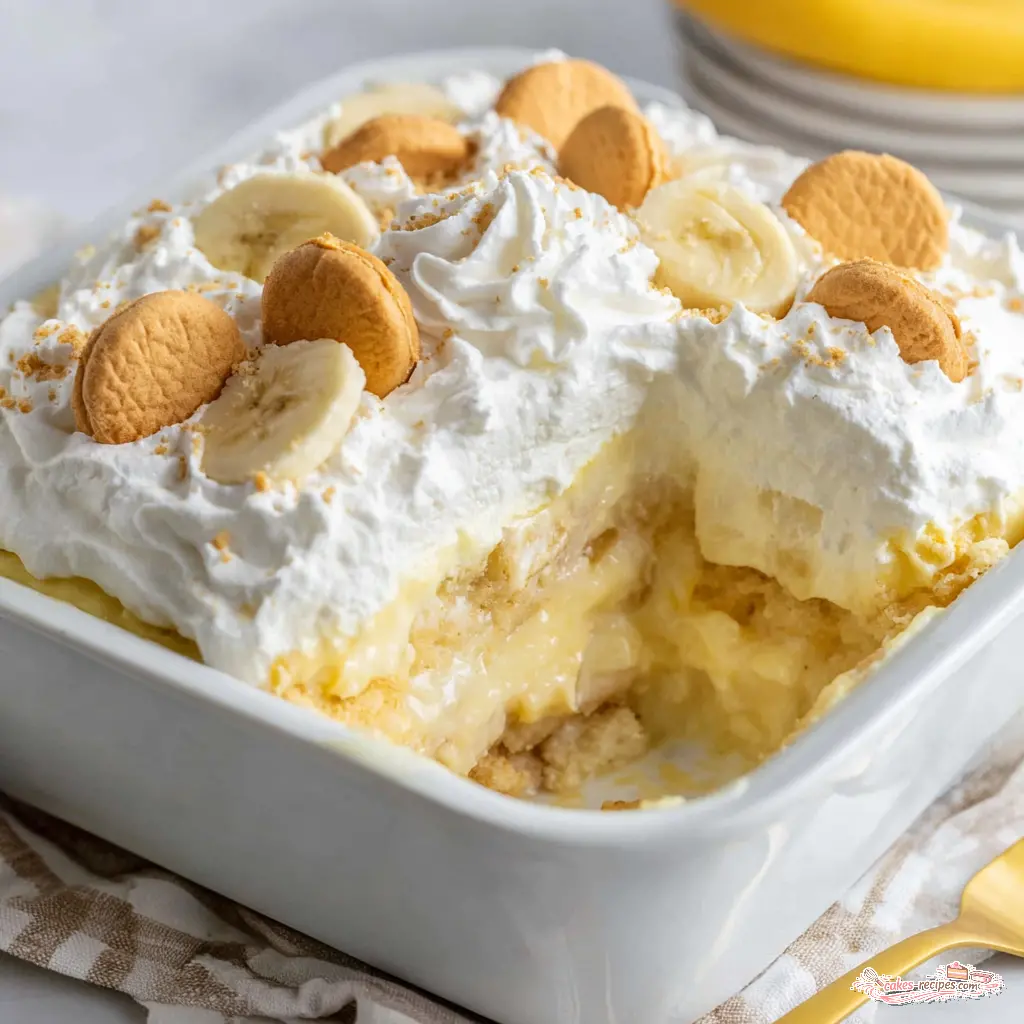
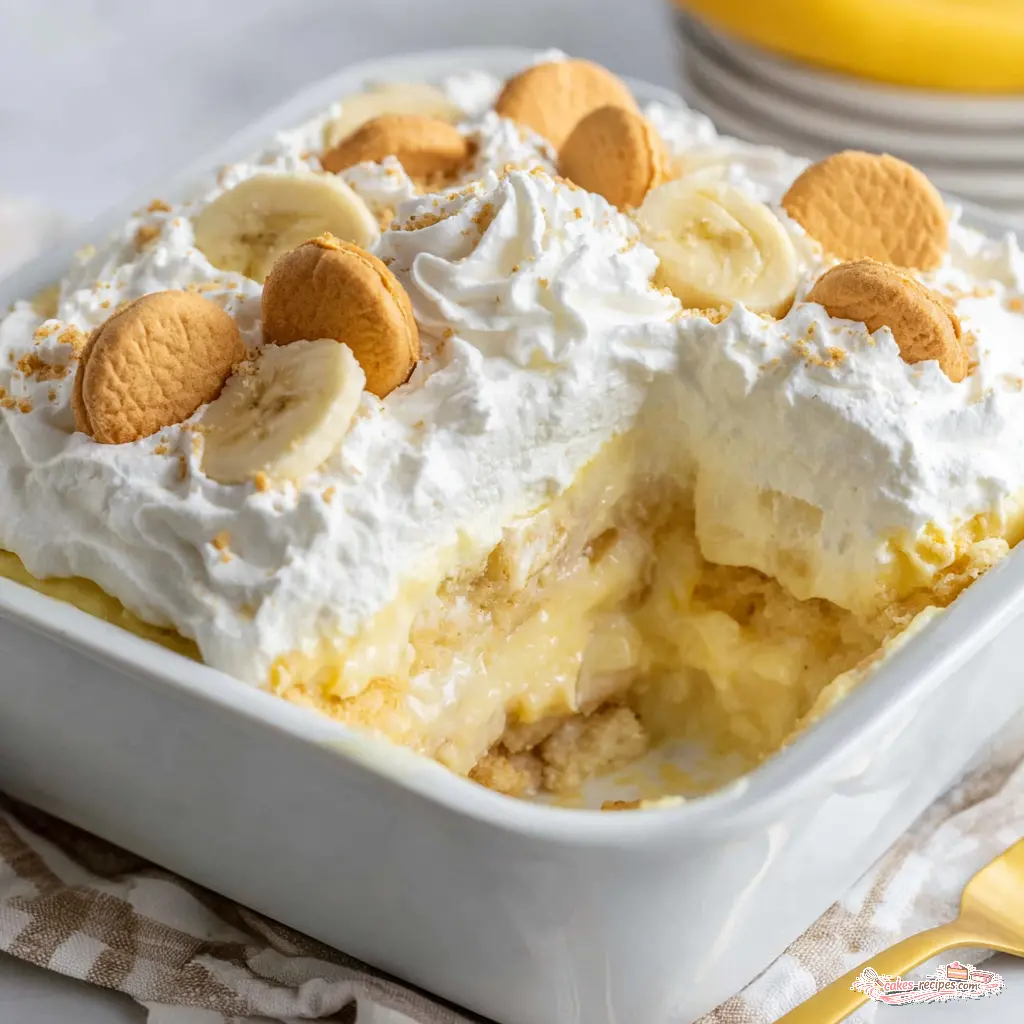
Easy Banana Dump Cake with Pudding
Ingredients
Method
- Preheat your oven to 350°F. Lightly coat a 9x13-inch baking pan with nonstick spray and set aside.
- In a large bowl, combine the yellow cake mix with the water, vegetable oil, and eggs as directed on the box. Whisk by hand for about 1 minute until smooth and no lumps remain.
- Pour the cake batter into the prepared pan and bake for 30 minutes, or until a toothpick inserted in the center comes out clean.
- While the cake is still warm, use the handle of a wooden spoon to poke holes all over the cake. Let it cool slightly on the counter.
- In another large bowl, whisk the instant banana pudding mix with the cold milk for about 2 minutes until combined. Do not let it set fully; it should be pourable.
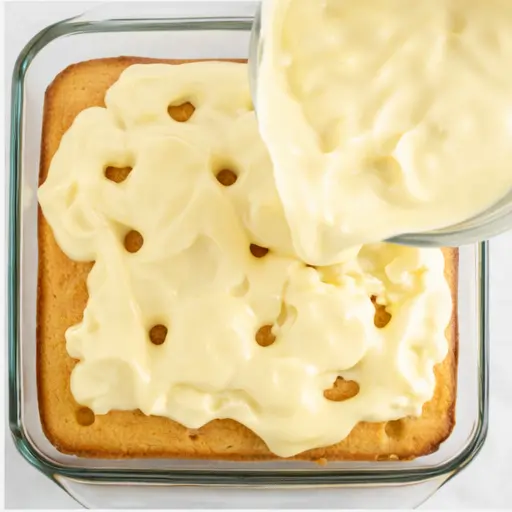
- Pour half of the pudding mixture over the warm cake, making sure it fills the holes. Gently press with the back of a spoon if needed.
- Pour the remaining pudding over the cake and spread it into an even layer.
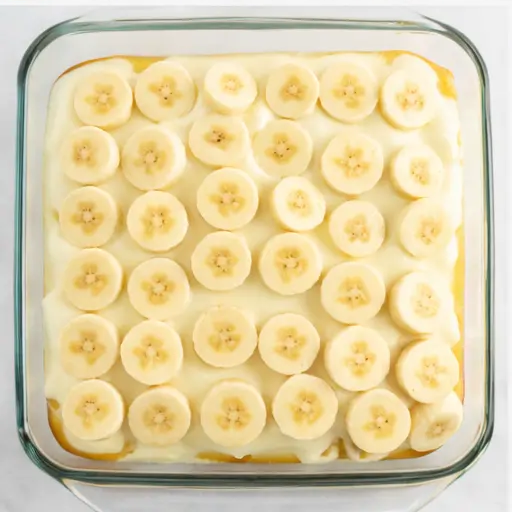
- Arrange the sliced bananas in a single layer over the pudding.
- Spread the thawed whipped topping evenly over the bananas.
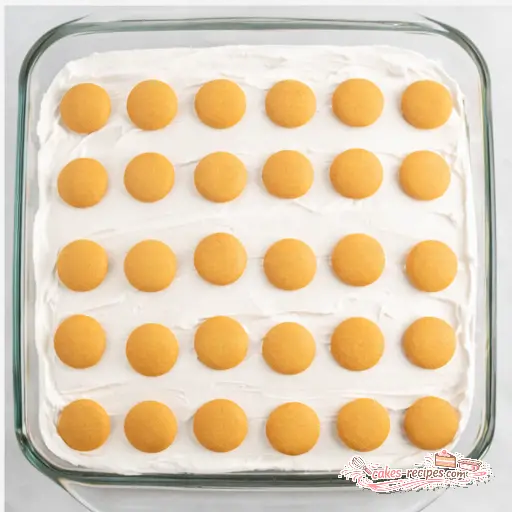
- Place the vanilla wafer cookies on top, one per serving area. Refrigerate the cake for at least 12 hours or overnight before slicing and serving.
Nutrition
Notes
Tried this recipe?
Let us know how it was!What Is a Banana Dump Cake? (And Why You’ll Love It)
You know those bananas that sit on your counter looking at you with judgment? Yeah, I had three of them last week. Brown spots, getting soft, basically begging me to either bake something or toss them. I’m not a tosser. So I made this banana dump cake, and honestly? It was the best decision I made all week.
Here’s the deal: a dump cake is exactly what it sounds like. You dump ingredients into a pan, layer them, and bake. No creaming butter and sugar. No sifting flour. No stand mixer required. This version takes that concept and turns it into something that tastes like you spent hours in the kitchen. My wife’s family thought I’d made it from scratch. I just smiled and nodded.
This particular banana dump cake uses yellow cake mix as the base, then gets soaked with instant banana pudding. You layer in sliced bananas, top it with whipped topping, and let it chill overnight. The result? A creamy, banana-forward dessert that’s part cake, part pudding, part magic. It’s the kind of thing that disappears at potlucks before you even get a slice.
Straight up, if you’ve got overripe bananas and a box of cake mix, you’re already 80% of the way there. The rest is just assembly and patience.
Why You’ll Love This Easy Banana Dump Cake Recipe
I’m not gonna lie to you. There are a lot of banana desserts out there. Banana bread. Banana pudding. Banana cream pie. But this banana dump cake? It’s different. It’s the lazy person’s way to look like a hero. And I mean that as a compliment.
Here’s why this recipe works:
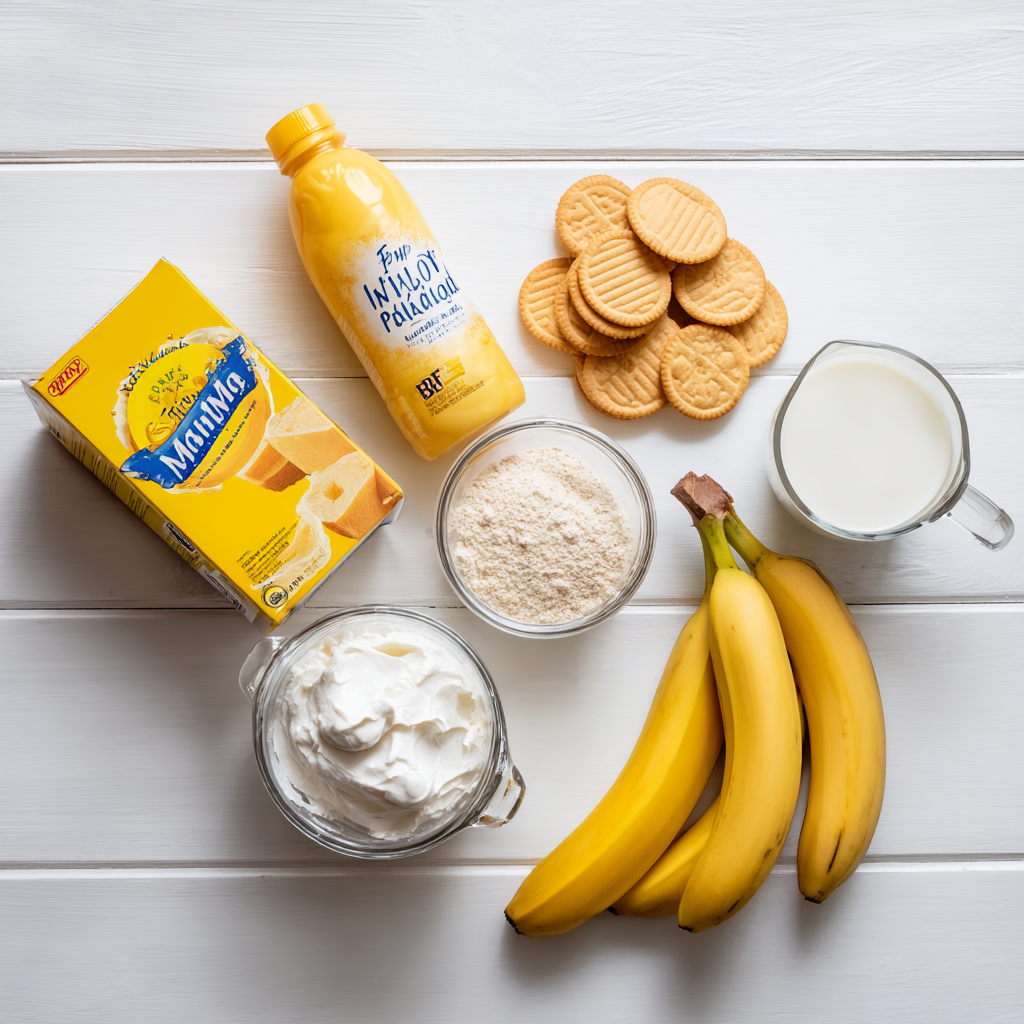
- Five main ingredients. That’s it. Cake mix, pudding, milk, bananas, whipped topping. Plus some vanilla wafers for garnish. You probably already have most of this stuff.
- No special equipment. One bowl. One whisk. One 9×13 pan. That’s the move. You don’t even need a mixer.
- It uses up those sad bananas. You know the ones. They’ve been sitting there for a week, getting spotty, and you feel guilty every time you walk past them. This is their redemption story.
- It’s a crowd-pleaser. I brought this to a family gathering last month, and my mother-in-law asked for the recipe. That’s a win in my book.
- It gets better with time. The pudding soaks into the cake overnight, creating this incredible texture that’s neither too wet nor too dry. Perfect texture, honestly.
Real talk? My first attempt at this came out a little too banana-y for my taste. But my kids devoured it, so I figured I was onto something. I tweaked the ratios, let it rest longer, and now it’s exactly what I want. That’s the beauty of dump cakes. They’re forgiving.
Ingredients You’ll Need for This Banana Dump Cake
Let me walk you through what you need. Nothing fancy here. Just good, solid pantry staples that won’t require a special trip to the store.
- 1 box yellow cake mix Standard 15.25 oz size. Duncan Hines or Betty Crocker, doesn’t matter. Use whatever you’ve got.
- 5.1 ounces instant banana pudding mix One box. Make sure it’s instant, not cook-and-serve. Big difference.
- 3 1/2 cups whole milk Cold. Whole milk gives the creamiest result, but 2% works in a pinch.
- 2 to 3 ripe bananas Sliced thin. The browner the better. You want them spotty and soft, not mushy black.
- 8 ounces frozen whipped topping Thawed. Cool Whip is the classic choice. Let it sit in the fridge for a few hours before using.
- 12 vanilla wafer cookies For garnish. Nilla Wafers are my go-to, but any brand works.
That’s it. No eggs, no butter, no oil for the cake mix? Wait you do need the ingredients listed on the back of the cake mix box. Usually water, oil, and eggs. So technically there are a few more things, but they’re basically freebies. Fair enough?
How to Make Banana Dump Cake: 4 Simple Stages
This is where it gets good. I’m going to walk you through the four major stages of making this banana dump cake. Each stage has a photo so you can see exactly what you’re aiming for.
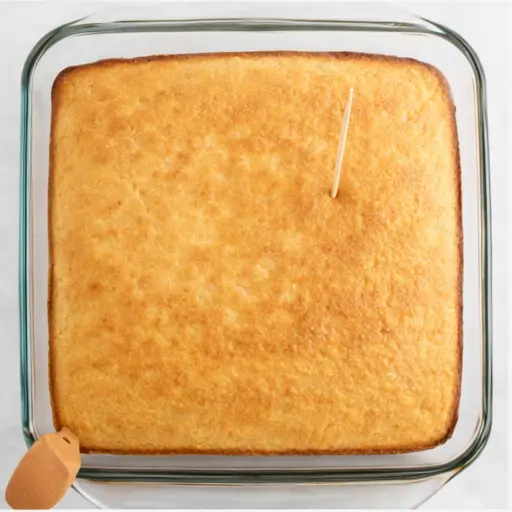
Stage 1: Bake the cake base. Preheat your oven to 350°F. Lightly coat a 9×13-inch baking pan with nonstick spray. In a large bowl, combine the yellow cake mix with the water, oil, and eggs as directed on the box. Whisk by hand for about a minute until smooth. Pour the batter into the pan and bake for 30 minutes, or until a toothpick inserted in the center comes out clean. While the cake is still warm, use the handle of a wooden spoon to poke holes all over. This is crucial those holes let the pudding soak in later.
Stage 2: Make the pudding layer. In another large bowl, whisk the instant banana pudding mix with the cold milk for about 2 minutes until combined. Don’t let it set fully it should still be pourable. Pour half of the pudding mixture over the warm cake, making sure it fills all those holes you poked. Gently press with the back of a spoon if needed. Then pour the remaining pudding over the top and spread it into an even layer. This is where the magic starts happening.
Stage 3: Add the bananas and whipped topping. Arrange the sliced bananas in a single layer over the pudding. Don’t overlap them too much you want each bite to get a little banana in it. Then spread the thawed whipped topping evenly over the bananas. Use a spatula and take your time. It doesn’t have to be perfect, but you want it smooth.
Stage 4: Garnish and chill. Place the vanilla wafer cookies on top, one per serving area. I usually do 4 rows of 3 cookies each. Then comes the hardest part: you need to refrigerate the cake for at least 12 hours. Overnight is best. This lets the pudding fully absorb into the cake, creating that incredible texture. Rushing this step will leave you with a soggy bottom. Trust me, I’ve tried.
Tips for the Best Banana Dump Cake
After making this a dozen times, I’ve learned a few things. Here are my best tips to make sure your banana dump cake turns out perfectly every time.
- Use very ripe bananas. The browner the better. They’re sweeter and mash easier into the cake. If your bananas are still yellow with no spots, they’re not ready.
- Don’t stir the layers. This isn’t a poke cake where you mix everything together. Keep the cake layer separate from the fruit and pudding. That’s what gives you the crumbly texture on top and the creamy layer below.
- Poke deep holes. Use the handle of a wooden spoon and go all the way through the cake. The deeper the holes, the more pudding gets absorbed.
- Let it rest the full 12 hours. I know it’s tempting to dig in after 4 hours. But the cake needs that time to absorb the pudding. Rushing it leaves you with a soggy bottom and uneven texture.
- Use whole milk. The fat content makes the pudding creamier. Skim milk works, but the texture won’t be as rich.
- If making ahead, add the vanilla wafers just before serving. They’ll stay crisp that way. Otherwise they get soft from the fridge moisture.
This works for me every time. Nailed it.
Variations to Try
Once you’ve mastered the basic banana dump cake, you can start playing around. Here are some variations I’ve tried and loved.
- Swap the pudding flavor. Use vanilla or butterscotch pudding instead of banana for a different twist. Vanilla gives a milder banana flavor, while butterscotch adds a caramel-like richness.
- Add chocolate chips. Sprinkle a handful of mini chocolate chips over the bananas before adding the whipped topping. The chocolate pairs beautifully with the banana.
- Add chopped nuts. Pecans or walnuts add a nice crunch. Sprinkle them over the whipped topping before adding the cookies.
- Use a different cake mix. White cake mix works great. So does spice cake for a fall-inspired version. Chocolate cake mix with banana pudding is surprisingly good too.
- Make it gluten-free. Use a gluten-free yellow cake mix and gluten-free vanilla wafers. The pudding is already gluten-free, so you’re good there.
- Make it dairy-free. Use plant-based milk (like oat or almond) for the pudding, and dairy-free whipped topping. For the cake mix, follow the box directions but use plant-based milk instead of regular.
These are just starting points. Use whatever cake mix you have on hand. That’s the beauty of dump cakes they’re endlessly adaptable.
Common Mistakes to Avoid
I’ve made every mistake in the book so you don’t have to. Here are the most common ones and how to fix them.
- ❌ Not poking enough holes in the cake. The pudding needs channels to soak into. If you only poke a few holes, the pudding sits on top and the cake stays dry. ✅ Poke holes every inch or so, going all the way through the cake.
- ❌ Using underripe bananas. Green or barely yellow bananas don’t have enough sweetness or flavor. They’ll taste bland. ✅ Wait until the bananas are spotty brown and soft. That’s when they’re at their peak.
- ❌ Skipping the overnight chill. I get it, you’re impatient. But cutting into the cake after only a few hours gives you a soggy, uneven texture. ✅ Plan ahead. Make it the night before you want to serve it.
- ❌ Overmixing the pudding. Whisking too long makes the pudding set before you pour it. Then it doesn’t soak into the cake properly. ✅ Whisk for about 2 minutes until combined but still pourable.
- ❌ Using hot cake for the pudding layer. If the cake is too hot, the pudding will thin out and not set properly. ✅ Let the cake cool slightly after poking holes, about 10 minutes, before adding the pudding.
What to Serve with Banana Dump Cake
This banana dump cake is pretty amazing on its own, but a few extras take it over the top.
- Vanilla ice cream. A scoop of good vanilla ice cream melting over a warm slice of dump cake? That’s comfort food at its finest.
- Fresh banana slices. Add a few extra banana slices on top for freshness and visual appeal.
- A drizzle of caramel sauce. The sweetness of caramel pairs beautifully with the banana flavor. Just a light drizzle is enough.
- Whipped cream. If you’re a whipped cream fanatic, add an extra dollop on each serving. Because why not?
- Black coffee. The bitterness of coffee cuts through the sweetness perfectly. It’s a classic diner combo for a reason.
My personal favorite? A warm slice with a scoop of vanilla ice cream and a cup of strong black coffee. That’s what Sunday afternoons taste like.
How to Store Leftovers
If you somehow have leftovers (good luck with that), here’s how to keep them fresh.
- Refrigerate tightly covered. Use plastic wrap or foil directly on the surface of the cake to prevent a skin from forming. It’ll keep for up to 4 days.
- Keep the vanilla wafers separate. If you’re storing leftovers, remove the cookies first. They’ll get soft from the fridge moisture. Add fresh ones when you’re ready to serve again.
- Freeze for longer storage. Wrap the entire pan tightly in plastic wrap, then foil. Freeze for up to 2 months. Thaw overnight in the fridge before serving.
- Reheat gently. Microwave individual servings for 20-30 seconds. Or warm the whole pan in a 350°F oven, covered with foil, for about 15 minutes.
Honestly though, this cake rarely makes it to day two in my house. The kids find it. Every time.
Frequently Asked Questions
Final Thoughts
Look, I’m not saying this banana dump cake will change your life. But it might change your weeknight dessert game. It’s easy enough to make after the kids are in bed, impressive enough to bring to a potluck, and delicious enough that people will ask for the recipe.
That’s the move. Make this for your next potluck, and try to bring home leftovers. I dare you.
And hey, if you make it and love it, come find me on Pinterest. I’m always pinning more easy dessert ideas. Seriously, my board is a mess of cake mixes and pudding boxes. But it works.
Source: Nutritional Information
Can I use frozen bananas for this banana dump cake?
You can, but thaw them first and drain off any excess liquid. Frozen bananas release a lot of water when they thaw, which can make the cake soggy. Fresh ripe bananas work best for texture and flavor.
Do I need to mash the bananas first?
Nope. Just slice them thin and arrange them in a single layer over the pudding. Mashing would change the texture too much. You want distinct banana pieces in each bite, not a puree.
How should I store leftover banana dump cake?
Cover tightly with plastic wrap or foil and refrigerate for up to 4 days. Remove the vanilla wafers before storing if you want them to stay crisp. Add fresh ones when you’re ready to serve again.
Can I make this banana dump cake ahead of time?
Absolutely. In fact, it’s better made ahead. The cake needs at least 12 hours in the fridge for the pudding to fully absorb. Make it the night before you plan to serve it for the best results.
How do I pick ripe bananas for my dump cake?
Look for bananas that are yellow with brown spots. They should be soft to the touch but not mushy. Avoid green bananas or ones with large black patches. The spotty ones are at peak sweetness.
What’s the best way to store leftovers?
Press plastic wrap directly onto the surface of the cake to prevent a skin from forming. Then cover the pan with foil. Refrigerate for up to 4 days. Remove cookies beforehand for crispness.
Can I freeze banana dump cake?
Yes. Wrap the entire pan tightly in plastic wrap, then foil. Freeze for up to 2 months. Thaw overnight in the fridge before serving. The texture might soften slightly, but it’s still delicious.
Why did my dump cake come out too dry?
You probably didn’t poke enough holes in the cake, or you didn’t let it rest long enough. Make sure to poke deep holes all over the warm cake and give it the full 12-hour chill time.
Are there any dietary considerations for this recipe?
This recipe contains gluten, dairy, and eggs. For gluten-free, use a gluten-free cake mix and cookies. For dairy-free, use plant-based milk and whipped topping. For vegan, use a plant-based cake mix and flax eggs.
Can I use fresh pineapple instead of canned?
This recipe doesn’t call for pineapple, but if you want to add it, use fresh pineapple and pat it dry thoroughly. Excess moisture from fresh pineapple can make the cake soggy.
What is a banana dump cake recipe?
A banana dump cake is a no-fuss dessert where you layer cake mix, bananas, pudding, and whipped topping in a pan. No mixer needed. Just dump, layer, and bake. It’s basically dessert for lazy perfectionists.
Can I customize my banana dump cake recipe?
Definitely. Swap the pudding flavor, add chocolate chips or nuts, use a different cake mix, or add caramel drizzle. The basic method stays the same, so feel free to experiment with what you have.
How do I store leftover banana dump cake?
Cover tightly and refrigerate for up to 4 days. Remove cookies before storing to keep them crisp. Microwave individual servings for 20-30 seconds to warm up. Add fresh cookies when serving.
What toppings work best with this recipe?
Vanilla ice cream is the classic pairing. Fresh banana slices, caramel drizzle, or extra whipped cream also work great. A sprinkle of crushed vanilla wafers adds nice crunch.
Can I use gluten-free cake mix for this banana dump cake?
Yes. Use a gluten-free yellow cake mix and gluten-free vanilla wafers. The pudding is naturally gluten-free. Follow the cake mix box directions for the wet ingredients, and you’re good to go.









3 Responses
Made this for a family gathering and it was a huge hit! I used low-fat milk because that’s all I had, and it still turned out creamy and delicious. The bananas soaked up the pudding perfectly. Thanks for the easy recipe!
Loved the flavor, but my cake came out a bit too soggy after chilling overnight. Should I reduce the milk in the pudding mix next time, or is that just how it’s supposed to be?
Hi Mark, thanks for trying it! Yes, a slight sogginess can happen if the bananas release extra moisture or if the pudding is a touch too thin. For a firmer texture, you can reduce the milk to 3 cups for the pudding, or let the cake cool completely before poking and pouring. Hope that helps!