Why You’ll Love These Blender Pumpkin Oat Muffins
It’s still hitting triple digits here in San Antonio, and yet here I am, reaching for pumpkin. The Fall Equinox is barely three weeks away, and I’ve decided my kitchen doesn’t need to wait for the calendar. Pumpkin season starts now, and these easy pumpkin oat muffins are my official kickoff.
If you’ve been searching for healthy pumpkin oatmeal muffins that actually taste like a treat, this is it. The blender does all the heavy lifting, so there are no mixing bowls, no flour dust, no fuss. Just toss everything in, press the button, and you’re about 35 minutes away from the best-smelling kitchen in town.
- One blender, zero mess: Everything goes in, blends smooth, and pours straight into the muffin tin.
- Naturally sweetened: Pure maple syrup adds just the right touch, no refined sugar needed.
- Freezer-friendly: Bake a batch, freeze half, and thank yourself on a busy Tuesday morning.
My first attempt at pumpkin oat muffins? Hockey pucks. Dry, dense, and my kids made that face. You know the face. But after testing this recipe again and again, I figured out the secret. The blender turns the rolled oats into a soft, flour-like base, while the pumpkin puree and Greek yogurt keep everything moist and tender. Now these easy pumpkin oat muffins are on repeat at our house, and I’m not mad about it.
Key Ingredients & Substitutions
There’s nothing fancy on this list. You probably have most of it in your pantry already. Let’s break down what each ingredient does, because understanding the why makes you a better baker, I promise.
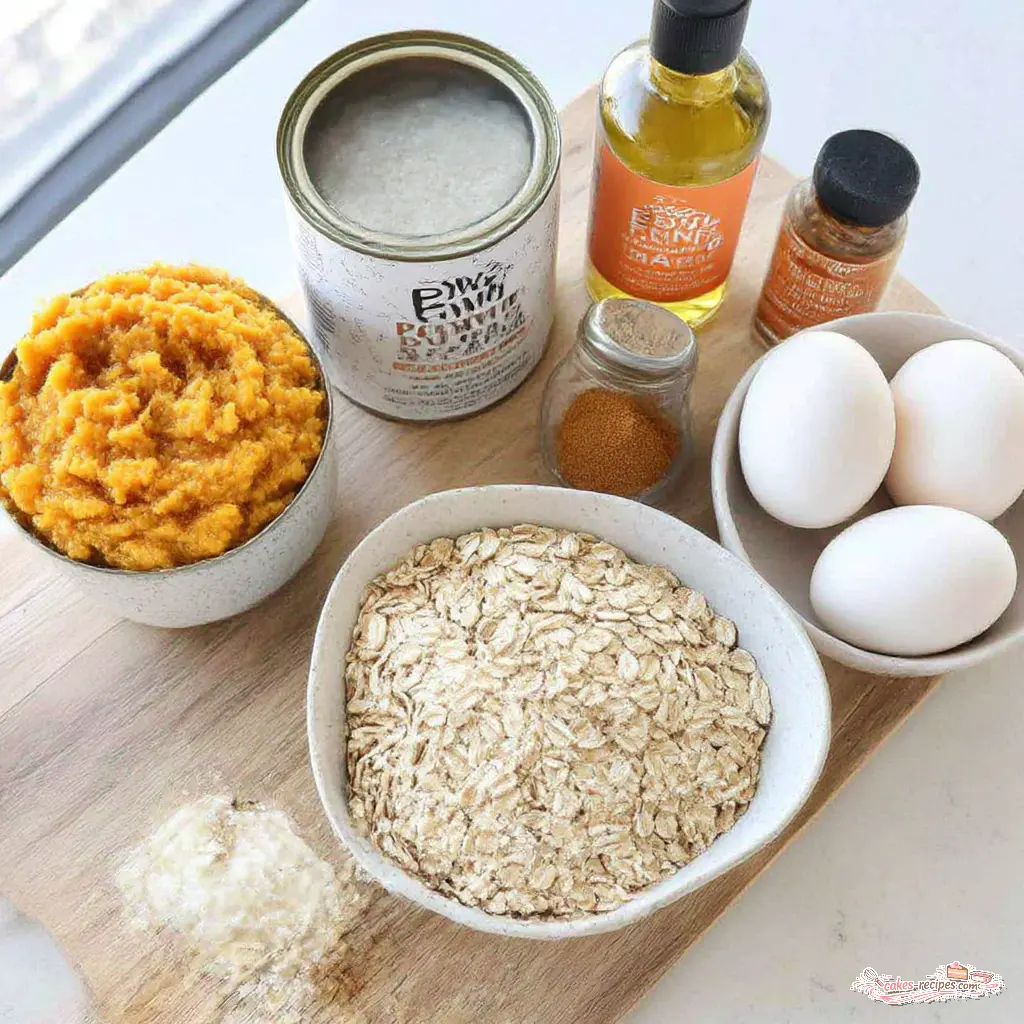
- Canned pumpkin puree: Grab puree, not pumpkin pie filling. Pie filling has sugar and spices already mixed in, which throws off the whole recipe.
- Plain Greek yogurt: My secret for tender, moist muffins. It adds protein and moisture without thinning the batter. Coconut yogurt works for a dairy-free version.
- Old-fashioned rolled oats: The blender grinds these into a fine oat flour, so you skip all-purpose flour entirely. Quick oats work too, they just blend up a bit finer.
- Avocado oil: Keeps the crumb soft without adding its own flavor. Any neutral oil like grapeseed will do the job.
- Pure maple syrup: Brings that warm, caramel-like sweetness that loves pumpkin. Honey or coconut sugar are great swaps.
- Pumpkin pie spice: The heart of that cozy fall flavor. Make sure yours is fresh, because old spices lose their magic.
These easy pumpkin oat muffins prove you don’t need a long, complicated ingredient list to bake something wonderful. Everything here earns its place, and most of it is probably in your cabinet right now.
How to Make Easy Pumpkin Oat Muffins
This is genuinely one of the easiest muffin recipes I make, and I’ve made a lot of muffins in my life. No sifting, no whisking, no pile of dirty bowls. Just four simple stages between you and a warm, cozy breakfast.
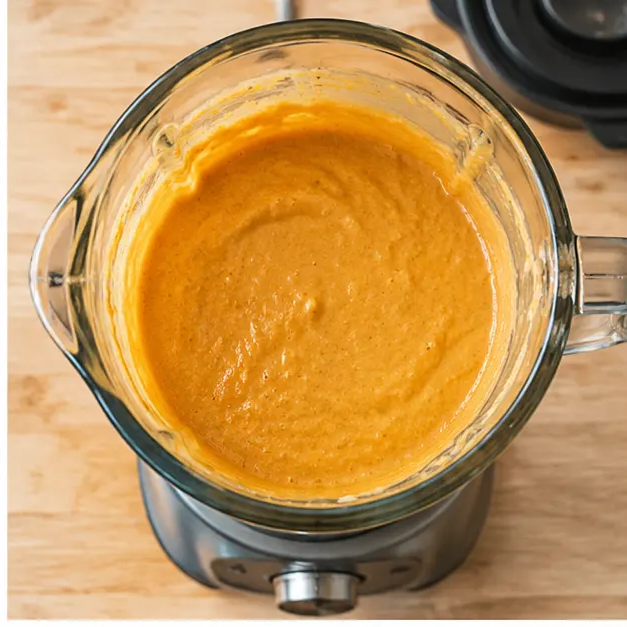
Stage 1: Blend everything together. Add the canned pumpkin puree, Greek yogurt, eggs, rolled oats, avocado oil, maple syrup, baking soda, baking powder, pumpkin pie spice, and a pinch of kosher salt to your blender. Blend on high until smooth, about 1 to 2 minutes. You’re looking for a thick, creamy batter with no visible oat flakes. Don’t over-blend here. Same rule as overmixing, blend just until it comes together.
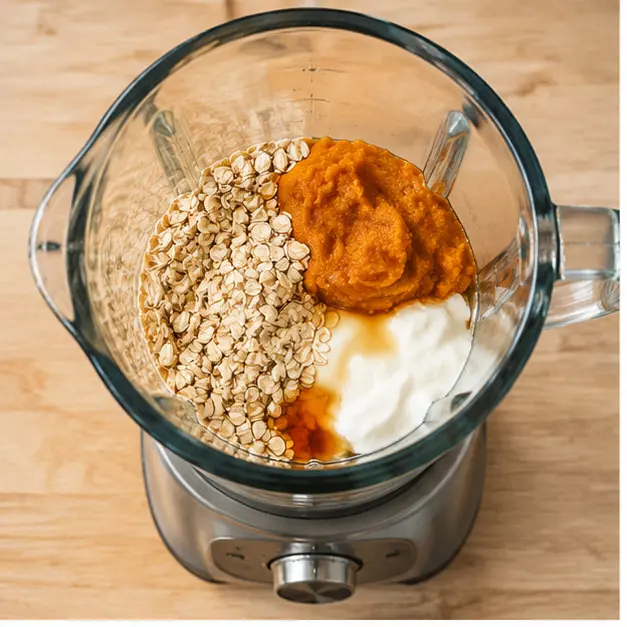
Stage 2: Let the batter rest. This little pause is the trick to domed tops. Give the batter about 5 minutes on the counter. The oats soak up some of the liquid, the batter thickens, and your muffins rise higher and rounder in the oven. It’s a tiny step that makes a visible difference.
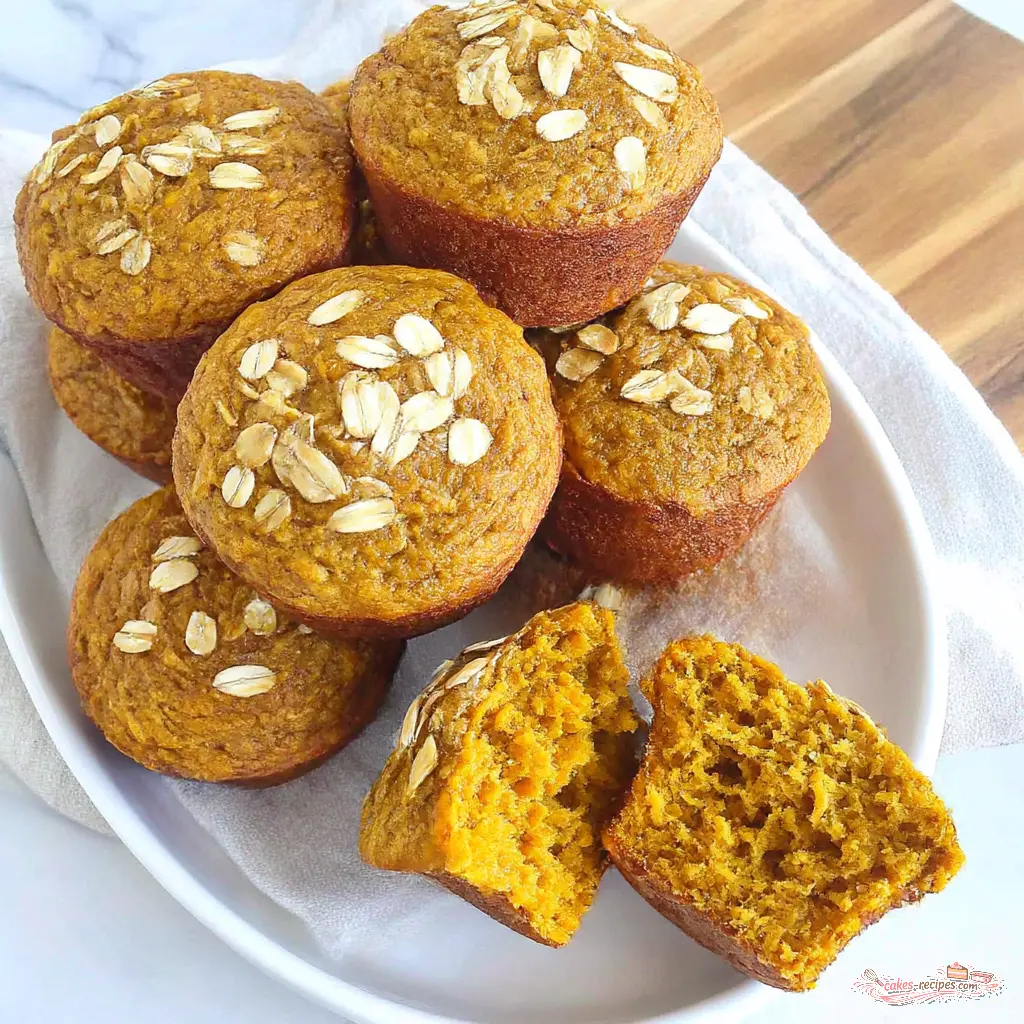
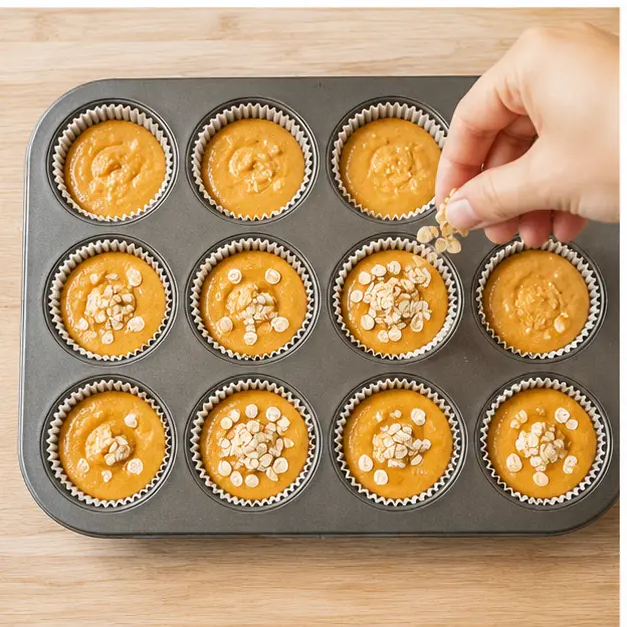
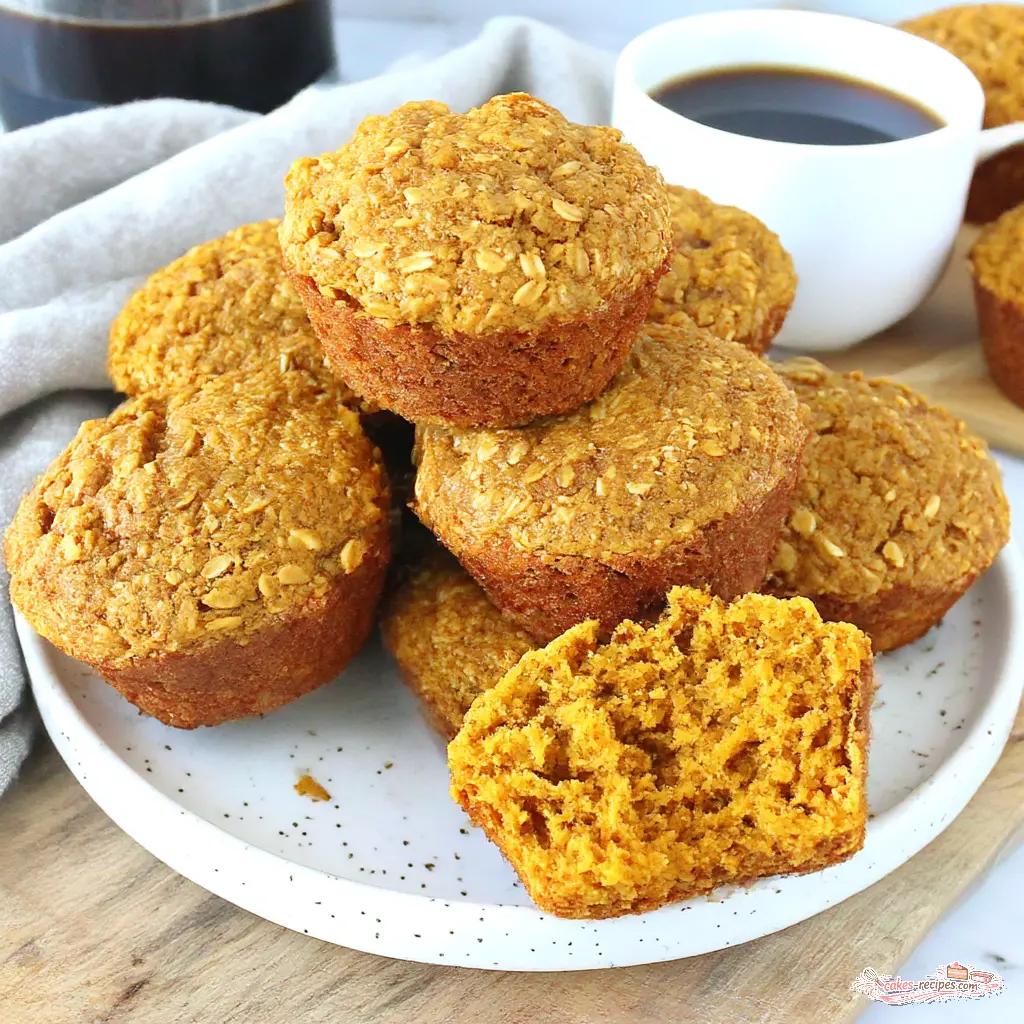
Stage 3: Fill the muffin tin. Line a 12-cup muffin tin with paper liners. Pour the batter in evenly, filling each cup almost to the top for those tall, bakery-style muffins. Sprinkle a few extra rolled oats over the tops and press them in gently. That little oat crust turns golden and slightly crisp as it bakes, and it looks gorgeous.
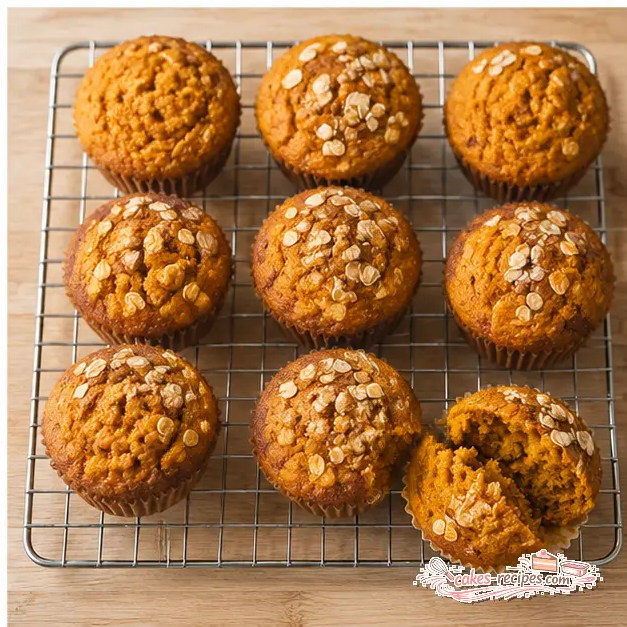
Stage 4: Bake and cool. Slide the pan into a 350°F oven and bake for 25 to 28 minutes. The kitchen fills with that warm pumpkin spice aroma, the kind that makes everyone wander in asking what’s baking. Here’s the doneness secret: a toothpick inserted in the center should come out with a few moist crumbs. If it’s completely clean, they’ve overbaked. Let the muffins cool completely on a wire rack, because leaving them in the pan traps steam and makes the bottoms soggy.
Tips for Perfect Pumpkin Oat Muffins
After many, many batches, these are the tips I swear by. Skipping any of them won’t ruin your muffins, but following them takes them from good to genuinely great.
starches in the oats and turns what should be light, tender muffins into dense, rubbery pucks. Blend just until the batter is smooth and no oat flakes remain, then stop. Same rule applies if you’re folding in mix-ins: gentle is the way to go.Variations & Substitutions
If you’re anything like me, you’ll make these once exactly as written, then immediately start brainstorming ways to change them up. Good news: these easy pumpkin oat muffins are endlessly flexible. Here are my favorite variations, all tested and approved in my own kitchen.
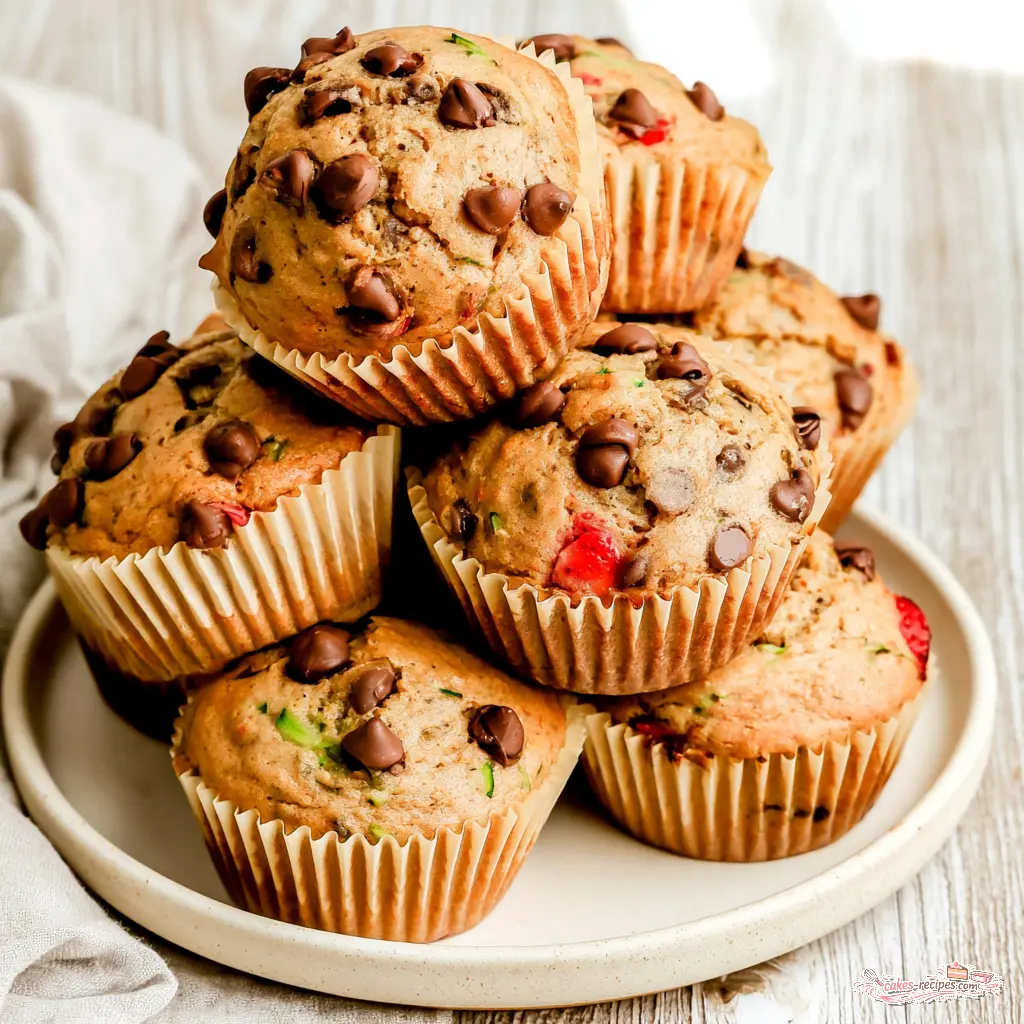
- Chocolate chip pumpkin oat muffins: Fold 3/4 cup of chocolate chips into the batter, then sprinkle a few extra over the tops before baking. Pumpkin and chocolate is one of those underrated flavor combinations, and my kids lose their minds over these.
- Nutty pumpkin muffins: Fold in a generous 1/2 cup of chopped walnuts or pecans. Toasting the nuts in a dry skillet for a few minutes first takes them to another level. Add a few extra chopped nuts on top so everyone knows what’s waiting inside.
- Dried fruit and ginger: Chopped dried cranberries or crystallized ginger both work beautifully. Cranberries add tart pops of color and flavor, while ginger brings a warm, slightly spicy kick. Use about 1/2 to 3/4 cup.
- Swap the sweetener: Honey and agave syrup both stand in for maple syrup at equal amounts. Coconut sugar works too, though it makes the batter a touch grainier. I always come back to maple syrup, but these are all great options depending on what’s in your pantry.
- Change the spice: If you don’t have pumpkin pie spice on hand, use 1 1/2 teaspoons of ground cinnamon instead, or try a chai spice blend for an unexpected twist. Feeling ambitious? Mix your own: 1 1/2 teaspoons cinnamon, 1/2 teaspoon ground ginger, 1/4 teaspoon nutmeg, and 1/4 teaspoon cloves or allspice.
- Make them vegan: Swap the Greek yogurt for coconut or almond yogurt, and use a flax egg in place of each regular egg. To make one flax egg, whisk 1 tablespoon of ground flaxseed with 3 tablespoons of water and let it sit for 5 minutes until it thickens. The texture comes out slightly denser but every bit as delicious.
- Go dairy-free: Simply replace the Greek yogurt with coconut yogurt or another non-dairy yogurt of your choice. That’s the only swap you need.
- Add a streusel topping: A quick crumble of rolled oats, a little coconut sugar, and a pinch of cinnamon sprinkled on top before baking makes these feel like a coffee shop treat.
Storage & Freezing
Let’s be honest, one of the best things about healthy pumpkin oatmeal muffins is that they’re made for meal prep. I regularly double the batch and freeze half, and future-me is always grateful. Here’s exactly how to store them so they stay moist, tender, and delicious.
At room temperature: Keep them in an airtight container for up to 2 days. If your kitchen runs warm, which mine absolutely does here in San Antonio, move them to the fridge after the first day to be safe.
In the refrigerator: They stay fresh in an airtight container in the fridge for 3 to 5 days. Some folks report keeping them up to 10 days, but in my experience, the texture starts to decline after day five. They’re still safe to eat, just not at their peak.
In the freezer: This is where the magic happens. Freeze the muffins in a single layer on a baking sheet until solid, then transfer them to a freezer-safe bag or container. They’ll keep beautifully for up to 3 months. When you’re ready to eat one, you’ve got options:
- Microwave: Pop a frozen muffin straight into the microwave for 30 to 60 seconds. It comes out tasting almost fresh-baked, which still feels like a small miracle to me.
- Overnight thaw: Move them from the freezer to the fridge the night before and they’re ready by breakfast. Or just leave them on the counter for about an hour.
- Pack them frozen: This one’s for the lunchbox crowd. Drop a frozen muffin into a lunchbox in the morning and it’ll thaw perfectly by lunchtime, no fuss required.
How to Serve Pumpkin Oat Muffins
These muffins are honestly wonderful on their own. But if you want to take them to the next level, here are my favorite ways to serve them.
- With nut butter: Split one in half and spread it with almond butter or peanut butter. The extra protein makes it a genuinely filling breakfast that keeps you going until lunch. This is my personal go-to.
- With a pat of butter: Simple, classic, and always a good decision, especially while the muffin is still warm.
- Alongside coffee: These were practically made for a steaming mug of coffee. The warm pumpkin spice aroma pairs perfectly with your favorite roast.
- In lunchboxes: My kids take these to school happily. Pair one with fruit and a cheese stick, and lunch is solved before you even have to think about it.
- For little eaters: Dice them into smaller pieces for toddlers. They’re great cold, warm, or at room temperature, which makes them wonderfully versatile.
Frequently Asked Questions
I get a lot of questions about these easy pumpkin oat muffins, so I figured I’d answer the good ones right here.
Can I use quick oats instead of rolled oats?
Yes, quick oats work in a pinch. They blend up even finer than rolled oats, so you’ll get a slightly smoother batter and a more tender crumb. No other adjustments needed.
Can I make these pumpkin oat muffins without a blender?
Absolutely. Pick up some store-bought oat flour and mix everything by hand in a large bowl. You’re looking for the same thick, smooth consistency. The blender is a convenience, not a requirement.
Can I use fresh pumpkin instead of canned pumpkin puree?
You can, but you need to drain it well first. Fresh pumpkin contains more water than canned, so spread the puree over a clean kitchen towel or cheesecloth and let it sit for a few minutes. Squeeze out the excess liquid, then measure. Canned pumpkin is more consistent, which is why I use it in most of my baking.
How do I know when the muffins are done?
The toothpick test works: insert one in the center and look for a few moist crumbs, not wet batter and not a perfectly clean stick. For an even more reliable check, use an instant-read thermometer. The internal temperature should hit around 200°F in the center of a muffin.
What if I don’t have pumpkin pie spice?
No problem. Mix 1 1/2 teaspoons cinnamon, 1/2 teaspoon ground ginger, 1/4 teaspoon nutmeg, and 1/4 teaspoon cloves or allspice. That gives you exactly the right amount for this recipe, and it tastes just as good as the store-bought stuff.
Why did my muffins come out dense?
The usual culprit is overmixing or over-blending. When you work the batter too much, the starches develop and make the muffins tough and heavy. Another possibility is old leavener. Check the dates on your baking soda and baking powder, and do the fizz test for good measure.
Why did my muffins sink in the middle?
Sinking is typically a sign of under-mixing, old leavener, or opening the oven door too early. The sudden temperature change can make the structure collapse before it’s set. Try to resist peeking until at least the 22-minute mark.
Can I make mini muffins with this recipe?
Yes! Use a mini muffin tin and bake at 350°F for 12 to 14 minutes. Watch them closely because they go from perfect to overdone quickly. This recipe makes about 24 mini muffins.
Can I use baking powder instead of baking soda?
No, don’t swap those. They’re both leaveners, but they work differently. Baking soda needs acid to activate, which this batter has plenty of from the Greek yogurt and maple syrup. Baking powder has its own acid built in, and swapping one for the other will change the rise and flavor of the muffins.
Can I reduce the maple syrup?
You can trim it down to 1/3 cup for a less sweet muffin, but I wouldn’t go much lower. The syrup does more than sweeten, it also adds moisture. Cut too much and you’ll notice the texture suffers.
Expert Notes & Data Insights
I’ve baked my way through more batches of these easy pumpkin oat muffins than I can count, and along the way, I’ve picked up a few insights worth passing along. Consider this the nerdy little appendix to everything above.
There’s a real reason the batter rest works. Oats are incredibly thirsty. When you give the blended batter even five minutes on the counter, the ground oats absorb moisture and swell. That thicker batter holds its structure better in the oven, which is why rested muffins rise taller with domed tops. It’s not superstition, it’s just food science doing its quiet thing in the background.
Freshly ground oats are genuinely better. When you blend rolled oats in your blender, you’re capturing the natural oils intact. Pre-ground oat flour sits on store shelves for months, and those oils slowly oxidize, which can make the flour taste flat and produce a denser crumb. The blender method isn’t just convenient, it’s actually the better way to bake with oats.
Internal temperature takes the guesswork out. The toothpick test is fine, but it’s subjective. If you want certainty, an instant-read thermometer is the way to go. Fully baked muffins should register right around 200°F in the center. At that temperature, the starches have gelatinized and the proteins have set, which means a perfect crumb every single time. It’s the same principle professional bakers use, and it works just as well in a home kitchen.
Double batches are the smart move. Here’s the data point that matters most for busy mornings: this recipe freezes exceptionally well, and the muffins keep their quality for up to three months. Baking a dozen takes roughly the same time as baking two dozen, so doubling the recipe and freezing half might be the best meal prep shortcut in your fall arsenal. Fewer crumbs, more coffee time, everyone wins.
At the end of the day, these healthy pumpkin oatmeal muffins check every box I care about. They’re easy enough for a Tuesday morning, healthy enough to feel good about, and delicious enough that my kids ask for them by name. That’s the trifecta, right there. I hope they become a staple in your kitchen too. Happy baking, y’all.
How do you make easy pumpkin oat muffins in a blender?
To make these easy pumpkin oat muffins, start by adding the rolled oats to your blender and pulsing until they form a fine flour. Then add the pumpkin puree, eggs, maple syrup, Greek yogurt, oil, spices, baking soda, and a pinch of salt. Blend until the batter is smooth and fully combined, being careful not to over-blend. Let the batter rest for about 5 minutes while your oven preheats and your muffin pan is lined—this helps create nice domed tops. Pour the batter into prepared muffin cups, filling them almost to the top for tall, bakery-style muffins, and bake until a toothpick inserted in the center comes out with just a few moist crumbs. The blender method means no extra bowls, and the whole batter comes together in minutes.
Can I use quick oats instead of rolled oats in these healthy pumpkin oatmeal muffins?
Yes, quick oats will work in a pinch for these healthy pumpkin oatmeal muffins. They are more finely chopped than old-fashioned rolled oats, so they blend into a slightly softer, more delicate oat flour. The muffins may turn out a bit more tender and less hearty, but the flavor and structure will still be great. If you need a gluten-free version, simply use certified gluten-free quick oats. Instant oats are not recommended because they are too finely processed and can make the texture gummy.
How should I store these easy pumpkin oat muffins so they stay fresh?
To keep these easy pumpkin oat muffins fresh, store them in an airtight container at room temperature for up to 2 days. For longer storage, place them in the refrigerator, where they will stay moist and flavorful for about 5 days. You can also freeze them for up to 3 months in a freezer-safe zip-top bag or container. To serve, microwave a frozen muffin for 30 to 60 seconds, or thaw it overnight in the fridge and enjoy cold, at room temperature, or lightly warmed. These muffins are perfect for meal prep and lunchboxes.
Are these blender pumpkin oat muffins gluten-free?
Yes, these blender pumpkin oat muffins are naturally gluten-free as long as you use certified gluten-free rolled oats. Because the oats are blended into flour right in the blender, no wheat flour is needed at all. If you have celiac disease or a gluten sensitivity, double-check that your baking soda, spices, and other ingredients are also certified gluten-free. Other than the oats, all the main ingredients are naturally gluten-free, making this an easy recipe to adapt for a gluten-free diet.
Can I substitute the Greek yogurt in these pumpkin oat muffins?
Yes, you can easily substitute the Greek yogurt in these pumpkin oat muffins. Plain regular yogurt or vanilla yogurt will work as a direct 1-to-1 swap, though you may need to reduce the milk slightly since Greek yogurt is thicker. For a dairy-free option, use plain unsweetened coconut yogurt or another nondairy yogurt. You can also use applesauce to lower the fat and keep the muffins moist—just replace the Greek yogurt with the same amount of applesauce. Keep in mind that the texture may be slightly less fluffy or tangy, but the muffins will still be delicious and tender.