Easy Sourdough Starter Recipe for Homemade Bread
Ingredients
Method
- In a pint-sized mason jar, combine 1/4 cup of flour and 2 tablespoons of water. Stir until well mixed. Cover the jar with a piece of cheesecloth or a coffee filter secured with a rubber band. Place the jar in a warm spot in your kitchen, like near the stove or on top of the fridge, and let it sit for 12 hours.
- After 12 hours, feed the starter with another 1/4 cup of flour and 2 tablespoons of water. Stir, cover, and let it sit for another 12 hours.
- On the morning of the second day, discard half of the starter mixture. Then feed the remaining starter with 1/4 cup of flour and 2 tablespoons of warm water (around 80-90°F). Stir, cover, and let it sit for 12 hours.
- After 12 hours, feed the starter again with the same amounts of flour and water. Stir, cover, and let it sit for another 12 hours.
- Continue this routine for the next 3 days: once daily, discard half the starter, then feed with 1/4 cup flour and 2 tablespoons warm water. Keep feeding twice a day (every 12 hours) with the same amounts.
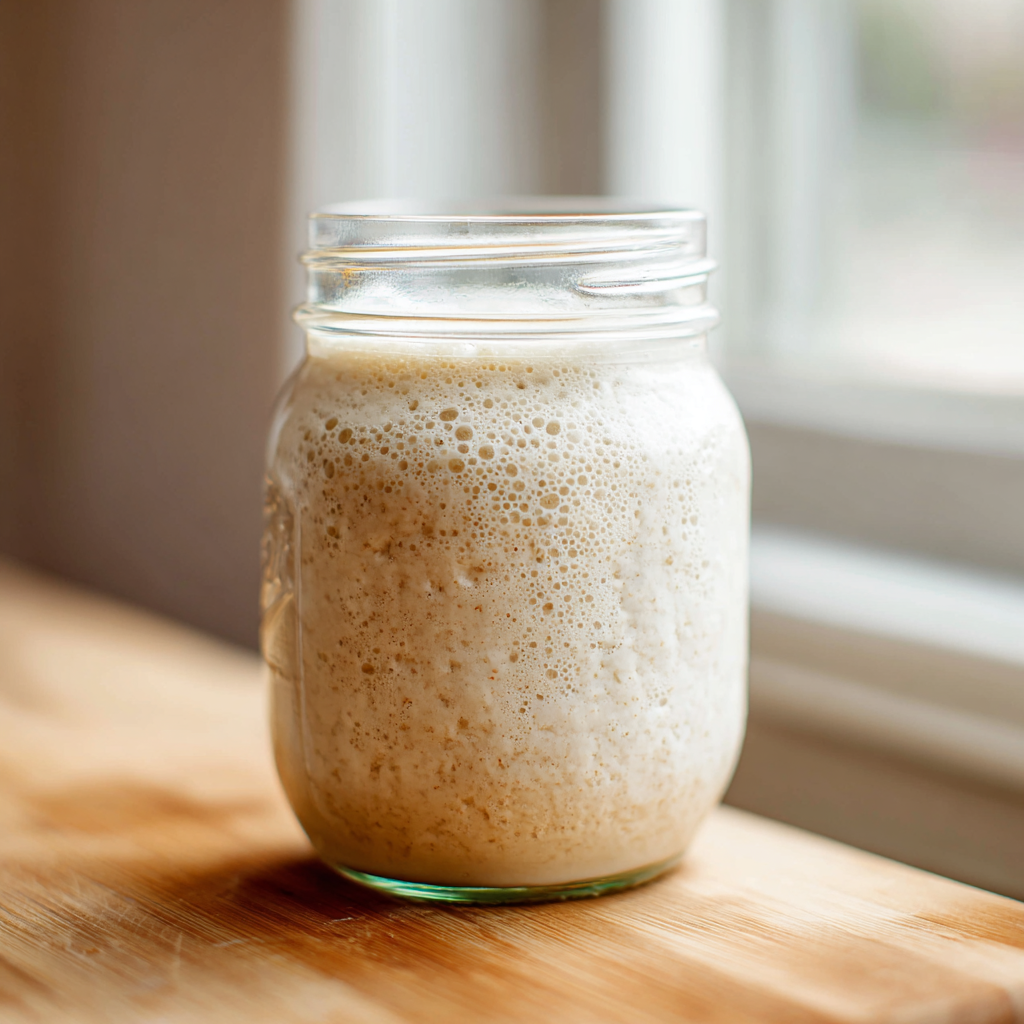
- By day 6, you should see plenty of bubbles and a pleasant sour smell. Your starter is now active and can be used for pancakes, waffles, and other pastries, though it may not yet be strong enough for a loaf of bread. You can switch to feeding once a day from now on.
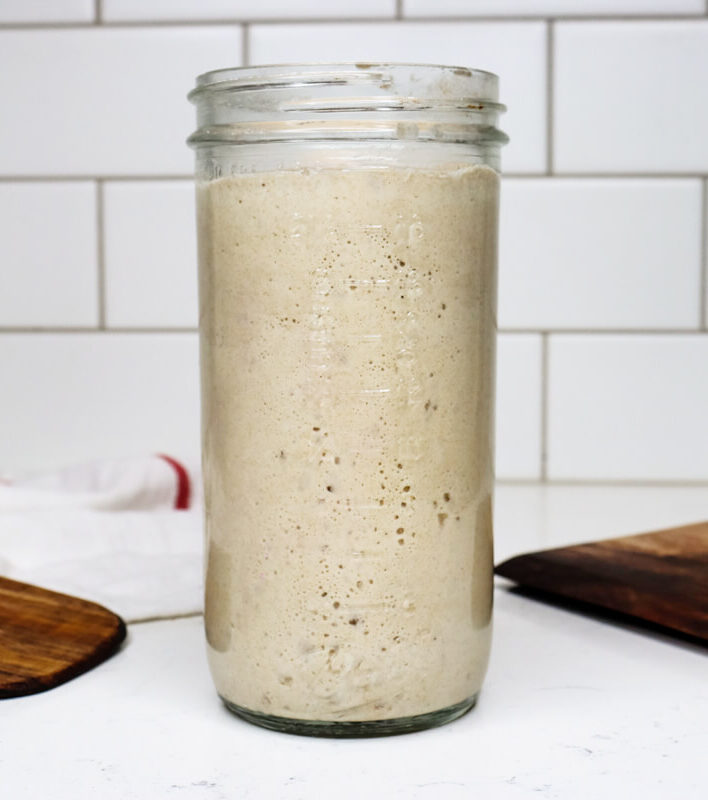
- Continue feeding once daily for about 3 more weeks. By week 4, your starter should be robust and ready for bread baking. It should double in size within 4-6 hours after feeding and have a tangy aroma.
Nutrition
Notes
Tried this recipe?
Let us know how it was!What Is Sourdough Starter?
I ruined my first three starters before figuring out the cheat code. Honestly, I almost gave up. I thought sourdough was this mystical thing that only grandmas with hundred-year-old starters could pull off. But here’s the thing it’s not magic. It’s just flour and water doing their thing.
A sourdough starter is basically a living culture of wild yeast and bacteria. You mix flour and water, and the natural yeasts floating around your kitchen move in and start fermenting. Think of it like a pet fish you don’t need to spend hours, just a splash of food and water daily. That’s it.
This easy sourdough starter recipe is the one I wish I’d had when I started. No complicated ratios. No fussing with scales (though I’ll share that option too). Just a simple, no-fail method that works every time.
Real talk: if you can stir flour into water, you can make this work. I promise.
How Long Will It Take?
Here’s where most beginners get anxious. They want bread tomorrow. I get it. But this easy sourdough starter recipe takes about 5 to 7 days to become active, and about 4 weeks to be truly robust for bread baking.
But here’s the good news you’ll see progress way before that. Tiny bubbles by day 2 or 3. A pleasant sour smell by day 4. By day 6, it’ll be bubbly enough for pancakes or waffles. You’re not waiting weeks for something to happen.
Time is a guide, not a rule. Your kitchen temperature, flour type, and water quality all affect speed. In my Portland kitchen (which runs cool), it takes the full 7 days. In a warm LA summer kitchen? You might be ready in 5.
When Will It Be Ready?
You’ll know your starter is ready when it passes these checks:
- Doubles in size within 4 to 6 hours after feeding
- Bubbles throughout not just on top, but all through the mixture
- Smells pleasant like ripe fruit and sour yogurt, not like vomit or nail polish remover
- Passes the float test drop a small spoonful in water, and it floats
What I’ve found is that the smell is the best indicator. When your starter smells tangy and sweet, that’s peak activity. When it smells sharp or like acetone, it’s hungry. You’ll learn to read it like a language.
One thing that tripped me up early on growth often slows down on days 3 and 4. This is totally normal. The starter is switching from the initial bacterial bloom to the yeast colony. Don’t panic. Just keep feeding.
Easy Sourdough Starter Recipe
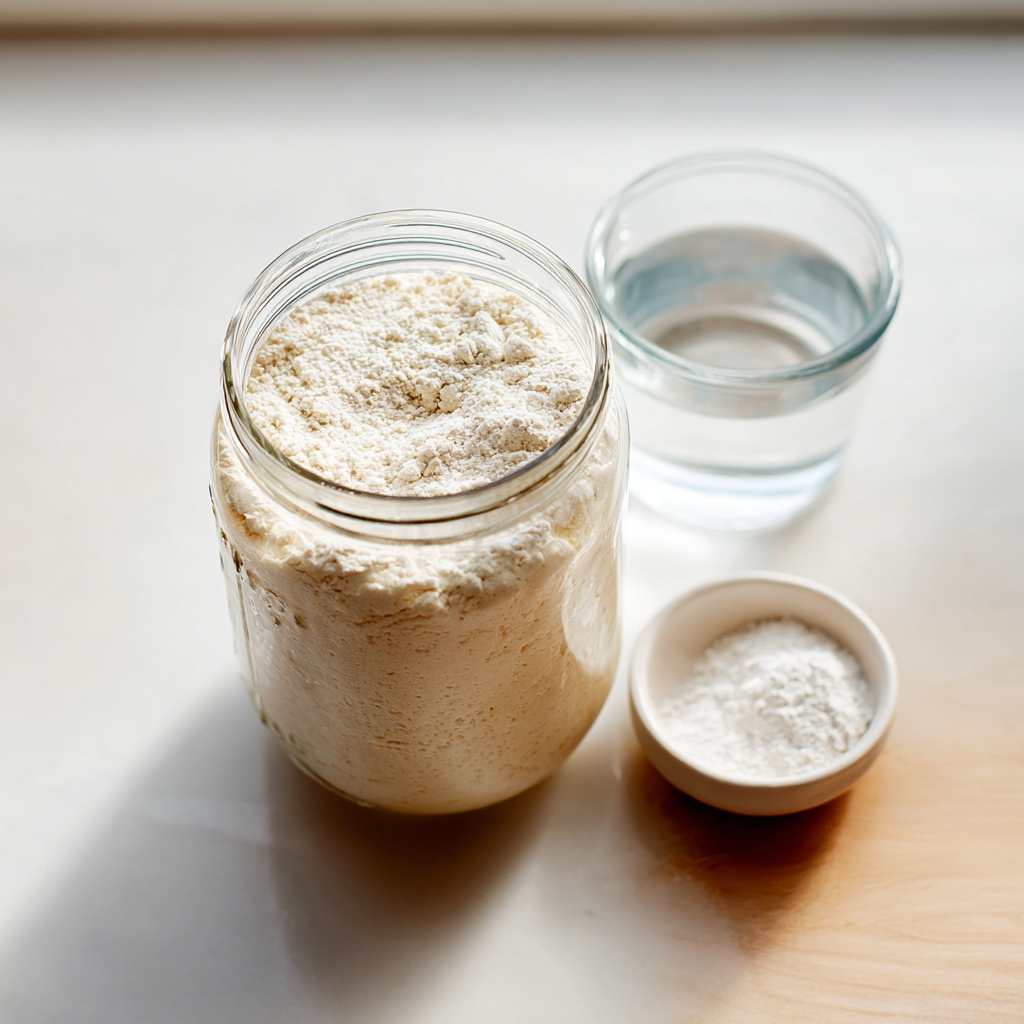
This easy sourdough starter recipe uses just two ingredients: all-purpose flour and water. That’s it. No special flour, no fancy equipment. You probably have everything right now.
What you’ll need:
- A pint-sized mason jar or any glass jar
- Cheesecloth or a coffee filter
- A rubber band
- All-purpose flour (unbleached is best)
- Filtered or chlorine-free water at room temperature
The key is chlorine-free water. Tap water chlorine can kill the wild yeast you’re trying to cultivate. If your tap water is chlorinated, let it sit out overnight, or use filtered water. I keep a pitcher of filtered water on my counter just for this.
Day 1
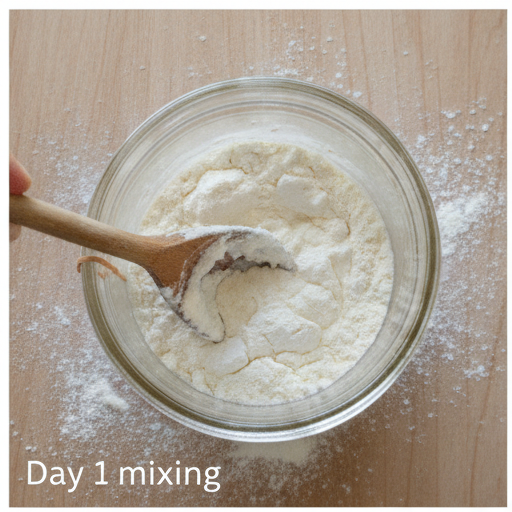
In your mason jar, combine 1/4 cup of flour and 2 tablespoons of water. Stir until it looks like thick paste. Don’t worry if it seems dry or lumpy that’s normal. Cover the jar with cheesecloth or a coffee filter secured with a rubber band. Place it in a warm spot in your kitchen, like near the stove or on top of the fridge.
Evening: After 12 hours, feed it again with another 1/4 cup of flour and 2 tablespoons of water. Stir, cover, and let it sit.
Day 2
Morning: Discard half the starter mixture. This feels wasteful, I know. But it’s necessary you’re controlling the food-to-yeast ratio. Then feed the remaining starter with 1/4 cup of flour and 2 tablespoons of warm water (around 80-90°F). Stir, cover, and let it sit for 12 hours.
Evening: Feed again with the same amounts. By now, you might see tiny bubbles. That’s your first sign of life!
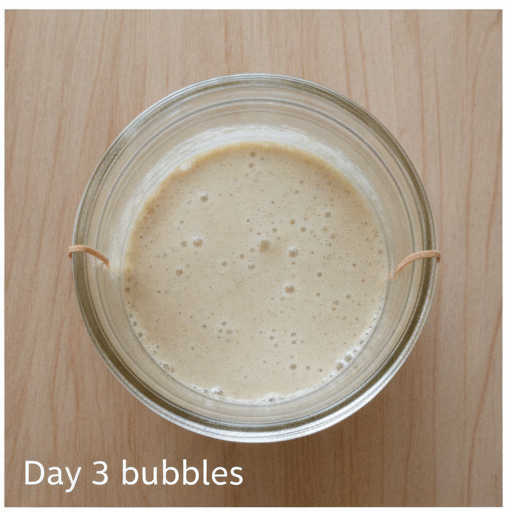
Days 3-5
Continue this routine: once daily, discard half, then feed with 1/4 cup flour and 2 tablespoons warm water. Keep feeding twice a day (every 12 hours) with the same amounts.
Days 3 and 4 can be discouraging. The starter might go quiet fewer bubbles, less rise. This is the bacterial shift I mentioned. Trust the process. Keep feeding. By day 5, you should see a comeback with more bubbles and a pleasant sour smell.
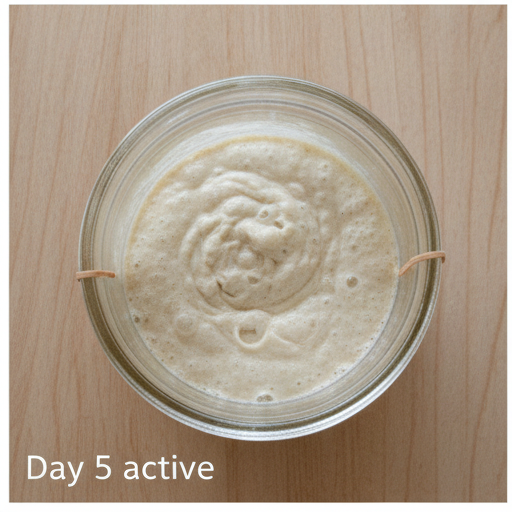
Day 6 and Beyond
By day 6, you should see plenty of bubbles and a pleasant sour smell. Your starter is now active and can be used for pancakes, waffles, and other pastries. It may not yet be strong enough for a loaf of bread, but you’re close. You can switch to feeding once a day from now on.
Continue feeding once daily for about 3 more weeks. By week 4, your starter should be robust and ready for bread baking. It should double in size within 4-6 hours after feeding and have a tangy aroma. That’s when you know you’ve got a reliable starter.
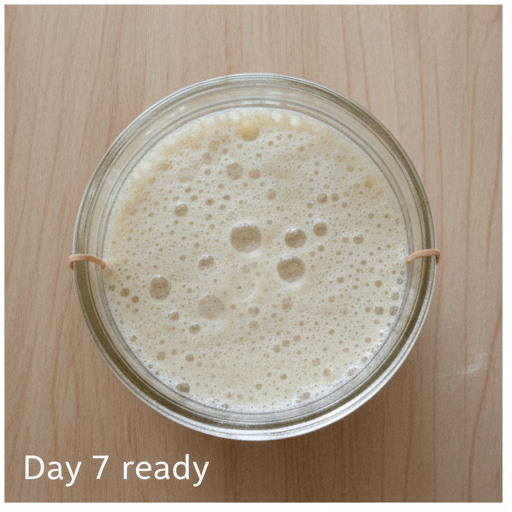
How to Feed Sourdough Starter
Once your starter is established, feeding is simple. You’re maintaining a balance keep the yeast happy and the bacteria in check.
The basic rule: equal parts starter, flour, and water by weight. But for volume measurements (which I use most days), it’s roughly 1/2 cup flour to 1/4 cup water for each feeding. This works for me.
Here’s my feeding routine:
- Discard all but about 1/4 cup of starter
- Add 1/2 cup all-purpose flour
- Add 1/4 cup filtered water
- Stir until smooth
- Cover and let it sit at room temperature
If you see a dark liquid on top (hooch), that means your starter is hungry. Pour it off before feeding. It’s not a problem just a sign to feed more often or use more flour.
What I’ve found is that a consistent feeding schedule matters more than exact ratios. If you feed at the same time every day, your starter will adapt and thrive.
How to Store Sourdough Starter
You have two options for storing your starter, depending on how often you bake.
Countertop storage: If you bake every day or every other day, keep your starter at room temperature. Feed it once daily (or twice if your kitchen is warm). This keeps it active and ready to go.
Refrigerator storage: If you bake once a week or less, store your starter in the fridge. Feed it, let it sit at room temperature for an hour, then pop it in the fridge. It’ll stay happy for up to a week without feeding. When you’re ready to bake, take it out, feed it, and let it come to room temperature.
I keep mine in the fridge most of the time. I feed it on Friday night, and by Saturday morning it’s ready for baking. Totally worth it for the convenience.
For long-term storage (vacation, etc.): You can dry your starter. Spread it thin on parchment paper, let it dry completely, then break it into flakes. Store in an airtight container. To revive, just add equal parts dried starter and water, then feed normally.
Tips for Success
After ruining those first three starters, I learned a few things the hard way. Here’s what I wish someone had told me:
- Temperature is everything. Aim for 70-75°F. Too cold and fermentation slows. Too hot and you get off flavors. In summer, my kitchen runs warm, so I move the jar to a cooler spot.
- Use unbleached all-purpose flour. Bleached flour has chemicals that can hinder fermentation. Whole wheat flour works great too, but switch to all-purpose after the first week for consistency.
- Don’t skip the discard. I know it feels wasteful, but it’s necessary. You’re controlling the population. Too much starter and not enough food means a weak culture.
- Name your starter. Sounds silly, but it helps. I named mine “Bubbles.” It makes the daily feeding feel like a small ritual instead of a chore.
- Collect discard in a separate jar. Keep it in the fridge and use it for pancakes, waffles, crackers, or even pizza dough. Nothing goes to waste.
Common mistakes and fixes:
❌ Using cold water: Cold water shocks the yeast. Use room temperature or slightly warm water (80-90°F).
❌ Not discarding enough: Your jar gets too full and the ratio is off. Always discard at least half before feeding.
❌ Panicking on days 3-4: Growth slows. This is normal. Keep feeding.
❌ Judging by time alone: Use visual and aroma cues. Your starter might be ready earlier or later than the recipe says.
❌ Ignoring hooch: That dark liquid means your starter is hungry. Pour it off and feed more often.
❌ Seeing mold or pink/orange layer: If you see this, discard everything and start over. Safety first.
Frequently Asked Questions
Final Thoughts
You’ve got this. Seriously. Making a sourdough starter is one of the most rewarding things you can do in the kitchen. It’s alive, it’s yours, and it cost you basically nothing but a little flour and water.
I still remember the first time my starter doubled in size. I literally did a little dance in my kitchen. That feeling of watching something grow from scratch it never gets old.
This easy sourdough starter recipe is designed to work for real people with real kitchens and real schedules. No perfection required. Just consistency and a little patience.
If you make this starter, I’d love to hear how it goes. Drop me a comment or tag me on social media. And if you’re looking for more inspiration, check out my Pinterest board where I share all my favorite sourdough recipes and tips.
Now go grab a jar and let’s start. Your first loaf of sourdough bread is closer than you think.
Source: USDA Nutritional Data
What is the easiest sourdough starter?
The easiest sourdough starter uses just all-purpose flour and filtered water with a simple once-daily feeding routine. My easy sourdough starter recipe requires no special equipment or complicated ratios just a mason jar, a rubber band, and a few minutes each day.
What is the 1/3/3 rule for sourdough starter?
The 1/3/3 rule means 1 part starter, 3 parts flour, and 3 parts water by weight. It’s a feeding ratio that creates a stiffer starter. For beginners, I recommend starting with equal parts by volume until you’re comfortable with the process.
Is sourdough bread ok for diabetics?
Sourdough bread can be a better option for diabetics because the fermentation process breaks down some of the carbohydrates, potentially lowering the glycemic response. However, portion control is still important. Always consult your healthcare provider for personalized advice.
What is the easiest thing to make with sourdough starter?
Sourdough pancakes or waffles are the easiest thing to make with a new starter. They don’t require a strong, mature starter just bubbly discard. Mix starter with an egg, a little flour, and some milk, and you’ve got breakfast in minutes.
What if my starter is not ready after 7+ days?
Don’t worry. Some starters take 10-14 days, especially in cooler kitchens. Check your temperature (aim for 70-75°F) and make sure you’re using chlorine-free water. If it’s still sluggish, try feeding twice daily for a few days to boost activity.
Can this sourdough starter be made with all purpose flour only?
Absolutely. All-purpose flour works perfectly for this easy sourdough starter recipe. Unbleached all-purpose is best because it has more natural yeast and no chemical residues. Bleached flour can work but may take longer to establish.
Can sourdough starter be made with bread flour only?
Yes, bread flour works well. It has higher protein content, which can create a stronger structure. You may need slightly more water since bread flour absorbs more liquid. Start with the same ratios and adjust as needed.
Can this sourdough starter be made with whole wheat, spelt flour or rye flour only?
Yes, these flours work great and often ferment faster because they have more natural yeasts. Whole wheat and rye starters tend to be more vigorous. You may need a bit more water since these flours are more absorbent.
Can sourdough starter be made with bleached flour?
Technically yes, but I don’t recommend it. Bleached flour contains chemical residues that can slow or inhibit fermentation. Unbleached all-purpose flour gives you the best chance of success with this easy sourdough starter recipe.
Why do you use whole wheat flour in the beginning and then switch to all purpose flour?
Whole wheat flour has more natural yeasts and nutrients that kickstart fermentation quickly. After the first week, switching to all-purpose flour creates a more consistent, predictable starter that’s easier to maintain for bread baking.
On Days 3 u0026amp; 4, my starter is not as bubbly compared to Days 1 u0026amp; 2. Growth is slowing down. Why?
This is completely normal. The initial bubbles on days 1-2 are from bacteria, not yeast. Days 3-4 are a transition period as the yeast colony establishes itself. Keep feeding consistently, and it will bounce back by day 5 or 6.
For the daily feedings, you mention to feed your starter ‘equal parts’ flour and water by weight. But the volume conversions are not equal. Is this a typo?
Not a typo. By weight, 1 cup of flour (about 120g) and 1 cup of water (about 240g) are not equal. But by volume, they work for this easy sourdough starter recipe. If you want precision, use a kitchen scale and aim for equal weights.
Can I use the sourdough discard from Day 1-7 for something else?
Discard from days 1-4 isn’t strong enough for sourdough recipes. By day 5, it can be used in waffles, pancakes, or muffins. After day 6, discard is fully usable. I collect mine in a separate jar in the fridge and use it for weekend pancakes.
How can I create a warm spot in my kitchen for my sourdough starter?
Place your jar on top of the refrigerator, near the stove, or in a cabinet above the oven. In cooler months, I put mine in the oven with the light on (oven off). The light bulb provides just enough warmth without overheating.
What if my kitchen is too warm?
If your kitchen is above 80°F, your starter will ferment very quickly and may develop off flavors. Move it to a cooler spot, like a basement or a cabinet away from heat sources. You may also need to feed twice daily to keep up with activity.
Why do I have to discard or remove the starter when feeding?
Discarding controls the population. If you kept adding flour and water without removing any, your jar would overflow and the ratio of food to yeast would be off. Discarding ensures your starter stays healthy and active.
What is a Sourdough Starter?
A sourdough starter is a living culture of wild yeast and bacteria that you cultivate from flour and water. It’s what makes sourdough bread rise and gives it that signature tangy flavor. Think of it as your own personal yeast farm.
How do I Know When My Starter is Ready?
Your starter is ready when it doubles in size within 4-6 hours of feeding, has bubbles throughout, smells pleasantly sour (like yogurt or ripe fruit), and passes the float test. Time is a guide use these visual and aroma cues instead.
How Long will the Starter Stay Doubled in Size?
At peak activity, your starter will stay doubled for about 2-4 hours before it starts to collapse. That’s the sweet spot for baking. After that, it becomes hungry and will develop hooch (dark liquid) on top. Feed it again to revive it.
How to Maintain a Sourdough Starter?
Maintain your starter by feeding it regularly. For countertop storage, feed once daily. For refrigerator storage, feed once a week. Always use equal parts flour and water, and discard half before each feeding to keep the balance right.
My Starter is Ready, But I Don’t Have Time to Mix the Dough
No problem. Feed your starter, let it sit for an hour, then put it in the refrigerator. It will stay happy for up to a week. When you’re ready to bake, take it out, feed it again, and let it come to room temperature before using.
What’s That Layer of Liquid?
That dark or clear liquid is called hooch. It’s a sign that your starter is hungry the yeast has consumed all the available food. Simply pour it off before feeding, or stir it back in if you prefer a more tangy flavor. Then feed as usual.