
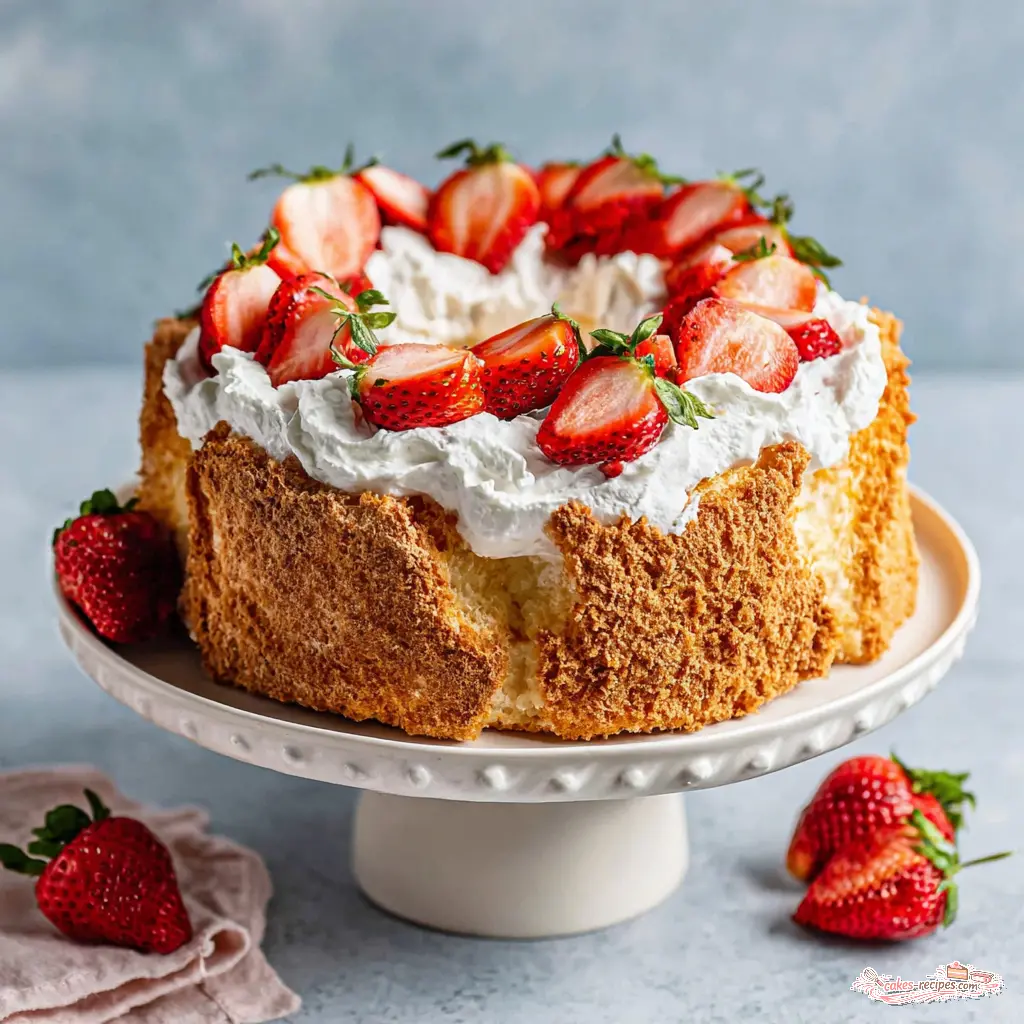
Why This Homemade Angel Food Cake Works
Angel food cake used to intimidate me. I’m not kidding. For years, I’d watch bakers flip those tall, golden-brown cakes onto their countertops, and I’d think, “That’s magic. I can’t do that.” My first attempt in Paris? Total collapse. The pan was greased, the whites were over-whipped, and I opened the oven door to check on it halfway through. It was a sad, dense pancake.
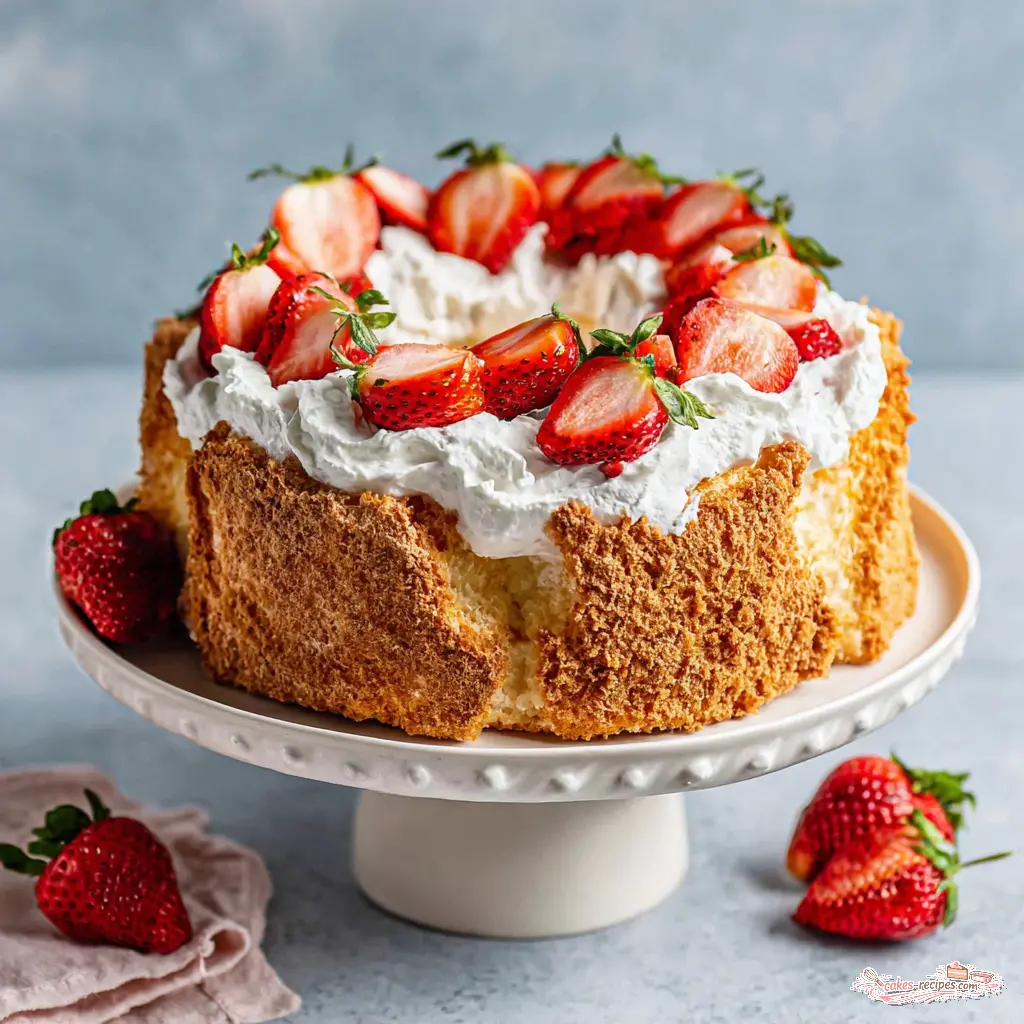
But here’s the thing: this homemade angel food cake isn’t about magic. It’s about technique. And once you understand the technique, it becomes one of the most rewarding things you can bake. This recipe is the exact method that made it click for me. It’s tall, it’s fluffy, it has that beautiful golden-brown crust and a pure white, cloud-like interior. It’s a bakery style angel food cake that you can make in your own kitchen.
What I love most about this angel food cake from scratch is how light it is. It’s a low fat cake dessert that doesn’t taste like a compromise. It’s perfect for summer, especially when you pair it with fresh, in-season strawberries and a dollop of whipped cream. It’s the kind of dessert that feels impressive but isn’t heavy. It’s the kind of dessert that makes people say, “You made this?”
Take your time with this one. Be patient with it. I promise, the reward is worth the effort.
What You Need To Make This Recipe
Before we get into the nitty-gritty, let’s talk about what you’ll need. The ingredient list is short, but each component plays a critical role. This isn’t a recipe where you can just swap things out willy-nilly. Well, mostly.
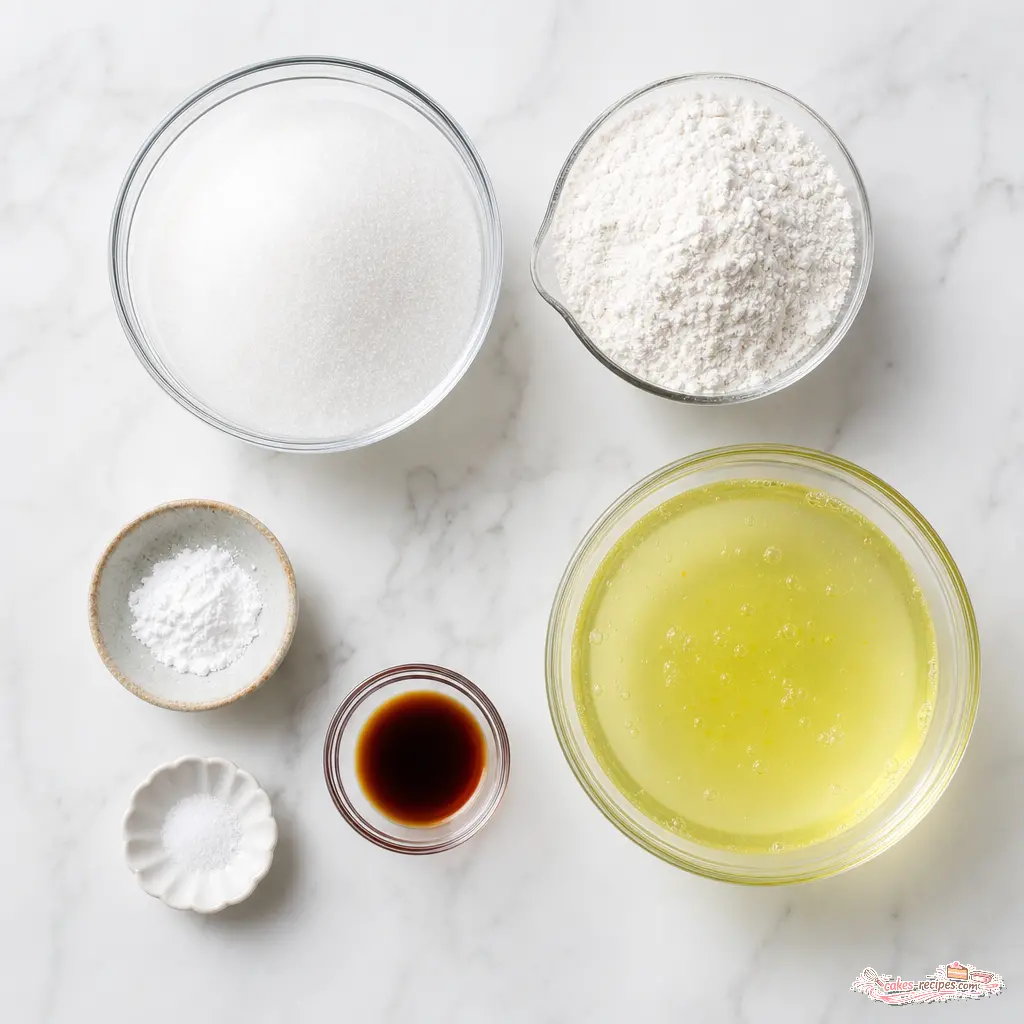
Essential Ingredients for Homemade Angel Food Cake:
- Granulated sugar: You’ll pulse this in a food processor to make it superfine. This helps it dissolve into the egg whites more easily, creating a stable foam.
- Cake flour: This is key. Cake flour has a lower protein content than all-purpose flour, which means less gluten development. Less gluten means a more tender, delicate crumb. I’ll talk about a cake flour substitute in the tips section.
- Egg whites: You need 12 large egg whites, and they absolutely must be at room temperature. Cold egg whites don’t whip up as well. They’re the entire structure of the cake.
- Cream of tartar: This is the stabilizer. It’s an acid that helps the egg white proteins bond together, creating a stronger, more stable foam. It’s the secret to a fail proof angel food cake.
- Vanilla and almond extract: The vanilla is a must. The almond extract is optional, but I love the floral note it adds. It’s subtle, but it makes the cake taste more complex.
- Salt: Just a pinch to balance the sweetness.
- Warm water: A little bit of warm water helps the sugar dissolve and the egg whites whip up faster. Don’t skip it.
Essential Tools:
- A 10-inch tube pan (the kind with the removable bottom and little feet). Do not use a nonstick pan. I’ll explain why in a minute.
- A stand mixer with a whisk attachment, or a hand mixer and a lot of patience.
- A fine-mesh sieve for sifting.
- A rubber spatula for folding.
- A cooling rack that the tube pan can sit upside down on.
How to Make Angel Food Cake
This is where the magic happens. I’m going to walk you through the four major stages of making this cake. Each stage has its own image, so you can see exactly what you’re aiming for. Remember, the detailed instructions are in the recipe card at the bottom, but here’s the why behind each step.
Stage 1: Prepping the Sugar and Flour
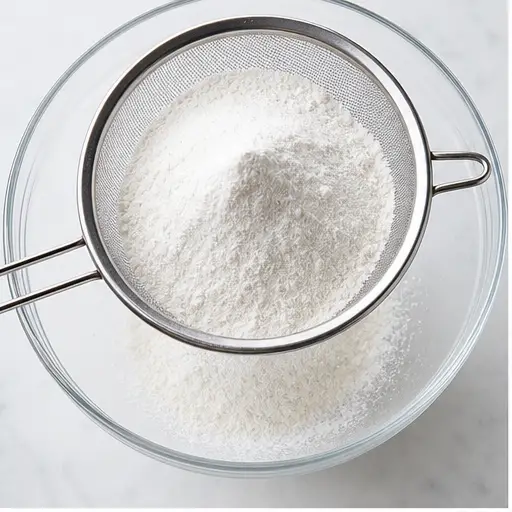
You start by pulsing the granulated sugar in a food processor for about two minutes. You want it superfine. This isn’t just a fancy chef trick. Superfine sugar dissolves more readily into the egg whites, which creates a smoother, more stable meringue. If you don’t have a food processor, you can use store-bought caster sugar, but pulsing it yourself is easy.
Then, you sift half of that superfine sugar with the salt and cake flour. The sifting is non-negotiable. It aerates the flour and ensures there are no lumps. The remaining sugar is set aside to be added to the egg whites later. This two-stage sugar addition helps control the meringue’s structure.
Stage 2: Whipping the Meringue
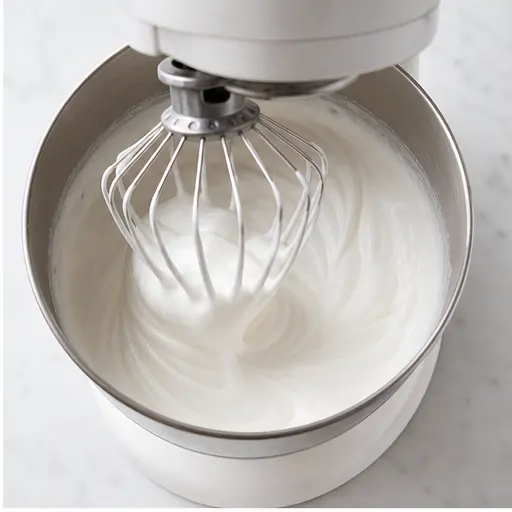
This is the most important part. In the bowl of your stand mixer, combine the egg whites, warm water, vanilla, almond extract, and cream of tartar. Mix on low speed for about a minute. This gets everything combined and starts to break up the egg whites.
Then, with the mixer running on medium speed, you gradually sift in the reserved superfine sugar. Don’t just dump it all in at once. Sift it in slowly, letting the mixer incorporate it. You’re building the foam here. You want to beat it until it reaches medium peaks. That’s the sweet spot. The peaks should be soft and billowy but hold their shape. They should be glossy, not dry. If you over-whip to stiff peaks, the foam becomes too rigid and can’t expand properly in the oven. The cake will be dry and possibly collapse. This is one of the most common egg white whipping tips I can give you.
Stage 3: Folding in the Flour
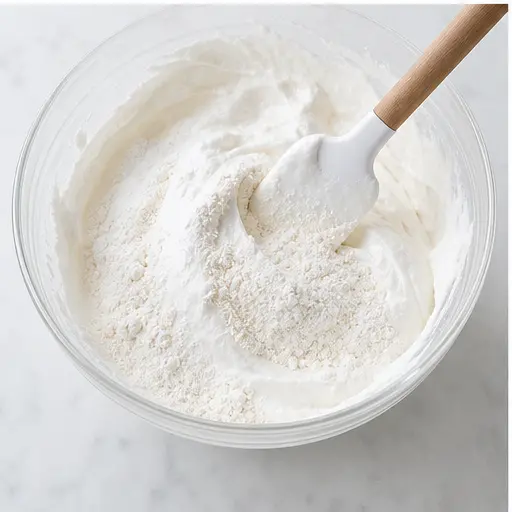
Now comes the gentle part. You sift a portion of the flour mixture over the foam and fold it in using a rubber spatula. This is where you need to be patient. The goal is to incorporate the flour without deflating all the air you just whipped into the egg whites.
The folding technique baking is simple: cut down through the center of the batter, scrape along the bottom of the bowl, and bring the spatula up the side, folding the batter over itself. Rotate the bowl a quarter turn and repeat. You want to see the flour disappear into the foam. It’s okay if the batter deflates a little, but you don’t want to stir it vigorously. Gently is the word here. Repeat until all the flour mixture is fully incorporated. The batter should be light, airy, and uniformly white.
Stage 4: Filling the Pan and Baking
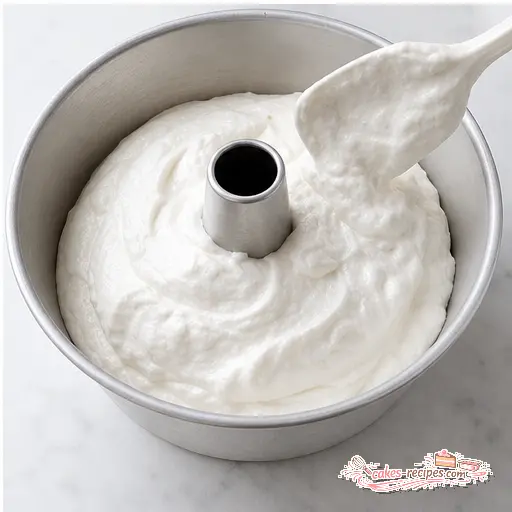
Carefully spoon the batter into an ungreased tube pan. I can’t stress this enough. Do not grease the pan. The batter needs something to cling to as it rises. Greased sides are a slide, not a ladder. The cake climbs up the sides of the pan to achieve its full height. If the pan is greased, it will just slide back down.
Bake at 350°F for 35 minutes. Don’t open the oven door during the first 30 minutes. The sudden rush of cool air can cause the cake to collapse. Test for doneness by inserting a wooden skewer halfway between the inner and outer wall. It should come out dry, with no wet batter clinging to it. The top should be a deep golden brown and feel springy to the touch.
When you lift the inverted pan and the cake glides out, you’ll know it worked. That’s the moment.
Why Whip The Egg Whites To Medium Peaks?
This is a question I get a lot. Why medium peaks? Why not stiff peaks? It seems counterintuitive, right? More air should be better.
Here’s the thing: when you whip egg whites to stiff peaks, the protein structure is very tight. The bubbles are small and rigid. When you fold in the flour and the batter goes into the oven, those rigid bubbles don’t have much room to expand. The cake rises, but it’s a tight, dense rise. It can also lead to a dry texture.
Medium peaks, on the other hand, are more flexible. The bubbles are still stable, but they have some give. When the heat of the oven hits them, they can expand beautifully, creating a tall, airy cake with a tender crumb. The foam should be glossy and hold a soft, droopy peak that curls over at the tip. It’s that perfect balance between structure and flexibility.
This is the cream of tartar purpose in action. It stabilizes the foam so it can reach this perfect medium peak stage without weeping or collapsing.
How to Bake and Cool the Cake
Baking is straightforward, but cooling is where most people mess up. I did, on my first attempt.
After the cake is baked, you need to immediately invert the pan onto a cooling rack. Yes, you have to flip the whole pan upside down – trust the process. The tube pan has little feet on the rim, or you can rest it on the neck of a bottle. The point is, the cake is hanging upside down, suspended by the pan’s central tube.
This is a crucial step. The cake is still very hot and delicate. If you let it cool right-side up, the weight of the cake will cause it to collapse under its own gravity. By cooling it upside down, you’re letting the structure set while it’s being gently stretched. This prevents sinking.
Let it cool upside down for at least one hour. Two hours is even better. I’ve been known to leave it overnight. When it’s completely cool, run a thin, sharp knife around the edges of the pan and the central tube to loosen it. Then, lift the cake out. It should glide out easily, tall and proud.
Pro Tips For Making This Recipe
After years of making this cake, I’ve learned a few things. Here are my best pro tips for making this recipe a success every time.
- Room temperature egg whites are non-negotiable. Cold egg whites don’t whip up as high or as stable. Separate your eggs when they’re cold, then let the whites sit on the counter for 30 minutes before you start.
- Use a clean, grease-free bowl. Any trace of fat (even a little yolk) will ruin your meringue. Wash your mixer bowl and whisk with hot, soapy water and dry them thoroughly before you start.
- Don’t over-fold. Once the flour is incorporated, stop. Over-folding deflates the batter.
- Don’t open the oven door. I said it before, but it’s worth repeating. The temperature shock can cause the cake to fall.
- Use a serrated knife to slice. A regular knife will squish the delicate crumb. A serrated knife saws through it cleanly.
- For a cake flour substitute: Measure 1 cup of all-purpose flour, remove 2 tablespoons, and add 2 tablespoons of cornstarch. Sift it together at least three times to combine. It’s not perfect, but it works in a pinch.
Why Did My Cake Collapse?
It happens to the best of us. Here’s a quick troubleshooting guide for common issues.
| ❌ Mistake | ✅ Solution |
|---|---|
| Greasing the tube pan. | Never, ever grease the pan. The batter needs to climb the walls. |
| Over-whipping the egg whites to stiff peaks. | Whip to medium peaks. Soft, billowy, and glossy. |
| Not cooling the cake upside down. | Invert the pan immediately after baking and cool for at least 1 hour. |
| Using a nonstick pan. | Use a standard aluminum tube pan. Nonstick pans are too slippery. |
| Using all-purpose flour instead of cake flour. | Cake flour is essential for a tender crumb. Use the substitute if needed. |
| Not measuring flour correctly. | Spoon flour into your measuring cup and level it off. Don’t scoop. |
| Opening the oven door during baking. | Resist the urge. Wait until the last 5 minutes to check. |
| Using carton egg whites. | They don’t whip up as well. Use fresh, whole egg whites. |
Serving Suggestions
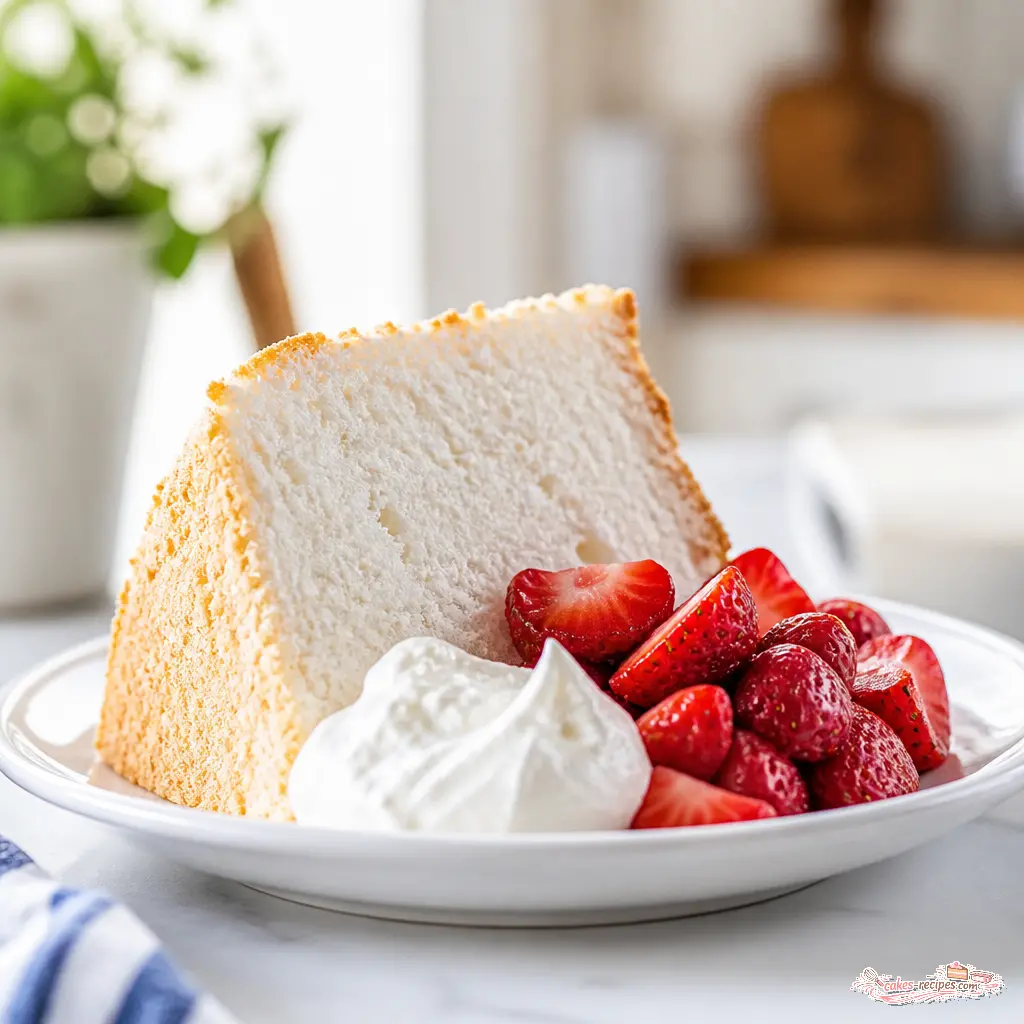
This angel food cake with strawberries is a classic for a reason. The sweet, airy cake is the perfect partner for the tart, juicy berries. Here are some of my favorite ways to serve it.
- Classic Strawberry Shortcake: Serve a slice with a pile of fresh, sliced strawberries (macerated in a little sugar if you like) and a generous dollop of lightly sweetened whipped cream. This is the ultimate summer cake idea.
- Berry Medley: Mix strawberries with blueberries, raspberries, and blackberries for a colorful and flavorful topping.
- Lemon Curd: The tangy, creamy lemon curd is a fantastic contrast to the sweet, airy cake.
- Just a Dusting: Sometimes, the cake is perfect on its own. A simple dusting of powdered sugar is all it needs.
- With Ice Cream: A scoop of vanilla or strawberry ice cream turns this into an indulgent sundae.
This cake is so light that it’s a perfect dessert after a heavy meal. It feels like a treat, but it doesn’t weigh you down. That’s the beauty of a low fat cake dessert that doesn’t taste like one.
How to Store Leftovers
If you have any leftovers, that is. This cake has a way of disappearing quickly. But if you do, here’s how to keep it fresh.
Store the cake in an airtight container at room temperature for up to 3 days. Do not refrigerate it. The refrigerator will dry it out and make it stale. If you need to keep it longer, you can freeze it.
To freeze: Wrap the cooled cake tightly in plastic wrap, then again in a layer of aluminum foil. Place it in a freezer bag and freeze for up to 3 months. To thaw, remove the wrapping and let it sit at room temperature for a few hours. It will be just as light and fluffy as the day you baked it.
I love that I can make this cake ahead of time for a summer barbecue. It’s one less thing to worry about on the day of the party.
Frequently Asked Questions
Light & Fluffy Homemade Angel Food Cake
Ingredients
Method
- Preheat your oven to 350°F.
- Place the granulated sugar in a food processor and pulse for about 2 minutes until it becomes superfine.
- Sift together half of the superfine sugar with the salt and cake flour; set the remaining sugar aside.
- In the bowl of a stand mixer fitted with the whisk attachment, combine the egg whites, warm water, vanilla extract, almond extract, and cream of tartar. Mix on low speed for about 1 minute.
- With the mixer running on medium speed, gradually sift in the reserved superfine sugar and continue beating until the meringue reaches medium peaks.
- When the peaks are medium, sift a portion of the flour mixture over the foam and gently fold it in using a spatula.
- Repeat folding in the remaining flour mixture until it is fully incorporated.
- Carefully spoon the batter into an ungreased tube pan.
- Bake for 35 minutes, then test for doneness by inserting a wooden skewer halfway between the inner and outer wall; it should come out dry.
- Immediately invert the pan onto a cooling rack and let it cool upside down for at least 1 hour before removing the cake.
Nutrition
Notes
Tried this recipe?
Let us know how it was!I hope this guide gives you the confidence to try this homemade angel food cake. It’s a skill that once you master, you’ll feel like you can tackle any baking challenge. And if you’re looking for more inspiration, I’d love for you to follow me on Pinterest where I share all my favorite summer dessert ideas and baking tips.
Source: Health & Nutrition Research
Can I use a Bundt pan for angel food cake?
I wouldn’t recommend it. A Bundt pan has a nonstick coating and intricate ridges, which make it difficult for the cake to climb and release properly. A standard 10-inch tube pan with a removable bottom and no nonstick coating is the best choice for a tall, beautiful angel food cake.
Do I grease the pan before putting in the batter?
Absolutely not. This is the most important rule of making a homemade angel food cake. The batter needs to cling to the sides of the ungreased pan to reach its full height. Greasing the pan creates a slippery surface, and the cake will slide back down and collapse. Keep it clean and dry.
If I sift the flour and sugar 3 times before adding the other ingredients, put batter into a parchment lined cake pan, do I have to shorten the bake time so that the cake doesn’t get burned?
Yes, you would need to adjust the bake time, but I strongly advise against using a parchment-lined pan. The parchment prevents the cake from climbing the sides, which is essential for its structure. Stick to an ungreased tube pan. If you must use a different pan, start checking for doneness at 25 minutes, but expect a shorter, denser cake.
Can I bake this half version (6 egg whites) in either a 13 by 9 light silver or dark nonstick pan, or two 9 inch pans?
I don’t recommend it. Angel food cake needs the tall, central tube of a tube pan to rise properly. In a 13×9 pan, the batter will spread too thin and bake into a dense, flat sheet. The texture and height won’t be the same. If you want a half recipe, use a smaller tube pan, like a 6-inch one.
Can you bake angel food cake in a regular pan?
Technically, yes, but the result will be a very different cake. Without the central tube of a tube pan, the heat won’t penetrate the center evenly, leading to a dense, gummy interior. The cake also won’t have the tall, light structure it’s known for. For the best results, use a tube pan.
Can you use caster sugar or powdered sugar instead?
Caster sugar is a great substitute. It’s already superfine, so you can skip the food processor step. Do not use powdered sugar. It contains cornstarch, which will alter the texture of the cake and can make it gummy. Stick with granulated sugar pulsed to superfine or caster sugar.
Can I use liquid egg whites from a carton?
I’ve tried this, and I don’t recommend it. Carton egg whites are pasteurized, which can affect their ability to whip into a stable foam. They often produce a less voluminous, more watery meringue. For a tall, fluffy homemade angel food cake, fresh egg whites are the way to go.
Do you have to use cake flour?
For the best texture, yes. Cake flour has a lower protein content than all-purpose flour, which means less gluten and a more tender crumb. If you don’t have it, you can make a substitute: for every cup of all-purpose flour, remove 2 tablespoons and add 2 tablespoons of cornstarch. Sift it together well.















4 Responses
This was my first time making angel food cake, and while the flavor was great, I had trouble with the height. My cake only rose about halfway up the pan. Could it be that my egg whites weren’t whipped enough, or is there something else I should check? I used room temperature eggs and cream of tartar as directed.
Hi David, thanks for giving it a try! It sounds like you might have under-whipped the egg whites slightly—they should form stiff, glossy peaks that hold their shape firmly. Also, make sure you’re folding the flour gently to avoid deflating the batter. Let me know how it goes next time!
I substituted the almond extract with lemon zest because I’m not a fan of almond flavor, and it was incredible! The citrus notes paired perfectly with the strawberries I served it with. This is definitely going into my regular rotation.
I tried this recipe last weekend and it turned out beautifully! The tip about not greasing the pan was a game-changer—I had no idea that was why my previous attempts always failed. The texture was so light and fluffy, just like you described. Thank you for sharing your technique!