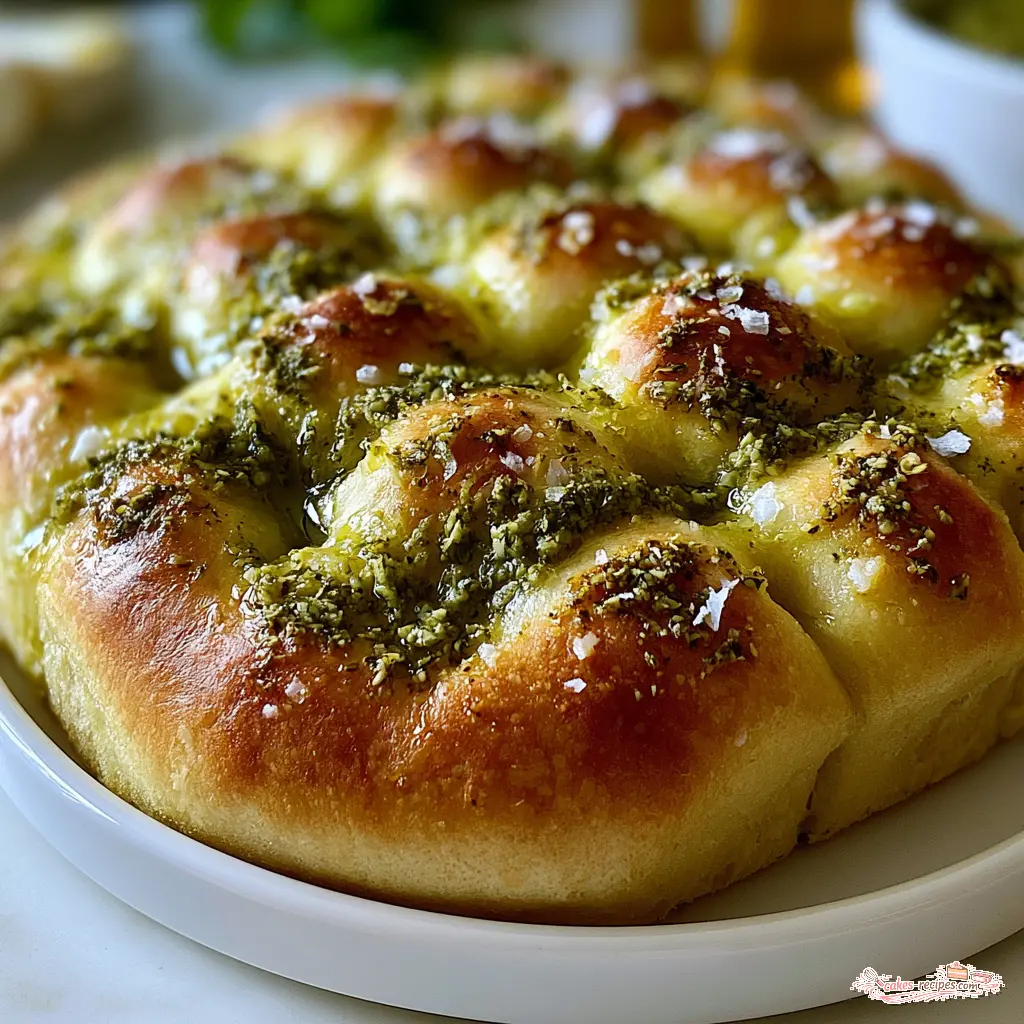
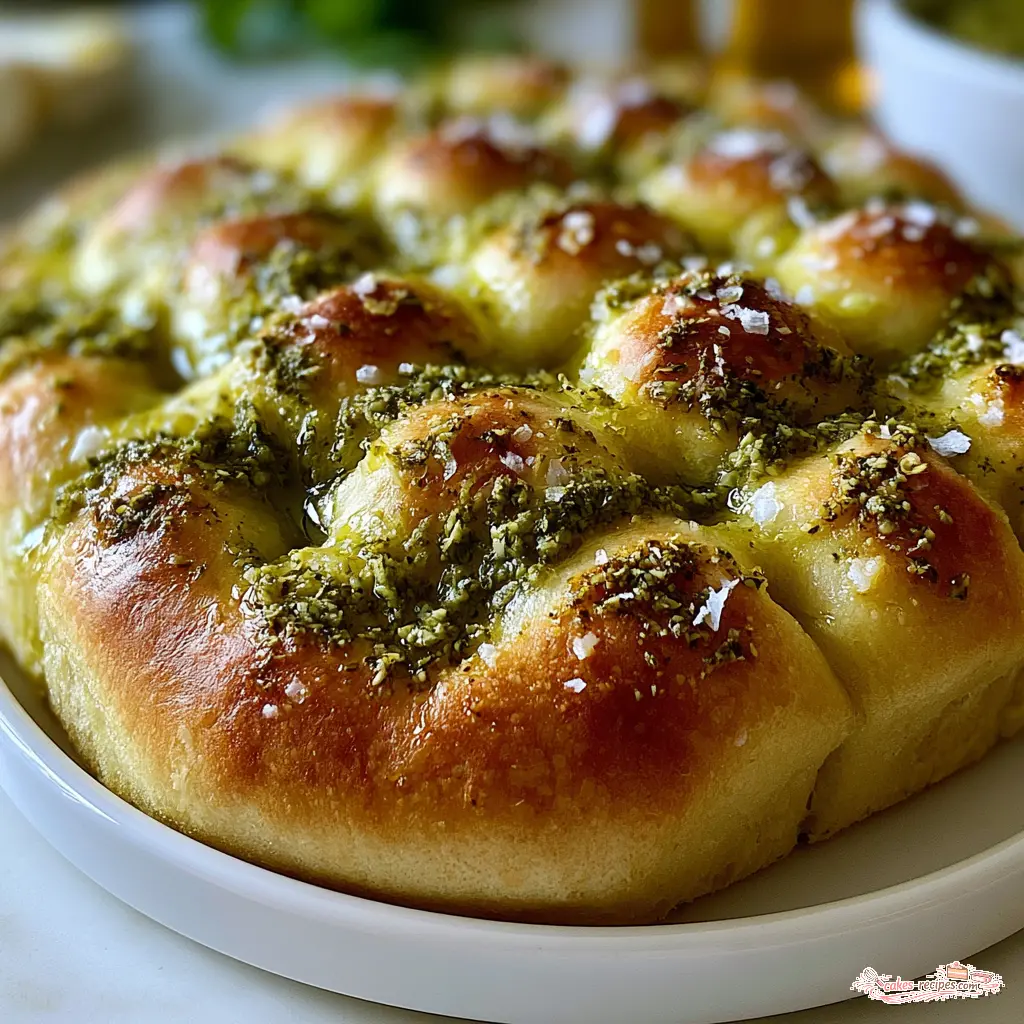
Homemade Focaccia with Fresh Basil Pesto: An Easy No-Knead Italian Classic
Ingredients
Method
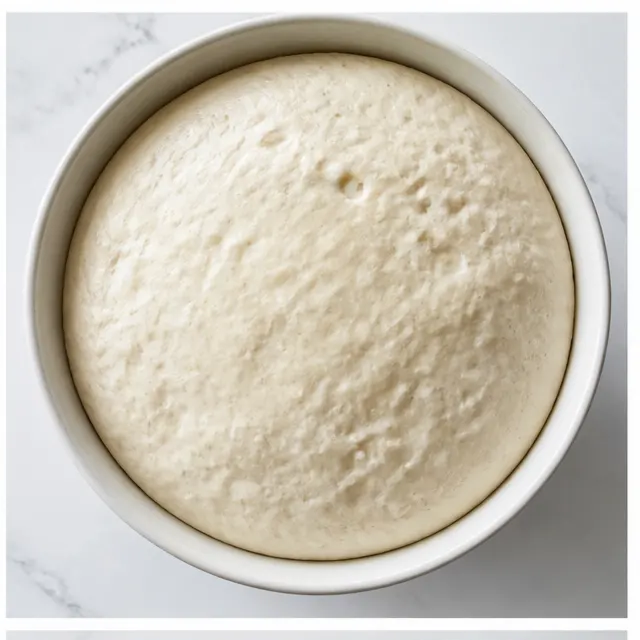
- In a large mixing bowl, whisk together the flour, instant yeast, and fine sea salt. Pour in the warm water and the 1/4 cup olive oil, then stir with a wooden spoon until a sticky dough forms. Cover the bowl and let it rise in a warm, draft-free spot until doubled, 2 to 3 hours.
- Drizzle the 2 tablespoons of olive oil into a 9x13-inch baking pan and use a pastry brush or your fingers to coat the bottom and sides thoroughly.
- Gently scrape the risen dough into the oiled pan and stretch it out toward the corners. Cover the pan and let the dough relax for 30 to 60 minutes.
- While the dough is resting, make the pesto: Combine the basil, Parmesan, pine nuts, garlic, half of the flaky salt, and black pepper in a food processor. Pulse until finely chopped, then, with the motor running, stream in the 1/3 cup olive oil and process until smooth. Taste and adjust the seasoning if needed.
- Preheat the oven to 425°F with a rack in the center.
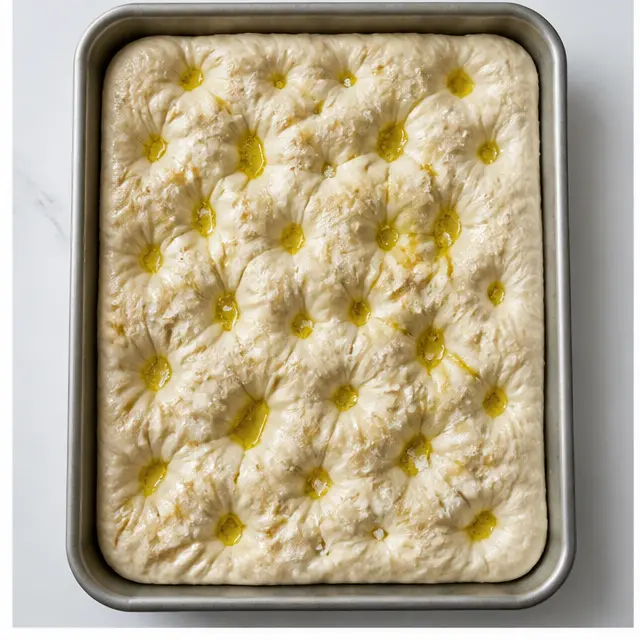
- Press the pads of your fingertips deeply into the dough to create dimples all over the surface. Drizzle with a little extra olive oil and sprinkle with the remaining flaky sea salt.
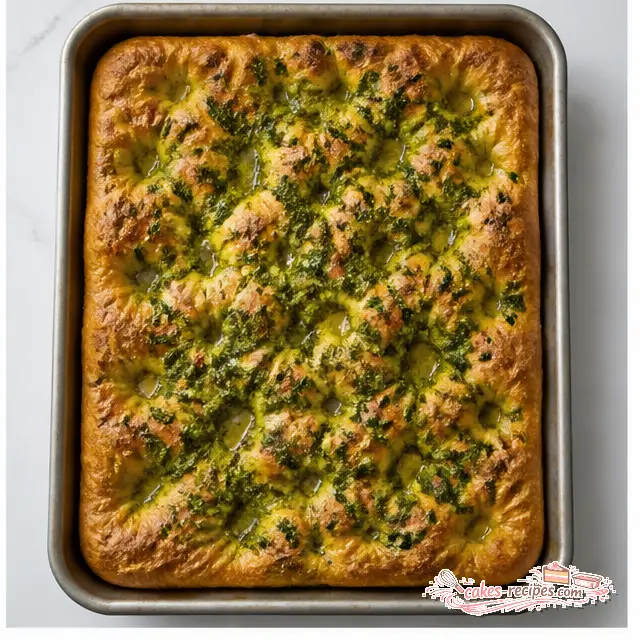
- Bake the focaccia for 20 to 25 minutes, until the top is golden brown and the edges look crisp and puffed.
- Take the pan out of the oven and let the focaccia cool for 2 to 3 minutes. Spread the pesto evenly over the warm surface, then return the pan to the oven for 2 to 3 minutes.
- Let the focaccia cool in the pan for 5 to 10 minutes before slicing. Serve warm or at room temperature.
Nutrition
Notes
Tried this recipe?
Let us know how it was!What Is Focaccia Bread?
Let me start with a confession: my first attempt at homemade focaccia was a total brick. Dense, pale, and honestly kind of sad. My French grandmother Mimi, who owned a pâtisserie in Lyon, would have raised one perfectly sculpted eyebrow. But here’s the good news. Homemade focaccia is forgiving. Learn a few simple tricks, and it becomes one of the easiest, most rewarding breads you’ll ever bake.
So what is focaccia, exactly? It’s an Italian flatbread that traces its roots to the Liguria region, specifically the city of Genoa. Think of it as pizza dough’s laid-back, olive-oil-soaked cousin. The ancient Romans baked a version of this bread on the hearth, which is where the name comes from: the Latin focus, meaning fireplace. And yes, it’s pronounced foh-KAH-chya. Foh. KAH. Chya. Say it with me. You’ve got this.
The main ingredients in focaccia are beautifully simple: flour, water, yeast, olive oil, and salt. No eggs, no sugar. Traditionally, it’s made by mixing a wet dough, letting it ferment slowly, stretching it into a pan, and dimpling the surface with your fingers before a high-heat bake. That high hydration dough is what gives focaccia bread its light, open crumb and that signature craggy top.
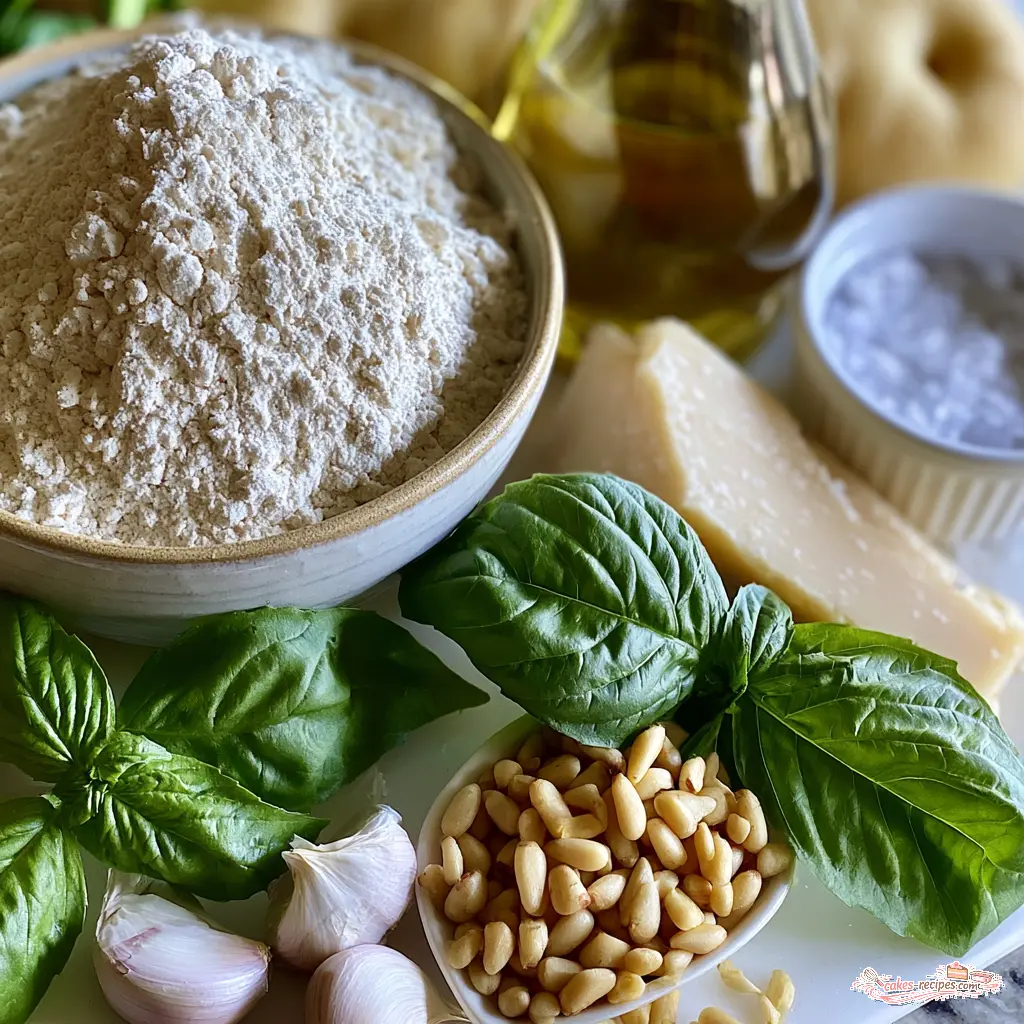
For this particular homemade focaccia recipe, you’ll also grab a few things for a fresh basil pesto. Fresh basil leaves, grated Parmesan, pine nuts, garlic, flaky sea salt, and a little black pepper. That’s the whole shopping list. Totally doable.
Why This Homemade Focaccia Works
This homemade focaccia has become my summer obsession, and I promise you’ll understand why after the first bite. The crust crackles when you press it. The inside is soft, airy, and chewy. And that basil pesto? It transforms a simple olive oil bread into something you’ll want to serve at every backyard gathering. Love that for you, honestly.
Here’s the secret about no knead focaccia. You stir everything together with a wooden spoon, cover the bowl, and walk away. The long rise builds gluten all by itself, which is exactly why no-knead methods work so well with high hydration dough. What looks like a sticky, alarming mess in the bowl becomes a light, beautifully dimpled bread with almost zero effort on your part.
That lesson reminds me of Mimi. When I was ten, she taught me to make choux pastry for cream puffs. The first batch was flat, the second burned, and the third was somehow both. She never got frustrated, she just showed me again. On the fourth try, they puffed perfectly, and we ate every single one. That day I learned that failure is just practice in disguise. Focaccia works the same way.
How to Make No-Knead Focaccia
The full recipe is in the card above, but let me walk you through the four big moments of your homemade focaccia journey. I’ll tell you exactly what everything should look and feel like, because I remember how anxious bread-making made me at first. (Deep breaths. You’ve got this.)
1. Mix the Dough
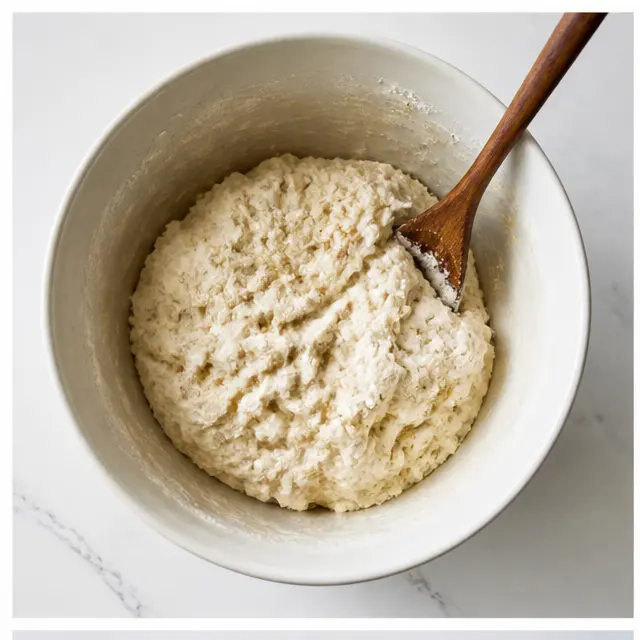
Whisk together the flour, instant yeast, and fine sea salt in a large bowl. Pour in the warm water, about 110°F, and the 1/4 cup of olive oil. Stir with a wooden spoon until a sticky, shaggy dough forms. It will look rough and wet, and that’s exactly right. (Yes, it’s supposed to look like this.) Cover the bowl and let it rise in a warm, draft-free spot for 2 to 3 hours until doubled. In hot summer weather, the yeast moves faster, so check on it a little early. In my experience, an air-conditioned corner of the kitchen works great.
2. Stretch and Let It Relax
Drizzle 2 tablespoons of olive oil into a 9×13-inch baking pan and coat the bottom and sides thoroughly. Don’t be shy here. That thick layer of oil is what gives the focaccia its golden, almost fried bottom crust. Gently scrape the risen dough into the pan and stretch it toward the corners. It will resist a little, which is completely normal. Cover the pan and let the dough relax for 30 to 60 minutes. This rest is what makes the dough much easier to work with in the next step.
3. Dimple and Top
This is my favorite part. Press the pads of your fingertips deeply into the dough to create dimples all over the surface. Go all the way down to the bottom of the pan. Those wells fill with olive oil when you drizzle a little more over the top, creating the classic dimpled bread look. This is also the moment it starts feeling like real bread, I promise. Sprinkle with flaky sea salt and don’t skip it. Those little salt crystals add the most wonderful pops of flavor against the rich, oily dough.
4. Bake and Finish With Pesto
Slide the pan into a 425°F oven and bake for 20 to 25 minutes, until the top is golden brown and the edges look crisp and puffed. When it comes out, listen. That crackle as the crust cools is the most satisfying sound in the world. Let it cool for 2 to 3 minutes, then spread the pesto evenly over the warm surface and return the pan to the oven for 2 to 3 minutes. That brief second bake sets the pesto right into the bread. The smell that fills your kitchen at this point? Pure bliss.
How to Make Fresh Basil Pesto
While the dough rises and rests, you can whip up the pesto in a food processor in about five minutes. Combine the basil, Parmesan, pine nuts, garlic, half of the flaky salt, and a pinch of black pepper. Pulse until finely chopped. Then, with the motor running, stream in the 1/3 cup of olive oil and process until smooth. Taste it and adjust. I tend to like mine with a little extra black pepper, but you might prefer more salt or a bigger hit of garlic.
For a California twist, substitute the pine nuts with toasted almonds and add a squeeze of Meyer lemon to the pesto. The bright citrus against the rich olive oil is genuinely incredible. You can also make the pesto up to 3 days ahead. Press plastic wrap directly onto the surface so it stays vibrant green. This is the sauce that takes this homemade focaccia over the top, so don’t skip it.
Focaccia Toppings and Variations
Once you’ve mastered the base homemade focaccia recipe, the topping possibilities are endless. Here are some of my favorite combinations to try:
- Rosemary focaccia: The classic. Sprinkle fresh rosemary over the dimpled dough with the flaky salt before baking.
- Cherry tomato focaccia: Press halved cherry tomatoes into the dough before baking for little bursts of summer sweetness.
- Olives or sun-dried tomatoes: Scatter them over the surface or fold them into the dough during the first rise.
- Fresh thyme or thin Meyer lemon slices: Add these before baking for a bright, herby finish.
- A final grating of Parmesan: It melts into the warm crust beautifully.
You can also change the pan to change the bread. A baking sheet creates a thinner, crispier focaccia, which is perfect for stacking into a focaccia sandwich. A cast iron pan gives you a thicker, softer style closer to focaccia genovese. Muffin tins make the cutest individual rolls. How cute is that?
Bread flour works beautifully in place of all-purpose flour if that’s what you have on hand. If you only have active dry yeast, bloom it in lukewarm water for 15 minutes until foamy before adding it to the flour mixture. And once you’re feeling confident, you can even experiment with a sourdough focaccia next. One bread at a time, though.
Tips for the Best Homemade Focaccia
After countless batches, here are the mistakes I’ve made so you don’t have to:
- ❌ Not oiling the pan enough: The focaccia sticks and you lose the gorgeous crisp bottom. ✅ Coat the bottom and sides of the pan thoroughly with olive oil.
- ❌ Handling the sticky dough with dry hands: It clings to everything. ✅ Oil your hands liberally and the dough will cooperate.
- ❌ Judging readiness by time alone: Rising times vary with temperature. ✅ Go by dough size and appearance, not just the clock.
- ❌ Under-baking: A pale crust means a gummy interior. ✅ Bake until deeply golden and puffed at the edges.
- ❌ Letting toppings dry out: They’ll burn in the hot oven. ✅ Slick toppings with a little olive oil before baking.
One more note for summer. Hot weather speeds up yeast activity, so your dough will rise faster than usual. That’s fine, just keep an eye on it. Find a cooler spot in the house if the kitchen feels like a sauna. Or use the overnight focaccia method: after the first rise, tuck the covered bowl into the fridge and finish the next day. The cold rest builds even more flavor.
Storage, Reheating, and Serving
Honestly, this homemade focaccia rarely survives a full day in my house. The pesto alone makes it irresistible. But if you do have leftovers, store them in an airtight container at room temperature for up to 2 days. To bring back the crackly crust, reheat slices in a 350°F oven for a few minutes. It tastes freshly baked all over again.
You can also freeze focaccia for up to 3 months. Wrap it tightly, thaw at room temperature, and reheat in the oven. Future you will be very grateful on a busy weeknight.
As for serving, I love slicing it in half horizontally and loading it with sandwich fixings. It also shines alongside soup, a big green salad, or a cheese board at your next potluck. Or just tear off warm pieces and dip them in olive oil, that makes me so happy. Every. Single. Time.
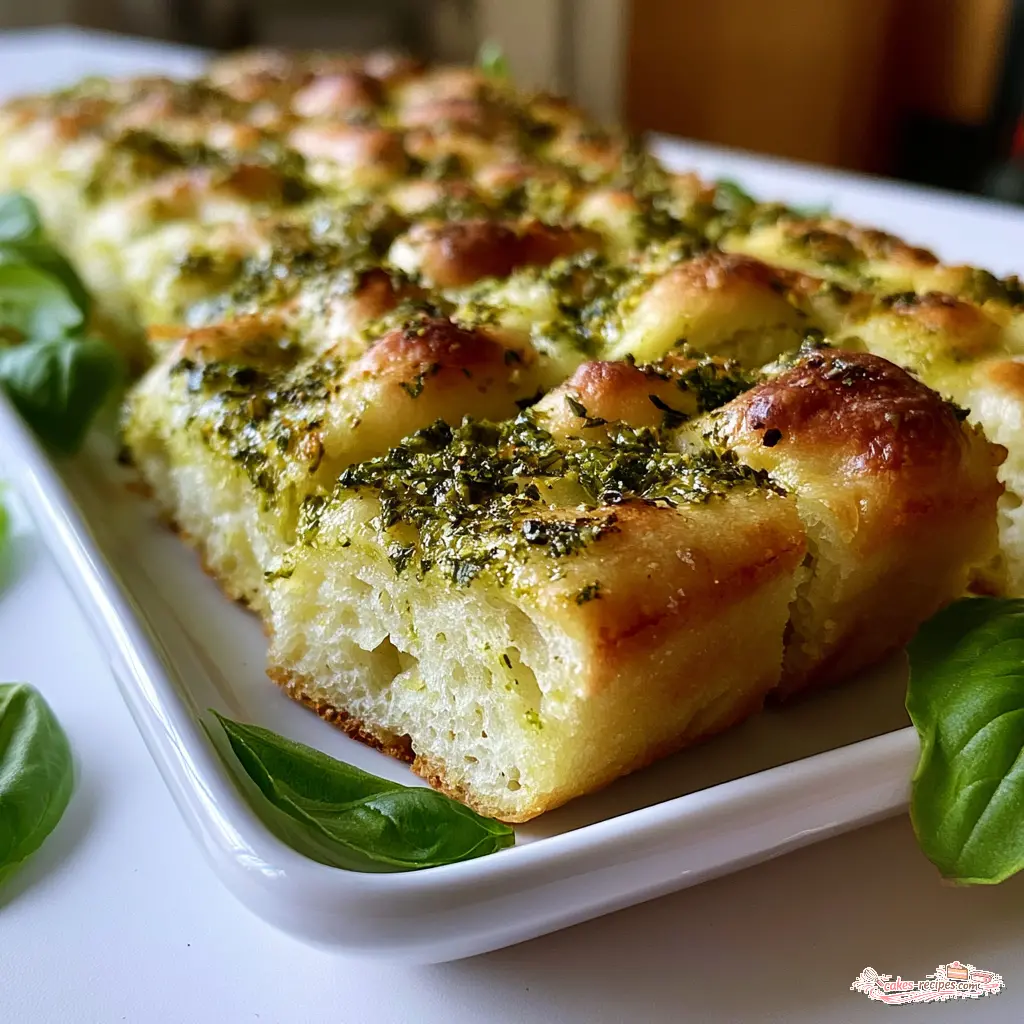
When you pull your homemade focaccia from the oven, with the pesto glistening and the flaky salt sparkling in the light, I hope you feel the same pride I did when I finally got it right. Baking bread is a little act of love, and you just did it. If you want more summer baking inspiration, follow me on Pinterest here. And tell me in the comments what toppings you’re excited to try. I’m always looking for new ideas.
Frequently Asked Questions
Source: Learn More About This Dish
Can this homemade focaccia be made in advance and kept overnight before baking?
Absolutely. After the first rise, cover the bowl and refrigerate the dough overnight. When you’re ready to bake, let it come to room temperature before continuing with the oiled pan step. The cold rest develops even more flavor, like an overnight focaccia from a bakery.
My tin is 25cm by 25cm. Should I remove some of the dough for homemade focaccia?
Keep all the dough! A 25cm square pan is slightly smaller than a 9×13-inch dish, so your focaccia will be a touch thicker and may need a few extra minutes in the oven. Just watch for that deep golden color. This works for me, but a larger baking sheet makes a thinner, crisper version if you prefer.