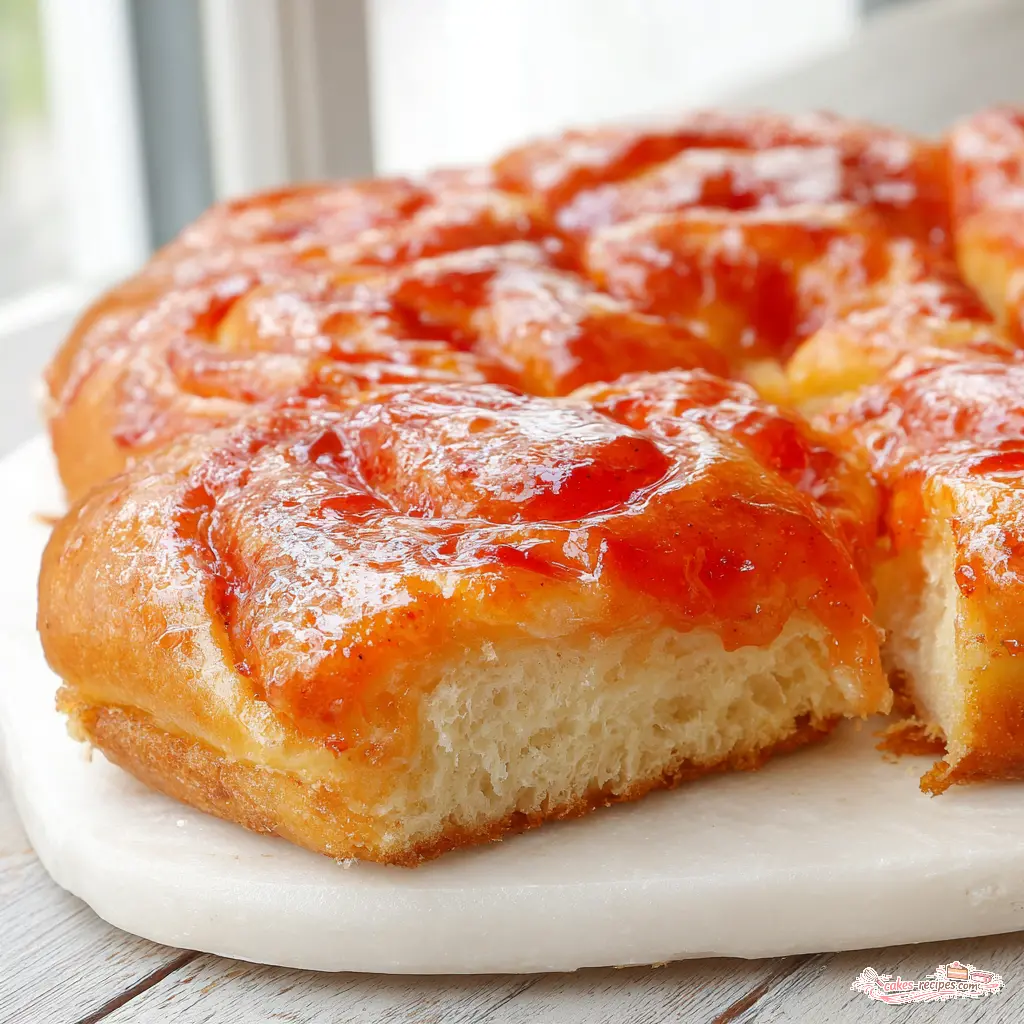
California Peach Cream Jelly Doughnut Focaccia
Ingredients
Method
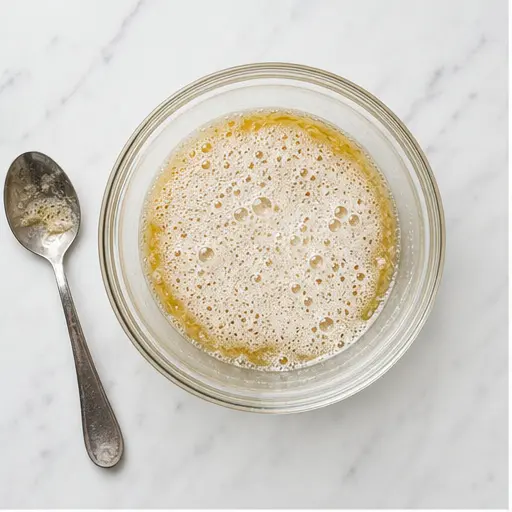
- In a small bowl, combine the hot water, sugar, and instant yeast. Stir gently and let sit for 5 minutes until the mixture becomes foamy and bubbly.
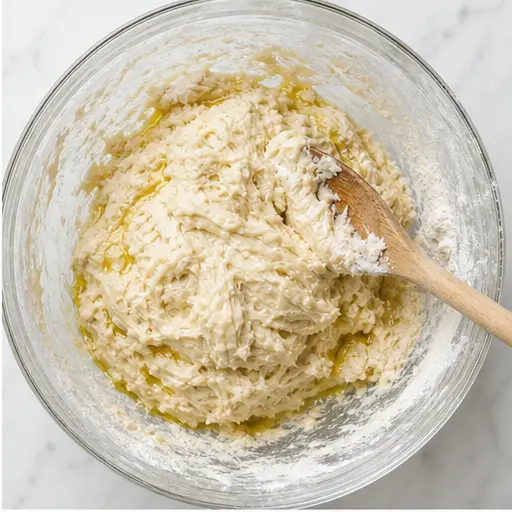
- In a large mixing bowl, whisk together the flour, baking powder, and salt. Make a well in the center and add 3 tablespoons of olive oil, the sparkling water, and the yeast mixture. Stir until just combined; the dough will be very sticky and lumpy.
- Cover the bowl tightly with plastic wrap and then a clean kitchen towel. Let the dough rise in a warm, draft-free spot until doubled in size, about 2 to 4 hours.
- Butter a 9x13-inch baking dish with the softened butter. Transfer the risen dough to the dish (it will deflate). Gently pull and stretch the dough to the edges. Fold the top edge down toward the center, then fold the bottom edge up. Rotate the dish and press the dough lightly with your fingertips to dimple it. Cover again with plastic wrap and let rise until more than doubled, about 1 to 2 hours.
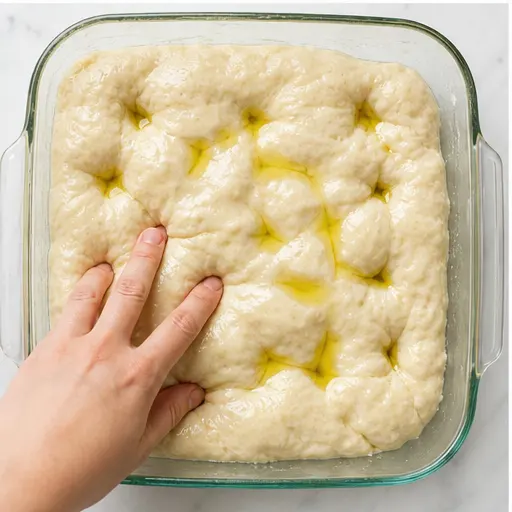
- Preheat your oven to 425°F. Drizzle the remaining 2 tablespoons of olive oil over the top of the dough. Use your fingertips to press dimples all over the surface, creating air pockets. Bake for 25 to 30 minutes, until deep golden brown. Remove from the oven and let cool in the pan for about 10 minutes.
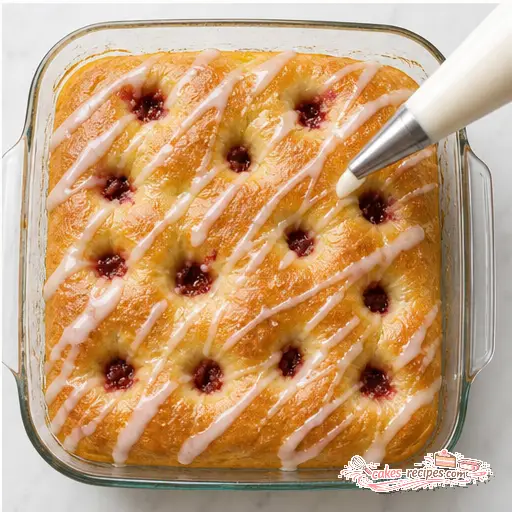
- Spoon the peach jam into a piping bag fitted with a round tip. Poke several holes into the top of the warm focaccia and pipe the jam into each hole, filling generously.
- In a medium bowl, whisk together the powdered sugar, cream extract, and milk until smooth and pourable. Drizzle the icing over the filled focaccia.
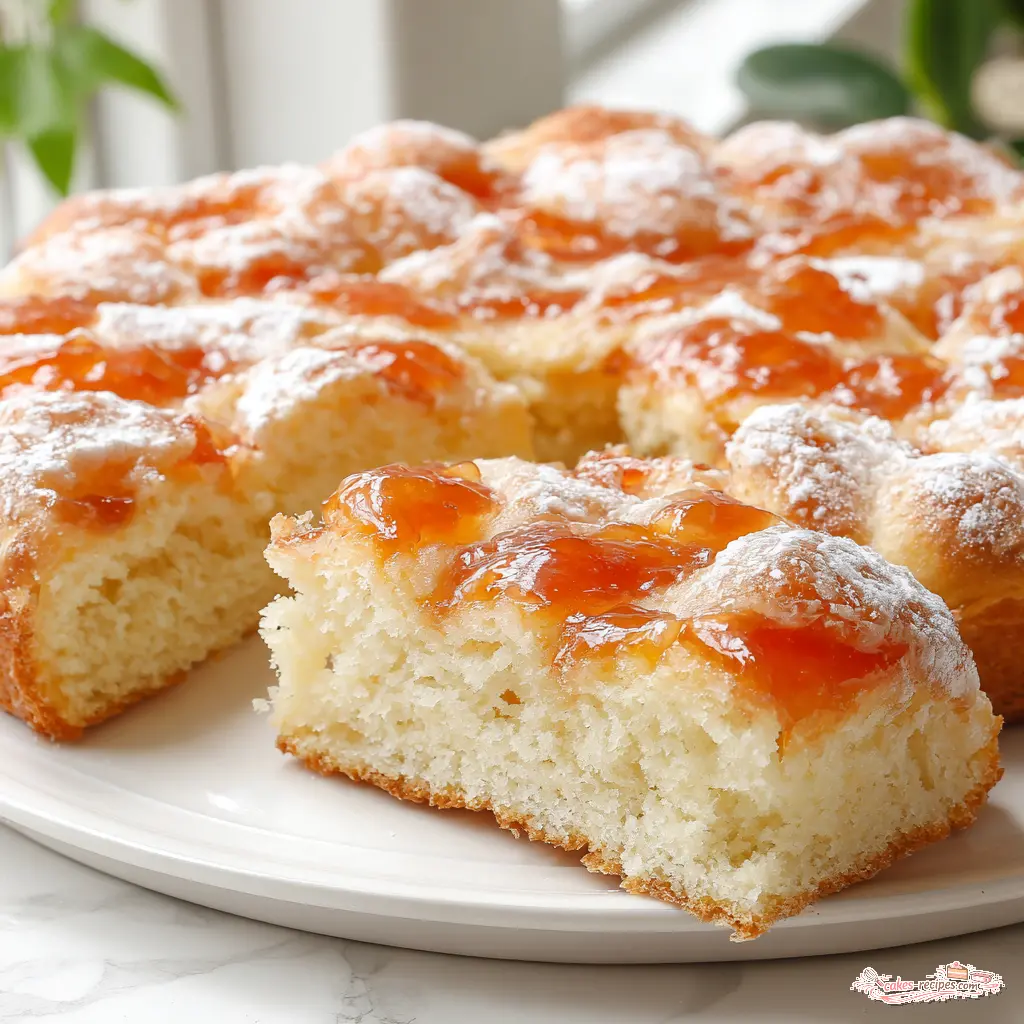
- Slice into squares and serve warm or at room temperature. Enjoy your jelly doughnut focaccia!
Nutrition
Notes
Tried this recipe?
Let us know how it was!Why You’ll Love This Jelly Doughnut Focaccia
I have a confession to make. I love jelly donuts. I mean, I REALLY love them. That first bite where your teeth sink through the soft, pillowy dough and hit that pocket of sweet, fruity jam? Perfection. But I absolutely hate frying. The hot oil, the splatters, the lingering smell in my kitchen for days. It’s a mess.
So when I started thinking about how to get that same jelly donut experience without the deep fryer, this jelly doughnut focaccia was born. And honestly? It might be better than the original.
Think about it. You get the same soft, yeasted bread. The same sweet jam filling. The same glossy, sugary glaze on top. But instead of individual donuts that disappear in two bites, you get a giant, shareable bread that feeds a crowd. It’s a no-fry donut recipe that delivers all the flavor with way less hassle.
What I love most about this recipe is how forgiving it is. Focaccia dough is naturally high-hydration and sticky. That means you don’t need to be a bread expert to get beautiful results. The sparkling water in the dough adds extra lightness and airiness. And the peach jam? It’s a nod to those California summers I grew up with, when the farmers markets are overflowing with stone fruit.
This is the kind of sweet focaccia recipe that makes people’s eyes go wide. They see it on the table and ask, “Wait, is that a donut? Is that bread? What IS that?” And then they take a bite and just smile. That’s the moment that makes all the rising and waiting worth it.
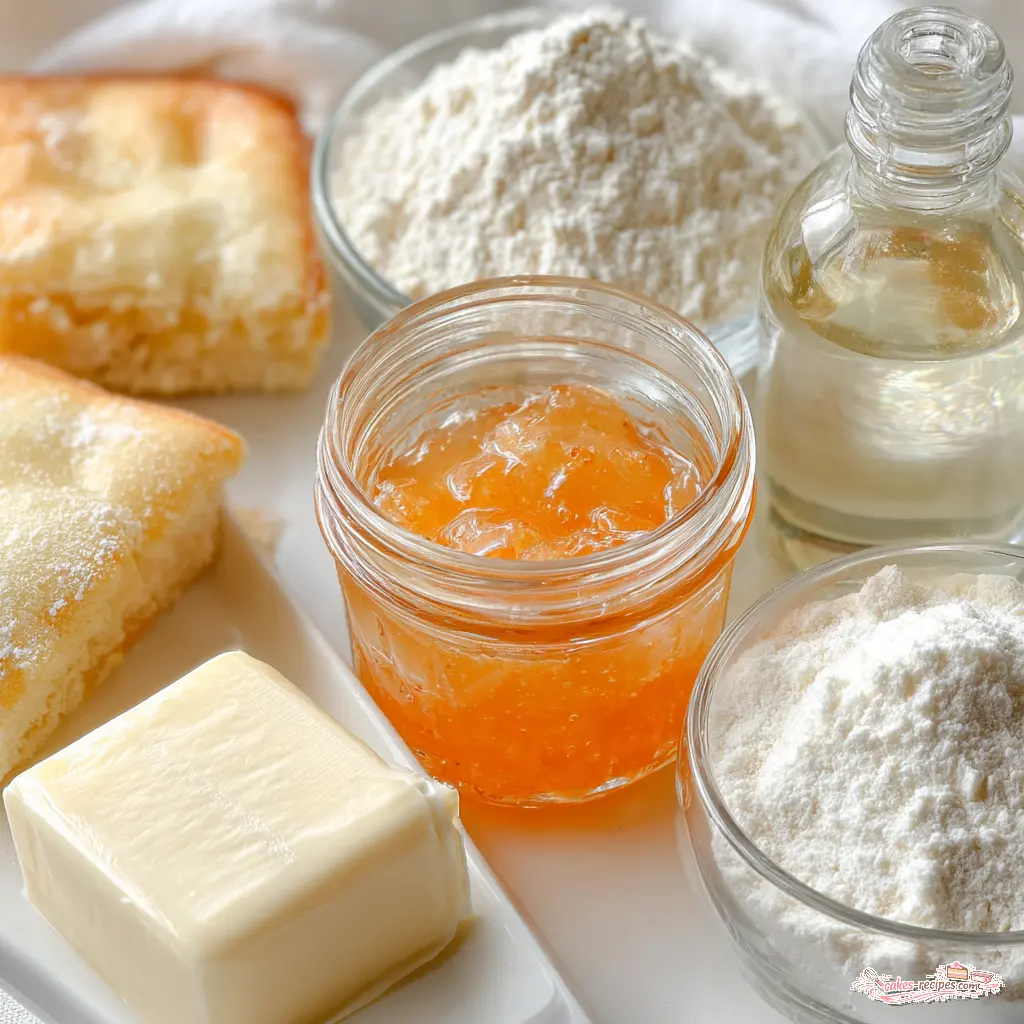
Ingredients for Peach Cream Jelly Doughnut Focaccia
Let’s talk about what you’ll need. The ingredient list is pretty straightforward, but a few things deserve a closer look.
Gluten-free bread flour or all-purpose flour. I developed this recipe with gluten-free bread flour because I wanted it to be accessible to more people. But if you don’t need gluten-free, just use regular all-purpose flour. The texture will be slightly different but still wonderful. Don’t skip the baking powder if you’re using gluten-free flour it helps with the rise.
Unflavored sparkling water. This is my secret weapon for focaccia. The bubbles add extra lightness and create a more open crumb. Regular tap water works, but the sparkling water makes a noticeable difference. Trust me on this one.
Peach jam. I use California peach jam because, well, I live in California and the peaches here are incredible. But any good quality jam will work. Look for one that’s not too runny you want it thick enough to stay in the holes you poke. More on that later.
Cream extract. This is what gives the glaze that authentic donut shop flavor. If you can’t find cream extract, vanilla extract is a fine substitute. But the cream extract really does add something special.
Here’s the full lineup:
- 3 3/4 cups gluten-free bread flour or all-purpose flour
- 1 teaspoon baking powder
- 2 teaspoons kosher salt
- 2 teaspoons instant yeast
- 1 cup hot water (about 110°F)
- 1 cup unflavored sparkling water (room temperature)
- 4 tablespoons extra-virgin olive oil, divided
- 1 tablespoon sugar
- 1 tablespoon unsalted butter, softened
- 1 cup peach jam
- 2 cups powdered sugar, sifted
- 1 teaspoon cream extract
- 3 tablespoons whole milk
Step-by-Step Instructions
Okay, let’s walk through this together. I’ll break it into four main stages so you can see the progress. Take your time with each one.
Stage 1: Activate the Yeast and Mix the Dough
Start by activating your yeast. In a small bowl, combine the hot water, sugar, and instant yeast. Stir gently and let it sit for about 5 minutes. You’re looking for it to become foamy and bubbly that’s how you know the yeast is alive and happy. If it doesn’t foam, your water might have been too hot or too cold. Don’t panic, just try again with fresh yeast and water at the right temperature.
While the yeast activates, whisk together the flour, baking powder, and salt in a large mixing bowl. Make a well in the center. Add 3 tablespoons of olive oil, the sparkling water, and the yeast mixture. Stir until just combined. The dough will be very sticky and lumpy. That’s exactly what we want. Don’t be tempted to add more flour.
Stage 2: First Rise and Shaping
Cover the bowl tightly with plastic wrap and then a clean kitchen towel. Let the dough rise in a warm, draft-free spot until doubled in size. This can take anywhere from 2 to 4 hours depending on your kitchen temperature. Be patient with it. Good things take time.
Once the dough has risen, butter a 9×13-inch baking dish with the softened butter. Transfer the dough to the dish it will deflate a bit, that’s normal. Gently pull and stretch the dough to the edges. Fold the top edge down toward the center, then fold the bottom edge up. Rotate the dish and press the dough lightly with your fingertips to dimple it. Cover again and let rise until more than doubled, about 1 to 2 hours.
Stage 3: Bake the Focaccia
Preheat your oven to 425°F. Drizzle the remaining 2 tablespoons of olive oil over the top of the dough. Use your fingertips to press dimples all over the surface, creating those classic focaccia pockets. THIS is where the magic happens those dimples will catch the jam later.
Bake for 25 to 30 minutes, until deep golden brown. The smell in your kitchen will be incredible. Let it cool in the pan for about 10 minutes before moving to the next step.
Stage 4: Fill with Jam and Glaze
While the bread is still warm, spoon the peach jam into a piping bag fitted with a round tip. Poke several holes into the top of the focaccia and pipe the jam into each hole, filling generously. Don’t be shy this is where the jelly donut experience comes from.
For the glaze, whisk together the powdered sugar, cream extract, and milk until smooth and pourable. Drizzle the icing over the filled focaccia. Let it set for a few minutes before slicing.
Pro Tips for the Best Results
After making this jelly doughnut focaccia more times than I can count, here are the things I’ve learned that make a real difference.
Don’t skimp on the olive oil. High-hydration dough needs oil to stay tender and not dry out. Be generous with it. The oil also helps create that beautiful golden crust.
Poke holes while the bread is warm. This is crucial. Warm bread absorbs the jam better, and the jam seeps into the bread rather than just sitting on top. You want that jam to soak in a little.
Let it rest before slicing. I know it’s tempting to cut into it right away, but letting it rest for about 15 minutes after glazing gives cleaner slices. The glaze sets slightly and the jam settles.
Use thick jam. Runny jam will just soak into the bread and make it soggy. Look for jam that holds its shape when you spoon it. If your jam is thin, you can simmer it for a few minutes to reduce it.
Rise time varies. Your kitchen temperature, altitude, and even the humidity can affect how long the dough takes to rise. Go by visual cues rather than strict timing. Doubled in size means doubled.
Substitutions and Variations
One of the best things about this recipe is how adaptable it is. Here are some ways to make it your own.
Different jams. Peach is my favorite, but any flavor works. Strawberry, raspberry, blueberry, cherry, or even apricot. Each one gives a different personality to the bread. For a Fourth of July brunch, try swirling red and blue jams together.
Citrus glaze. Add a teaspoon of lemon or orange zest to the glaze for a bright, fresh twist. It cuts through the sweetness beautifully.
Chocolate version. Add a tablespoon of cocoa powder to the glaze and top with colorful sprinkles. It’s like a chocolate donut in bread form.
Peaches and cream. Layer in some sliced fresh peaches with the dough before baking, then add more on top with the glaze. It’s a summer dream.
Simple glazed. Skip the jam altogether and just go with the glaze for a classic glazed donut focaccia. Sometimes simple is best.
Storage and Make-Ahead Instructions
This jelly doughnut focaccia is best enjoyed the day you make it, but leftovers are still wonderful the next day.
Storage: Store in an airtight container at room temperature for up to 2 days. The glaze might soften a bit, but that’s not a bad thing.
Reheating: Reheat slices in a 300°F oven for about 5 minutes. This brings back the warmth and softness. The glaze will melt slightly, so if you want it pristine, reheat without the glaze and add fresh glaze after.
Freezing: You can freeze the unfilled, unglazed bread for up to a month. Wrap it tightly in plastic wrap and then foil. When you’re ready, thaw at room temperature, then fill and glaze fresh. This is a great make-ahead strategy for holidays.
Overnight option: Prepare the dough through the first rise, then refrigerate it overnight. The next morning, bring it to room temperature before shaping and proceeding with the recipe. This actually develops more flavor.
Serving Suggestions
This bread is versatile enough for breakfast, brunch, or dessert. Here’s how I like to serve it.
- For brunch: Slice it into squares and arrange on a platter. It’s the centerpiece of any brunch spread. Pair with fresh fruit and coffee.
- As dessert: Serve warm with a scoop of vanilla ice cream. The warm bread, cold ice cream, and sweet jam are a perfect combination.
- With tea or coffee: A slice of this with a cup of morning coffee is pure comfort. The sweetness is just right for breakfast.
- For parties: Cut it into smaller pieces for a shareable dessert board. It’s always the first thing to disappear.
I’d love to see how yours turns out. Tag me when you make this – I want to see your jammy masterpiece! And if you’re looking for more baking inspiration, follow me on Pinterest for all my favorite sweet bread recipes.
Frequently Asked Questions
Source: Nutritional Information