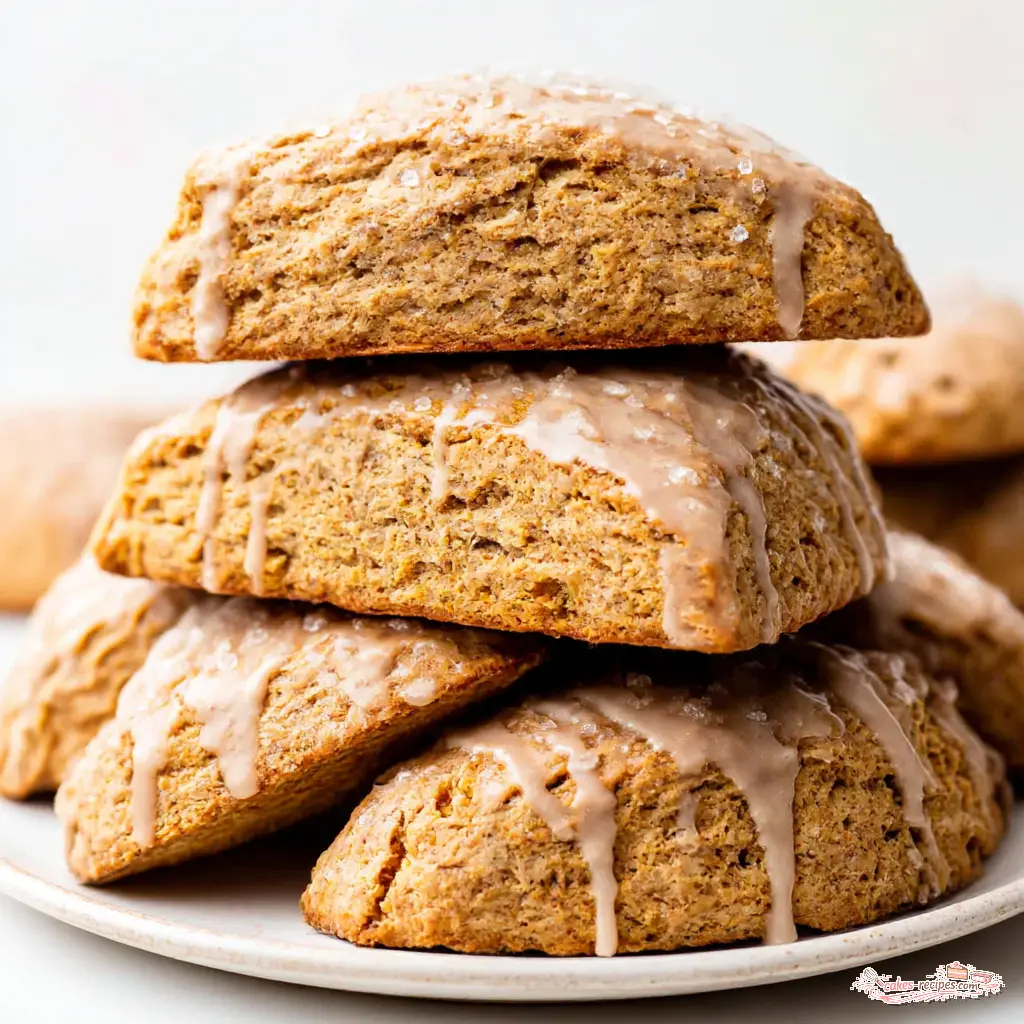
Flaky Maple Pumpkin Scones
Ingredients
Method
- Preheat the oven to 400°F (204°C). Place a rack in the lower third of the oven. Line 1 or 2 large baking sheets with parchment paper or silicone baking mats. If you're making mini scones, use 2 baking sheets. Set aside.
- Whisk the flour, baking powder, cinnamon, pumpkin pie spice, and salt together in a large bowl. Grate the frozen butter on the large holes of a box grater. Add the grated butter to the flour mixture and cut it in using a pastry blender, two forks, or your fingertips until the mixture forms pea-sized crumbs. Set aside.
- In a small bowl, whisk together 1/3 cup of the heavy cream, the egg, blotted pumpkin, brown sugar, and vanilla extract. Drizzle the liquid over the flour-butter mixture and stir until everything is just moistened.
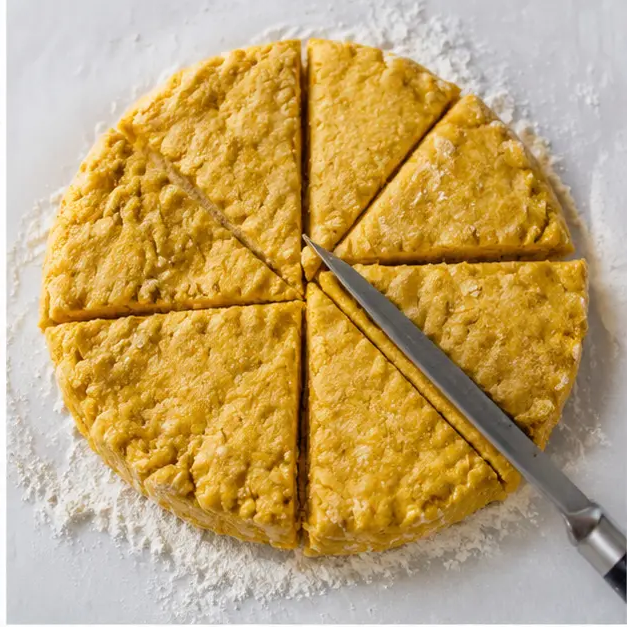
- Flour your hands and gently work the dough into a ball as best you can. Turn it out onto a lightly floured surface and press into a neat 8-inch disc. With a very sharp knife, cut into 8 equal wedges. For smaller scones, press the dough into two 5-inch discs and cut each into 8 wedges.
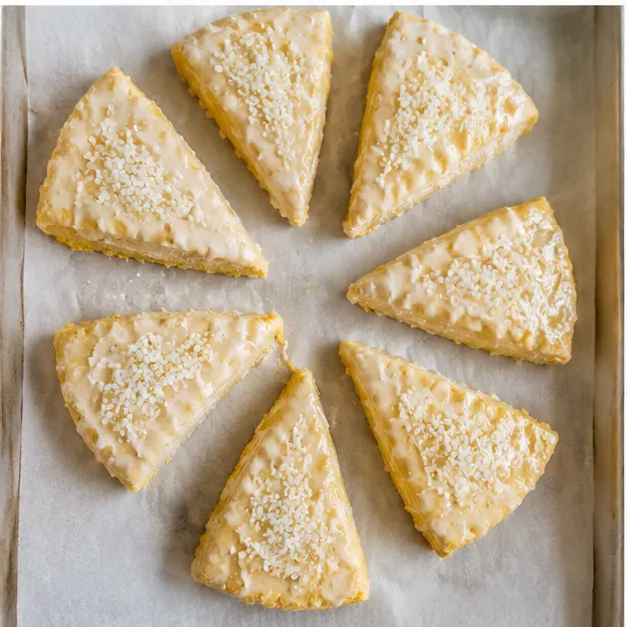
- Place the scones at least 2 inches apart on the prepared pans. Using a pastry brush, brush the tops with the remaining heavy cream and sprinkle with coarse sugar if desired for a crunchy sparkle.
- Bake the larger scones for 20-25 minutes, until lightly browned. If baking mini scones, check at 18-20 minutes. Let them cool for a few minutes on the baking sheet while you make the glaze.
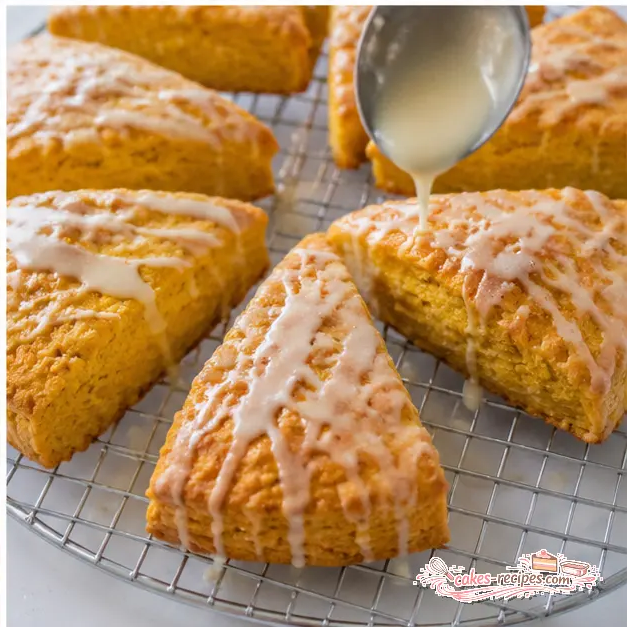
- In a small saucepan over low heat, melt the butter and maple syrup together, whisking occasionally. Once the butter is melted, remove from the heat and whisk in the sifted confectioners' sugar. Add a pinch of salt if you like. Drizzle the glaze over the warm scones.
- Serve immediately; leftovers keep at room temperature or in the refrigerator for up to 2 days.
Nutrition
Notes
Tried this recipe?
Let us know how it was!Why You’ll Love These Maple Pumpkin Scones
You know that moment. You’re standing at a bakery case, glass between you and a neat stack of maple pumpkin scones. Each one craggy and glazed, catching the light, and the little sign says $4.50. You could buy one. Or you could make a whole batch at home for about the same price. And honestly? Yours will be better.
Fall officially arrives in 26 days. But your kitchen can get there today. These maple pumpkin scones bake in about 25 minutes, so you get that cozy pumpkin spice aroma without running the oven for an hour and turning your apartment into a sauna. That’s a real consideration when it’s still August and the heat won’t quit.
So what’s the payoff? Let me break it down.
- Flaky edges that shatter just a little when you bite in
- A tender, moist crumb that holds up to coffee
- Warm cinnamon and pumpkin pie spice in every single bite
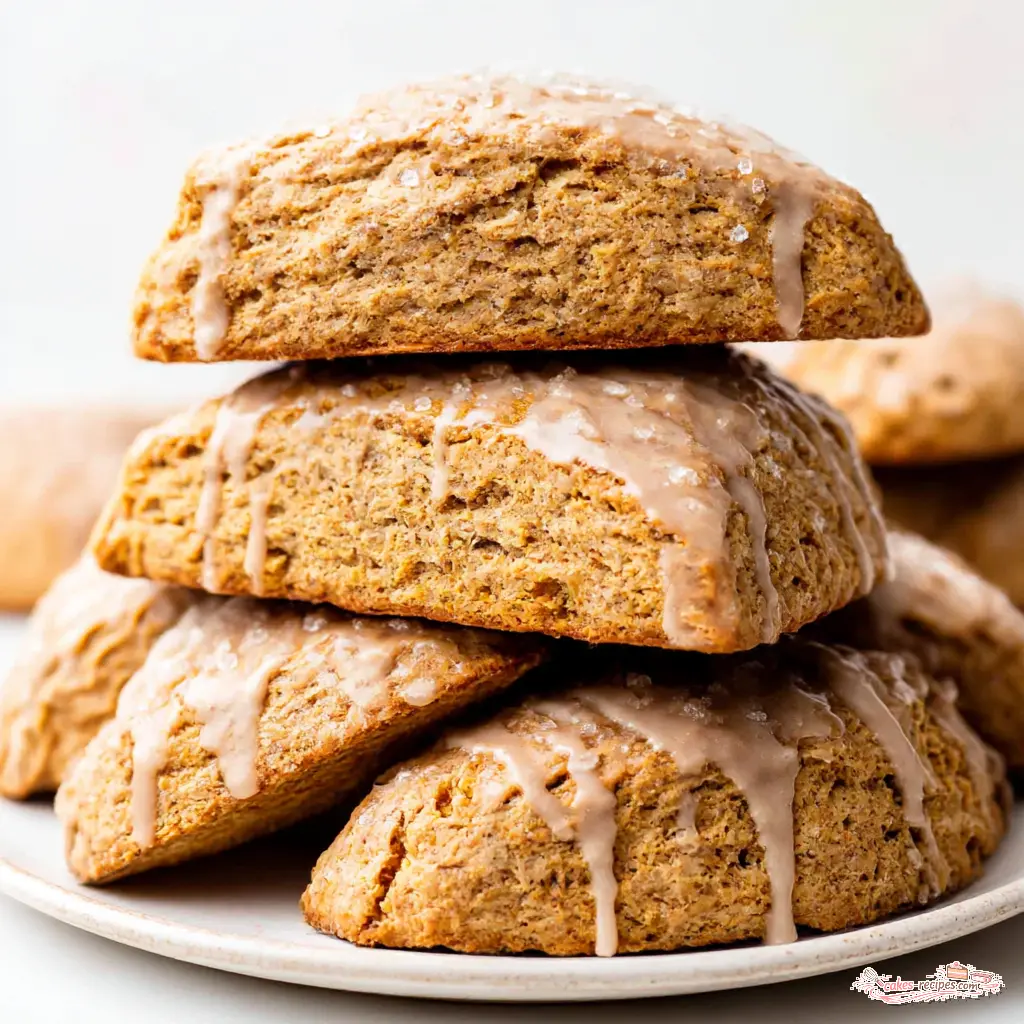
- A glossy maple glaze that sets with a delicate crackle
My roommates have already claimed dibs on the next batch. One of them asked if these are a Starbucks pumpkin scone copycat. Close enough, I told her. Better, actually.
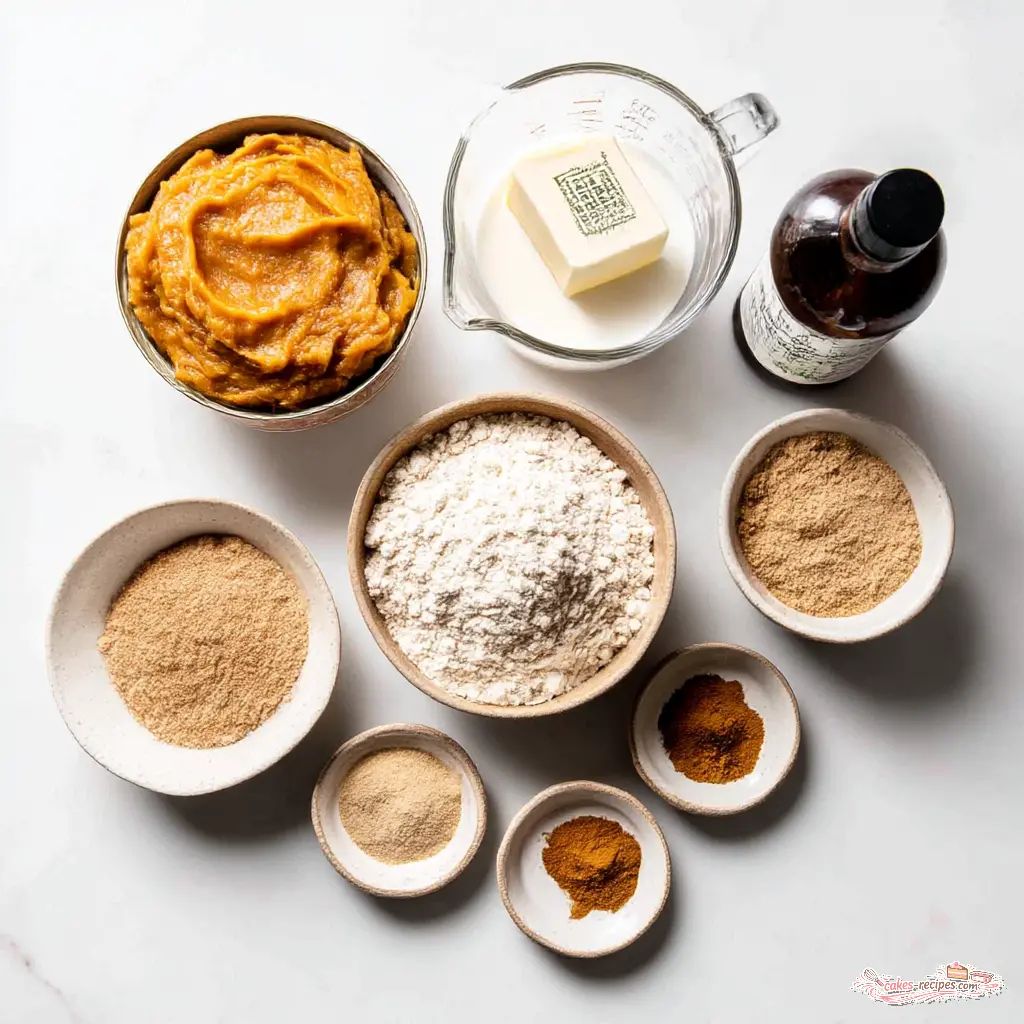
Maple Pumpkin Scone Ingredients
You probably have most of this already, and that’s part of the charm. But a few choices matter more than you’d think. Here’s the lineup worth talking about.
- Canned pumpkin puree. Not pumpkin pie filling. The filling is pre-sweetened and pre-spiced, and it will throw off the whole dough.
- Unsalted butter, frozen. This is your flakiness secret. Cold butter melts slowly in the oven, releasing steam that creates those lovely layered pockets.
- Heavy cream. The fat here gives scones their tender, rich crumb. Don’t swap in regular milk, you’ll notice the difference immediately.
- Pure maple syrup. The real stuff matters in the glaze. Pancake syrup is mostly corn syrup and it won’t give you that deep, woodsy maple flavor.
- Pumpkin pie spice and cinnamon. The warm duo that makes the whole kitchen smell like October.
- Light brown sugar. Adds moisture and a subtle molasses note that plays nicely with the pumpkin.
Here’s the step everyone tries to skip. Spread the canned pumpkin over a few layers of paper towels and press gently to absorb the excess moisture, then measure. It takes 30 seconds and it prevents a sticky, spreading dough. I know it feels wasteful. Do it anyway. Trust me on this.
Tools You’ll Need (Nothing Fancy)
If you bake at all, you probably own all of this already. No mixer required, no special pans, no stress.
- Box grater, for grating that frozen butter
- Pastry blender, two forks, or your own two hands
- Pastry brush, for the cream wash
- A sharp knife, for clean cuts
- Baking sheet lined with parchment paper
No pastry blender? No stress. Two forks work fine. Or just rub the butter into the flour with your fingertips, working quickly so it stays cold. I’ve used all three methods depending on what’s clean. The scones don’t care how you get there.
How to Make Maple Pumpkin Scones
The full recipe is right up there in the card, so I won’t repeat every detail. Instead, let me walk you through the four big moments and why they matter. Each one has a reason behind it, and understanding the reason makes you a better baker.
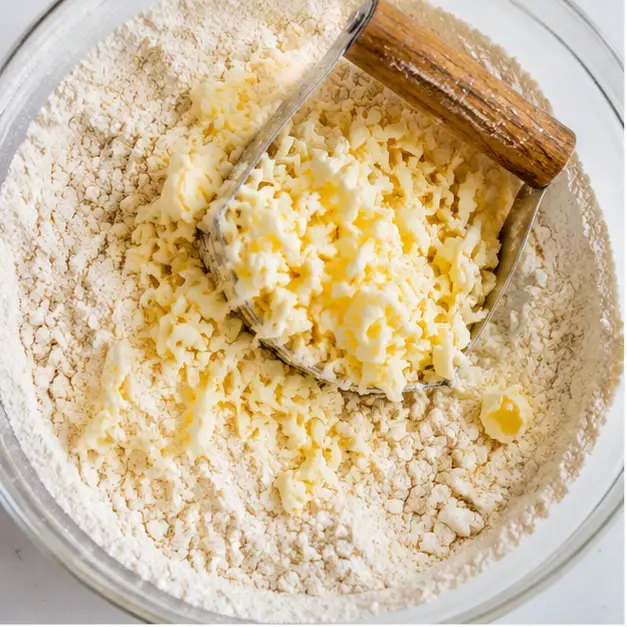
Stage 1: Grate the Frozen Butter
This is a game changer. Grate your frozen butter on the large holes of a box grater so you get these thin little shreds. They distribute through the flour evenly without you having to guess whether you cut the butter small enough. Then work it in with a pastry blender until the mixture looks like pea-sized crumbs.
Some bigger pieces are fine. Actually, they’re good. Those pockets of butter are what create the flaky scone texture you’re after. The butter melts in the oven, releases steam, and leaves behind airy layers. That’s the whole trick.
Stage 2: Mix Until Shaggy, Then Stop
In a small bowl, whisk the heavy cream, egg, blotted pumpkin, brown sugar, and vanilla. Drizzle that over the flour and butter mixture and stir until everything is just moistened. Stop right there. The dough will look shaggy and rough. That’s exactly what you want.
Overmixing is the number one scone killer. It develops gluten, and gluten makes scones tough and dense. I learned this the hard way. My first attempt came out like hockey pucks because I kept stirring, trying to make the dough look smooth. It never gets smooth. It’s supposed to look a little messy. Stop while it’s shaggy and you’ll be fine.
Stage 3: Shape, Brush, and Bake
Flour your hands and gently work the dough into a ball. Turn it out onto a lightly floured surface and press it into a neat 8-inch disc, about an inch thick. With a very sharp knife, cut it into 8 equal wedges. Then place the scones at least 2 inches apart on your prepared baking sheet.
Here’s where the bakery magic happens. Brush the tops with the remaining heavy cream. That cream wash gives you a golden, slightly crisp top. Then sprinkle with coarse sugar if you want that crunchy sparkle. Bake at 400°F for 20 to 25 minutes, until lightly browned. Your kitchen will smell like a fall bakery. In August. It’s glorious.
Stage 4: Make the Maple Glaze
Give the scones a few minutes to cool on the baking sheet. That’s when you make the glaze. Melt the butter and pure maple syrup together in a small saucepan over low heat. Once the butter melts, remove it from the heat and whisk in the sifted confectioners’ sugar and a pinch of salt.
Here’s a little upgrade if you’re feeling fancy. Let the butter foam and turn amber before you add the maple syrup. You’ll smell it before you see it, like toasted hazelnuts. Look for the amber color, listen for the quiet sizzle, trust your nose. That’s the brown butter moment, and it adds so much depth to the glaze.
Then drizzle. Watch the glaze catch in the craggy ridges and drip slowly down the sides. This is the part where you stop and take a photo. I always do. Mine look like cute little rocks sometimes. Still glorious.
Tips for the Best Maple Pumpkin Scones
You’ve probably heard about the 15 minute rule for scones. Here’s why it exists. Chilling the shaped dough re-firms the butter and relaxes the gluten. That means taller, flakier scones instead of flat pucks. In hot weather, this matters even more. If your kitchen is warm, your butter softens fast, and soft butter means spreading.
So if you have an extra 15 minutes, pop the shaped scones in the fridge before they go in the oven. Scone dough resting is the easiest insurance policy for a perfect batch. Cold ingredients are the secret, especially in summer.
Now let’s troubleshoot the common fails, because we’ve all been there.
- ❌ Dough too sticky? → ✅ Add a light dusting of flour to your hands and work surface. Blotting the pumpkin more thoroughly next time will help too.
- ❌ Scones spreading into blobs? → ✅ Your butter was too soft, or the pumpkin had too much moisture. Refrigerate the shaped scones for 15 minutes next time.
- ❌ Glaze too thin? → ✅ Whisk in a little more sifted confectioners’ sugar, a tablespoon at a time.
- ❌ Glaze too thick? → ✅ Warm it gently or add a tiny splash of maple syrup.
- ❌ Scones tough and dense? → ✅ You overworked the dough. It happens to everyone once. Next time, stop mixing while it’s still shaggy.
Measuring Flour Correctly
This is the quiet reason so many scones come out dry. Scooping flour with your measuring cup packs it down, and suddenly you’ve added way more flour than the recipe needs. The result is a dry, dense bake.
Spoon the flour into your cup, then level it off with a knife. Or use a kitchen scale. 2 cups of all-purpose flour is 250 grams. I use the scale when I remember. When I don’t, I spoon and level. Both work, and both beat scooping.
Heavy Cream for the Win
Heavy cream is doing a lot of heavy lifting in these scones. The fat content keeps the crumb tender and adds a richness that milk just can’t match. Some scone recipes reach for buttermilk, which gives tang and lift. Cream gives richness; buttermilk gives zip.
This recipe leans into cream for that bakery-style tenderness, and honestly, it’s the right call. First batch? Use the cream as written. Later, feel free to experiment with swapping half the cream for buttermilk. You might love what the tang does.
Maple Pumpkin Scone Variations
The base recipe is pretty great on its own. But here’s where you make it yours. These are all optional add-ins, and the scones work beautifully with or without them.
- Add chopped pecans or walnuts, about half a cup, folded into the dough at the end. Wonderful for texture.
- Toss in dried cranberries for a little tartness against the sweet maple glaze.
- Chocolate chips work too. Because chocolate makes everything better.
- For a milder maple flavor, cut the glaze in half and skip the coarse sugar on top.
- Make mini scones by pressing the dough into two 5-inch discs and cutting each into 8 wedges. Perfect for brunch buffets.
My mom used to cater parties for a hundred people, and she would have approved of mini scones. More to go around. That was her rule, always make more than they asked for. These scones follow that spirit.
Storage & Serving Suggestions
Scones are best warm, same day. That’s the honest truth. But they’re still pretty great the next morning, especially with a quick reheat.
- Room temperature: airtight container, up to 2 days.
- Refrigerator: up to 4 days if you need them to last longer.
- Reheat: toaster oven for a few minutes. The glaze softens and the edges crisp right back up.
These are also freezer-friendly scones, which makes them perfect for planning ahead. For unbaked dough, slice the wedges and freeze them on a parchment-lined baking sheet. Once solid, transfer to a freezer bag with parchment between the layers. Bake from frozen, just add a few minutes. For baked scones, cool completely, wrap tightly, and freeze for up to 2 months. Thaw at room temperature, reheat, and glaze fresh.
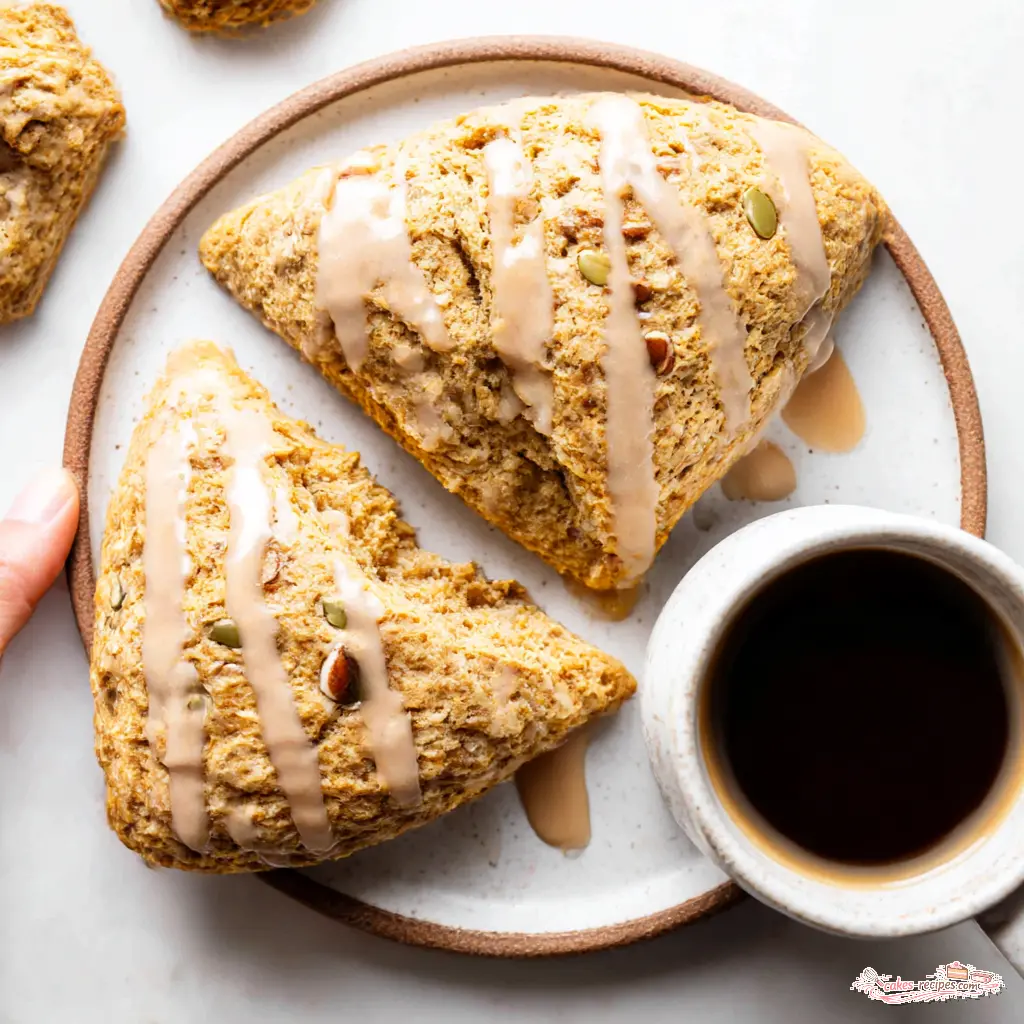
This is the make-ahead-and-relax approach, and I am all about it. Serving-wise, these were born for a coffee pairing. A hot latte, a plain black coffee, maybe some chai. They also shine at brunch spreads, baby showers, and Thanksgiving morning. Basically anywhere you want to look like you have your life together.
Frequently Asked Questions
When you pull your tray from the oven, when the maple glaze catches the light, when your kitchen smells like a pumpkin spice dream in the middle of August, you’ll know why these maple pumpkin scones are the one. Autumn is on its way. Your kitchen can get there first.
I want to see that glaze drip. Come find me on my Pinterest boards and share your batch. I’m always adding fall baking recipes to my collection, and maple pumpkin scones are at the top of the list.
Source: Learn More About This Dish
What is the 15 minute rule for scones?
The 15 minute rule means letting your shaped scones rest in the fridge for 15 minutes before baking. This re-firms the butter and relaxes the gluten, so the scones bake up taller and flakier instead of spreading into flat pucks. It’s especially helpful in warm kitchens.
What is the best pumpkin to use for pumpkin scones?
Canned 100% pure pumpkin puree, not pumpkin pie filling. The filling is pre-sweetened and spiced, which throws off the dough. And always blot the puree with paper towels before measuring, since excess moisture makes the dough sticky and causes spreading. Consistency is the goal.
When should you glaze scones?
Glaze while the scones are still warm, about 5 minutes after they come out of the oven. Warm scones let the maple glaze sink in just a little and set with that signature crackle. If they’re too hot, the glaze runs right off. Too cold, and it just sits on top. Warm is the sweet spot.
Can I make these maple pumpkin scones gluten-free?
I haven’t tested this recipe with gluten-free all-purpose flour, so I can’t promise the same texture. Scones rely on gluten structure for their tender crumb. If you try a 1:1 gluten-free baking blend, expect a more delicate, crumbly scone. Let me know how it goes if you test it.
Can I use coconut sugar instead of brown sugar?
You could, but understand the tradeoff. Coconut sugar is less moist than brown sugar, so your scones may be slightly drier and less tender. It also won’t give the same flavor depth. Stick with light brown sugar for the best result, or use coconut sugar and accept a slightly different texture.
Can I freeze these scones for Christmas morning?
Absolutely. Freeze the unbaked shaped wedges for up to 6 weeks, then bake from frozen, adding a few minutes to the bake time. Or bake them, cool completely, and freeze for up to 2 months. Reheat in a toaster oven and glaze fresh. Christmas morning, solved.