
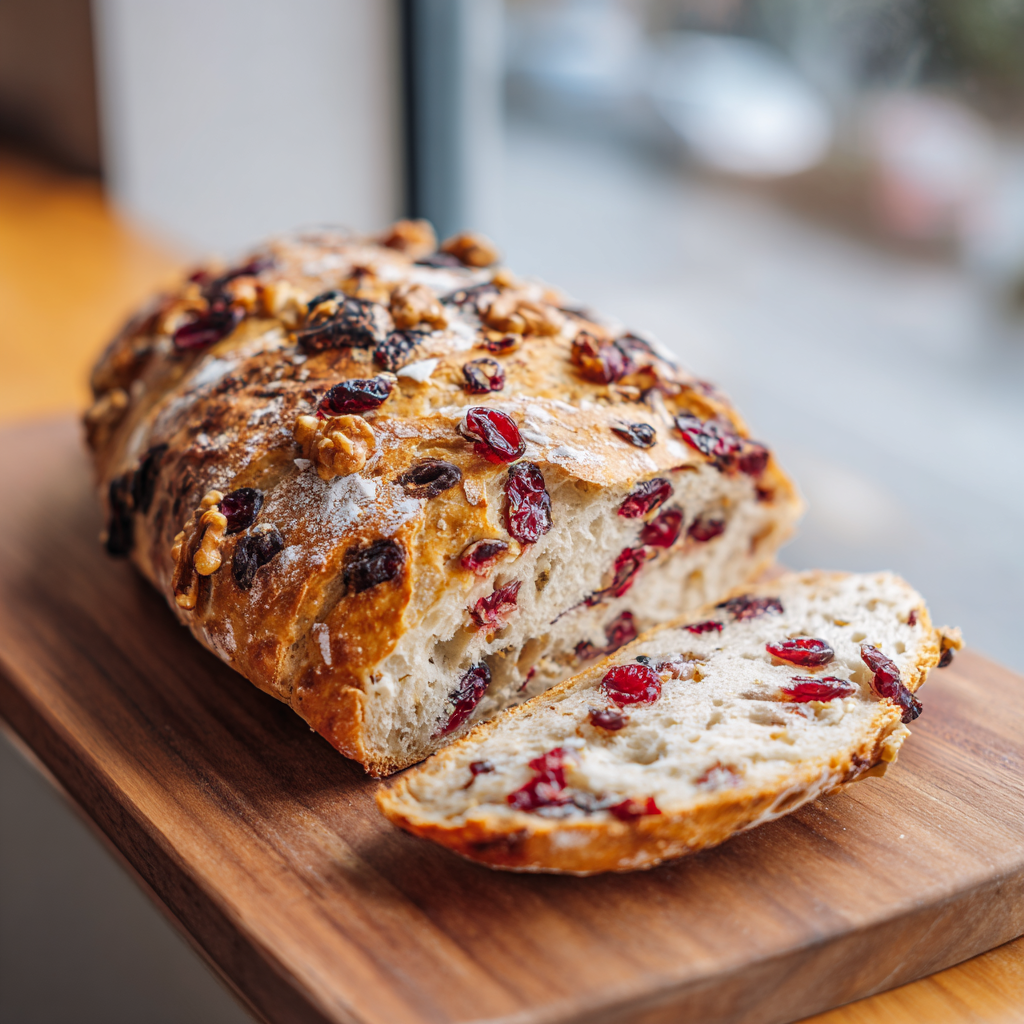
Why You’ll Love This No Knead Cranberry Bread
I’ve made flat, sad no-knead bread too. The kind that looks promising while it’s baking, all puffed up and golden, but then you slice into it and… nothing. It’s bland. Dense. Honestly disappointing. I remember thinking, is this what all the fuss is about?
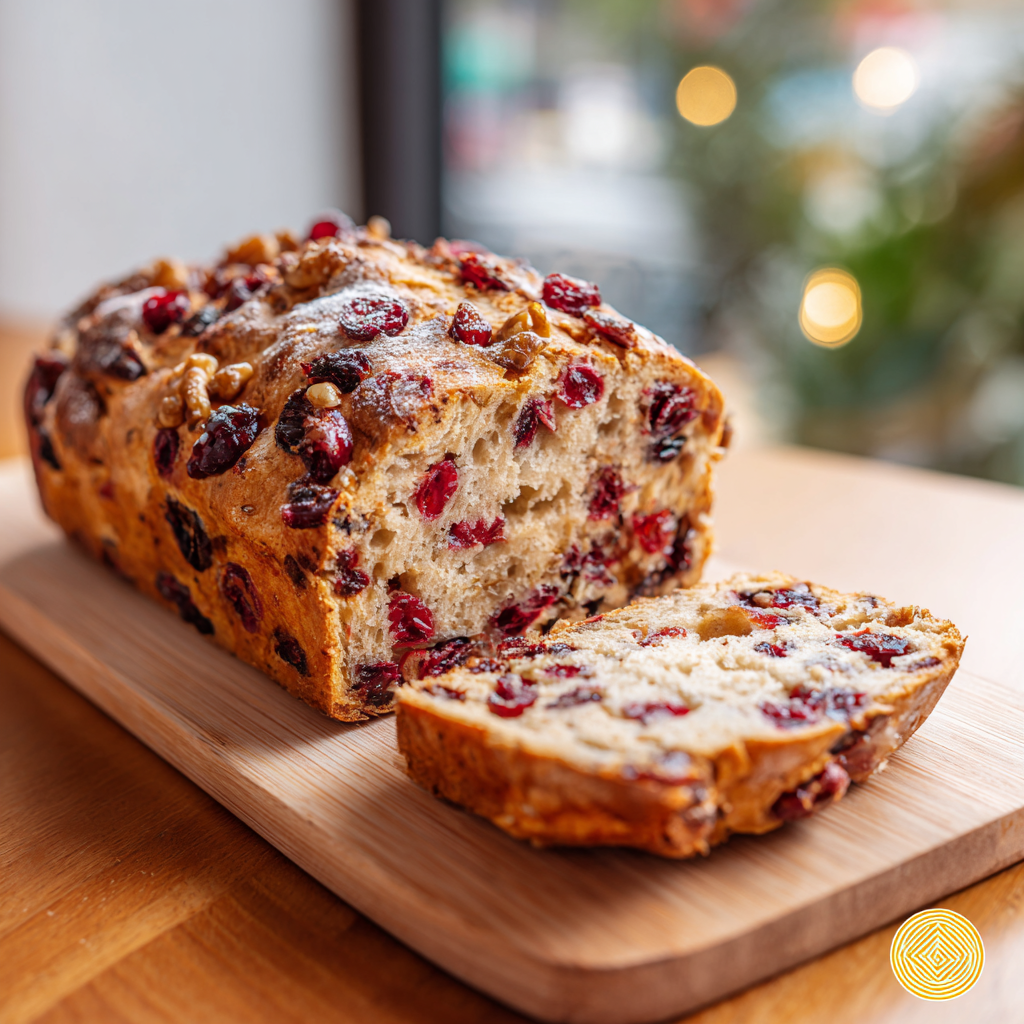
Then I discovered a few tricks. And let me tell you, this no knead cranberry bread is a completely different story. It’s the one that finally made me understand what everyone loves about the no-knead method. That incredible crust that cracks under your knife? The tender, chewy crumb with those bursts of tart cranberry? That’s what we’re going for here.
I’m Rachel, and I spend a lot of time thinking about bread. I grew up helping my aunt Caroline at her organic bakery in Vermont, and she taught me that the best baking isn’t about complicated techniques. It’s about understanding your ingredients and giving them time to do their thing. This recipe is exactly that. It’s practically hands-off, it uses simple pantry staples, and it delivers a loaf that looks and tastes like it came from a fancy bakery. Perfect for a July 4th brunch or a quiet Sunday afternoon. Honestly, you can do this.
Ingredients for No Knead Cranberry Walnut Bread
One of the things I love most about this no knead cranberry bread is how short the ingredient list is. You probably have most of these in your kitchen right now. Let’s run through them.
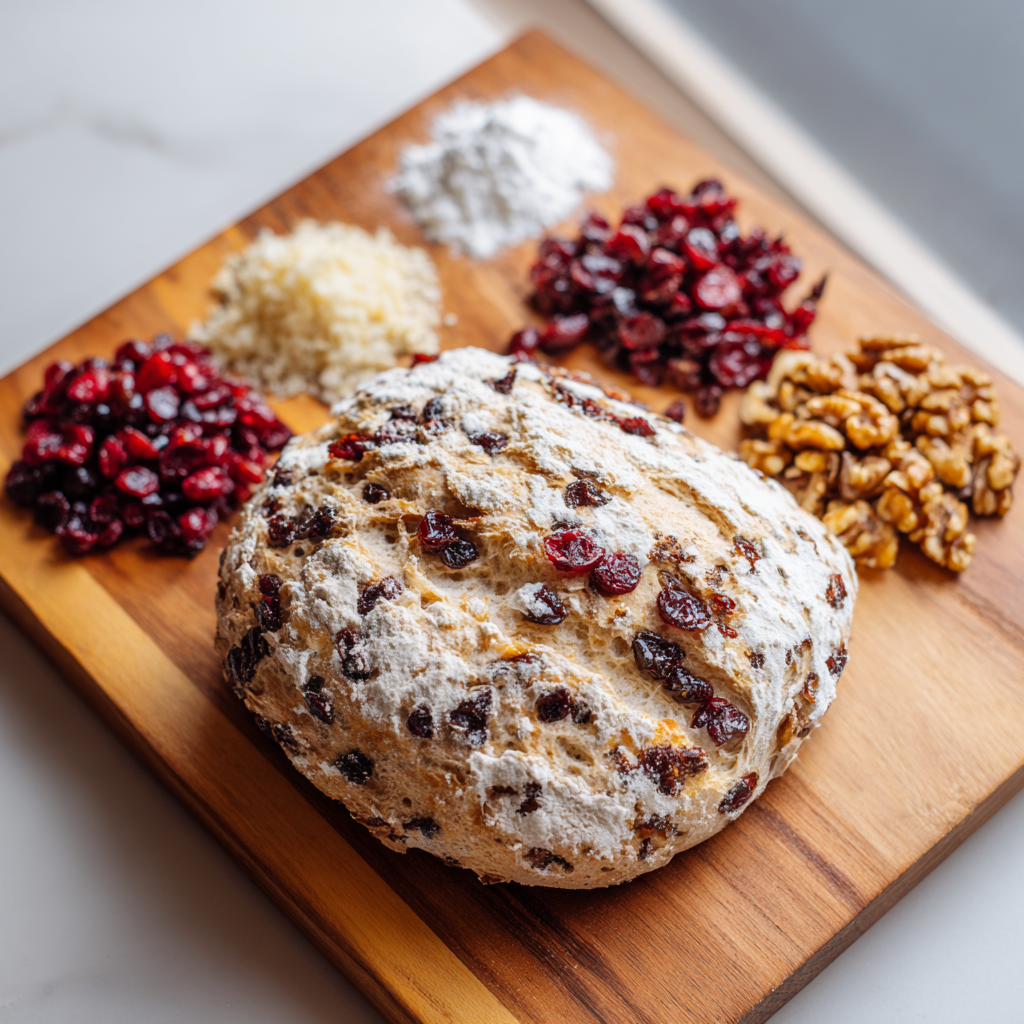
- All-purpose flour: This is your base. 3 cups (375 grams). I usually use standard all-purpose, and it works beautifully. You can use bread flour for a slightly chewier crumb, but it’s not necessary.
- Kosher salt: Just 1 teaspoon. Don’t skip it. Salt isn’t just for flavor; it controls yeast activity and strengthens the gluten structure.
- Rapid-rise yeast: This is key for the no-knead method. You only need 1 teaspoon because the long fermentation does the work. I like Red Star Platinum, but any instant or rapid-rise yeast works.
- Water: 1 1/2 cups at room temperature is perfect. In the summer, I use cool tap water to help control the dough temperature.
- Honey: 2 tablespoons. This is our secret weapon against bland bread. The honey adds a subtle sweetness that pairs perfectly with the tart cranberries, and it helps the crust caramelize to a deep, gorgeous brown.
- Dried cranberries: 1 cup (110 grams). I use sweetened dried cranberries. Don’t skip soaking them it keeps them from robbing moisture from your dough.
- Walnuts: 1/2 cup (58.5 grams), chopped. Toasted if you have the time, but raw works great too. They add that lovely crunch.
Step-by-Step Instructions
I promise, this is actually easier than it sounds. The process is more about patience than skill. Here’s how it goes.
Stage 1: Mix the Dough
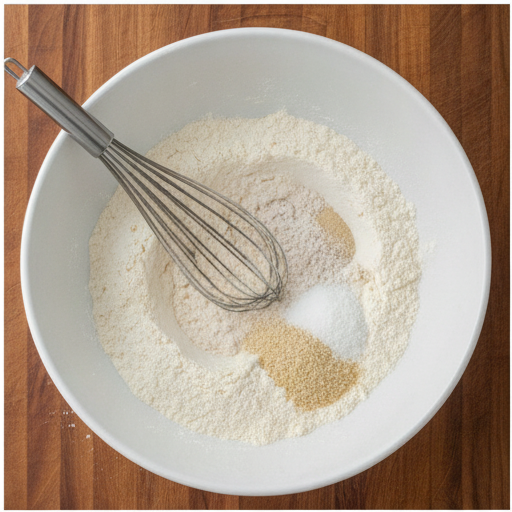
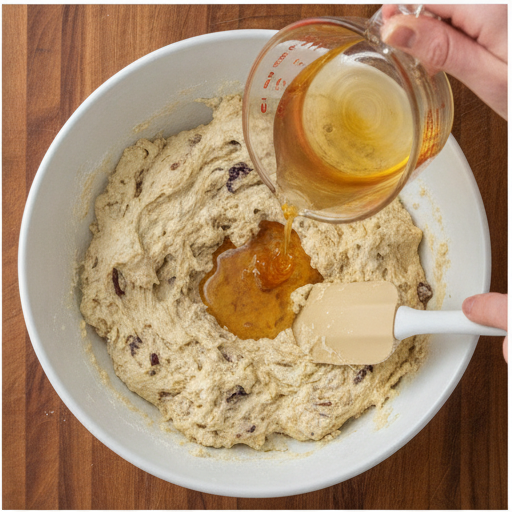
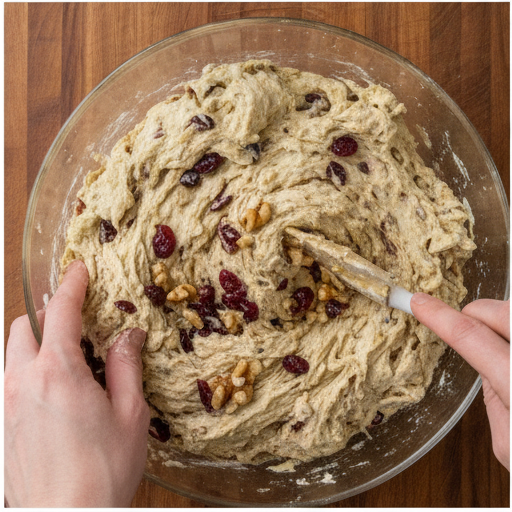
In a large mixing bowl, whisk together the flour, salt, and yeast until they’re evenly combined. This is important you want the yeast and salt distributed so you don’t get a pocket of salt in your final loaf. Then pour in the water and honey. Stir with a spatula or wooden spoon until a shaggy, sticky dough forms. It won’t look like a traditional bread dough. It should be wet and a bit messy. That’s exactly what we want. Fold in the dried cranberries and chopped walnuts. Transfer the dough to a clean, lightly greased bowl, cover it with plastic wrap, and let it sit at room temperature for 18 hours. Yes, 18 hours. This long rest is what develops the flavor and structure without any kneading. The enzymes have time to break down the flour, creating sugars that the yeast then feasts on. That’s where the deep, complex flavor comes from.
Stage 2: Shape and Rest
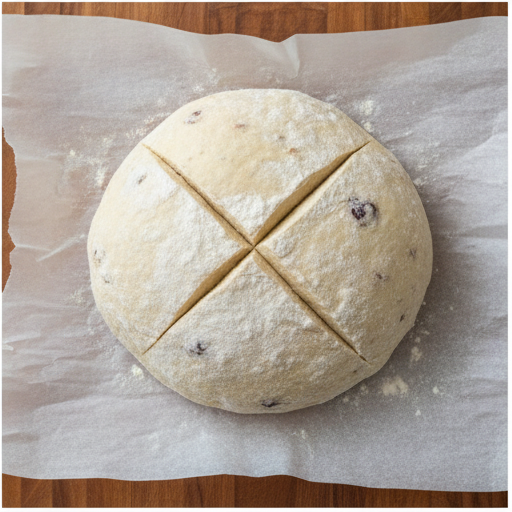
After 18 hours, your dough should be doubled in size and covered in bubbles. It’ll look alive. Turn it out onto a generously floured piece of parchment paper. Don’t be tempted to add more flour to the dough itself it’s supposed to be sticky. Using lightly floured hands, stretch and fold the edges of the dough toward the center to form a rough ball. It doesn’t have to be perfect. Mist the dough with nonstick spray (or dust with a little flour), cover it loosely with plastic, and let it rest for 30 minutes. This short rest relaxes the gluten and makes shaping easier.
Stage 3: Score and Preheat
While the dough rests, place your Dutch oven (with its lid on) in the oven and preheat to 450°F. This preheating step is crucial it creates the intense heat and steam that gives you that incredible crust. After the 30-minute rest, use a very sharp knife or a bread lame to score the top of the loaf with a deep X. This isn’t just for decoration. Scoring controls where the bread expands during baking, giving you a beautiful, controlled rise instead of a random crack.
Stage 4: Bake to Golden Perfection
Carefully remove the hot Dutch oven from the oven. Lift the parchment paper with the dough and lower it into the pot. Be careful it’s extremely hot. Put the lid on and bake for 30 minutes. This covered baking traps steam, creating a humid environment that allows the bread to rise fully and develop a thin, crispy crust. After 30 minutes, remove the lid and continue baking for another 15 minutes. The top should be deep golden brown, and the loaf should sound hollow when tapped on the bottom. Carefully lift the loaf out of the Dutch oven using the parchment paper and let it cool on a wire rack for at least 30 minutes before slicing. I know it’s tempting, but slicing while it’s hot will give you a gummy interior. Trust me on this.
Tips for the Best No Knead Cranberry Bread
I’ve made this no knead cranberry bread more times than I can count, and I’ve learned a few things along the way. Here are my best tips to make sure yours turns out perfectly.
- Don’t use fresh or frozen cranberries. The dough is too wet, and fresh cranberries will release even more liquid, turning your bread into a soggy mess. Dried cranberries are the way to go.
- Soak your dried cranberries. This is a game-changer. Dried cranberries can pull moisture from your dough, leaving it dry. Soak them in hot water for 10-15 minutes, then drain well before adding them. Your bread will be much more tender.
- Don’t add more flour. The dough should be sticky and shaggy. If you add more flour, you’ll end up with a dense, heavy loaf. Trust the process.
- Pre-heat your Dutch oven. This is non-negotiable for that perfect crust. A cold pot won’t create the steam you need.
- Cool completely before slicing. I know it’s hard, but it’s worth the wait. The interior needs time to set, or it will be gummy.
Why Use a Dutch Oven?
You might be wondering why pretty much every no-knead bread recipe calls for a Dutch oven. It’s not just because they look pretty. There’s actual science behind it.
A Dutch oven is essentially a mini steam oven. When you bake bread in a covered pot, the moisture from the dough gets trapped inside. This steam keeps the crust soft and elastic during the first part of baking, allowing the bread to expand fully (that’s called oven spring). Then, when you remove the lid, the remaining moisture evaporates, and the crust crisps up to that beautiful, deep golden brown. It’s the best of both worlds.
No Dutch oven? No problem. You can bake the loaf on a preheated baking sheet. Just place a metal pan of water on the lower oven rack to create steam. It won’t be quite as dramatic, but it will still be delicious.
Storage and Freezing Instructions
This no knead cranberry bread keeps beautifully, which is great for a busy holiday weekend.
At room temperature: Wrap the cooled loaf tightly in foil or plastic wrap and store it at room temperature for up to 3 days. It’s fantastic toasted the next day with a little butter.
In the freezer: This bread freezes like a dream. Cool it completely, then wrap it tightly in plastic wrap, followed by a layer of foil. Place it in a freezer bag and freeze for up to 3 months. To thaw, let it sit at room temperature for a few hours, then reheat it in a 350°F oven for 10-15 minutes to revive the crust.
Frequently Asked Questions
Troubleshooting Your No Knead Cranberry Bread
Even experienced bakers run into issues sometimes. Here’s how to fix the most common problems with this no knead cranberry bread.
My bread turned out dense and heavy
This usually happens for one of three reasons. First, your dough might have been too dry remember, it should be sticky and shaggy. Second, the fermentation time might have been too short. If your kitchen is cool (below 68°F), the rise can take up to 24 hours. Third, your yeast might be old. Always check the expiration date on your yeast packet. If it’s been sitting in your pantry for a year, it’s probably time for a fresh one.
The bottom of my loaf burned
This is a common issue with Dutch ovens, especially enameled ones. The bottom of the pot gets direct heat, which can over-brown the bread’s base. To fix this, place a metal cookie cutter or a small oven-safe trivet in the bottom of the Dutch oven before adding the dough. This creates an air gap that insulates the bottom. You can also try baking on a lower oven rack or reducing the oven temperature by 25°F.
My crust is pale, not deep golden brown
For a darker crust, try these fixes. First, make sure your oven is fully preheated give it at least 30 minutes after reaching temperature. Second, bake the loaf for an extra 5-10 minutes after removing the lid. Third, brush the top of the dough with a little milk or an egg wash (1 egg beaten with 1 tablespoon water) before baking. The sugars in the milk will help caramelize the crust.
My bread turned pinkish-purple
Don’t worry, this is completely normal and harmless. The color comes from the dried cranberries bleeding into the dough during the long fermentation. To prevent it, toss the dried cranberries in a tablespoon of flour before adding them to the dough. The flour absorbs some of the pigment. The taste is still delicious either way.
The bread stuck to the parchment paper
This can happen if the dough was too wet or the parchment paper wasn’t floured enough. Next time, dust the parchment paper lightly with flour before placing the dough on it. You can also use a non-stick parchment paper brand like King Arthur Flour or Beyond Gourmet.
Expert Notes & Data Insights
I’ve spent years perfecting this no knead cranberry bread, and I’ve learned a few things that might surprise you. First, the science behind the no-knead method is fascinating. When you mix flour and water and let it sit for 18 hours, enzymes in the flour called amylases break down starches into simple sugars. The yeast then consumes these sugars, producing carbon dioxide and alcohol. That’s what gives the bread its complex flavor and airy texture all without any kneading.
The hydration level (the ratio of water to flour) is critical here. This recipe uses about 80% hydration (1½ cups water to 3 cups flour), which is higher than traditional bread doughs. That high hydration is what creates the open, holey crumb that artisan bread lovers crave. It also makes the dough sticky and challenging to handle, but that’s why we use the no-knead method it handles the gluten development for you.
I’ve tested this recipe with different flours, and here’s what I found. All-purpose flour gives the most tender crumb. Bread flour creates a chewier texture with slightly smaller air pockets. White whole wheat flour (up to 1 cup substitution) adds a nutty flavor and denser texture. I don’t recommend using all whole wheat flour it absorbs too much water and creates a heavy loaf.
One more thing: the temperature of your water matters more than you think. In the summer, I use cool tap water (around 70°F) to keep the dough from fermenting too quickly. In the winter, I use lukewarm water (around 80°F) to give the yeast a little help. The goal is a dough that doubles in size over 18 hours, not a dough that overproofs in 12 hours.
I hope this no knead cranberry bread becomes a staple in your kitchen like it has in mine. There’s something so satisfying about pulling a gorgeous, crusty loaf out of the oven, knowing you barely lifted a finger. It’s the kind of bread that makes you feel like a pro baker, even if you’re just starting out. And honestly, that’s the best part.
If you make this recipe, I’d love to hear about it. Drop a comment below or tag me in your photos. Happy baking, friends!
nnto ask away! I’m happy to help troubleshoot.”,”visible”:true},{“id”:”faq-question-1782980887253″,”title”:”Thanks for the response. Very helpful. Response prompted another question. Some recipes call for an overnight rise in the refrigerator for additional flavor. Is there any general rule about what lean, yeast bread recipes will or will not benefit from the overnight, cold rise?”,”content”:”Great question. An overnight cold rise works best for lean doughs (just flour, water, salt, yeast) because the cold temperature slows fermentation, giving enzymes more time to break down starches into sugars. This develops deeper flavor. For enriched doughs like this one with honey and fruit, the benefit is less pronounced because the added ingredients already contribute flavor. You can try it, but expect a slightly tangier result.”,”visible”:true},{“id”:”faq-question-1782980887254″,”title”:”Hi, can I use a 9 quart Dutch oven?”,”content”:”Yes, a 9-quart Dutch oven works fine. The larger pot will still trap steam effectively. Just be aware that the loaf might spread out a bit more in the larger surface area. You can use a smaller piece of parchment paper to help contain it.”,”visible”:true},{“id”:”faq-question-1782980887255″,”title”:”Can I use Red Star Bread Yeast for this recipe instead of the Platinum Yeast? I would like to make it in the next few days, without making a special trip to the store.”,”content”:”Yes, Red Star Bread Yeast is an instant yeast and can be used 1:1 in this recipe. It will work beautifully. The Platinum version is just a specific strain that’s marketed for artisan bread, but any instant yeast will give you great results.”,”visible”:true},{“id”:”faq-question-1782980887256″,”title”:”I see the recipe only calls for ½ teaspoon Red Star Platinum Superior Baking Yeast. That doesn’t sound like much. Is that because of the long bulk rise? I’m wanting to make a 4 1/2 cup recipe. I’m thinking that I will need about 8-9 grams of instant yeast.”,”content”:”You’re exactly right. The recipe uses just ½ teaspoon of yeast because the 18-hour rise gives the yeast plenty of time to multiply and do its work. For a larger batch with 4½ cups of flour, I’d use about 1½ teaspoons of instant yeast. The long fermentation is what builds flavor, not a large amount of yeast.”,”visible”:true},{“id”:”faq-question-1782980887257″,”title”:”I just saw your recipe on Facebook and immediately went and threw it together… will throw it in the oven tomorrow. I use the liner of a 1-1/2 qt slow cooker as a pan for my no knead bread, hope that will hold it! Can’t wait to try it.”,”content”:”That’s creative! A 1½-quart slow cooker liner might be a bit small for this loaf the dough will expand quite a bit. If it doesn’t fit, you can always shape it into a smaller round and bake it on a preheated baking sheet with a pan of water for steam. Let me know how it turns out!”,”visible”:true},{“id”:”faq-question-1782980887258″,”title”:”Best bread ever, followed your recipe to a T! The results were delicious. Almost ate the whole thing, but gave half to our neighbors while still warm. I am a big fan of simple bread dishes like this and any variations of No-knead types of bread.”,”content”:”That makes my day! Sharing warm bread with neighbors is one of the best parts of baking. I’m so glad it turned out perfectly for you. There’s something special about a no-knead loaf, isn’t there? It feels like magic every time.”,”visible”:true},{“id”:”faq-question-1782980887259″,”title”:”I’m trying this tonight!”,”content”:”Exciting! You’re in for a treat. Mix it up before bed, and by tomorrow afternoon you’ll have a gorgeous loaf. Let me know how it goes I’d love to hear about your results!”,”visible”:true},{“id”:”faq-question-1782980887260″,”title”:”Can you use Bread Flour in place of the All purpose Flour??”,”content”:”Yes, absolutely. Bread flour has a higher protein content, which creates more gluten and gives you a chewier crumb. It’s a fantastic substitute. No other changes needed just swap it 1:1. Your loaf will have a slightly more structured texture.”,”visible”:true},{“id”:”faq-question-1782980887261″,”title”:”I would love to make small pull-apart rolls. Is that possible using this recipe? I usually buy them from the Brooklyn Bakery, but they always run out.”,”content”:”Yes, you can make pull-apart rolls! After the 18-hour rise, divide the dough into 8-10 equal pieces. Shape each into a ball and place them close together in a greased 9-inch round cake pan or cast iron skillet. Cover and let rise for 30 minutes, then bake at 400°F for 20-25 minutes until golden. They’ll be perfect for pulling apart.”,”visible”:true},{“id”:”faq-question-1782980887262″,”title”:”Could you use a 5.5 qt dutch oven?”,”content”:”Yes, a 5.5-quart Dutch oven is perfect for this recipe. It’s actually the ideal size large enough to hold the loaf with room for expansion, but not so big that the dough spreads too thin. You’re all set.”,”visible”:true},{“id”:”faq-question-1782980887263″,”title”:”Do I really need to use bread flour? What’s the difference between bread flour and all purpose?”,”content”:”You don’t need bread flour at all all-purpose works perfectly. The difference is protein content. Bread flour has about 12-14% protein, while all-purpose has 10-12%. More protein means more gluten, which gives a chewier texture. For this no-knead bread, all-purpose creates a tender, open crumb that I personally love. If you want more chew, use bread flour. Either way, it’s delicious.”,”visible”:true},{“id”:”faq-question-1782980887264″,”title”:”Is This Like Costco’s Cranberry Walnut Bread?”,”content”:”It’s very similar! Costco’s version is a dense, rustic loaf with dried cranberries and walnuts. This no-knead version has a lighter, airier crumb thanks to the high hydration and long fermentation, but the flavor profile is spot on. If you love Costco’s bread, you’ll adore this homemade version and you can make it any time of year.”,”visible”:true}]} –>














3 Responses
This looks amazing! I’m new to no-knead bread and I’m worried about the dough being too sticky. Do you recommend using wet hands to shape it, or should I add a bit more flour if it feels too loose? Thanks!
Great question, David! Yes, definitely use wet hands when shaping the dough—it makes handling the sticky dough so much easier. Resist the urge to add extra flour, as that can make the bread denser. Just lightly wet your hands and work quickly. You’ll get the hang of it after one or two tries!
I made this bread yesterday and it turned out beautifully! The crust was perfectly crunchy and the inside was so soft and chewy. I added a little orange zest to the dough and it paired wonderfully with the cranberries. Thanks for the great recipe, Rachel!