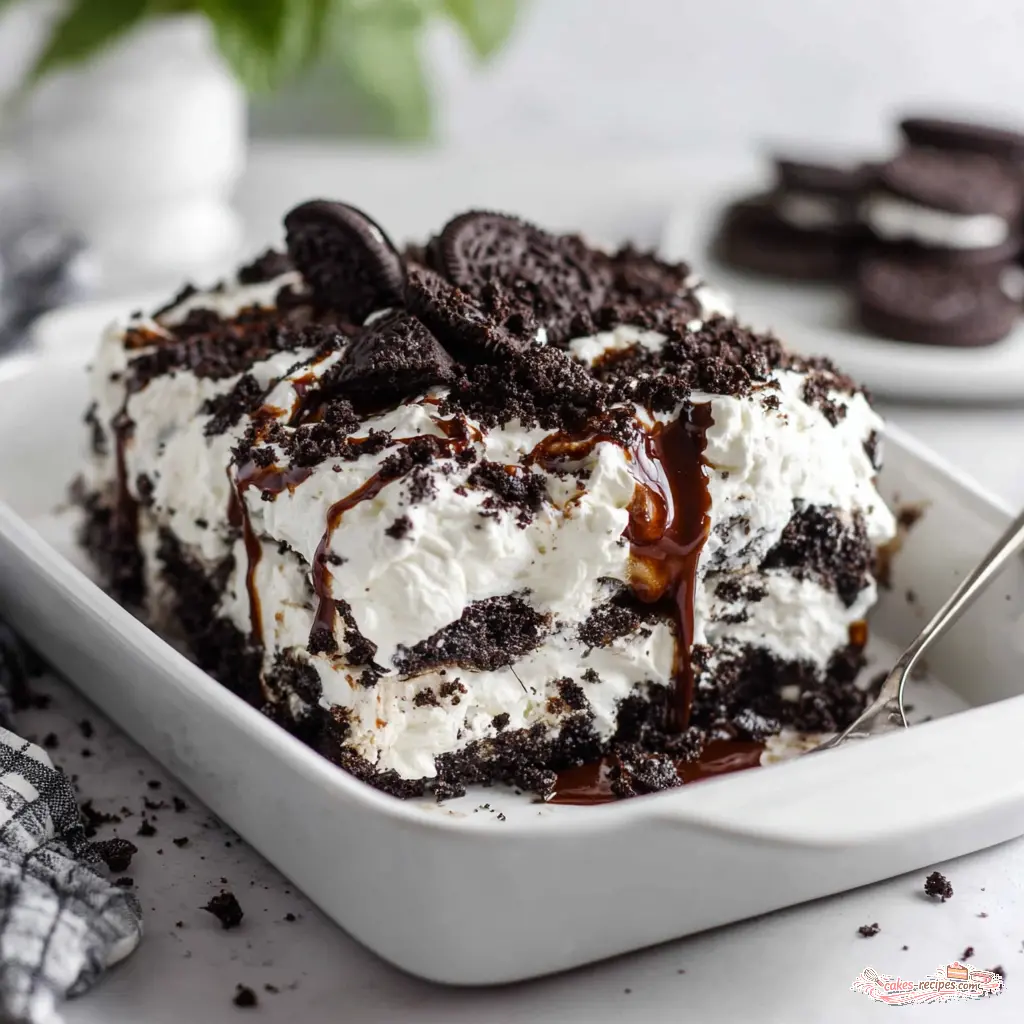
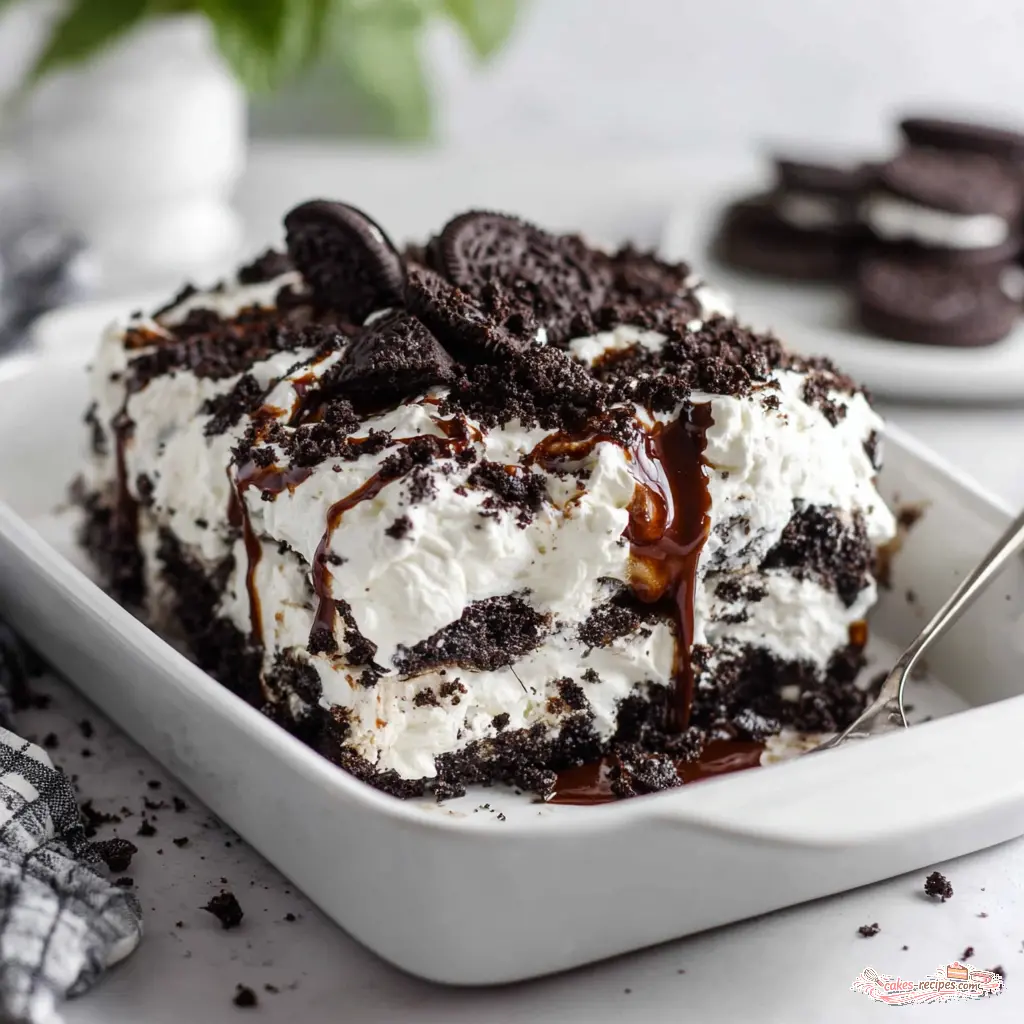
Ultimate Oreo Poke Cake
Ingredients
Method
- Preheat your oven to 350°F. Lightly coat a 9x13-inch baking pan with nonstick cooking spray.
- In a large bowl, combine the chocolate cake mix, water, vegetable oil, and eggs. Beat until smooth and well blended.
- Pour the batter into the prepared pan and bake for 25 minutes, or until a toothpick inserted into the center comes out clean.
- Let the cake cool completely, then use the handle of a wooden spoon to poke holes all over the cake, spacing them about 1 inch apart.
- In a medium bowl, whisk together the instant Oreo pudding mix and cold milk until smooth and thickened, about 2 minutes.
- Pour the pudding evenly over the poked cake, spreading it into all the holes. Refrigerate for at least 1 hour to set.
- Spread the thawed whipped topping over the chilled pudding layer in an even layer.
- Crush the Oreo cookies (by hand or in a bag) and sprinkle the crumbs over the whipped topping.
- Drizzle with chocolate syrup if desired, then slice and serve cold.
Nutrition
Notes
Tried this recipe?
Let us know how it was!Why This Oreo Poke Cake Works
You know that feeling when you want a showstopper dessert but don’t want to sweat over a hot oven? Claro que sí. That’s exactly why this Oreo poke cake exists. It’s the perfect summer dessert for potlucks, barbecues, or just a Tuesday when you need something cold and chocolatey. I once burned a cake so badly I swore off baking for months. The smoke alarm went off, the kids cried, and we ordered ice cream instead. Then a friend brought this Oreo poke cake to a neighborhood gathering, and I couldn’t believe how easy it was. No complicated techniques. No fancy equipment. Just a box of cake mix and some simple ingredients that come together to make something incredible. This recipe has saved me more times than I can count. It’s the kind of dessert that makes people think you spent hours in the kitchen. But between you and me, it takes about 15 minutes of active work. The rest is just chilling in the fridge. Perfect for busy parents, young professionals, or anyone who wants a delicious treat without the stress. The beauty of this Oreo poke cake is in the layers. You’ve got a moist chocolate cake base, then creamy Oreo pudding that seeps into every hole, and finally a fluffy whipped topping with crunchy cookie crumbs on top. Each bite is cool, creamy, and packed with chocolate flavor. And the best part? No oven required after the initial bake. Your kitchen stays cool while the fridge does all the work.Why You’ll Love This Oreo Poke Cake
Quick: Only 15 minutes of prep time.
Make-Ahead: Tastes even better after chilling overnight.
Crowd-Pleaser: Disappears fast at any gathering.
No Special Tools: Just a 9×13 pan and a wooden spoon.
Ingredients You’ll Need
Let’s talk about what goes into this Oreo poke cake. The ingredient list is short and sweet, and you probably have most of these in your pantry already.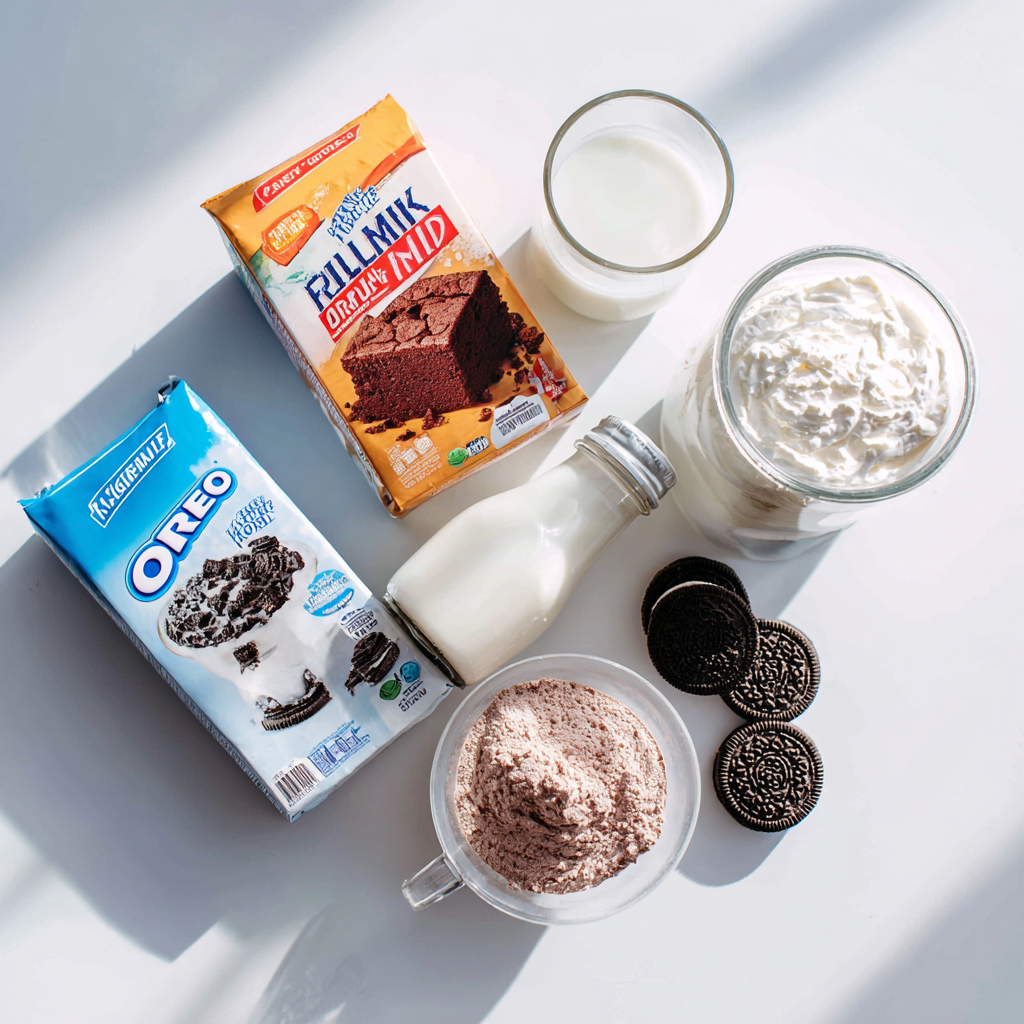 For the cake base, you’ll need a box of chocolate cake mix. I usually grab whatever’s on sale at Ralphs or Vons. The 15.25 oz box is perfect for a 9×13 pan. You’ll also need water, vegetable oil, and eggs. That’s it for the cake.
Now for the magic part. You need two packages of instant Oreo pudding mix. Yes, Oreo pudding exists, and it’s amazing. If you can’t find it at your local store, you can use vanilla instant pudding and stir in some finely crushed Oreos. But trust me, the Oreo pudding is worth hunting for. You’ll also need cold milk. Whole milk works best, but 2% is fine too.
For the topping, grab a container of whipped topping. I like the regular size, about 8 ounces. Make sure it’s thawed before you spread it on. You’ll also need about 12 whole Oreo cookies for crushing on top. And if you want to get fancy, a drizzle of chocolate syrup makes it look extra special.
Pro tip: If you’re feeling adventurous, you can swap regular Oreos for golden or double-stuffed. My kids love when I use double-stuffed because there’s more creamy center in every bite.
For the cake base, you’ll need a box of chocolate cake mix. I usually grab whatever’s on sale at Ralphs or Vons. The 15.25 oz box is perfect for a 9×13 pan. You’ll also need water, vegetable oil, and eggs. That’s it for the cake.
Now for the magic part. You need two packages of instant Oreo pudding mix. Yes, Oreo pudding exists, and it’s amazing. If you can’t find it at your local store, you can use vanilla instant pudding and stir in some finely crushed Oreos. But trust me, the Oreo pudding is worth hunting for. You’ll also need cold milk. Whole milk works best, but 2% is fine too.
For the topping, grab a container of whipped topping. I like the regular size, about 8 ounces. Make sure it’s thawed before you spread it on. You’ll also need about 12 whole Oreo cookies for crushing on top. And if you want to get fancy, a drizzle of chocolate syrup makes it look extra special.
Pro tip: If you’re feeling adventurous, you can swap regular Oreos for golden or double-stuffed. My kids love when I use double-stuffed because there’s more creamy center in every bite.
Step-by-Step Instructions
This Oreo poke cake comes together in four simple stages. Let me walk you through each one so you feel confident from start to finish.Stage 1: Bake the Cake
Preheat your oven to 350°F. Lightly coat a 9×13-inch baking pan with nonstick cooking spray. In a large bowl, combine the chocolate cake mix, water, vegetable oil, and eggs. Beat until smooth and well blended. Pour the batter into the prepared pan and bake for 25 minutes, or until a toothpick inserted into the center comes out clean. The smell of chocolate cake baking is one of my favorite things. It reminds me of Saturday mornings in my abuela’s kitchen. But don’t get too distracted by the aroma. Let the cake cool completely before moving to the next step. This is important. If you poke holes in a warm cake, the holes will collapse and the pudding won’t soak in evenly.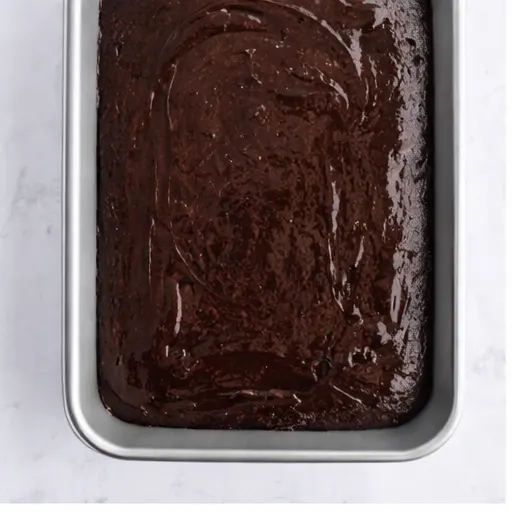
Stage 2: Poke the Holes
Once the cake is completely cool, grab the handle of a wooden spoon. Use it to poke holes all over the cake, spacing them about 1 inch apart. Don’t worry if they’re uneven. Extra deliciousness finds its way into every hole anyway. My nine-year-old daughter loves this part. She takes it very seriously, making sure every inch of the cake gets poked. Last month she told me I hadn’t poked enough holes on one side, and she was right. That section didn’t soak evenly. So take your time. More holes mean more pudding in every bite.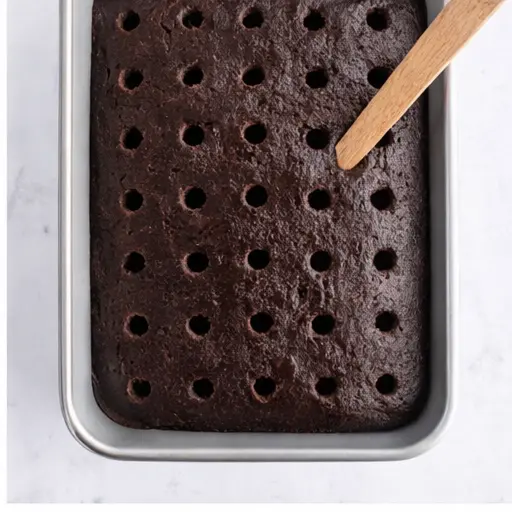
Stage 3: Add the Pudding
In a medium bowl, whisk together the instant Oreo pudding mix and cold milk until smooth and thickened. This takes about 2 minutes. You want it to be soft set but still pourable. If it’s too thick, add a splash more milk. Pour the pudding evenly over the poked cake. Use a spatula to spread it into all the holes. You’ll see the dark pudding filling every little pocket. It’s so satisfying. Refrigerate for at least 1 hour to let the pudding set. This is the hardest part because you just want to dig in.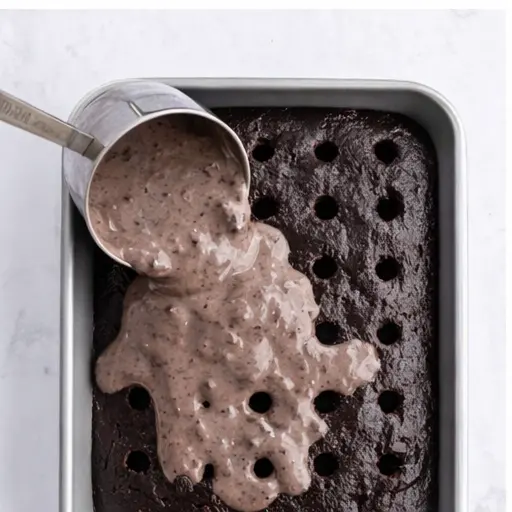
Stage 4: Finish and Serve
Once the pudding is set, spread the thawed whipped topping over the entire cake in an even layer. Crush the Oreo cookies by hand or in a bag and sprinkle the crumbs over the whipped topping. Drizzle with chocolate syrup if you’re feeling fancy. Slice cold for clean cuts. The first slice is always a little messy, but that’s okay. It’s the taste that matters. And trust me, the taste is incredible.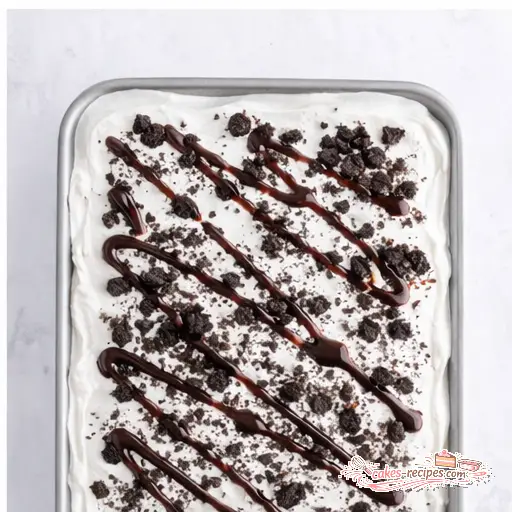
Tips for the Best Oreo Poke Cake
After making this Oreo poke cake more times than I can count, I’ve picked up a few tricks. Let me share them with you so your cake turns out perfect every time. Cool the cake completely. I know I said this already, but it’s worth repeating. A warm cake will collapse when you poke holes, and the pudding won’t absorb evenly. Patience pays off here. Poke holes evenly. Space them about 1 inch apart. Not too close, or the cake gets soggy. Not too far apart, or you’ll have dry spots. The handle of a wooden spoon is the perfect size. Let the pudding thicken. Whisk it for a full 2 minutes. You want it to be thick enough to stay in the holes but thin enough to pour. If it’s too runny, it will pool at the bottom of the pan. Add Oreos just before serving. This is the biggest tip. If you add the crushed Oreos too early, they’ll get soggy. Sprinkle them on right before you serve the cake for maximum crunch. Chill overnight for best flavor. The cake actually tastes better after sitting in the fridge overnight. The flavors meld together, and every bite is perfectly creamy.Storage and Make-Ahead Tips
This Oreo poke cake is perfect for making ahead. In fact, I usually make it the day before I plan to serve it. The extra time in the fridge makes it even better. Store leftovers in an airtight container in the refrigerator for up to 3 days. Keep the cake chilled until you’re ready to serve. It can sit at room temperature for a few hours at a party or potluck, but it’s best kept cold. If you don’t plan on serving the whole cake, only add crushed cookies on the slices you plan to serve right away. Wait to decorate the rest so the cookies don’t get soggy. This way, you can enjoy fresh crunchy Oreos on every slice.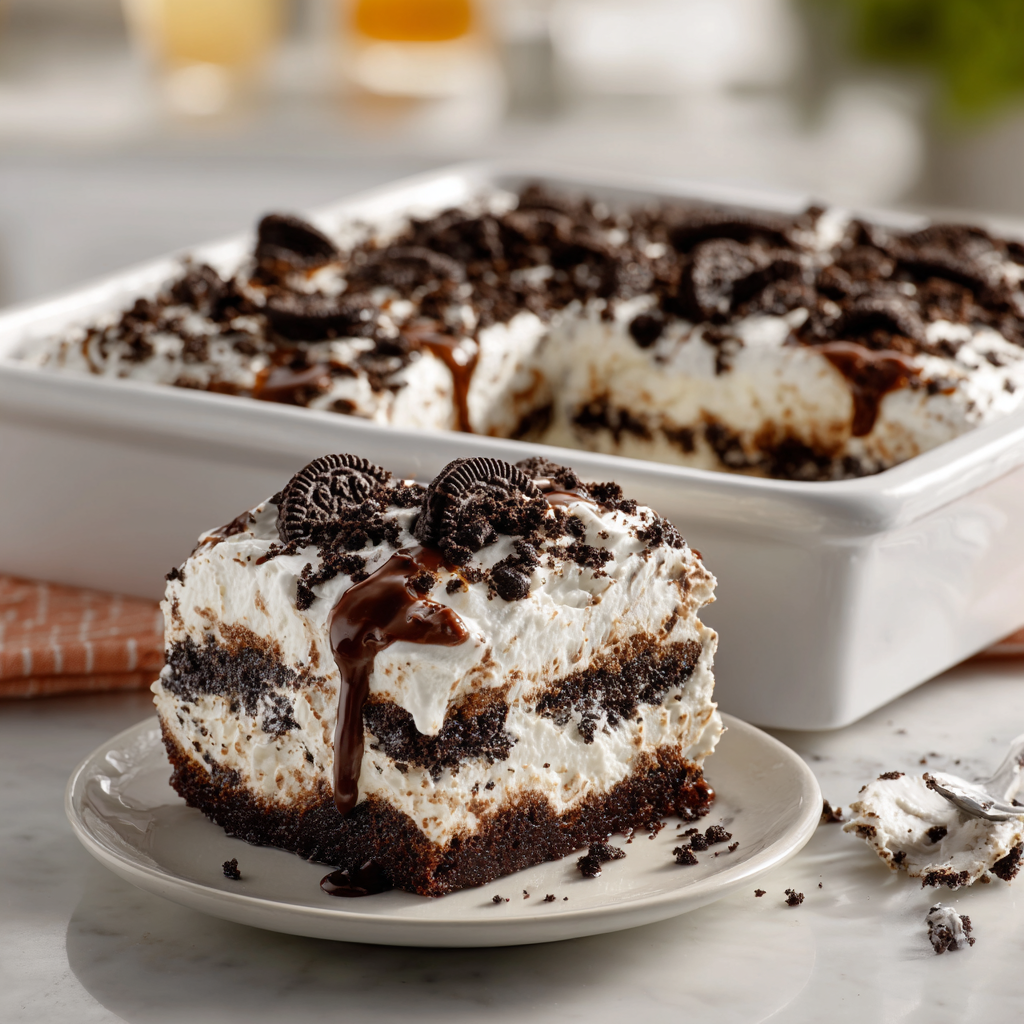
Common Mistakes to Avoid
Even experienced bakers make mistakes sometimes. Here are the most common ones I’ve seen and how to avoid them. ❌ Poking holes too close together → ✅ Space them about 1 inch apart for even pudding distribution. ❌ Poking holes all the way through the cake → ✅ Only poke about halfway down so the filling stays in the cake, not at the bottom of the pan. ❌ Adding Oreos to the top too early → ✅ Sprinkle them on just before serving for maximum crunch. ❌ Not letting cake cool before poking → ✅ Wait until the cake is completely cool so the holes don’t collapse. ❌ Pouring filling when cake is too hot → ✅ The cake should be cool so the pudding sets properly. ❌ Stirring instead of folding whipped topping → ✅ Fold gently to keep the topping light and fluffy.Frequently Asked Questions
Final Thoughts
This Oreo poke cake is more than just a dessert. It’s a way to bring people together without spending hours in the kitchen. It’s the kind of recipe that becomes a family tradition, passed down from one generation to the next. My abuela taught me that a properly soaked cake should be moist but never mushy. This recipe honors that lesson perfectly. Every bite is creamy, chocolatey, and full of Oreo goodness. So the next time you need a dessert that wows without the stress, make this Oreo poke cake. Your family will thank you. Your friends will ask for the recipe. And you’ll feel like a baking superstar with almost no effort. Now go make this and watch it disappear. Perfecto.For more delicious recipes and inspiration, follow me on Pinterest. I share new recipes every week!
Source: USDA Nutritional Data
What is poke cake?
A poke cake is a cake that’s been poked with holes and then has a liquid filling poured over it. The filling seeps into the holes, making every bite moist and flavorful. For this Oreo poke cake, we use Oreo pudding as the filling.
When making a poke cake, do you let it cool before adding pudding?
Sí, you must let the cake cool completely before adding the pudding. If the cake is warm, the holes will collapse and the pudding won’t soak in evenly. Patience is key here. Let it cool for about 30 minutes after baking.
How to make 2 ingredient Oreo cake?
You can make a simple version by mixing one box of chocolate cake mix with one can of soda. But for the full Oreo poke cake experience, you’ll want the pudding and whipped topping layers. The extra ingredients make it truly special.
What is the best pan for Oreo poke cake?
A 9×13-inch baking pan is perfect for this Oreo poke cake. It gives you enough surface area for plenty of holes and a nice thick cake. Glass or metal both work fine. Just make sure to grease it well so the cake comes out easily.
What do you pour into a poke cake?
For this Oreo poke cake, you pour a mixture of instant Oreo pudding mix and cold milk into the holes. The pudding thickens as it sets, creating a creamy filling. You can also use sweetened condensed milk, gelatin, or fruit puree for other poke cake variations.
Why is my poke cake soggy?
A soggy poke cake usually means you poked too many holes too close together, or you poured too much liquid. Stick to spacing holes about 1 inch apart and use the right amount of pudding. Also, make sure the cake is fully cool before poking.
When do you poke a poke cake?
Poke the holes after the cake has cooled completely. If you poke while the cake is still warm, the holes will close up. Let it cool for about 30 minutes after baking, then use the handle of a wooden spoon to make your holes.
Can you make this ahead?
Absolutely. This Oreo poke cake is perfect for making ahead. In fact, it tastes even better after chilling overnight in the fridge. Just wait to add the crushed Oreos until right before serving so they stay crunchy.
How long does it last?
Store this Oreo poke cake in an airtight container in the refrigerator for up to 3 days. It will stay moist and delicious. Just keep it chilled and add fresh crushed Oreos each time you serve a slice.
Can you freeze Oreo Poke Cake?
I don’t recommend freezing the assembled cake because the whipped topping and pudding can get watery when thawed. But you can freeze the baked cake base before adding the pudding and toppings. Wrap it tightly and freeze for up to 3 months.