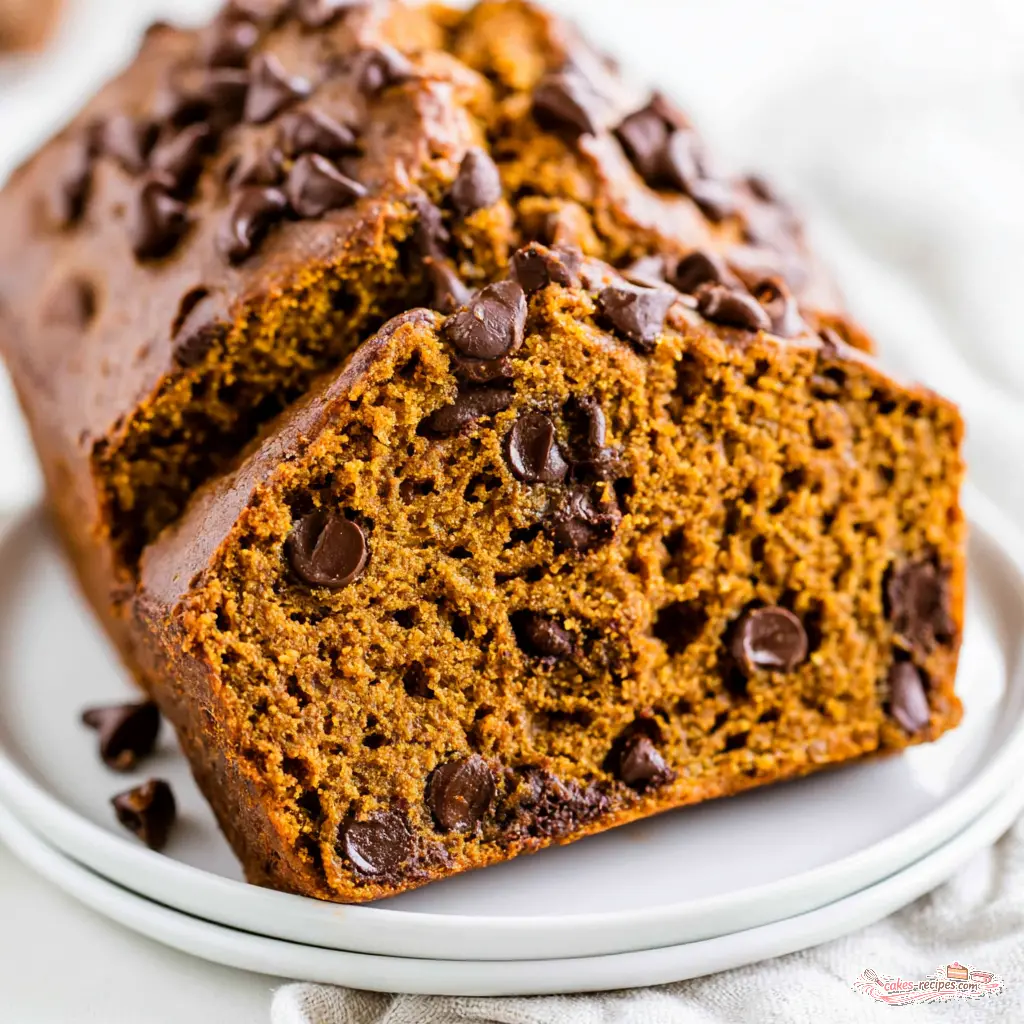
Flourless Peanut Butter Pumpkin Bread
Ingredients
Method
- Preheat the oven to 350 degrees F and line a 9x5 inch loaf pan with parchment paper, leaving a little overhang on the long sides for easy removal.
- In a large mixing bowl, stir together the maple syrup, peanut butter, pumpkin puree, eggs, pumpkin pie spice, baking soda, vanilla extract, and salt until the batter is completely combined.
- Fold in the chocolate chips gently so they are evenly dispersed throughout the batter.
- Pour the batter into the prepared loaf pan and smooth the top with a spatula. Bake for 35 to 40 minutes, until a toothpick inserted into the center comes out clean and the top feels fully set.
- Take the pan out of the oven and let the bread cool for 30 minutes in the pan before lifting it out and slicing.
- Store any leftover peanut butter pumpkin bread in an airtight container in the refrigerator for up to 5 days.
Nutrition
Notes
Tried this recipe?
Let us know how it was!Why You’ll Love This Peanut Butter Pumpkin Bread
Real talk: it’s August. The air conditioner is working overtime, and the last thing anyone wants is to heat up the kitchen. But I’ve already made this peanut butter pumpkin bread three times this month, and I’m not apologizing for it.
Canned pumpkin puree doesn’t care about the calendar. Neither does a jar of smooth peanut butter. When the fall craving hits early, this is the recipe that answers it.
This peanut butter pumpkin bread is different from the classic quick bread you grew up with. There’s no flour, no butter, and no mixer required. Just one bowl, a sturdy spoon, and about five minutes of active work.
The peanut butter does the heavy lifting here. It provides the structure that flour normally would, while the eggs and pumpkin keep everything tender and moist. The result is a loaf that’s dense in the best way, almost like a cross between banana bread and a flourless chocolate torte. (I’ve made enough of those to know.)
- One bowl, no mixer: You can literally make the batter with a spoon.
- Gluten-free and dairy-free: No flour, no butter, no milk. Naturally.
- 5 minutes of prep: Mix, pour, bake. That’s the whole story.
- Oil-free: The peanut butter brings all the richness you need.
It works as a make-ahead breakfast, a lunchbox snack, or a sneak-a-slice-at-midnight situation. No judgment here. Fair warning though: this loaf doesn’t last long in my kitchen. My niece called it “Uncle Marcus cake” and ate two slices before I could even grab a photo.
Ingredients and Substitutions
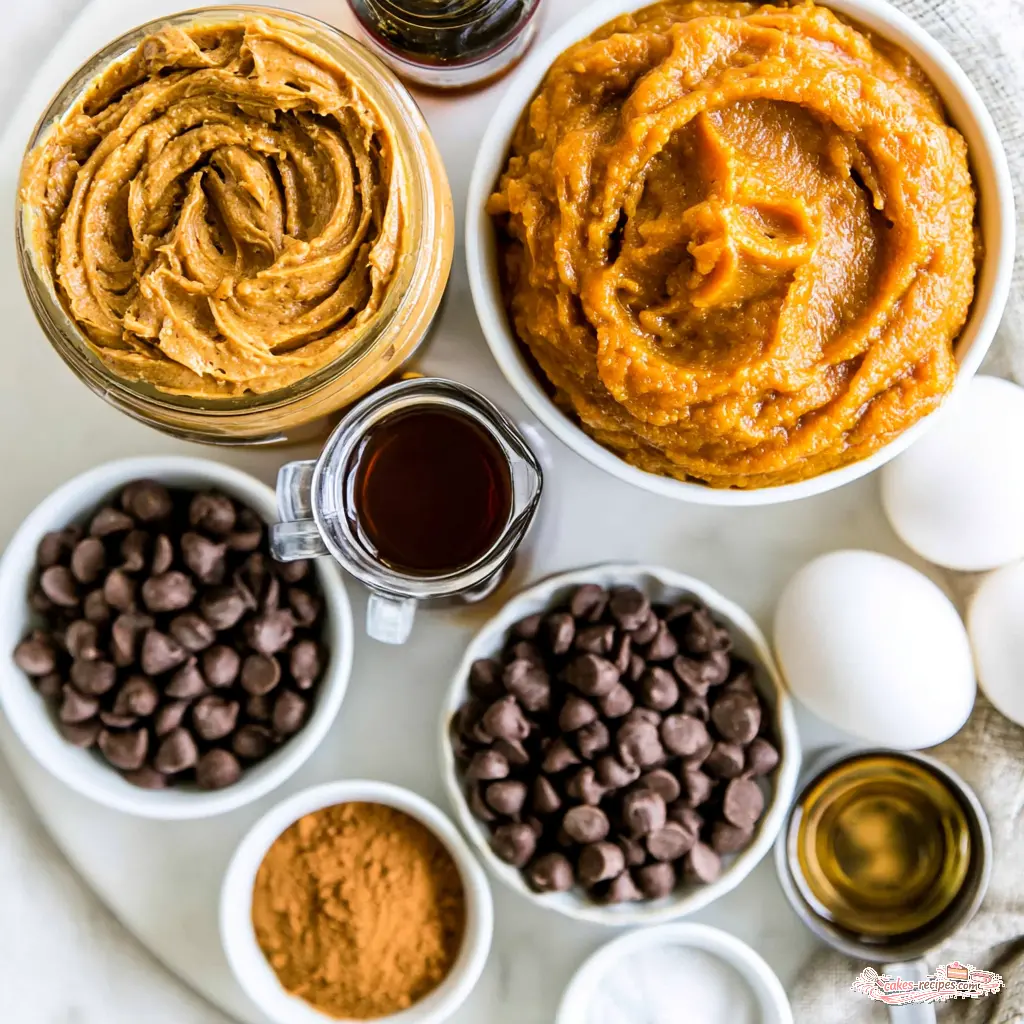
This recipe keeps things intentionally simple. Nine ingredients, most of which are probably already in your pantry. Here’s what works, and what definitely doesn’t, when you start swapping things around.
Peanut butter. Use smooth unsweetened natural-style peanut butter, and don’t skip that note. Conventional peanut butter has added sugar and stabilizers that change how it behaves in baking. Natural peanut butter, the kind where the oil separates on top, gives you the purest flavor and the right texture for this bread.
One thing though: stir that jar well before you measure. If the oil isn’t incorporated, you’ll end up with a drier, less flavorful loaf. That’s the kind of mistake that’s easy to make and hard to un-bake.
Pumpkin puree. Use 100% pure pumpkin puree, canned or homemade. Not pumpkin pie filling, which is already sweetened and spiced. If you’re using homemade puree, strain off the excess liquid first. Too much moisture makes the center heavy and undercooked.
Maple syrup. This is the liquid sweetener that keeps things moist. You can swap in agave or coconut nectar if that’s what you have. A sugar-free maple syrup also works if you’re watching your sugar intake.
Chocolate chips. Use dairy-free chips to keep this fully dairy-free, or skip them entirely. More on that below.
Eggs. Room temperature eggs mix more evenly into the batter. Cold eggs can make the peanut butter seize up slightly, which gives you a lumpy batter. (Ask me how I know. The first loaf I tested had streaks, it still baked fine, but those lumps bothered me.)
How to Make Peanut Butter Pumpkin Bread
The method here is almost embarrassingly easy. No creaming butter, no sifting flour, no folding egg whites. You mix everything in one bowl and let the oven do the rest. That’s the beauty of this peanut butter pumpkin bread.
Stage 1: Prep the pan. Preheat your oven to 350°F and line a 9×5 inch loaf pan with parchment paper. Leave a little overhang on the long sides, it makes lifting the finished loaf out so much easier. This is one of those small steps that saves you from a crumbled mess later.
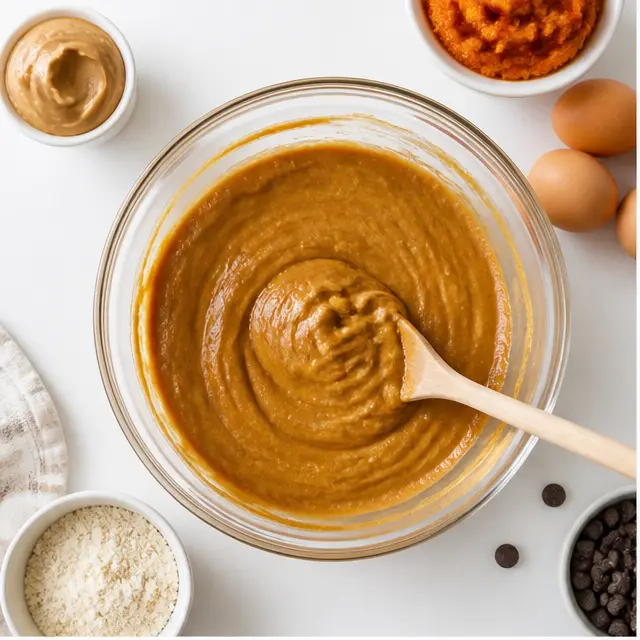
Stage 2: Mix the batter. In a large mixing bowl, stir together the maple syrup, peanut butter, pumpkin puree, eggs, pumpkin pie spice, baking soda, vanilla extract, and salt. The key word here is stir, not beat. You want the batter completely combined with no lumps, but you don’t want to overwork it. Stop as soon as it comes together.
The batter will look thick and glossy, almost like a soft cookie dough. That’s exactly what you’re after. If it looks too thin, your pumpkin puree might have been watery. If it looks stiff, your peanut butter needed more stirring.
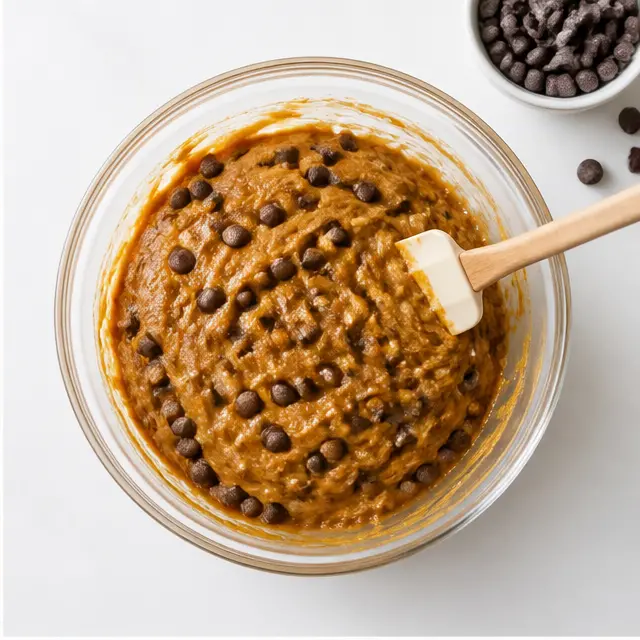
Stage 3: Fold in the chocolate chips. Gently fold the chocolate chips through the batter so they’re evenly dispersed. Don’t overmix here either. The chips should be scattered throughout, not crushed into the mixture. Pour the batter into the prepared loaf pan and smooth the top with a spatula.
This is also the moment to press a few extra chocolate chips onto the surface if you want that bakery-style look. Not required, but it does make a pretty top.
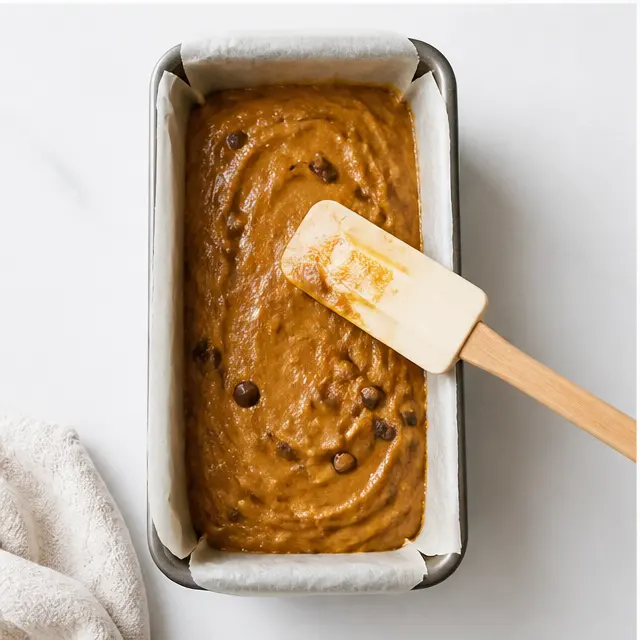
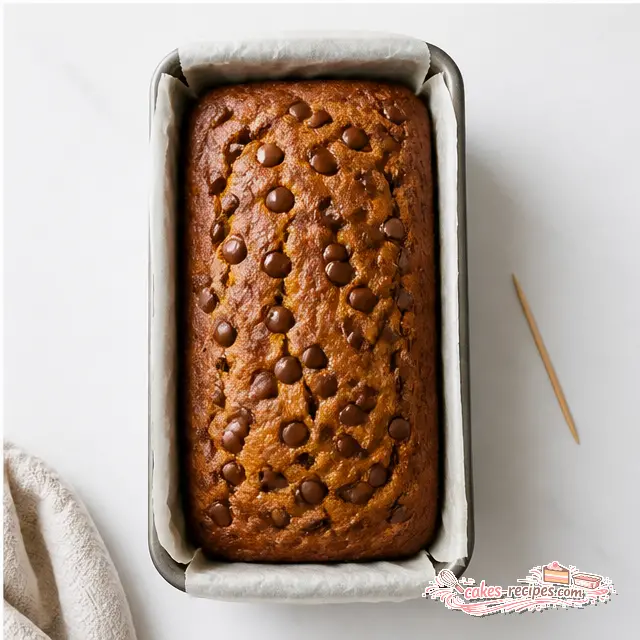
Stage 4: Bake and cool. Bake for 35 to 40 minutes, until a toothpick inserted into the center comes out clean and the top feels fully set. Ovens vary, so start checking at 35 minutes. And resist the urge to open the oven door before then, the temperature drop can cause the center to sink.
Here’s the part most people rush: cooling. Let the bread cool in the pan for 30 minutes before lifting it out. I know, the smell is torture. But slicing too early is the number one reason this bread crumbles. Patience pays off in clean slices.
Tips for the Best Peanut Butter Pumpkin Bread
After a few rounds of testing this loaf, I’ve learned exactly where things go wrong. Let’s skip those lessons and go straight to what actually works.
What Works and What Doesn’t
Do: Use natural peanut butter and stir it well before measuring.
Don’t: Use pumpkin pie filling instead of pure pumpkin puree. They’re not interchangeable.
Doneness cues. The top should feel set and spring back slightly when you press it. A toothpick inserted in the center should come out clean, not wet. If the top browns too quickly while the center is still raw, tent the loaf loosely with foil for the last 10 minutes.
Texture targets. You’re looking for a moist, dense crumb, not airy like a sponge cake. This is supposed to be fudgy. That’s the flourless charm.
Overmixing. Mixing too vigorously develops toughness, even without flour. Stir until combined, then stop. That’s the whole secret to a tender crumb.
Here are the common mistakes, in one quick list:
- ❌ Overmixing the batter → ✅ Stir just until combined for the moistest bread.
- ❌ Using pumpkin pie filling → ✅ Use 100% pure pumpkin puree, and strain homemade puree.
- ❌ Opening the oven too early → ✅ Wait until the 35-minute mark to check.
- ❌ Slicing while warm → ✅ Cool for 30 minutes in the pan, then slice.
Variations and Add-Ins
This peanut butter pumpkin bread is friendly to customization, but keep in mind that any add-in is optional. The base recipe works beautifully as written.
Skip the chocolate. For a chocolate-free loaf, simply leave out the chips and stir in 1/4 cup of toasted chopped pecans or walnuts instead. The nutty crunch plays nicely with the pumpkin spice.
Different nut butters. Almond butter works well here, just make sure it’s smooth and unsweetened. Sunflower seed butter is another option if you need a nut-free version.
More pumpkin flavor. Add an extra 1/2 teaspoon of pumpkin pie spice to the batter if you want a stronger spice presence. It’s a subtle tweak, but it makes the fall flavor pop.
Extra peanut butter swirl. Warm a few tablespoons of peanut butter and dollop it on top of the batter before baking. Swirl it gently with a knife for a marbled effect and a more intense peanut butter flavor.
Dark chocolate chips are my personal preference here. The bitterness balances the maple syrup and the earthiness of the pumpkin. If you use milk chocolate, the loaf leans sweeter, which is fine, just different.
Storage and Leftovers
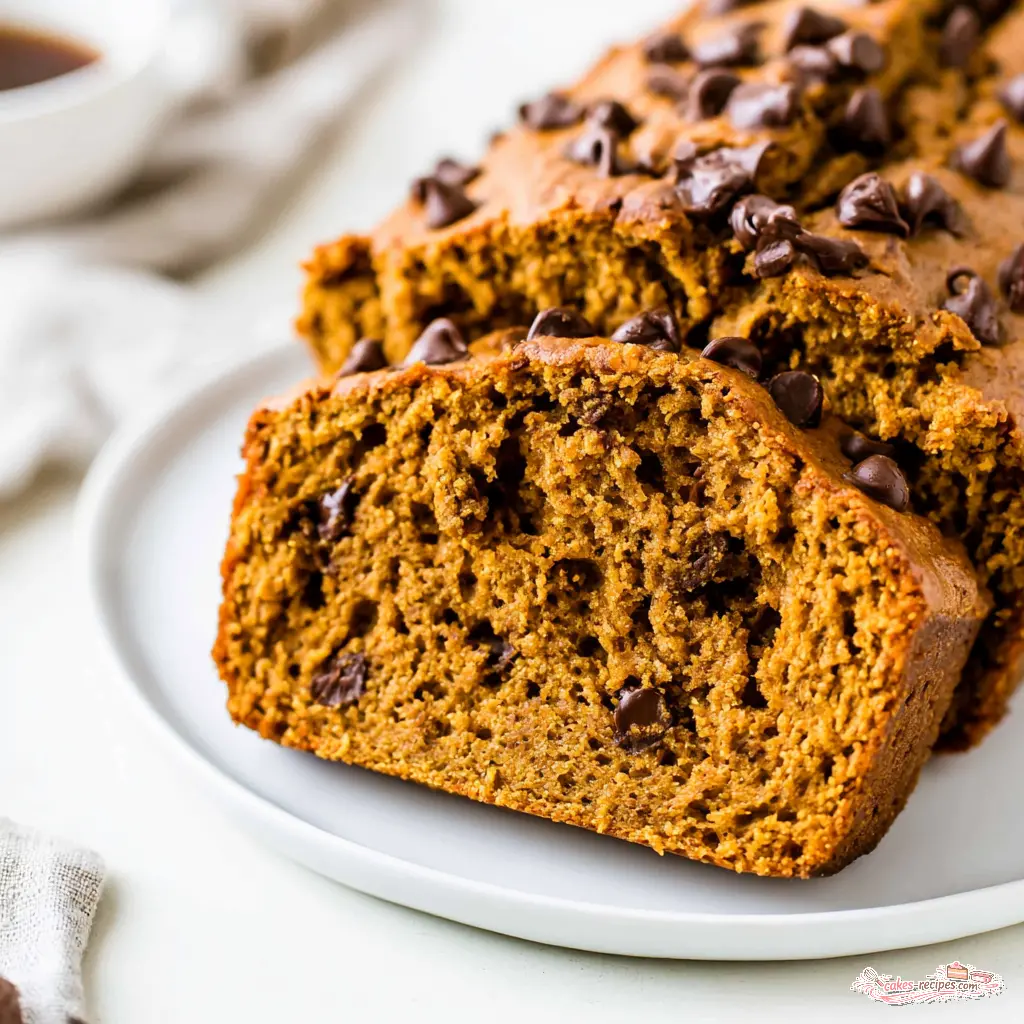
This peanut butter pumpkin bread actually tastes better the next day, if you can make it last that long. The flavors mingle overnight, and the texture firms up just slightly, which makes slicing even cleaner.
Refrigerator. Store leftovers in an airtight container in the fridge for up to 5 days. The pumpkin and eggs make this bread perishable enough that I wouldn’t leave it at room temperature for more than a day.
Freezer. Yes, this loaf freezes beautifully. Wrap it tightly in plastic wrap, then again in foil, and freeze for up to 3 months. To thaw, leave it in the fridge overnight. Slice first if you want single portions, that way you can pull out one slice at a time.
Reheating. The bread firms up when chilled, so warm individual slices in the microwave for 10 to 15 seconds if you prefer a softer, just-baked texture. A quick pass in the oven or air fryer also works if you like a slightly crisped edge.
For your meal prep planning: this loaf makes a great make-ahead breakfast or lunchbox snack for the week. Slice it, portion it, and grab it on your way out the door.
Frequently Asked Questions
Final Thoughts
Look, I get it. Pumpkin bread in August feels like wearing a sweater in a heatwave. But this peanut butter pumpkin bread is worth breaking the seasonal rules for. It’s easy, it’s forgiving, and it fills your kitchen with that warm, spiced aroma that makes everything feel right.
Whether you’re getting a head start on fall baking or you just need a reliable one-bowl loaf that feeds a crowd, this recipe delivers. Get that moist pumpkin bread energy going, and don’t skip the 30-minute cool.
Want to save this recipe for your fall baking lineup? Save it to your Pinterest board so it’s waiting for you when the leaves start turning.
Happy baking, and may your center always be fully set.
Source: Learn More About This Dish
Just wondering if you can freeze the loaf?
Absolutely. Wrap the cooled loaf tightly in plastic wrap, then foil, and freeze for up to 3 months. Thaw overnight in the fridge, or slice first and microwave individual slices for 10 to 15 seconds. It tastes just as good as fresh, so consider doubling the batch.
Can I add protein powder to bump up the protein? Or will that make it too dry?
That’s a fair instinct, but I haven’t tested it and I’d be cautious. Protein powder absorbs a lot of moisture, and this flourless loaf has a delicate balance. If you try it, start with a small scoop and be ready to add a splash of extra liquid. I can’t promise the texture, so experiment at your own risk.