
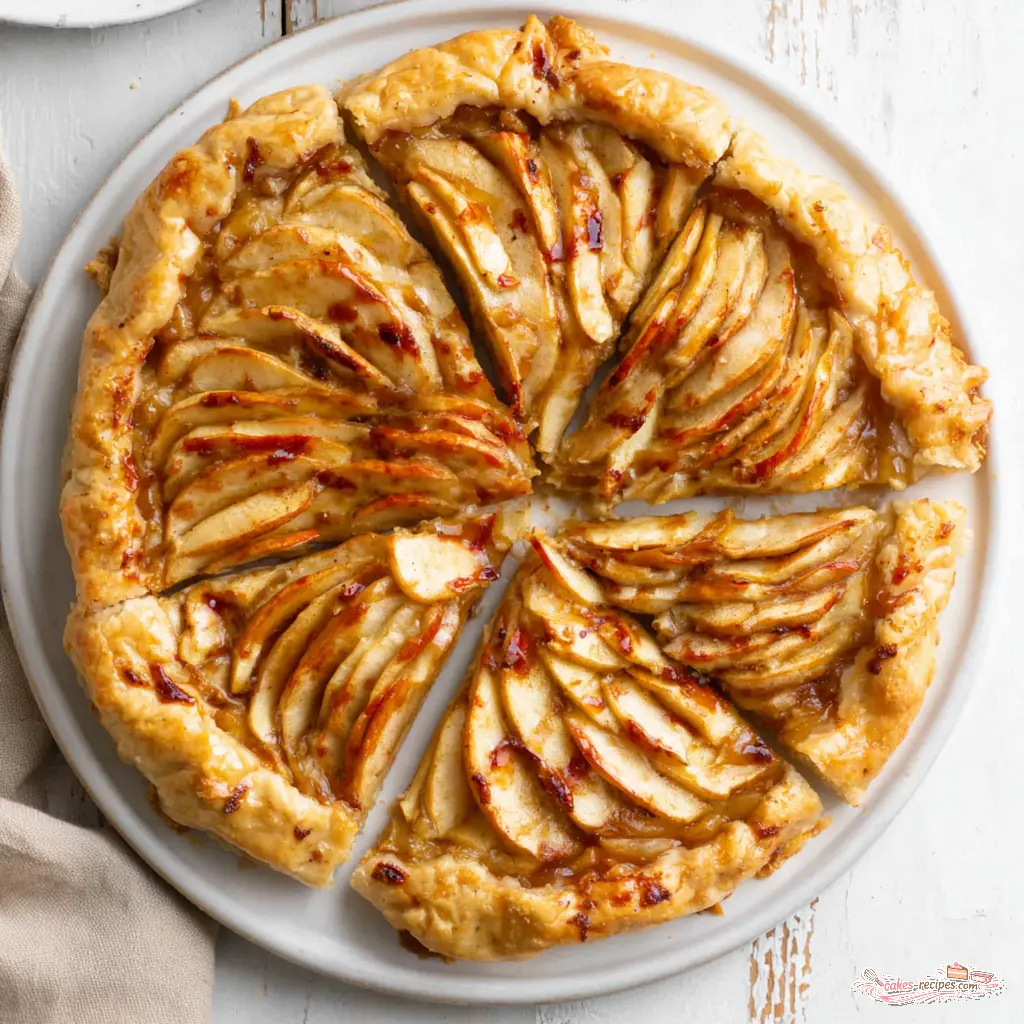
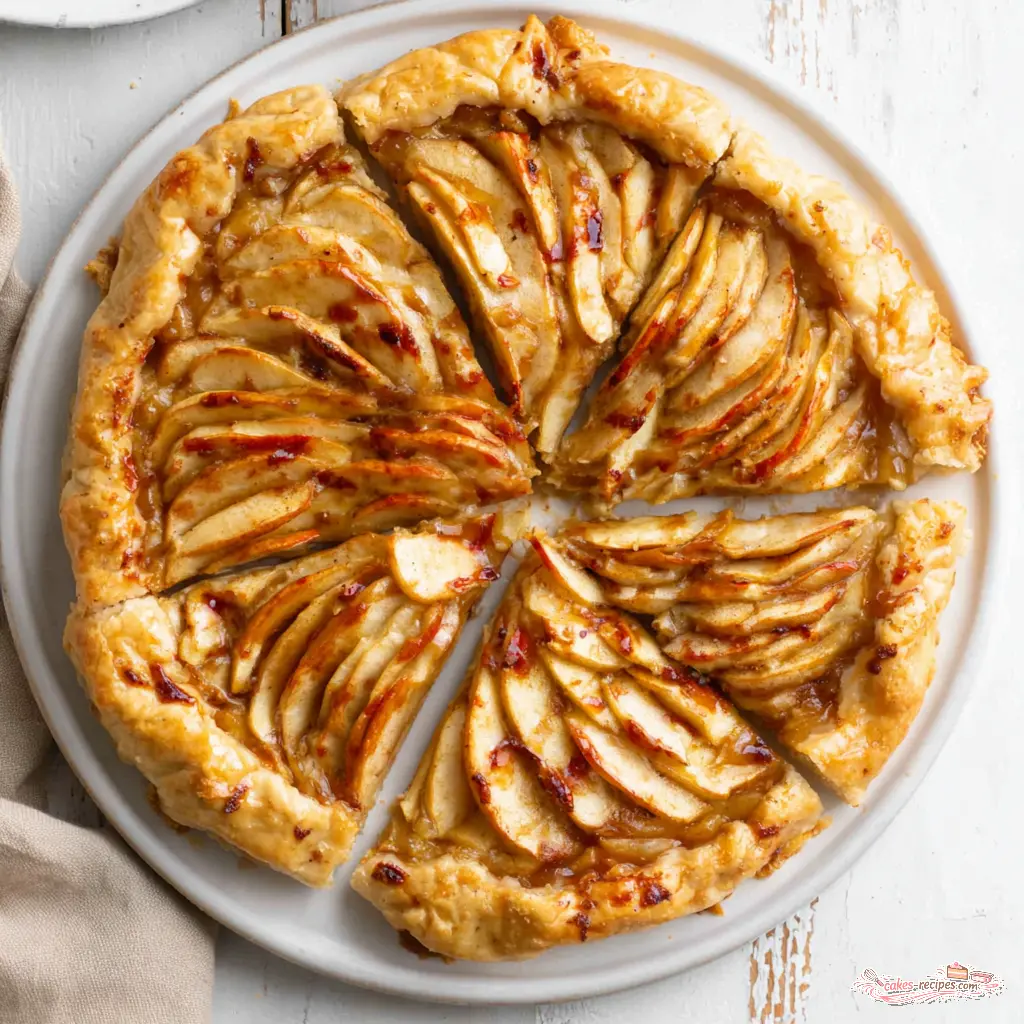
Easy Puff Pastry Apple Tart with Apricot Glaze
Ingredients
Method
- Preheat your oven to 400 degrees Fahrenheit.
- Warm 3/4 cup of apricot jam in a small saucepan over medium-low heat for 2 to 3 minutes, stirring occasionally, until it becomes loose and spreadable. You can also microwave it in a small bowl for 30 seconds.
- While the jam is heating, in a large bowl, combine 1/4 cup granulated sugar, 1/4 cup brown sugar, 2 tablespoons flour, 1 1/2 teaspoons cinnamon, 1 teaspoon lemon juice, and a pinch of kosher salt.
- Mix the dry ingredients together until well combined.
- Add the sliced Granny Smith apples to the bowl and toss gently until every slice is evenly coated with the sugar mixture.
- Lightly flour a clean countertop and roll out the puff pastry sheet into a rectangle about 9 by 13.5 inches. Transfer it to a parchment-lined baking sheet.
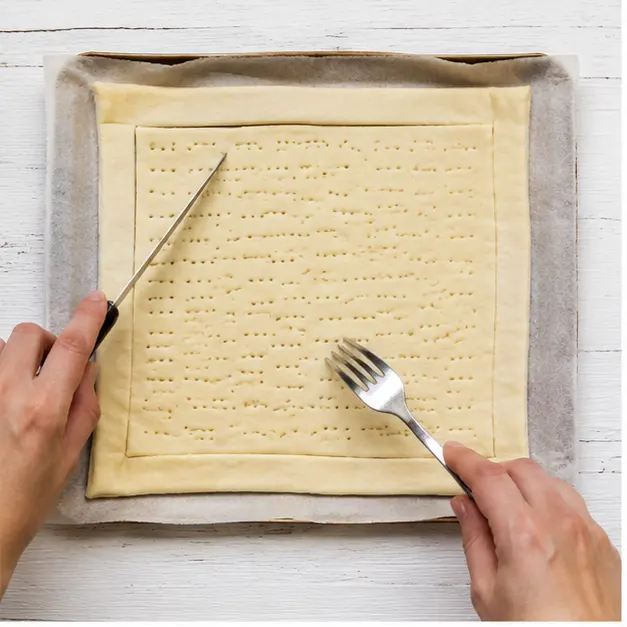
- Using a sharp knife, score a border about 1 inch from the edge of the puff pastry, being careful not to cut all the way through. Prick the inner area of the pastry all over with a fork.
- Spread 1/2 cup of the warmed apricot jam evenly over the inner area of the pastry, reserving the remaining 1/4 cup for later.
- Arrange the apple slices in a single layer over the jam, overlapping them slightly for a beautiful presentation.
- Fold the outer border of the pastry up and over the edges of the apples, pressing gently to seal. Brush the folded crust with the beaten egg and sprinkle with the remaining 1 tablespoon of granulated sugar.
- Scatter the cold butter cubes over the apples.
- Bake for 30 to 35 minutes, until the crust is deep golden brown and the apples are tender but not mushy.
- Reheat the remaining 1/4 cup of apricot jam until loose, then brush it over the hot apples for a glossy finish.
- Let the tart cool on the baking sheet for 5 to 10 minutes, then slice and serve warm with a scoop of vanilla ice cream.
Nutrition
Notes
Tried this recipe?
Let us know how it was!Why You’ll Love This Puff Pastry Apple Tart
I used to think apple tarts required hours of Houdini-like pastry work. Rolling, folding, chilling, praying the butter didn’t leak. Honestly, it felt like a weekend project, not a Tuesday night dessert. But here’s the thing. Store-bought puff pastry changes everything.
This puff pastry apple tart is my go-to when I want something that looks like I spent all afternoon in the kitchen but actually took about 15 minutes of hands-on work. The secret? Frozen puff pastry from the grocery store. No judgment here. That makes sense, right? We’re busy people.
The result is a rustic apple tart with a flaky pastry crust that shatters when you cut into it. The apples get tender and caramelized, held together by a sweet cinnamon sugar coating. And that apricot glaze on top? It gives the whole thing a glossy, bakery-quality finish that makes you look like a pro.
This works for summer fruit desserts when you want something light but satisfying. It’s also perfect as a back to school sweet treat when you need to ease back into the school routine with something special. Trust me, this one disappears fast. I’ve seen it happen.
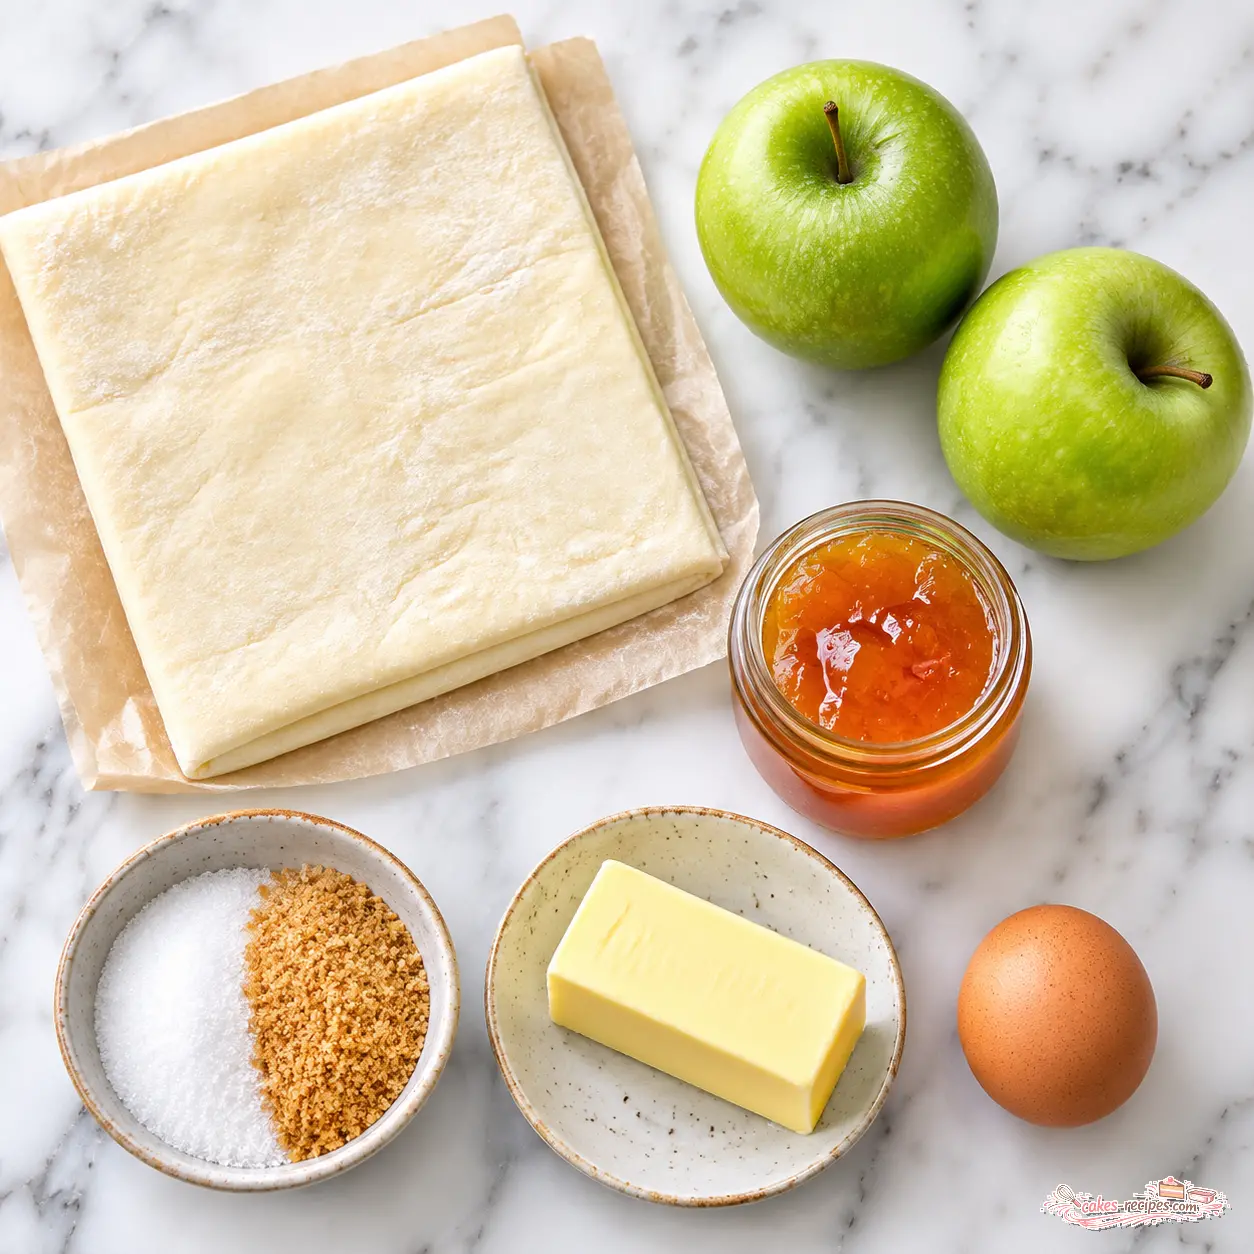
Ingredients for Puff Pastry Apple Tart
The ingredient list is short, which is exactly the point. You probably have most of this already. Let me walk through what you need and why each one matters.
- Puff pastry, thawed overnight in the fridge: This is your canvas. I use store-bought sheets from the freezer aisle. Thawing in the fridge overnight gives you the best texture. Don’t rush it on the counter or the butter gets too soft.
- Apricot jam, divided: You’ll use half under the apples and half as a glaze after baking. The sweetness balances the tart apples perfectly. Good quality jam makes a difference.
- Granulated sugar and brown sugar: The granulated sugar adds crunch on top. The brown sugar brings that deep caramel note to the apples. Both work together.
- All-purpose flour: Just a couple tablespoons to thicken the apple juices so they don’t make the pastry soggy. This is the trick.
- Ground cinnamon: The classic warming spice that makes apple desserts taste like home. One and a half teaspoons feels just right.
- Fresh lemon juice: A teaspoon from half a lemon. It keeps the apples from browning and brightens all the flavors.
- Kosher salt: Just a pinch. It balances sweetness and makes everything taste more like itself.
- Granny Smith apples: Two medium apples, cored and sliced into quarter-inch slices. They hold their shape during baking and provide that necessary tartness against the sweet filling.
- Egg, beaten: For the egg wash that gives the crust that golden, glossy finish. Don’t skip it.
- Cold unsalted butter: Cut into small cubes and scattered over the apples before baking. It melts into the filling and adds richness.
- Vanilla ice cream: For serving. This is non-negotiable in my house. The cold creaminess against the warm tart is perfection.
That’s it. Eleven ingredients, most of which are pantry staples. This is what I love about store-bought puff pastry recipes. They let the few ingredients shine without a lot of fuss.
Substitutions and Variations
I’ve tested a few variations on this easy apple tart, and they all work. Here’s what I’ve learned.
Different apples: Granny Smith is my first choice for that tartness, but Honeycrisp or Fuji work well too. They’re sweeter and a little softer, so keep an eye on them during baking. Avoid Red Delicious or Gala, they turn to mush.
Different jam: If you don’t have apricot jam, orange marmalade is fantastic. The citrus notes play beautifully with the apples. Fig jam or apple butter also work. Just make sure it’s spreadable. Warm it up first.
Dairy-free version: Use vegan butter in place of regular butter. The puff pastry itself sometimes contains butter, so check the label if that’s a concern. Some brands are dairy-free.
Individual tarts: Cut the puff pastry into four squares, score borders on each, and divide the apples among them. Baking time might be a few minutes shorter. They’re great for parties.
Add crunch: Sprinkle chopped walnuts or pecans over the apples before baking. About a quarter cup works well. I’ve done this for holiday gatherings and it’s always a hit.
Spice it up: A pinch of cardamom or ginger alongside the cinnamon adds a nice complexity. Start with a quarter teaspoon and adjust from there.
The beauty of this recipe is its flexibility. It’s forgiving. You can make it your own without worrying about ruining it.
How to Make Puff Pastry Apple Tart
Let me walk you through the process. I’ll break it into four stages so you can see the progression. Each stage has its own photo so you know exactly what to look for.
Stage 1: Prep the Pastry and Filling
First things first. Preheat your oven to 400 degrees Fahrenheit. While that’s heating, warm three-quarters cup of apricot jam in a small saucepan over medium-low heat for two to three minutes. Stir occasionally until it becomes loose and spreadable. You can also microwave it in a small bowl for 30 seconds. Either way works.
In a large bowl, combine a quarter cup granulated sugar, a quarter cup brown sugar, two tablespoons flour, one and a half teaspoons cinnamon, one teaspoon lemon juice, and a pinch of kosher salt. Mix it together until well combined. Then add your sliced Granny Smith apples and toss gently until every slice is evenly coated.
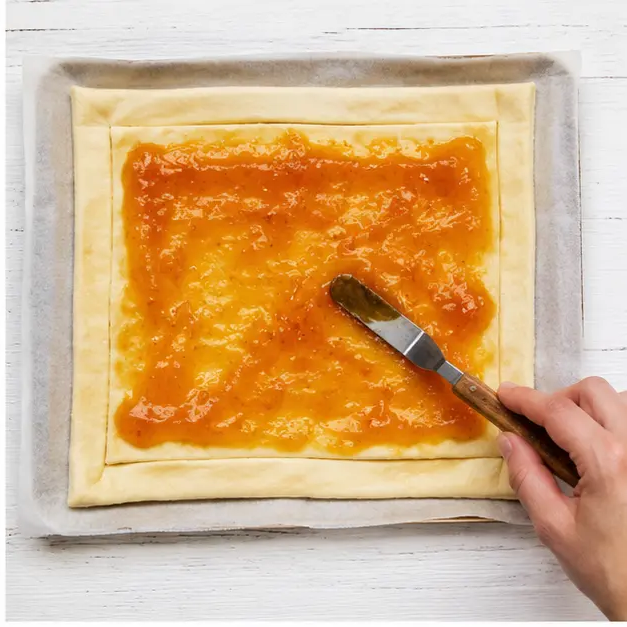
Lightly flour a clean countertop and roll out the puff pastry sheet into a rectangle about 9 by 13.5 inches. Transfer it to a parchment-lined baking sheet. Now here’s the important part. Using a sharp knife, score a border about one inch from the edge of the puff pastry, being careful not to cut all the way through. Then prick the inner area all over with a fork. This prevents the center from puffing up too much while the border rises beautifully.
Stage 2: Assemble the Tart
Spread half cup of the warmed apricot jam evenly over the inner area of the pastry. Reserve the remaining quarter cup for later. The jam layer adds sweetness and helps keep the pastry moist underneath the apples.
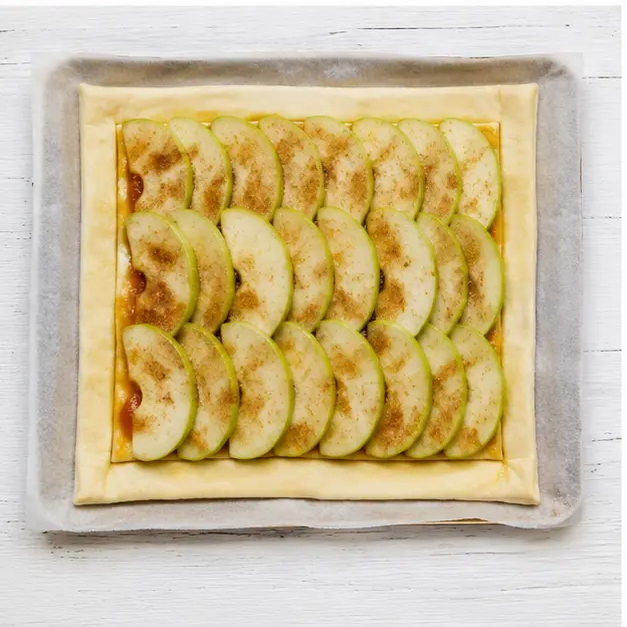
Now arrange the apple slices in a single layer over the jam. Overlap them slightly for a beautiful presentation. I like to do neat rows, but a rustic spiral pattern works too. Don’t stress about perfection. The apples will settle as they bake.
Fold the outer border of the pastry up and over the edges of the apples, pressing gently to seal. Brush the folded crust with the beaten egg and sprinkle with the remaining one tablespoon of granulated sugar. Scatter the cold butter cubes over the apples.
Stage 3: Bake Until Golden
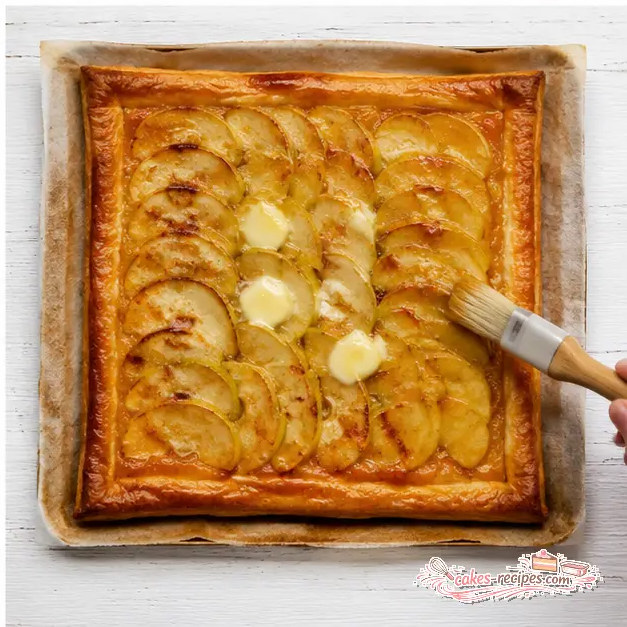
Bake for 30 to 35 minutes. You’re looking for the crust to be deep golden brown and the apples to be tender but not mushy. The sugar on the crust will caramelize and create a beautiful crackled surface. The butter will melt into the apples, making them soft and rich.
Here’s what to watch for. If the edges are browning too quickly but the center needs more time, tent the tart loosely with foil for the last five to ten minutes. Every oven runs a little differently. I’ve had to do this with my older oven that has hot spots.
Stage 4: Glaze and Serve
As soon as the tart comes out of the oven, reheat the remaining quarter cup of apricot jam until loose. Brush it over the hot apples for a glossy finish. This is the step that makes the tart look like it came from a bakery. The warm jam soaks into the apples and gives them that gorgeous sheen.
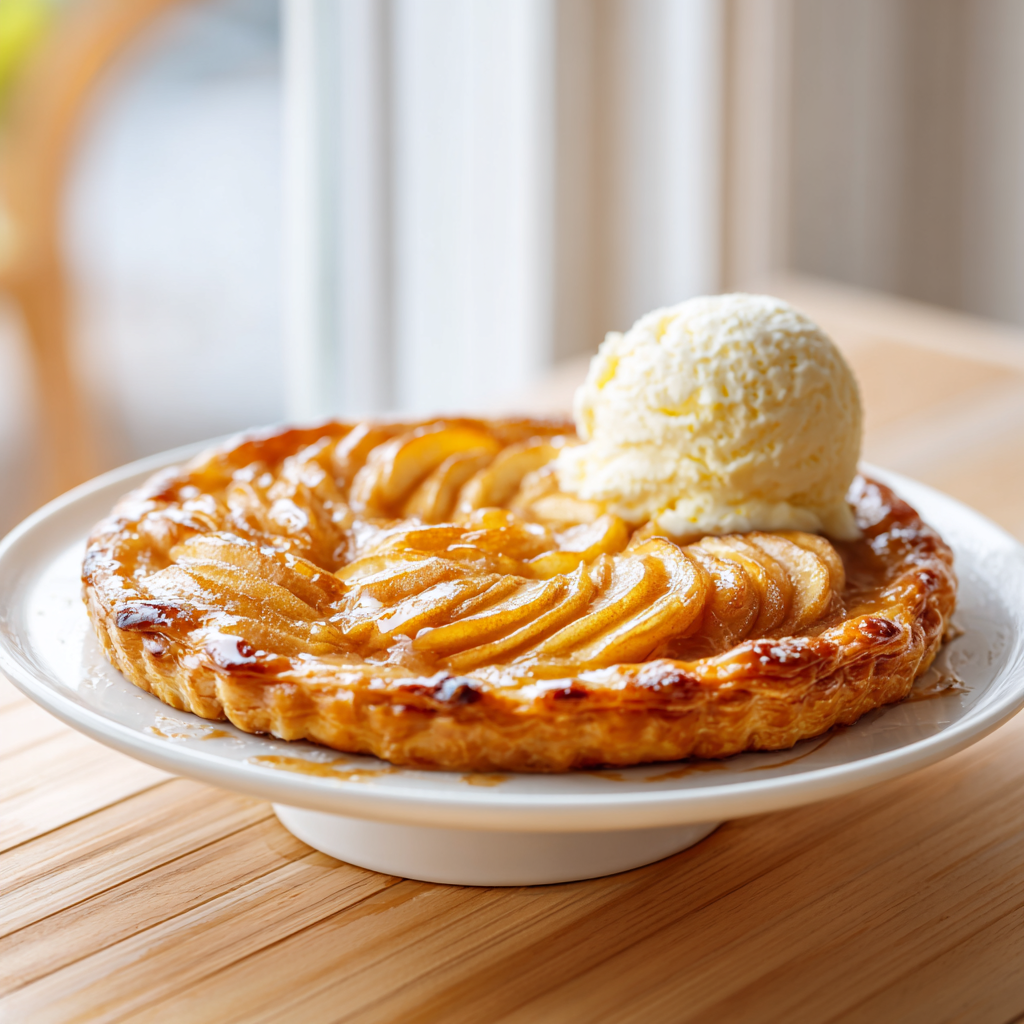
Let the tart cool on the baking sheet for five to ten minutes. This is important. If you slice too soon, the apple slices will shift and the layers won’t hold. Give it that brief rest. Then slice and serve warm with a scoop of vanilla ice cream.
Tips for the Best Apple Tart
I’ve made this puff pastry apple tart more times than I can count. Here are the things I’ve learned that make the difference between good and great.
- Don’t skip docking the pastry. Pricking the inner area with a fork prevents it from puffing up like a balloon under the filling. The border will still rise beautifully, but the center stays flat for the apples.
- Use cold butter. The cubes should be straight from the fridge. They melt slowly during baking, creating steam pockets that keep the pastry flaky. Warm butter just gets absorbed.
- Slice apples evenly. Quarter-inch slices cook at the same rate. Too thick and they’re crunchy. Too thin and they turn to applesauce. A mandoline helps if you have one, but a sharp knife works fine.
- Don’t overfill. A single layer of overlapping slices is enough. Piling on too many apples releases excess juice that makes the pastry soggy. Trust me on this one.
- Glaze while warm. The apricot jam brush-on works best when both the tart and the jam are hot. It creates that glossy finish that makes everyone think you’re a pastry chef.
- Let it rest before slicing. Five to ten minutes on the baking sheet. The layers need to settle. Slice too soon and you’ll have a beautiful mess instead of neat portions.
These tips address the common apple tart baking mistakes I see people make. Soggy bottom? Usually from not docking the pastry or using too-wet apples. Uneven browning? Check your oven temperature with an oven thermometer. They’re not expensive and they save a lot of frustration.
One more thing. If you’re worried about a soggy pastry crust, you can preheat the baking sheet in the oven before placing the tart on it. The hot surface gives the bottom an immediate blast of heat that helps it crisp up. I do this when I’m feeling extra cautious.
Storage and Reheating
This tart is best fresh from the oven, but leftovers happen sometimes. Here’s how to handle them.
Room temperature: The tart can sit at room temperature for up to two hours if you’re serving it over a longer period. Cover loosely with foil if there are flies around.
Refrigerator: Store leftover tart in an airtight container in the fridge for up to three days. The pastry will soften slightly, but it still tastes great.
Reheating: The key is to reheat in a 350-degree Fahrenheit oven for about five minutes. This crisps the pastry back up and warms the apples through. Don’t use the microwave, it makes the pastry soggy and sad. I’ve tried it. It’s not worth it.
Freezing: You can freeze the baked tart for up to one month. Wrap it tightly in plastic wrap and then foil. Thaw in the fridge overnight and reheat in the oven. You can also freeze it unbaked without the egg wash or glaze. Bake from frozen, adding about five minutes to the baking time.
Honestly though, this tart rarely lasts long enough to need storage. It’s one of those desserts that people keep coming back to for just one more slice.
Frequently Asked Questions
This puff pastry apple tart has become my signature dessert for casual dinners and holiday gatherings alike. It’s the kind of recipe that makes people say “You made this?” with genuine surprise. And honestly, that never gets old.
I love seeing the golden results when you make this. Tag me on Pinterest when you do. I’m always inspired by the creative variations people come up with. Happy baking, everyone.
Source: Nutritional Information
Do you need to peel the apples for an apple tart?
I don’t peel them for this tart. The skin adds color and texture, plus it helps the slices hold their shape during baking. If you prefer a softer texture, you can peel them. It’s personal preference.
Should you cook the apples before baking an apple tart?
No need. The quarter-inch slices cook perfectly in the 30 to 35 minute bake time. Pre-cooking would make them too soft and they’d lose their structure. The high oven temperature caramelizes them beautifully as they bake.
What kind of apples are best for apple tart?
Granny Smith is my top choice. They’re tart enough to balance the sweet filling and they hold their shape during baking. Honeycrisp and Fuji also work well. Avoid soft varieties like Red Delicious that turn to mush.
Can you make an apple tart ahead of time?
You can prepare the apple mixture and warm the jam up to a day ahead. Assemble and bake the tart fresh for best results. The pastry is at its flakiest straight from the oven. Leftovers reheat well though.
What’s the difference between apple pie and apple tart?
An apple pie has a top and bottom crust, usually made from pie dough. An apple tart is open-faced with just a bottom crust, often made from puff pastry. Tarts are generally lighter, quicker to make, and show off the fruit.
Can you make an apple tart with pie crust instead of puff pastry?
Yes, you can substitute pie crust for puff pastry. The texture will be different. Pie crust is denser and more crumbly, while puff pastry is light and flaky. Both work, but this recipe is designed for the flakiness of puff pastry.
Can I make this puff pastry apple tart ahead of time?
You can assemble the tart completely, then refrigerate it unbaked for up to four hours. Add the egg wash and sugar just before baking. This makes it perfect for entertaining when you want to minimize last-minute work.
Can I use Granny Smith apples for this tart?
Absolutely. Granny Smith is actually my preferred apple for this recipe. Their tartness balances the sweet apricot jam and brown sugar filling. They also hold their shape beautifully during baking without turning mushy.
Can I freeze this apple tart?
Yes, you can freeze the baked tart for up to one month. Wrap it tightly in plastic wrap and foil. Thaw in the fridge overnight and reheat in a 350-degree oven for five minutes to refresh the crust. You can also freeze it unbaked.
Can I make individual apple tarts with this recipe?
Yes. Cut the puff pastry sheet into four equal squares. Score borders on each square, spread with jam, and arrange apple slices. Baking time will be about 20 to 25 minutes. They’re perfect for parties or portion control.














3 Responses
This was absolutely delicious! I made it for a family dinner and everyone raved about it. The apricot jam glaze really takes it to the next level. I used Honeycrisp apples instead of Granny Smith because that’s what I had, and it still turned out perfectly sweet and tender. My only question is—could I prep the tart a few hours ahead and bake it right before serving?
Hi Sarah, so glad it was a hit! Yes, you can absolutely assemble the tart a few hours ahead and keep it in the fridge. Just brush on the egg wash right before baking so the pastry stays flaky. Enjoy!
Great recipe, but I found the 1/4 cup of sugar in the apple mixture a bit too sweet for my taste. Next time I’ll cut it down to 2 tablespoons. Also, my puff pastry didn’t puff as much as I hoped—maybe I didn’t thaw it enough? Still, the flavor was lovely and it looked beautiful.