Why These Sourdough Cinnamon Rolls Work
Real talk: that jar of sourdough discard in the back of your fridge has been judging you. I get it. You fed a starter once, kept it alive for a week, and now you’re staring at a cup of tangy discard wondering what on earth to do with it. These sourdough cinnamon rolls are the answer.
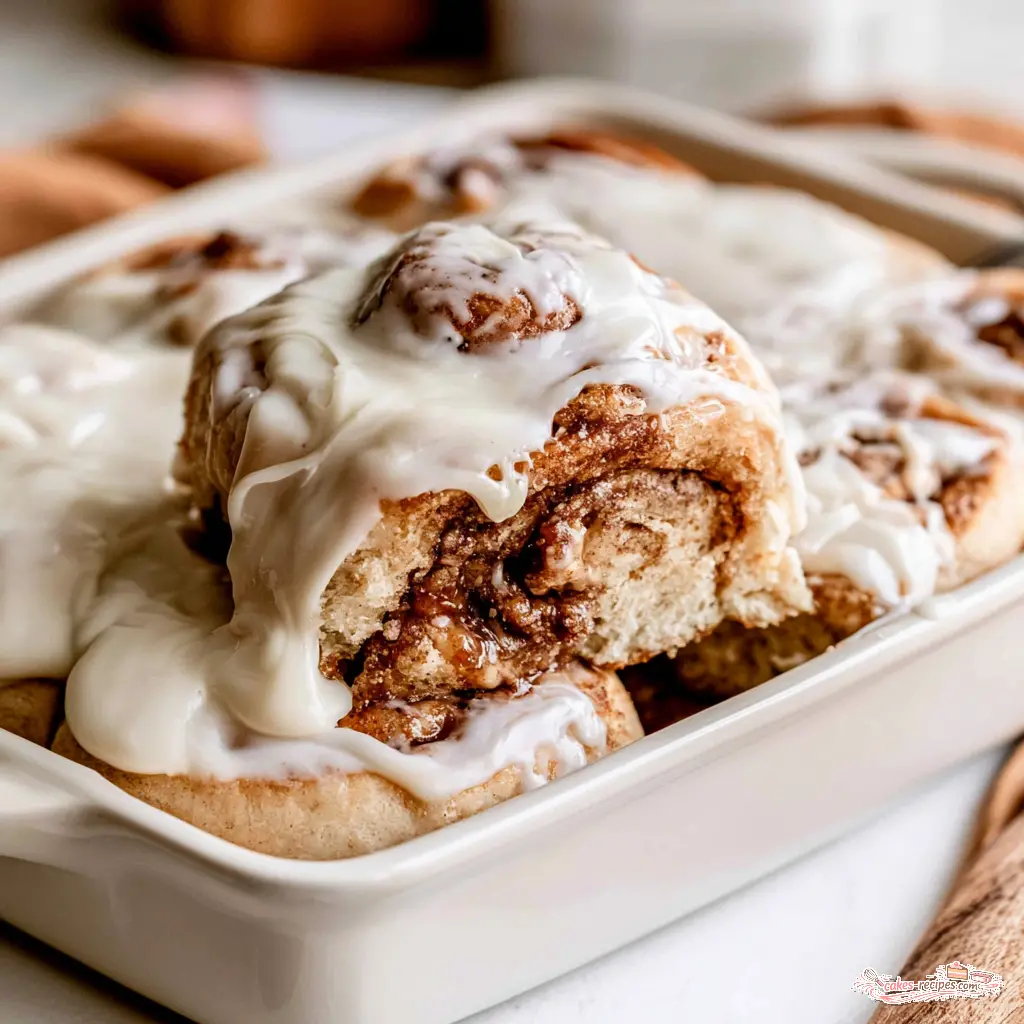
Here’s the thing about most discard recipes. They turn out dense, flat, or way too sour. Not these. The honey cream cheese glaze and the gooey brown sugar filling are what you’ll remember, but the magic is in the dough itself. It’s soft, tender, and just tangy enough to keep things interesting.
I learned the value of not wasting good ingredients during a year in Colombia, watching Rosa turn every scrap into something beautiful. That’s the whole idea behind sourdough discard cinnamon rolls. No yeast, no overnight babysitting, no specialty equipment. Just one bowl, a baking dish, and about 50 minutes between you and the best thing your kitchen will smell like all week.
Important Ingredients
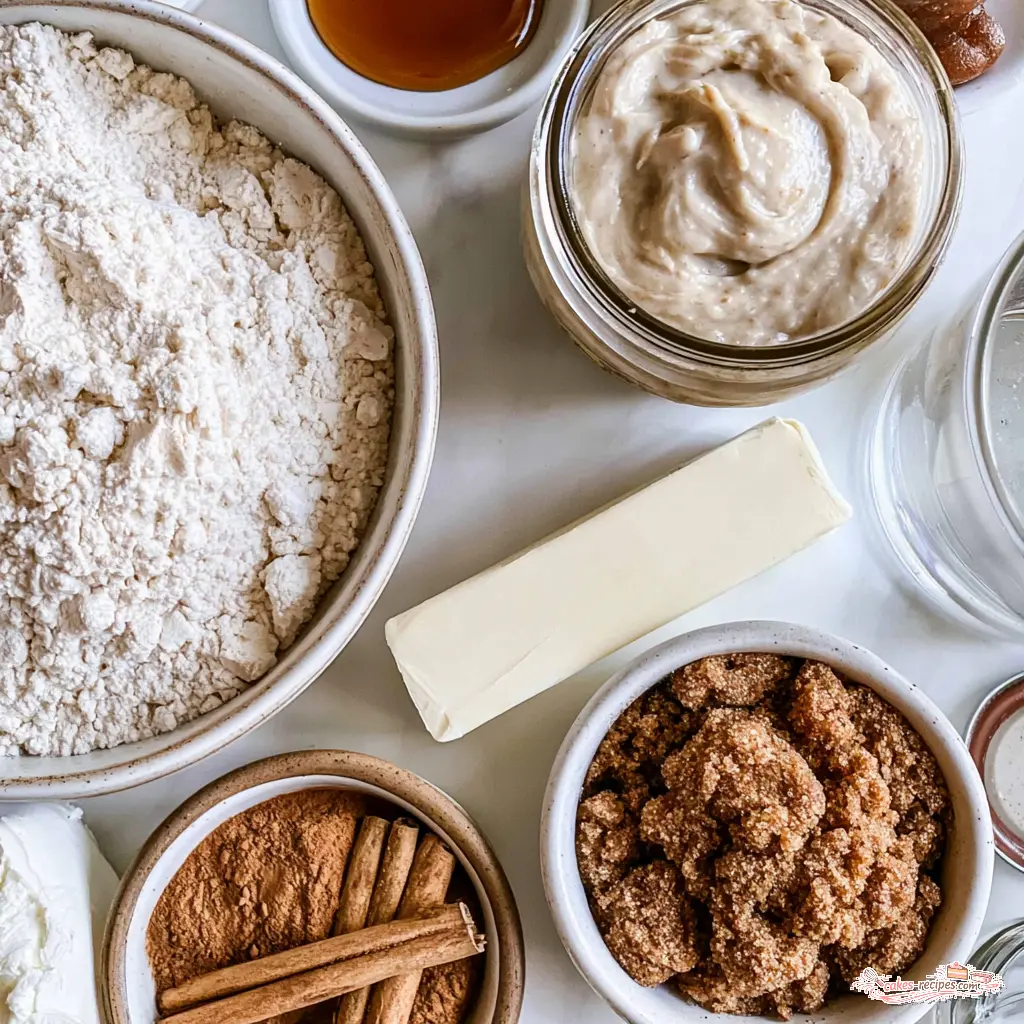
For the best sourdough cinnamon rolls, you probably have most of these already. That’s what I love about this recipe.
…and make the dough spread into a flat puddle before it ever reaches the oven. Warm is fine. Hot is a problem. I made this mistake exactly once, and a tray of sad, wide, crispy pancakes taught me the lesson permanently.How to Make These Sourdough Cinnamon Rolls
This recipe moves fast. No long rise, no waiting for a starter to peak, no complicated folding. Just one bowl, a rolling pin, and about 50 minutes between you and the best thing your kitchen will smell like all week.
Step 1: Mix the Dry Ingredients
Whisk the flour, baking soda, baking powder, and salt together in a large mixing bowl. Before you do anything else, check those leavener dates. This recipe relies entirely on baking soda and baking powder for lift, so stale ones will leave you with dense, sad hockey pucks. I speak from experience.
Step 2: Bring It Together
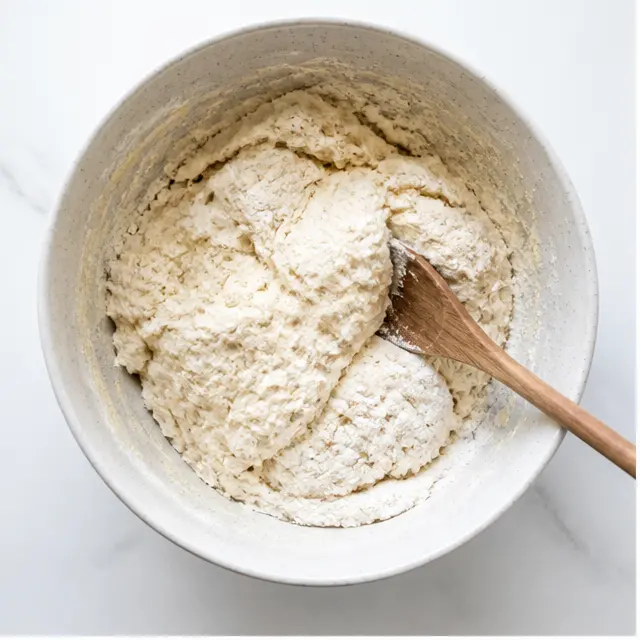
Add the sourdough discard, beaten egg, honey, and the cooled melted butter. Stir with a spatula until a soft, shaggy dough forms. It will be stickier than a typical bread dough that’s a good thing. Soft dough means soft rolls. Resist every instinct to add more flour here; that’s what your work surface is for.
Step 3: Roll It Out
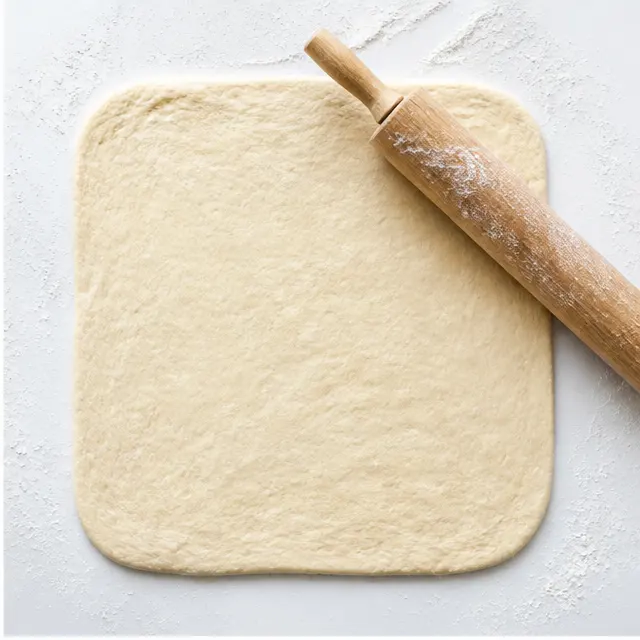
Turn the dough out onto a generously floured surface and sprinkle a little flour over the top. With floured hands, press it into a rough rectangle. Then roll it into a 12 by 14-inch rectangle, about a quarter-inch thick. Don’t stress over perfect geometry. Just aim for an even thickness so the rolls bake at the same rate.
If the dough springs back and refuses to cooperate, walk away for 10 minutes. Letting it rest lets the gluten relax, and it will roll out much more willingly. This is not a battle of wills, and the dough always wins.
Step 4: Make the Filling
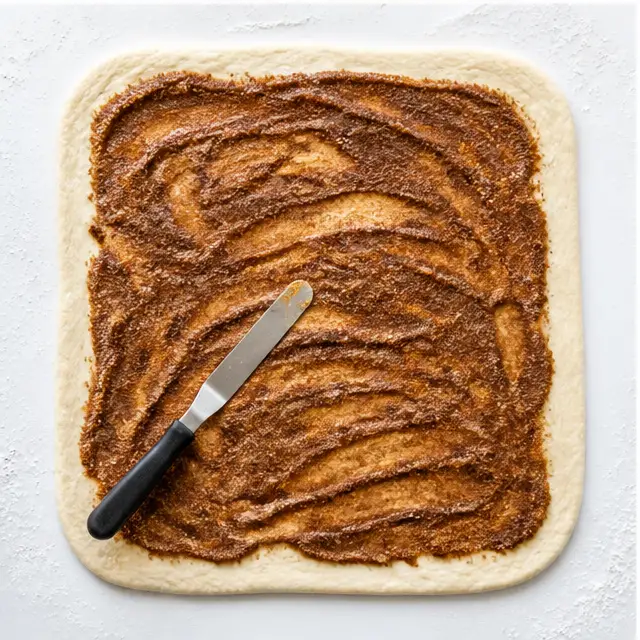
In a small bowl, stir together the softened butter, brown sugar, cinnamon, and one spoonful of flour. That little spoonful of flour sounds like a typo, but it’s not. It stabilizes the filling so it doesn’t turn into a sticky lava flow that oozes out of the rolls while baking.
Step 5: Fill, Roll, and Slice
Spread the filling evenly across the dough, all the way to the edges. Starting at the edge closest to you, roll the dough away from you into a snug but not super-tight log. A bench scraper is your best friend here it lifts sticky dough off the counter without a fight.
Slice the log into 8 large rolls, or 12 smaller ones if you want to feed a crowd. A sharp chef’s knife with a gentle sawing motion works beautifully. If the log mushes instead of cutting, refrigerate it for 15 minutes. That’s not cheating; that’s strategy.
Step 6: Bake
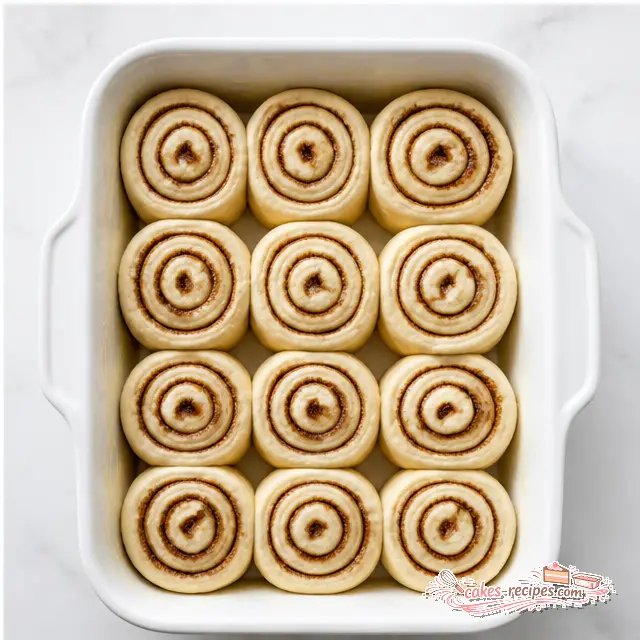
Place the rolls in a buttered 9×13 baking dish, cut side up. Leave a little room between them so they can puff up and lean on each other. For the gooiest centers in your life, pour about a quarter cup of warm heavy cream over the rolls right before they go into the oven. Trust me on this one.
Bake at 350°F for 28 to 35 minutes. Glass dishes run longer than metal, so expect the far end of that range if you’re using glass. The rolls are done when they’re puffed and deeply golden, and the center of a middle roll reads 200°F on an instant-read thermometer. Yes, I’m that person. It’s the only foolproof way to know the centers are baked through.
Step 7: Glaze
While the rolls bake, beat the softened cream cheese and honey together until smooth, then add heavy cream a splash at a time until the glaze is pourable. It should be thinner than frosting and thicker than milk think thick maple syrup. Let the rolls cool for about 10 minutes before glazing. Warm rolls melt the glaze into every crevice; hot rolls just let it slide off and pool in the pan.
Pro Tips for the Tallest, Tenderest Rolls
- Chill the log before slicing. Ten to fifteen minutes in the fridge firms up the dough for clean cuts. This one tip fixes 80% of ugly-roll problems.
- Cut evenly, bake evenly. Inconsistent sizes mean some rolls are done while others are still doughy in the middle. A ruler is overkill; just eyeball the spacing.
- Use a bench scraper for sticky dough. It’s a $10 tool, and it will save you more frustration than any other gadget in your kitchen.
- Don’t add extra flour. A sticky dough that you manage with a floured surface gives you pillowy rolls. A dry dough gives you breadstones.
- Let the rolls rest before slicing if they resist. A 10-minute break makes rolling infinitely easier.
Variations and Substitutions
The beautiful thing about sourdough discard cinnamon rolls is how forgiving the dough is. Here’s where you can make them yours.
- Active starter instead of discard: Use the same amount of active, bubbly starter, but skip the baking soda and baking powder. Let the cut rolls rise for 1 to 1.5 hours at room temperature before baking. You get a deeper, more traditional sourdough flavor this way.
- Mix-ins: Sprinkle raisins, chopped pecans, or walnuts over the filling before rolling. Please do this. It’s an excellent decision.
- Whole wheat swap: Replace up to half the all-purpose flour with whole wheat. You may need a splash more liquid to keep the dough soft.
- Seasonal fillings: Stir finely diced apple into the brown sugar filling for a fall version, or add a spoonful of pumpkin puree and pumpkin pie spice for Thanksgiving morning.
- Egg-free option: Omit the egg and hold back a little flour, adding only what you need to form a soft dough.
- Dairy-free: Use plant-based milk in the glaze and a vegan cream cheese substitute. The dough itself is flexible just keep the butter cold and melted separately.
Make-Ahead and Overnight Instructions
This is the section that makes these rolls a holiday hero. You can absolutely assemble these the night before, and they’ll actually get better for it.
Overnight method: Shape the rolls and arrange them in the baking dish. Cover tightly with plastic wrap and refrigerate for up to 24 hours. In the morning, pull the dish out while the oven preheats, let it sit at room temperature for about 20 minutes, then bake as directed. Add a few extra minutes to the bake time since you’re starting from cold.
Bake-ahead method: Bake the rolls completely, skip the glaze, and store covered at room temperature. Reheat the whole pan at 350°F for 10 minutes, then glaze. Nobody will ever know they weren’t born in your oven that morning.
Freezer method: Assemble the rolls in a disposable foil pan, cover with plastic wrap and then foil, and freeze for up to 3 months. To bake, thaw overnight in the fridge, let them sit at room temperature for 20-30 minutes, then bake as directed.
How to Store and Reheat Leftovers
If you have leftovers a big if, in my house here’s the full rundown.
- Unfrosted rolls: Keep them in an airtight container at room temperature for 2 to 3 days.
- Frosted rolls: Store in the refrigerator for up to 4 days. The cream cheese glaze means they’re happier chilled.
- Freezer: Freeze baked, unfrosted rolls in a freezer-safe container, separated by parchment paper, for up to 3 months.
- Reheating: For a single roll, microwave for 15-20 seconds. For a full pan, cover with foil and warm at 350°F for 10 minutes. The foil traps steam and keeps the rolls soft, so don’t skip it.
Frequently Asked Questions
Can I use a glass baking dish instead of metal?
Yes. Glass heats up more slowly but holds heat longer, so add about 5-10 minutes to the bake time. Check the internal temperature in the center of a middle roll, not the edge you want 200°F.
How long does sourdough discard last in the fridge?
Weeks, honestly. As long as it doesn’t develop mold or smell like nail polish remover, it’s safe to use. Just keep in mind that older discard is more acidic and tangy, which is actually great for this recipe.
Can I halve or double this recipe?
Both work. For a half batch, bake in a 9-inch square pan and start checking around 25 minutes. For a double batch, use two 9×13 pans or one large roasting pan, and keep them on the center rack.
Can I make these without a stand mixer?
Yes this dough is actually better by hand. It’s soft and forgiving, and a spatula plus a floured surface is genuinely all you need. No mixer required, no mixer to clean.
Why do my rolls look pale and doughy in the middle?
That’s an underbaked center. A thermometer is your friend here: when the center of the middle roll hits 200°F, you’re done, even if the surface looks darker than you’d like. Also remember glass pans need more time than metal starting there fixes most of these problems.
Can I skip the baking soda and baking powder?
Only if you swap in active starter and allow a real rise time, as described above. The chemical leaveners are what make this recipe quick, so removing them without a plan will give you flat, dense rolls.
Troubleshooting: When Things Go Wrong
Hockey pucks instead of fluffy rolls
Check your leaveners first. Baking soda and baking powder lose their power after about six months, and expired ones will never recover. The other culprit is butter that was too hot, which starts the chemical reaction early and exhausts it before the oven gets involved. Cool that butter.
Filling leaked out everywhere
That flour in the filling isn’t optional it’s stabilizer. Also, pinch the seam of the log closed and tuck the wispy ends under the cut rolls. It keeps everything contained and helps them hold their shape.
The dough is too sticky to handle
Chill it. Ten minutes in the fridge makes a world of difference. If it’s still a disaster, lightly flour your work surface and rolling pin not the dough itself, which just creates gummy layers.
Rolls are unevenly baked
Your slices were different sizes, or the pan was crowded. Keep the rolls close together for soft sides, but give them breathing room so the center ones cook through. And measure your pan: a 9×13 is ideal, but a too-small dish will make thick, underbaked centers.
The Quick Science: Why This Works
Here’s what’s actually happening in your bowl. Sourdough discard is full of lactic and acetic acid, which is where that signature tang comes from. When you mix those acids with baking soda, they react and produce carbon dioxide gas that’s your lift. The baking powder is backup insurance, guaranteeing the dough rises even if your discard isn’t super acidic.
The discard also adds moisture and tenderness because the fermented grains are already partially broken down. That’s why these rolls are soft and pillowy instead of tough. And the spoonful of flour in the filling? It absorbs the butter as it melts, keeping the filling exactly where it belongs instead of leaking down the sides of your rolls.
Expert Notes & Data Insights
After testing this recipe across a month of Sunday mornings, here’s the honest breakdown of what I learned. The single highest-impact variable was pan material: glass took a full 8 minutes longer than metal to reach the same 200°F center temperature. If you only take one thing from this article, let it be the thermometer and the pan swap.
The most forgiving ratio is 250 grams of discard to 250 grams of flour equal parts by weight. That keeps the dough soft without being unmanageable, and it works with both fed and unfed starter. Older discard, around 5-7 days in the fridge, gives noticeably more pronounced tang without going sour, and it’s the sweet spot for these rolls.
Pouring warm cream over the rolls before baking added measurable moisture to the center of the rolls the kind you feel in the first bite. It’s a one-ingredient upgrade with no downside. And freezing? Unbaked frozen rolls that thawed overnight were nearly indistinguishable from fresh, but baked-then-frozen rolls came out slightly drier even with careful reheating. If you’re prepping ahead, freeze unbaked.
At the end of the day, these sourdough cinnamon rolls are about using what you have, not wasting what you don’t need, and turning something ordinary into a morning your kitchen will remember. Rosa would approve.
What does sourdough do to cinnamon rolls?
Sourdough (or sourdough discard) adds a subtle tangy flavor that balances the sweet cinnamon-sugar filling, along with extra moisture and tenderness. The fermented grains in the discard help create a soft, fluffy crumb and can contribute a slight chewy texture. Because discard is often unfed, it works beautifully alongside a small amount of instant yeast or chemical leaveners like baking soda and baking powder, giving you that sourdough complexity without a long rise time.
Can I turn my sourdough dough into cinnamon rolls?
Yes! Any soft, enriched sourdough dough — one that contains butter, sugar, and often an egg — can be rolled out, filled with cinnamon sugar, and shaped into cinnamon rolls. If your sourdough dough is leaner, add a bit more butter or oil to ensure it stays tender. Simply roll it to a rectangle, spread with softened butter, sprinkle with cinnamon sugar, roll into a log, slice, and bake. Adjust rise times if you’re using an active starter rather than discard, and make sure the dough has similar hydration to this recipe for the fluffiest results.
What is the difference between regular cinnamon rolls and sourdough cinnamon rolls?
Regular cinnamon rolls rely on commercial yeast for their rise and have a straightforward sweet, buttery flavor. Sourdough cinnamon rolls use sourdough starter or discard, which adds a pleasant tang, deeper flavor complexity, and extra moisture to the dough. They can be made with yeast, with only sourdough (using a long ferment), or with a combination of sourdough discard and quick-acting leaveners — the method you choose affects rise time and whether the rolls need an overnight rest. The result is a more flavorful, tender roll that’s still just as gooey and satisfying.
Baking. What is the best way to bake sourdough cinnamon rolls?
For the best results, bake sourdough cinnamon rolls in a metal or cast-iron pan at 350°F (175°C) until they’re puffed and golden brown on top. A cast-iron skillet distributes heat evenly and gives you perfectly soft sides. If you use a glass baking dish, expect to add a few minutes to the bake time. For extra-gooey centers, pour about 1/4 cup warmed heavy cream over the rolls just before baking. Bake until the internal temperature reaches about 190°F in the center or until a toothpick inserted comes out clean — then let them cool for about 10 minutes before frosting.
Ingredients. What are the ingredients in sourdough cinnamon rolls?
Sourdough cinnamon rolls call for a simple enriched dough: all-purpose or bread flour, sourdough discard, buttermilk, butter, an egg, sugar, and a small amount of instant yeast (plus baking soda and baking powder if you’re using discard for a quick rise). The filling is a mixture of softened butter, brown sugar, cinnamon, and a spoonful of flour to prevent gaping. The frosting in this honey cream cheese version combines softened cream cheese, butter, honey, and powdered sugar — you can also use traditional cream cheese frosting or a simple glaze.
Rise Time. How long do sourdough cinnamon rolls take to rise?
Rise time depends on your method. In this quick recipe, the dough does an initial rest of about 30-60 minutes at room temperature, and after shaping, the rolls rise for another 30-45 minutes before baking. If you’re using an active sourdough starter with no commercial yeast or added leaveners, you’ll need a longer first rise (10-12 hours at cool room temperature) and then another 1-1.5 hours after shaping. For overnight cinnamon rolls, shape the rolls, cover tightly, and refrigerate for 8-24 hours, then let them sit at room temperature while the oven preheats. The exact timing depends on your kitchen temperature—warmer kitchens rise faster, cooler kitchens slower.
Variations. What are the different variations of sourdough cinnamon rolls?
Sourdough cinnamon rolls are endlessly customizable. Swap the sourdough discard for an equal weight of active sourdough starter and omit the baking soda/powder, adding a longer second rise instead. Add mix-ins like raisins, chopped pecans, walnuts, or diced apples to the filling before rolling. Try seasonal twists by adding pumpkin puree or apple butter to the filling, or use brown butter in the frosting for a nutty flavor. You can also make a savory version by using Marmite and a blend of cheddar and parmesan in place of the cinnamon-sugar. For a dairy-free option, use plant milk in the dough and a yogurt-based frosting.