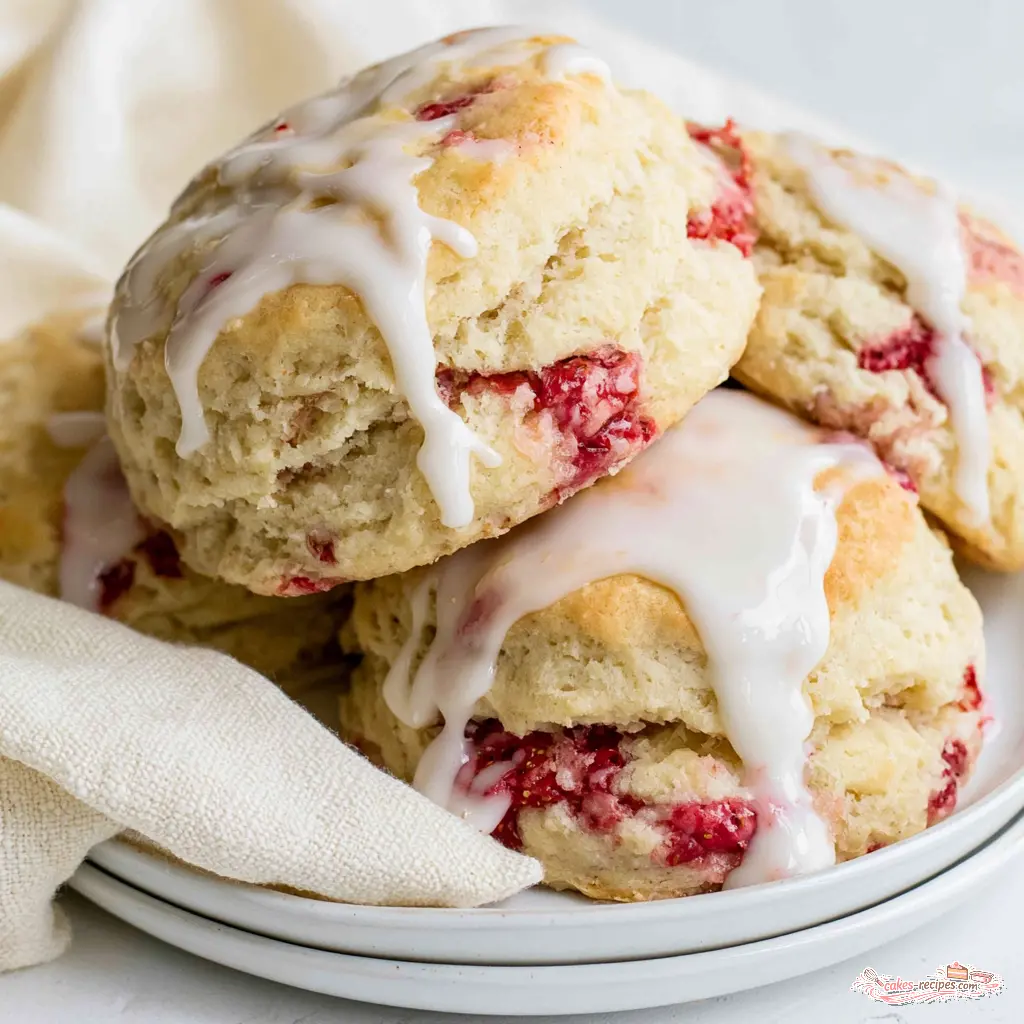
What Are Strawberry Biscuits?
Real talk: my first attempt at strawberry biscuits was a disaster. Pale, flat discs that tasted more like baking mix than berries. The strawberries had turned the dough to mush, and the butter melted before the oven even got hot. It was, honestly, a sad breakfast. But these strawberry biscuits? Completely different story. Tender, flaky, and studded with jammy pockets of fresh fruit, they taste like something from a bakery case. Except they come together in about 35 minutes with a cup of Bisquick and a handful of summer berries. You’re going to love this one.Why You’ll Love Them
- Made with Bisquick, so they’re nearly foolproof, even for a nervous baker
- Fresh strawberries in every bite, not just pink-speckled butter
- Bright Meyer lemon glaze that cuts the sweetness with a little tang
- 35 minutes, start to finish, warmer than your oven preheats
- Freeze beautifully, which makes them perfect for busy mornings
Ingredients You Need
The beauty of this recipe is how short the list is. You probably have most of it in your pantry right now. For the biscuits, you’ll need Bisquick baking mix, a little extra baking powder, cold unsalted butter, milk, and fresh strawberries. For the glaze, just powdered sugar and fresh lemon juice.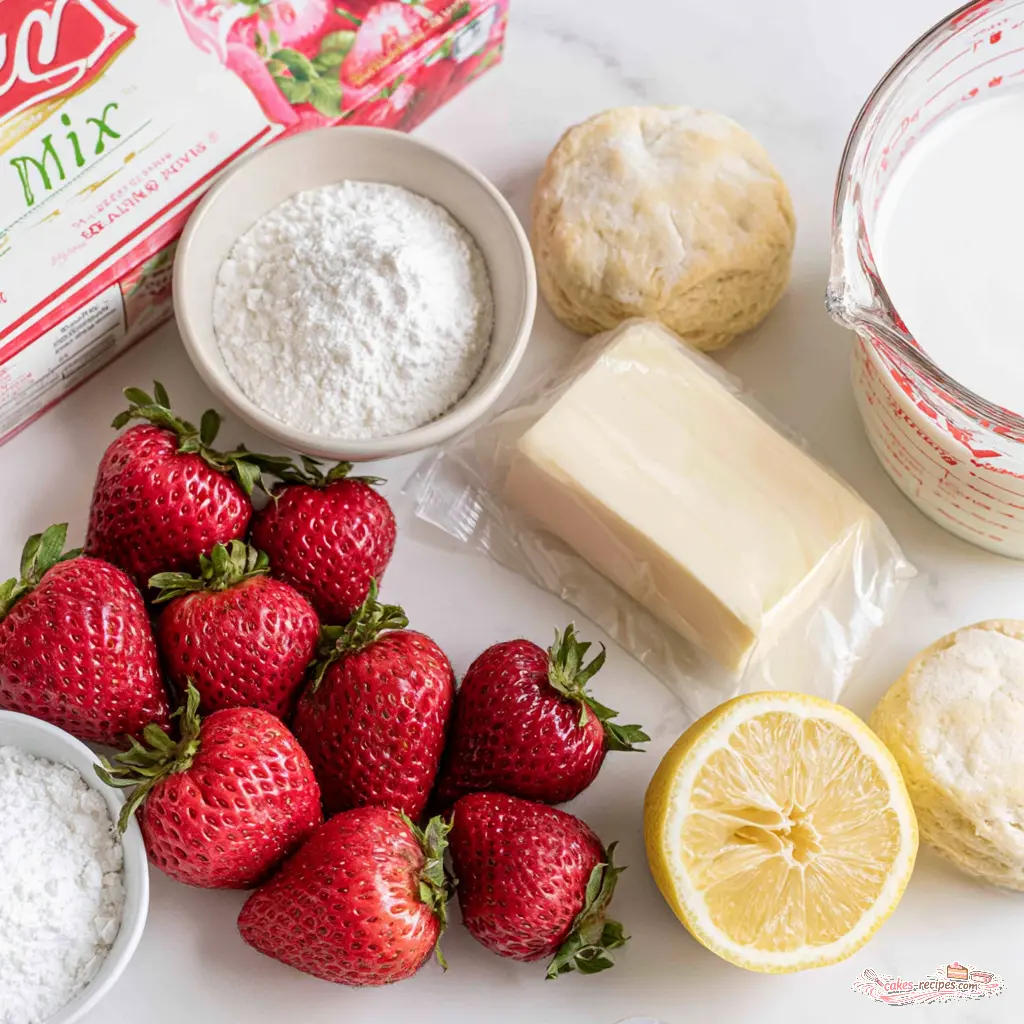 Here’s where ingredient choices matter:
- Butter stays in the fridge until the last second. Grated cold butter cuts into the mix faster than cubes and creates those flaky layers you’re after.
- Whole or 2% milk gives the richest crumb. Skim works, but the texture won’t be as tender.
- Finely dice the strawberries. Big chunks release too much juice into the dough. You want little red flecks, not a soggy mess.
- Meyer lemons are a California treat and worth hunting down. Their juice is less acidic than regular lemons, with a floral sweetness that pairs beautifully with strawberries. That said, a regular lemon works just fine.
Fresh vs Frozen Strawberries
This is the question I get every summer, especially when the berry prices spike. The honest answer? Fresh strawberries are the best choice for strawberry biscuits, period. Fresh California berries, especially at the tail end of the season in August, are at their peak sweetness. They hold their shape when folded into the dough, and the little pieces bake into soft, jammy pockets that make each bite interesting. Frozen berries can work in a pinch, but here’s the trick: don’t thaw them first. Toss them in frozen, straight from the bag, and accept that your dough will be a touch wetter. Thawing releases all that juice and turns the dough sticky and purple before it even hits the baking sheet. I’ve made that mistake once. The biscuits tasted fine, but they looked like something a cartoon character stepped on.How to Make Strawberry Biscuits
Now for the fun part. The method here is simple, but a few small moves make the difference between average biscuits and ones people request for their birthday breakfast.Stage 1: Keep the Butter Cold and Fold Gently
Start by whisking the Bisquick and baking powder together. Then cut in the cold butter using a pastry blender or two forks until the pieces are smaller than a pea. This is the moment that determines flaky layers, so don’t rush it. Pour in the milk, add the diced strawberries, and fold with a spatula just until a sticky dough forms. In my experience, people panic at this stage because the dough looks wet. That’s exactly what you want. Overmixing here creates tough biscuits, so stop as soon as everything comes together.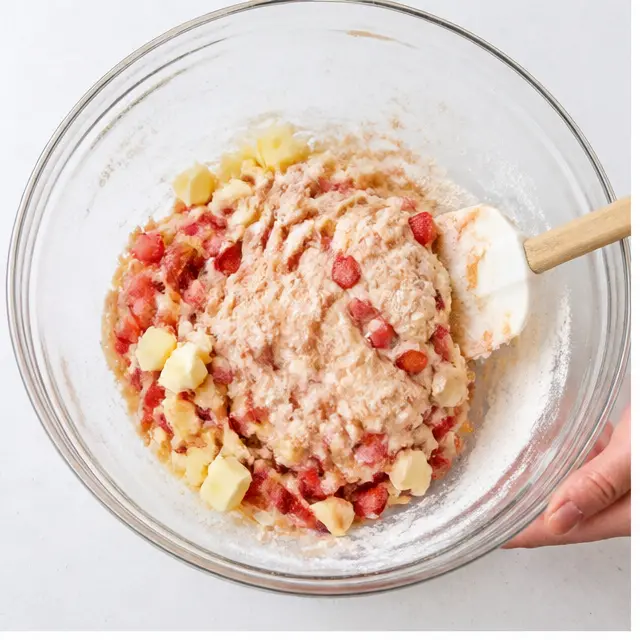
Stage 2: Drop or Cut, Your Call
You have two options here, both delicious. For the quickest route, use a large cookie scoop to drop even mounds onto your prepared baking sheet. Drop biscuits are rustic and lovely, with craggy edges that catch the glaze so well. If you want the classic tall round shape, dust a work surface with flour and turn the sticky dough out onto it. Flour your hands, pat the dough to about 1 inch thick, then dip a biscuit cutter in flour and press straight down. No twisting, no wiggling. Twisting seals the edges and stops them from rising. Press straight down, lift straight up.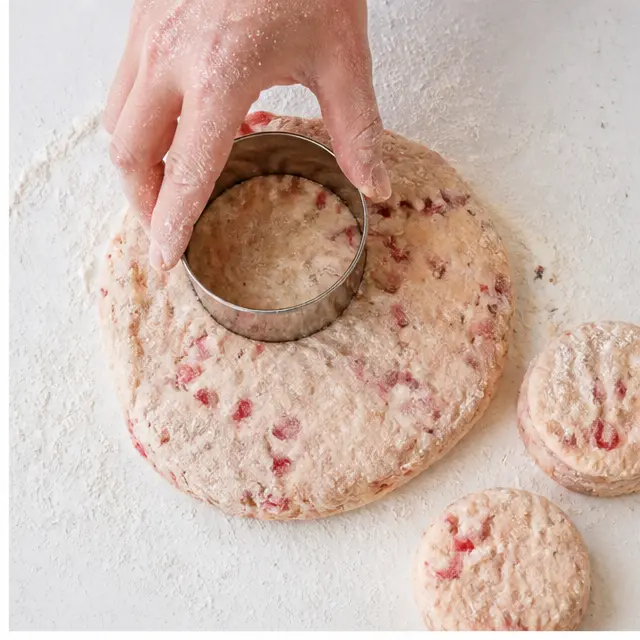
Stage 3: The Freezer Rest That Makes Them Tall
Here’s the step everyone wants to skip, and please don’t. Pop the baking sheet in the freezer for 15 minutes before baking. This solidifies the butter again after all your handling. When the biscuits hit the hot oven, the butter melts rapidly and creates steam, which pushes the layers upward. That’s the secret to tall, flaky strawberry biscuits instead of flat, dense ones.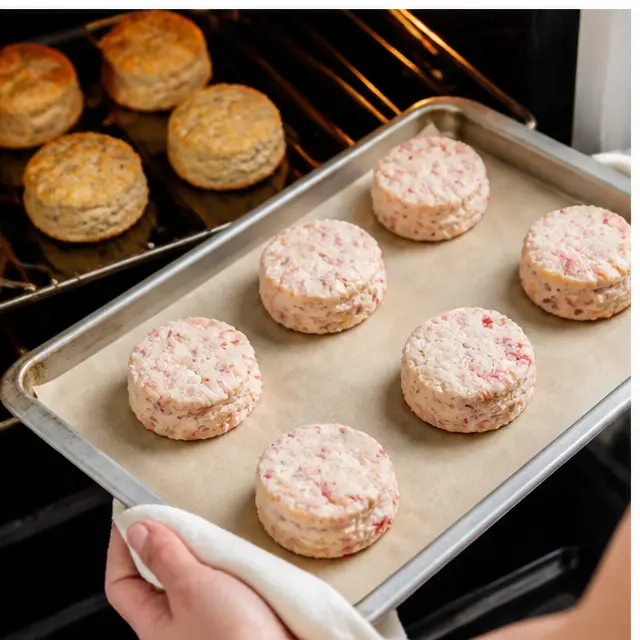
Stage 4: Bake and Glaze
Bake the chilled biscuits at 450 degrees F for 15 to 20 minutes, until they’re puffed and golden brown. The smell, by the way, is incredible. Butter, baked strawberries, and a hint of lemon all mingling together. Trust the process. Let them cool on the baking sheet for a few minutes while you whisk up the glaze.Strawberry Icing With a Bright Finish
The icing is a simple combination of powdered sugar and fresh lemon juice, using Meyer lemons if you can find them. Whisk until smooth and pourable. If it’s too thick to drizzle, add a few drops more lemon juice. If it’s too thin, add a little more powdered sugar. Drizzle it over the still-warm biscuits and let them sit for 5 to 10 minutes. The glaze sets to a satiny finish that shatters just a little when you bite through it.
Tips for Perfect Strawberry Biscuits
In my experience, a handful of small decisions make a huge difference with strawberry biscuits. Here are the ones I repeat to every reader who emails me about flat or dry results:- Keep everything cold. If your kitchen is hot, chill the mixing bowl and even the flour for 10 minutes before starting.
- Don’t overwork the dough. Mix just until it comes together. Overmixing develops gluten, and gluten makes tough, chewy biscuits.
- Use aluminum-free baking powder if possible. The aluminum kind can leave a bitter, tinny aftertaste that works against the sweet berries.
- Add flour to your hands, not the dough. If the dough feels too sticky when shaping, sprinkle more flour on your hands rather than kneading more flour into the dough.
Common Mistakes and Quick Fixes
❌ Overmixing the dough until it’s smooth and stretchy → ✅ Stop mixing the second it comes together, even if it looks shaggy.
❌ Twisting the biscuit cutter → ✅ Press straight down and lift straight up. Twisting seals the edges and kills the rise.
❌ Skipping the freezer rest → ✅ Budget those 15 minutes. They’re the difference between tall layers and sad pancakes.
❌ Using thawed frozen strawberries → ✅ Add them straight from the freezer, or just use fresh berries for the best texture.
Strawberry Biscuit Variations & Substitutions
This recipe is a fantastic base for other fruit, too. In the summer, I swap in diced peaches, raspberries, or blueberries. The method stays identical, the color just changes. What I’ve found is that softer fruits work best, so keep the pieces small and fold gently. A few other easy tweaks:- Lemon zest. Grate a little Meyer lemon zest into the dough for even more bright flavor.
- Plain milk icing. If you don’t have lemons, swap the juice for an equal amount of milk for a milder, sweeter finish.
- Coarse sparkling sugar. Sprinkle it on the glaze before it sets for a crunchy, bakery-style top.
- Strawberry shortcake style. Serve these with vanilla ice cream and a spoonful of strawberry compote for dessert. Nobody will be mad.
How to Store and Serve Strawberry Biscuits
Strawberry biscuits are truly best the morning they’re baked, warm from the oven with the glaze still glossy. But leftovers? They keep better than you’d think. Store them in an airtight container at room temperature for up to 2 days. To reheat, pop them in the microwave for 15 to 20 seconds, just until the butter warms and the crumb turns tender again. The glaze will melt into the biscuit a little on reheating, which honestly, tastes incredible. Serve them for breakfast, brunch, or as an afternoon treat with a hot cup of coffee.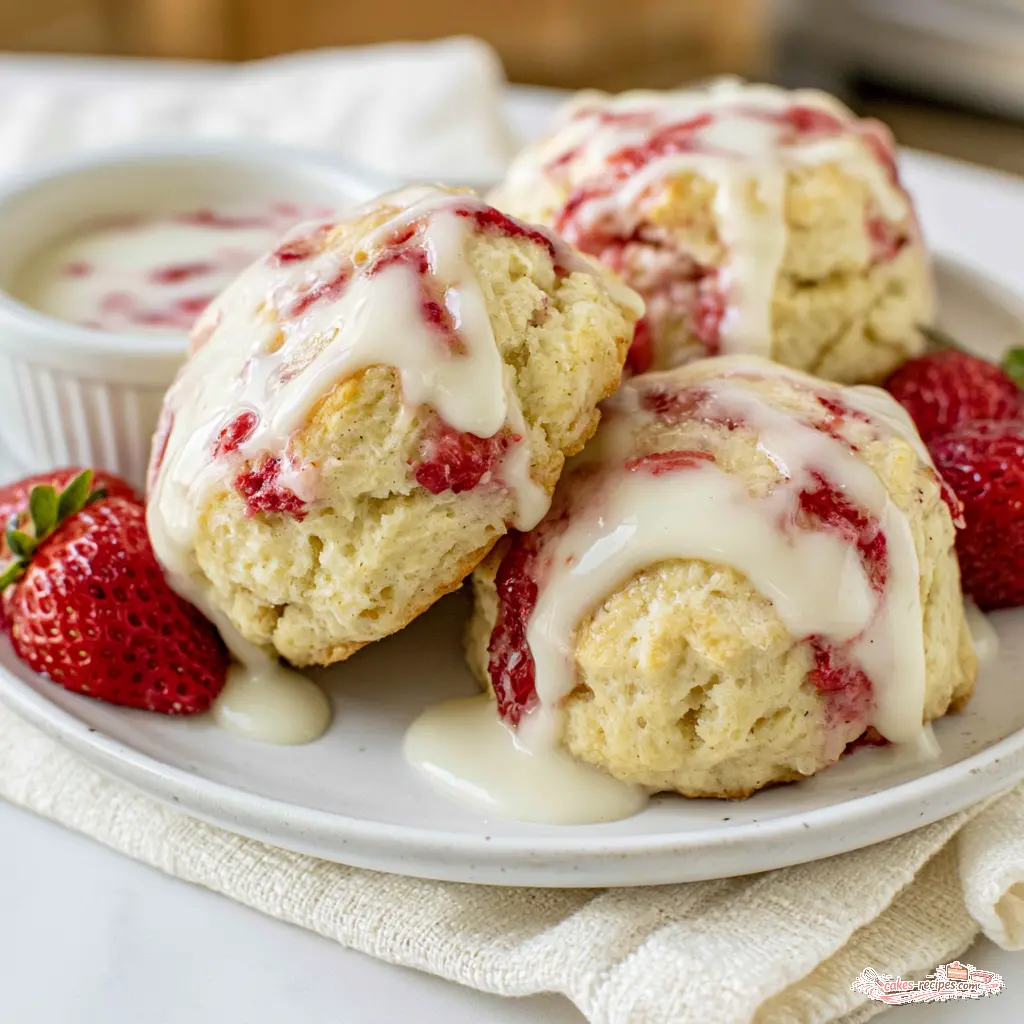 For make-ahead mornings, here’s the system I recommend:
- Freeze unbaked biscuits on the baking sheet until solid, then transfer to an airtight bag. They’ll keep for 2 to 3 months.
- Bake from frozen, adding 2 to 3 minutes to the baking time.
- Glaze after baking, not before.
Conclusion
There’s something magical about pulling apart a warm strawberry biscuit and finding those jammy pockets of fruit. It tastes like the last taste of summer, which is fitting since August is the tail end of California’s strawberry season. If you can get your hands on fresh local berries, this is the recipe to make with them. These strawberry biscuits have become my go-to for weekend brunch and back-to-school mornings alike. They’re forgiving, fast, and genuinely impressive. If you make them, tell me how yours turn out, and what you’re packing for the first day of school. I’d love to hear about your berry successes. And if you’re looking for more inspiration, [you’ll love the breakfast boards I save on Pinterest](https://www.pinterest.com/jaaralgertha/).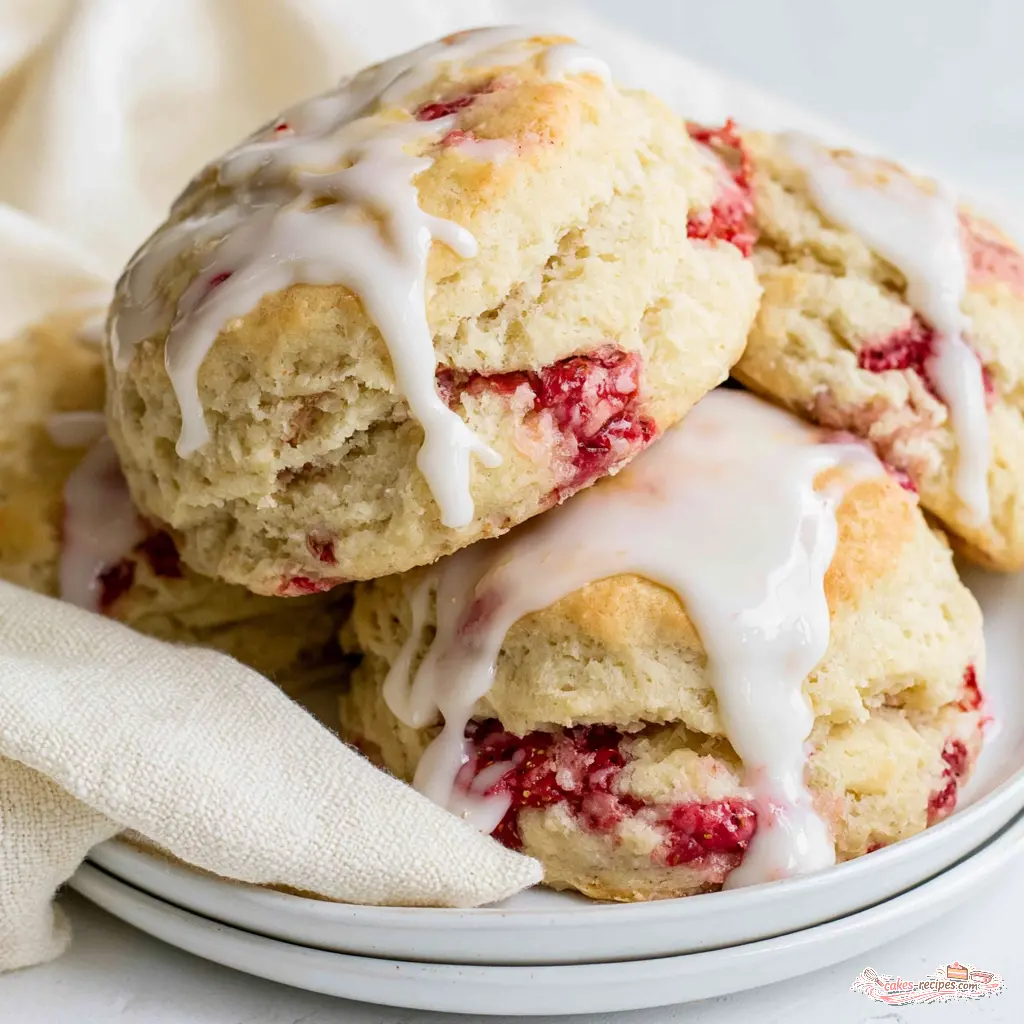
Fresh Strawberry Biscuits with Meyer Lemon Glaze
Ingredients
Method
- Heat the oven to 450 degrees F and line a rimmed baking sheet with parchment paper; set aside.
- In a medium mixing bowl, whisk the Bisquick mix and baking powder together until evenly combined.
- Add the cold grated butter to the dry mixture, then use a pastry blender or two forks to cut it in until the pieces are smaller than a pea.
- Pour in the milk and add the diced strawberries, folding gently with a spatula just until a sticky dough forms. Do not overmix.
- Use a large cookie scoop or ice cream scoop to drop even mounds of dough onto the prepared baking sheet, spacing them about 2 inches apart.
- Place the baking sheet in the freezer for 15 minutes to chill the dough thoroughly.
- Dust a clean work surface or a sheet of parchment generously with flour, then turn the sticky dough out onto it. Flour your hands and pat the dough to a 1-inch thickness, adding a little more flour to your hands as needed.
- Dip a biscuit cutter into flour, then press it straight down into the dough without twisting to cut rounds. Place the biscuits on the prepared sheet 2 inches apart.
- Gather the dough scraps, gently pat them back together to 1 inch thick, and cut more rounds. Add these to the baking sheet.
- Transfer the baking sheet to the freezer and chill for 15 minutes.
- Bake the chilled biscuits in the preheated oven for 15 to 20 minutes, until puffed and golden brown on top. Let them cool on the baking sheet for a few minutes while you prepare the icing.
- In a small bowl, whisk the powdered sugar and lemon juice (or milk) until smooth and pourable. Drizzle the glaze over the still-warm biscuits.
- Let the biscuits sit for 5 to 10 minutes so the icing sets to a satiny finish, then serve warm.
Nutrition
Notes
Tried this recipe?
Let us know how it was!Strawberry Biscuits FAQ
Source: Learn More About This Dish
Can I freeze unbaked biscuits?
Absolutely. Shape your strawberry biscuits, then freeze them solid on the baking sheet before transferring to an airtight bag. They’ll keep for 2 to 3 months. Bake from frozen at 450 degrees F, just add 2 to 3 minutes to the baking time.
Can I freeze leftover baked biscuits?
Yes, though the texture changes slightly because strawberry moisture affects the crumb when thawed. Cool them completely, wrap well in plastic, and freeze for up to 2 months. Reheat in the microwave or a low oven until warmed through.
If my strawberry biscuit dough is dry, what should I do?
Add milk, one tablespoon at a time, just until the dough comes together. The recipe’s sticky dough is normal, so don’t panic if it looks wet. If it’s dry, it likely means your berries were extra dry or you overmeasured the mix. A splash of milk fixes it right up.