

Heirloom Tomato Galette with Blue Cheese and Honey
Ingredients
Method
- In a food processor, combine the flour, cornmeal, salt, and pepper. Pulse a couple times to mix. Scatter the cold butter cubes over the flour mixture and pulse until the butter is broken down into pea-sized pieces, about 10 to 12 pulses.
- Add 1/4 cup ice water and pulse until the dough just starts to clump together. If it seems dry, add 1 to 2 tablespoons more ice water, pulsing after each addition. Turn the dough out onto a lightly floured surface, knead it gently a few times to bring it together, then shape into a flat disk. Wrap tightly in plastic wrap and refrigerate for at least 30 minutes, or up to 2 days.
- While the dough chills, melt the 2 tablespoons butter in a large skillet over medium-high heat. Add the sliced onion and 1/4 teaspoon each of salt and pepper. Cook, stirring often, until the onion softens, about 5 minutes.
- Reduce the heat to medium-low and continue cooking, scraping up any browned bits from the bottom of the pan, until the onions are deep golden brown and very tender, about 20 minutes. Stir in the thyme leaves, then season with additional salt and pepper to taste. Remove from heat and set aside.
- Preheat the oven to 375°F. Line a large baking sheet with parchment paper. On a lightly floured surface, roll the chilled dough into a 14-inch round about 1/8-inch thick. Carefully transfer the dough to the prepared baking sheet.
- Sprinkle the crumbled blue cheese evenly over the dough, leaving a 3-inch border around the edges. Top with the shredded cheddar, then spread the caramelized onions in an even layer. Arrange the torn basil leaves over the onions, followed by the zucchini rounds in a single layer. Season lightly with salt and pepper.
- Layer the heirloom tomato slices over the zucchini, then scatter half of the cherry tomatoes on top. Drizzle everything with olive oil, season again with salt and pepper, and drizzle with a little honey. Fold the exposed dough border up and over the filling, pleating as needed. Brush the folded crust with the beaten egg.
- Place the assembled galette in the refrigerator for 15 minutes to firm up the crust before baking.
- Bake the galette for 45 to 55 minutes, until the crust is deep golden brown and the tomatoes are lightly charred at the edges. Let it cool on the baking sheet for 5 minutes.
- Slice into wedges and serve warm or at room temperature. Top with the reserved cherry tomatoes, an extra drizzle of honey, and a sprinkle of toasted walnuts and fresh thyme, if desired.
Nutrition
Notes
Tried this recipe?
Let us know how it was!Why You’ll Love This Heirloom Tomato Galette
You know that moment at the farmers market when you see those gorgeous heirloom tomatoes in all their colors deep purple, streaked green, sunshine yellow, classic red and you just can’t resist buying way too many? Yeah, me too. Every single summer. And then you get home and think, okay, what now?
This heirloom tomato galette is exactly what now looks like. It’s the kind of dish that makes you look like you spent hours in the kitchen when really, the galette does all the work for you. No tart pan needed. No perfect edges required. That’s the beauty of a free-form pie it’s meant to be rustic. And rustic means forgiving.
I’ve made this recipe more times than I can count, and I still get a little thrill every time I pull it out of the oven. The cornmeal crust gets so flaky and golden. The blue cheese melts into this creamy, tangy layer that holds everything together. And those tomatoes? They burst and concentrate in the heat, getting just a little charred at the edges. Then you drizzle honey over the whole thing and finish with fresh thyme. Así mero. That’s exactly right.
This galette works for pretty much any summer occasion. A casual dinner with a side salad. A backyard cookout where everyone’s standing around with a drink. Even brunch, honestly it’s that versatile. And it’s just as good at room temperature as it is warm, which means you can make it ahead and not stress.
Let me show you how to make it.
Heirloom Tomato Galette Ingredients
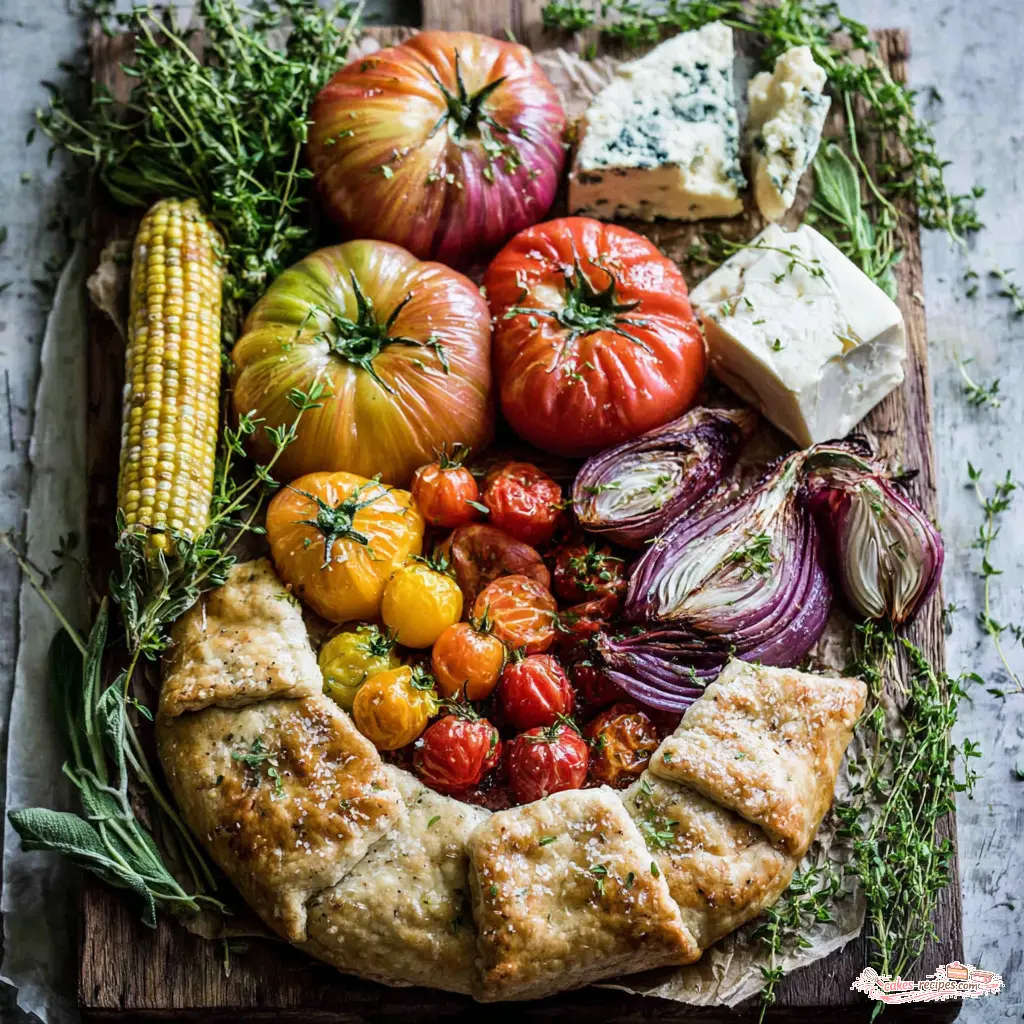
Here’s what you’ll need. And trust me, every single ingredient earns its place here.
For the cornmeal crust:
- All-purpose flour and cornmeal the cornmeal adds this wonderful crunch and texture that a regular pie crust just doesn’t have. Fine or medium grind both work.
- Salt and freshly ground black pepper don’t skip the pepper in the crust. It adds a subtle warmth.
- Cold unsalted butter this is non-negotiable. The butter needs to be really cold, cut into small cubes. It’s what gives you those flaky layers.
- Ice water you’ll need about ¼ cup plus maybe a tablespoon more.
- One large egg for brushing the crust gives you that gorgeous golden shine.
For the filling and toppings:
- Butter and one sweet onion you’re going to caramelize these low and slow until they’re deep golden brown and almost jammy.
- Fresh thyme lots of it. Six sprigs, leaves stripped. It goes into the onions and on top as garnish.
- Blue cheese and sharp cheddar the blue cheese crumbles and melts into this creamy, tangy base. The cheddar adds sharpness and helps hold everything together. This is your cheese barrier against a soggy crust.
- Fresh basil leaves torn and scattered over the cheese layer.
- One small zucchini sliced thin into rounds. Adds a lovely subtle texture.
- Heirloom tomatoes and cherry tomatoes the stars of the show. Use 1 to 2 small to medium heirlooms, sliced ¼-inch thick, plus about 1½ cups of cherry tomatoes, halved.
- Extra-virgin olive oil, honey, and toasted walnuts for drizzling and sprinkling at the end.
Maria’s Tip on Tomatoes
Salt and drain your tomatoes. This is the single most important step for avoiding a soggy heirloom tomato galette. Slice your heirlooms and halve your cherry tomatoes, lay them on a paper towel-lined plate, sprinkle with salt, and let them sit for at least 15 minutes. Pat them dry before using. I’ve skipped this step before. No te preocupes I learned my lesson the hard way. Don’t be me.
How to Make a Heirloom Tomato Galette
Okay, let’s walk through this. I’ll break it into four big stages. Each one builds on the last, and before you know it, you’ll have a gorgeous galette.
Stage 1: Make the cornmeal crust.
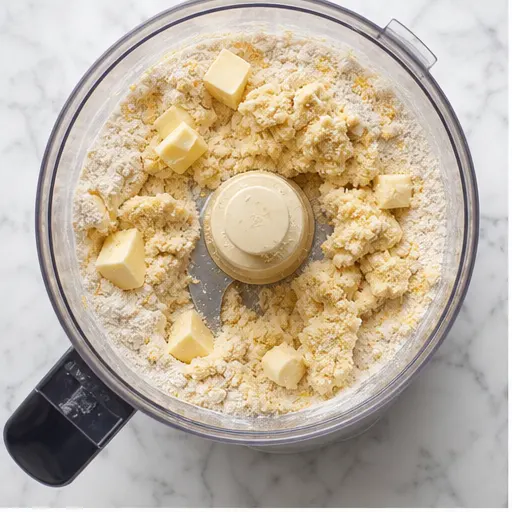
This is easier than you think. In a food processor, combine the flour, cornmeal, salt, and pepper. Pulse a couple times to mix. Then scatter your cold butter cubes over the top. Pulse until the butter is broken down into pea-sized pieces about 10 to 12 pulses. You want visible bits of butter. That’s what creates flaky layers.
Add ¼ cup of ice water and pulse until the dough just starts to clump together. If it seems dry, add another tablespoon or two of ice water, pulsing after each. Turn it out onto a lightly floured surface, knead it gently just a few times to bring it together, then shape it into a flat disk. Wrap it tightly in plastic wrap and refrigerate for at least 30 minutes. You can even make this up to 2 days ahead.
Stage 2: Caramelize the onions.
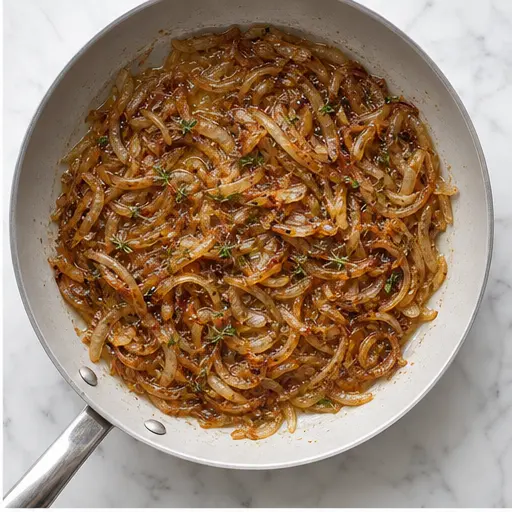
While the dough chills, melt 2 tablespoons of butter in a large skillet over medium-high heat. Add the sliced onion and a pinch of salt and pepper. Cook, stirring often, until the onion softens about 5 minutes. Then reduce the heat to medium-low and keep cooking. This is where patience pays off. Stir occasionally, scraping up any browned bits from the bottom of the pan. After about 20 minutes, the onions will be deep golden brown and very tender. Stir in the thyme leaves, season to taste, and set aside.
I love the smell of caramelizing onions. It reminds me of my abuela’s kitchen on Saturday afternoons slow cooking, good conversation, the promise of something delicious.
Stage 3: Assemble the galette.
Preheat your oven to 375°F. Line a large baking sheet with parchment paper. On a lightly floured surface, roll the chilled dough into a 14-inch round about ⅛-inch thick. Don’t worry if it’s not a perfect circle rustic is the whole point here. Carefully transfer the dough to the prepared baking sheet.
Now for the layering. This order matters. First, sprinkle the crumbled blue cheese evenly over the dough, leaving a 3-inch border around the edges. Then top with the shredded cheddar. Spread the caramelized onions in an even layer over the cheese. Scatter the torn basil leaves, then arrange the zucchini rounds in a single layer. Season lightly.
Layer the heirloom tomato slices over the zucchini. Scatter half the cherry tomatoes on top. Drizzle everything with olive oil, season again with salt and pepper, and drizzle with a little honey. Now fold the exposed dough border up and over the filling, pleating as you go. Brush the folded crust with the beaten egg. Pop the whole thing in the fridge for 15 minutes to firm up the crust before baking. This little chill step makes a big difference.

Stage 4: Bake and serve.
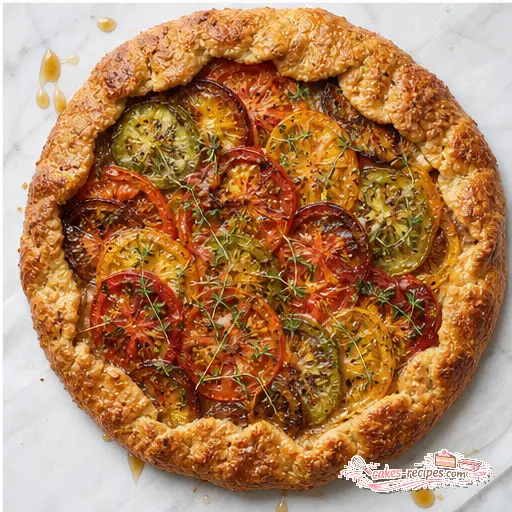
Bake the galette for 45 to 55 minutes. You’re looking for the crust to be deep golden brown and the tomatoes to be lightly charred at the edges. Let it cool on the baking sheet for 5 minutes this is crucial for clean slices.
Slice into wedges and serve warm or at room temperature. Top with the reserved cherry tomatoes, an extra drizzle of honey, and a sprinkle of toasted walnuts and fresh thyme if you’re feeling fancy. Perfecto.
Tips for the Best Tomato Galette
I’ve made this heirloom tomato galette more times than I can count, and I’ve definitely made every mistake along the way. Here’s what I’ve learned so you don’t have to.
Common Mistakes and How to Avoid Them
❌ Not salting and draining tomatoes: This leads to a soggy crust. Always salt and drain your tomatoes for at least 15 minutes before assembling.
❌ Not using cold enough butter for the crust: Warm butter won’t create those flaky layers. Keep your butter in the fridge until the last minute.
❌ Not chilling the dough before rolling: A warm dough is sticky and hard to work with. Chill it for at least 30 minutes.
❌ Not baking until the bottom crust is deeply golden: If the bottom isn’t fully cooked, you’ll end up with a soggy galette. Bake for the full 45-55 minutes.
❌ Slicing the galette while it’s still hot: The filling needs time to set. Let it cool for at least 5 minutes before slicing.
A few more tips:
- Use a variety of heirloom tomato colors and sizes for the best flavor and appearance. Purple, yellow, green, red the more colors, the prettier the galette.
- Overlap the tomato slices generously. They’ll shrink as they bake, so don’t be shy.
- Don’t overfill the galette. Leave that 3-inch border for folding.
- If you don’t have a food processor, you can make the crust by hand using a pastry cutter or two forks. Just work quickly so the butter stays cold.
Storage and Reheating
This galette is at its best the day you make it, but leftovers are still wonderful. Store leftover slices in the fridge for up to 2 days. To reheat and crisp the crust back up, pop them in a 350°F oven for about 10 minutes. Don’t use the microwave it’ll make the crust soggy.
You can also make the dough and caramelize the onions up to 2 days in advance. Just keep the dough wrapped in the fridge and the onions in a covered container. Then on the day you want to serve, all you have to do is roll, assemble, and bake.
For longer storage, you can freeze the unbaked dough. Wrap it tightly in plastic wrap, then foil, and place it in a freezer bag for up to 3 months. Thaw overnight in the fridge before using.

Variations and Substitutions
One of the things I love about this recipe is how flexible it is. Here are some ways to make it your own:
- Cheese swaps: Don’t have blue cheese? Goat cheese or feta work beautifully. The tanginess complements the tomatoes just as well.
- Add caramelized onions: Already in the recipe, but you could double them if you’re an onion lover.
- Gluten-free version: Substitute the all-purpose flour with a 1-to-1 gluten-free baking flour blend. The cornmeal already adds great texture.
- Herb variations: Try fresh oregano or rosemary instead of thyme. Or use a mix.
- Add more vegetables: Thinly sliced summer squash or eggplant would be lovely additions.
- Skip the walnuts: If you’re not a nut person or have allergies, just leave them out. The galette is still fantastic.
For a completely different take, you can use this same cornmeal crust and filling technique for a stone fruit galette variation in late summer. Peaches and nectarines with a little honey and thyme? Qué padre. How cool is that?
Frequently Asked Questions
I hope you love this heirloom tomato galette as much as my family does. It’s become our go-to summer dish, the one we make when tomatoes are at their peak and we want something that feels special without being fussy. And honestly? It’s the kind of recipe that makes you look like a hero. Claro que sí.
If you make it, I’d love to hear how it turns out. And if you’re looking for more summer inspiration, come follow me on Pinterest I’m always pinning seasonal recipes, from rustic tarts to simple salads and everything in between.
Source: Nutritional Information