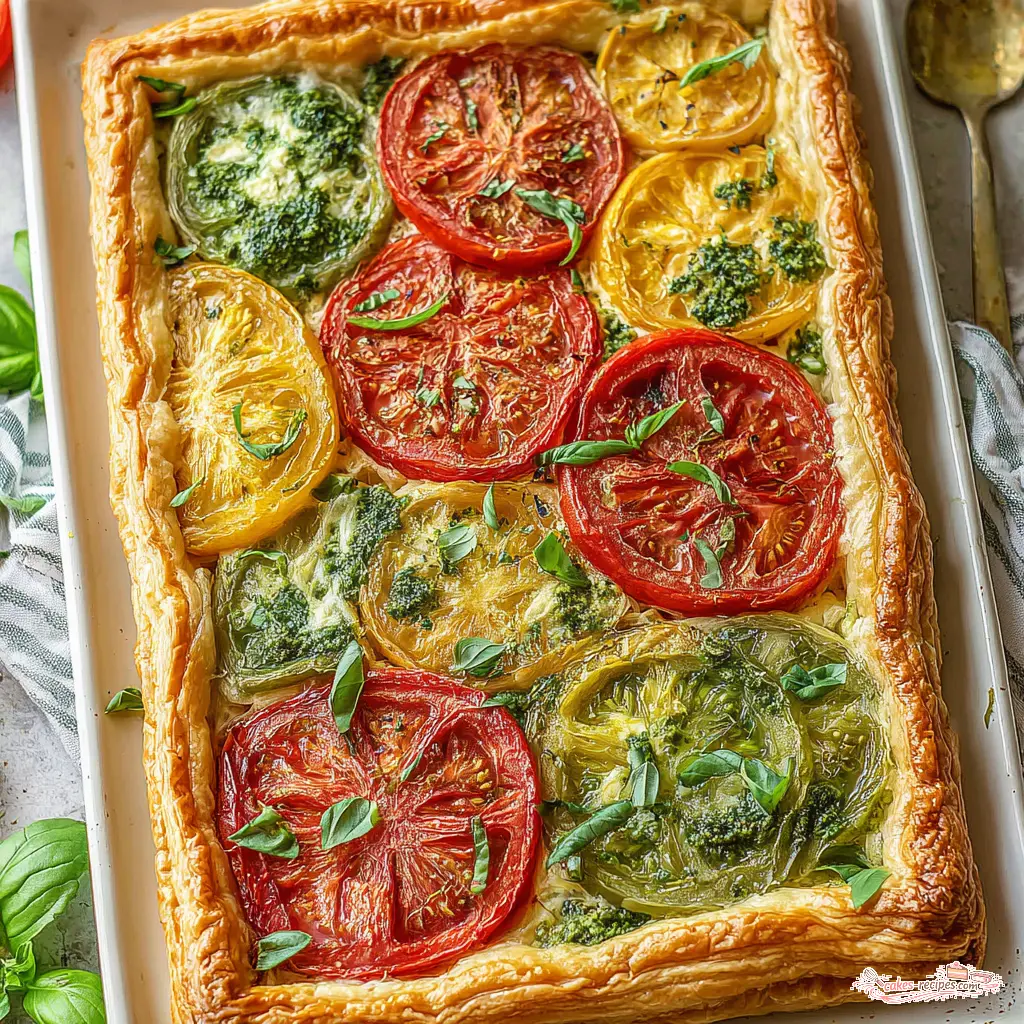
Why You’ll Love This Puff Pastry Tomato Tart
There’s this moment every summer when tomatoes finally taste like something. You know the one. You bite into a slice and it tastes like sunshine and soil and everything good. That’s when I start thinking about this puff pastry tomato tart. It’s the thing I bring to every backyard dinner and picnic, and it never lasts long.
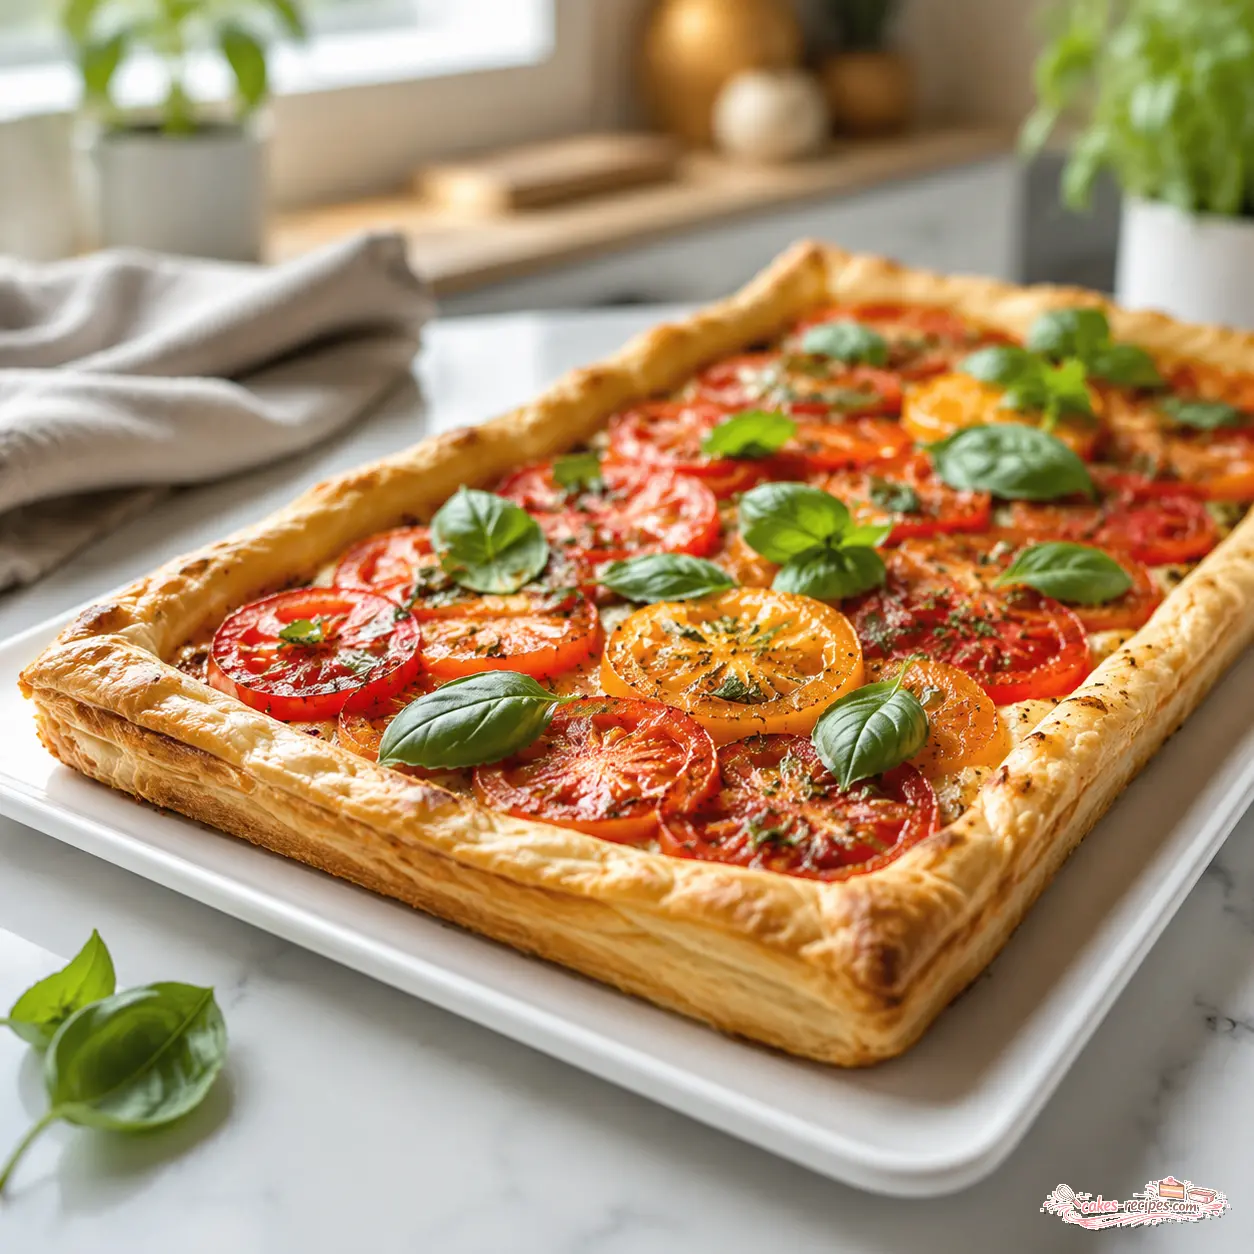
Here’s the thing. I used to think tarts were fussy. All that blind baking and worrying about soggy bottoms. But this one? It’s different. The puff pastry sheet does all the work for you. You just thaw it, roll it, score it, and spread on the herbed ricotta. The tomatoes go on top, and thirty minutes later you’ve got this gorgeous golden thing that looks like it came from a bakery.
Let me walk you through why this works:
- It’s fast. From fridge to table in about 40 minutes. That’s less time than ordering pizza.
- It’s forgiving. Don’t stress about perfect rows of tomatoes. Rustic is beautiful. Trust me.
- It’s versatile. Serve it as an appetizer, a light dinner with a salad, or cut it into bite-size pieces for a party.
- It tastes like summer. The creamy ricotta, the juicy tomatoes, the flaky crust. Every bite is peak season.
I first made this for a Fourth of July barbecue a few years back. I was nervous because there were like fifteen people and I’d never made it for a crowd. But I set it out on a wooden board, and within twenty minutes it was gone. My friend’s husband asked for the recipe three times. That’s when I knew I had something special.
Ingredients and Substitutions
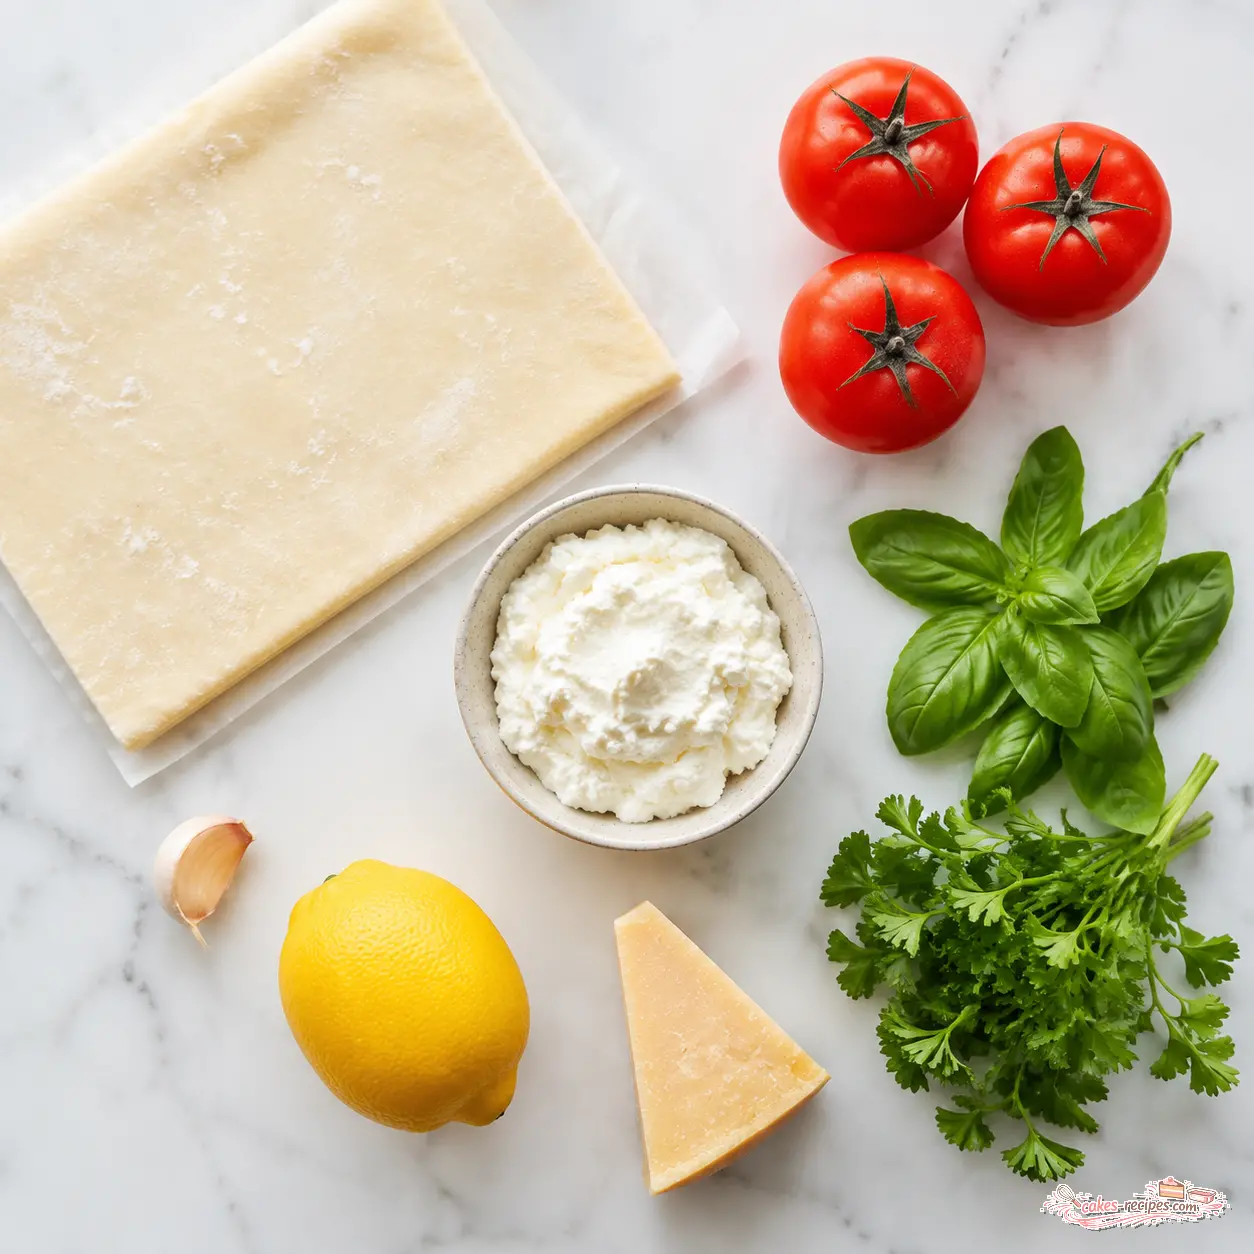
The ingredient list is short, and that’s intentional. When you’re working with peak summer tomatoes, you don’t need much else. Let me break down what you’ll need for this tomato ricotta tart.
For the Crust
You’ll need one sheet of frozen puff pastry, thawed. I use the kind from the freezer section at Ralphs or Trader Joe’s. Make sure it’s thawed properly. Overnight in the fridge works best. If you’re in a hurry, let it sit on the counter for about 30 minutes, but don’t let it get too warm or it’ll be sticky and hard to work with. Also grab one large egg for the egg wash. That’s what gives the crust that beautiful golden sheen.
For the Herbed Ricotta Filling
This is where the magic happens. You’ll need 8 ounces of full-fat ricotta cheese. Don’t use the low-fat stuff here. The full-fat version is creamier and gives you a much better texture. You’ll also need a quarter cup of freshly grated Parmesan cheese, one clove of minced garlic, and fresh herbs. I use a combination of parsley and basil. The fresh basil is non-negotiable in my book. It just pairs so perfectly with the tomatoes.
Here’s the secret ingredient: Meyer lemon zest and juice. I know, it sounds unexpected in a savory tart. But that bright citrus note cuts through the richness of the ricotta and makes everything taste fresher. If you can’t find Meyer lemons, regular lemons work just fine. The flavor will be slightly more tart, but still delicious.
For the Topping
You’ll need about one pound of ripe tomatoes. This is where you can get creative. Heirloom tomatoes are gorgeous if you can find them at the farmers market. Cherry tomatoes work great too. Or a mix of both. The key is that they’re ripe and flavorful. Slice them about a quarter-inch thick and blot them dry with paper towels. This step matters more than you think. More on that in a minute.
Substitutions
Here are a few swaps that work well:
- Gluten-free option: Use a gluten-free puff pastry. Just check the package for thawing instructions.
- Dairy-free option: Use plant-based puff pastry and substitute the ricotta with a dairy-free ricotta alternative. The texture will be slightly different, but still good.
- Cheese swaps: You can replace the Parmesan with pecorino or Grana Padano. Or add some shredded mozzarella to the ricotta mixture for extra richness.
- Herb variations: If you don’t have fresh basil, use more parsley or add some fresh oregano or thyme.
How to Make a Puff Pastry Tomato Tart
Alright, let’s get into it. I’m going to walk you through the four main stages. Each one has a trick that makes the difference between a good tart and a great one.
Stage 1: Prep the Pastry
First things first. Preheat your oven to 350 degrees F. Line a large rimmed baking sheet with parchment paper. I use a half-sheet pan for this. It’s the perfect size.
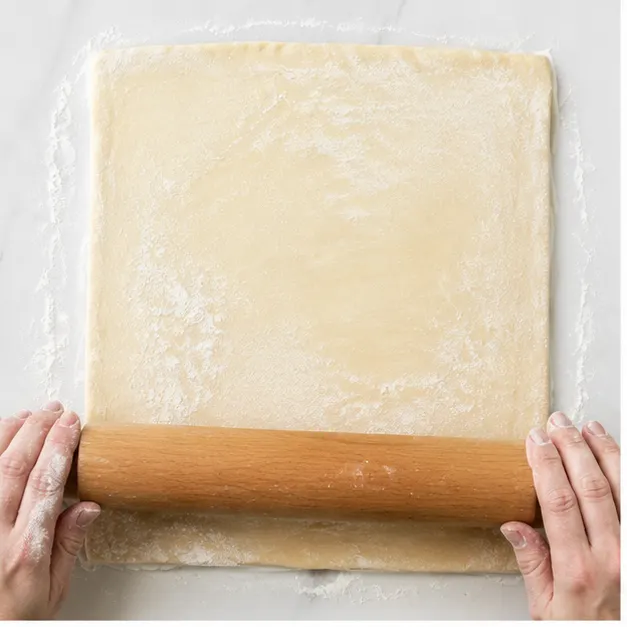
On a lightly floured surface, unfold your thawed puff pastry sheet. Roll it out into a 10×14-inch rectangle. Don’t stress about getting it perfectly even. Close is good enough. Transfer it to your prepared baking sheet.
Here’s the trick that took me years to learn. Score a border one inch from the edges using a sharp knife. Be careful not to cut all the way through. Then prick the pastry inside the border all over with a fork. This is called docking. It prevents the center from puffing up too much. The border will rise into a beautiful golden frame, and the center stays flat for your toppings. That’s why we do it.
Stage 2: Make the Herbed Ricotta
This part is almost too easy. In a food processor, combine the ricotta, Parmesan, minced garlic, parsley, basil, Meyer lemon zest and juice, salt, and pepper. Process until smooth and well blended. That’s it. Takes about 30 seconds.
I like to taste it at this point and adjust the seasoning. A little more salt? Another squeeze of lemon? This is your chance to dial it in. The filling should be creamy, bright, and slightly tangy from the lemon.
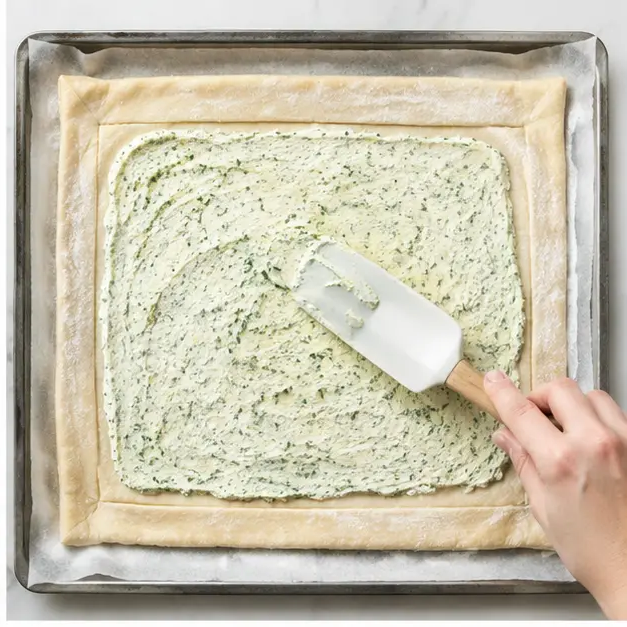
Spread the herbed ricotta mixture evenly over the pastry, staying within that scored border. Don’t go all the way to the edge. Leave that border exposed so it can puff up into that gorgeous crust.
Stage 3: Arrange the Tomatoes
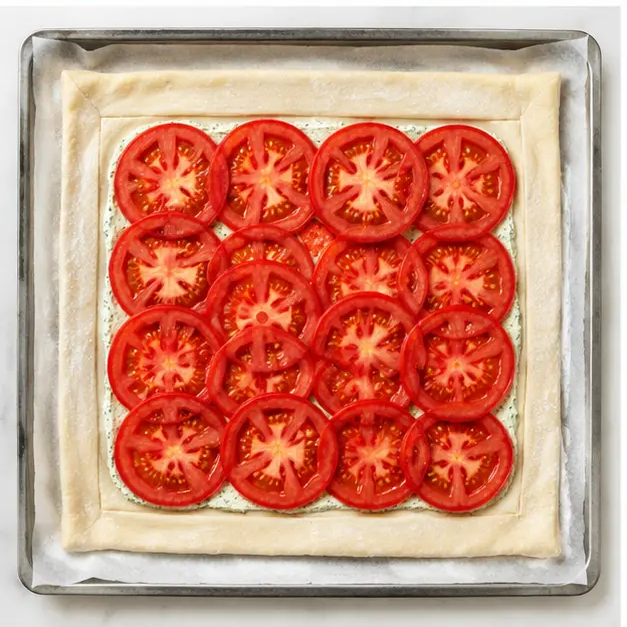
Now for the fun part. Arrange your tomato slices in a single layer on top of the ricotta. I like to overlap them slightly in rows. It looks intentional and beautiful. But honestly, any pattern works. Just make sure they’re in a single layer. Piling them up leads to a soggy mess.
Remember how I said to blot the tomatoes dry? This is why. Tomatoes are mostly water. If you don’t remove some of that moisture, it seeps into the pastry and you end up with a sad, soggy crust. A few paper towels and a gentle pat is all it takes. Worth the extra step.
Brush the exposed border of the pastry with the egg wash. This is what gives it that beautiful golden sheen. Don’t skip this. It makes the tart look so much more polished.
Stage 4: Bake and Serve
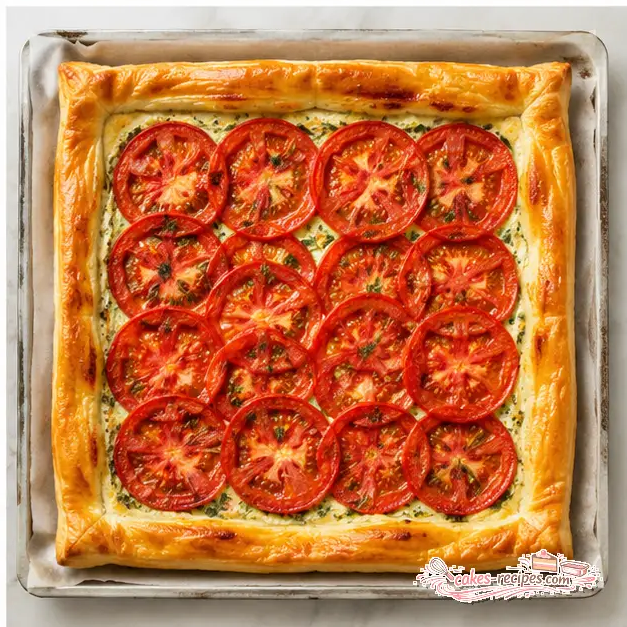
Bake for 25 to 30 minutes. You’re looking for the puff pastry to be puffed and golden brown, and the tomatoes to be tender. The edges should be deep golden and crispy. The tomatoes will look slightly wrinkled and concentrated.
Let the tart cool slightly on the baking sheet before cutting. I know it’s tempting to dig in right away, but giving it a few minutes helps the filling set. Cut it into 6 to 8 squares. Serve warm or at room temperature. Garnish with extra fresh basil or a dollop of ricotta if you’re feeling fancy.
Chef’s Tips for the Best Tomato Tart
Over the years, I’ve learned a few things that make this puff pastry tomato tart turn out perfectly every time. Let me share them with you.
How to Avoid a Soggy Crust
This is the number one question I get. The answer is threefold. First, blot your tomatoes dry. Second, don’t overload the tart. One layer of tomato is plenty. Third, spread the ricotta all the way to the border. That cheese layer acts as a barrier between the tomatoes and the pastry. It soaks up some of the moisture before it can reach the puff pastry.
Puff Pastry Handling Tips
Work with cold pastry. If it gets too warm, it becomes sticky and hard to handle. If that happens, just pop it in the fridge for 10 minutes. Also, make sure your puff pastry is fully thawed before you try to roll it. Partially frozen pastry will crack and tear.
Tomato Selection
Use the best tomatoes you can find. This is not the time for pale, mealy supermarket tomatoes. Hit up the farmers market or grow your own. Heirloom tomatoes are stunning, but Roma tomatoes work great too because they’re meatier and less watery. Cherry tomatoes are also a solid choice.
Variations to Try
Once you’ve mastered the basic tomato and ricotta tart, feel free to experiment. Here are some of my favorite variations.
- Add olives or capers. Scatter a few pitted olives or capers over the tomatoes before baking. They add a briny punch that pairs beautifully with the sweet tomatoes.
- Crumbled feta. Sprinkle some feta over the top before baking. It adds a salty, tangy element that’s delicious.
- Extra cheese. Add shredded mozzarella or crumbled goat cheese to the ricotta mixture for extra richness.
- Different herbs. Try using fresh oregano, thyme, or marjoram in the ricotta mixture instead of basil and parsley.
- Balsamic glaze. Drizzle a little balsamic glaze over the finished tart. It adds sweetness and a beautiful dark contrast.
Storage and Reheating
This tart is best enjoyed the day it’s made. But leftovers are still pretty great. Here’s how to handle them.
Storage: Store leftovers in an airtight container in the refrigerator for up to 2 days. The pastry will soften slightly, but it’s still delicious.
Reheating: The key to reviving that flaky crust is the oven. Reheat in a 350 degrees F oven for 10 to 15 minutes. Don’t use the microwave. It’ll turn the pastry into a sad, chewy mess. The oven brings back some of that crispness.
Make ahead: You can assemble the tart a few hours ahead of time and keep it in the fridge. Just add the egg wash right before baking. This is great for entertaining. You can prep everything, then pop it in the oven when your guests arrive.
Freezing: This tart can be frozen for up to 1 month. Thaw it in the fridge overnight, then reheat in the oven until crispy. It won’t be quite as good as fresh, but it’s still a solid option for meal prep.
Frequently Asked Questions
You’ve got this. Your puff pastry tomato tart will be the star of the table. I promise. There’s something about that golden, puffed crust, the creamy ricotta, and the juicy burst of tomato that just makes people happy. And honestly? That’s what cooking is all about.
If you make this recipe, I’d love to hear about it. Tag me or leave a comment. And if you’re looking for more summer inspiration, come find me on Pinterest. I’m always pinning new ideas for using up those farmers market finds.
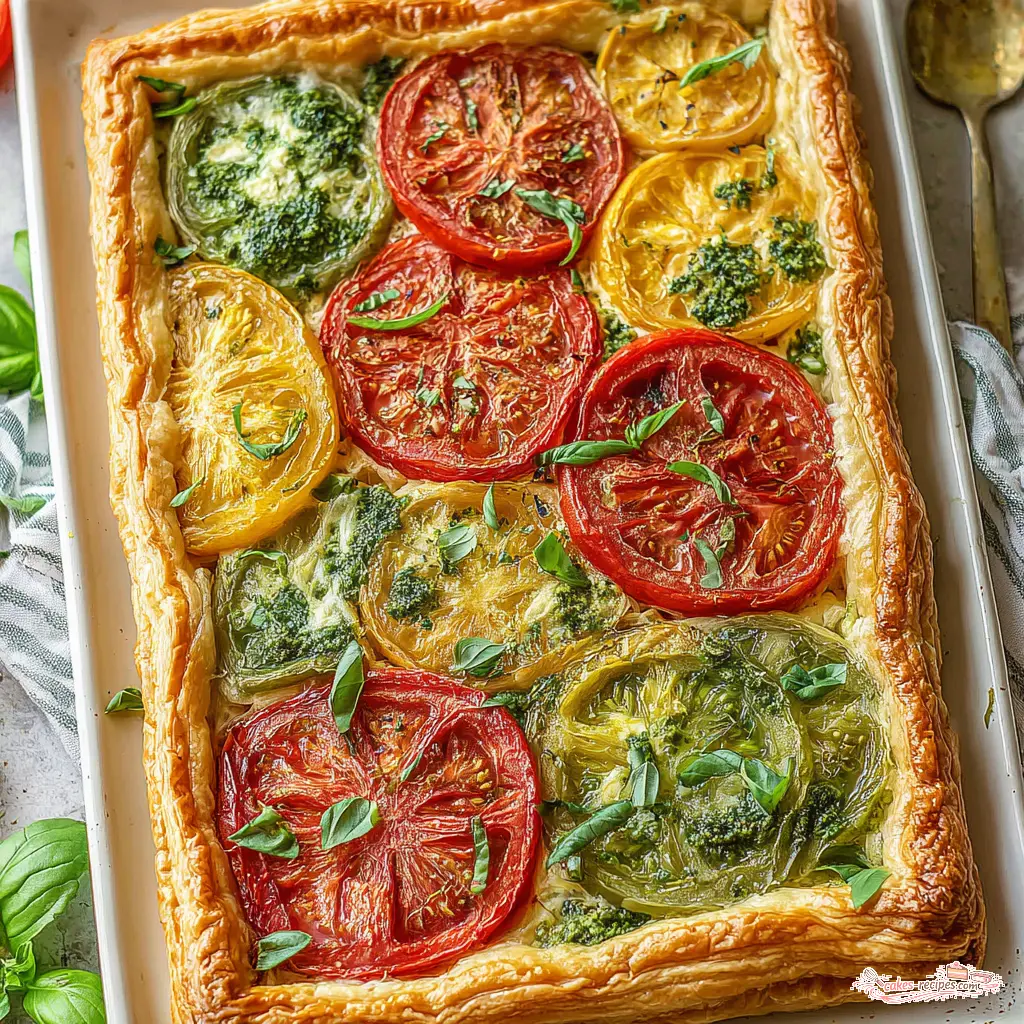
California Puff Pastry Tomato Tart with Herbed Ricotta
Ingredients
Method
- Preheat your oven to 350 degrees F. Line a large rimmed baking sheet (half-sheet size) with parchment paper.
- In a food processor, combine the ricotta, Parmesan, minced garlic, parsley, basil, lemon zest, lemon juice, salt, and pepper. Process until smooth and well blended. Set aside.
- On a lightly floured surface, unfold the thawed puff pastry sheet. Roll it out into a 10x14-inch rectangle. Transfer the pastry to the prepared baking sheet.
- Using a sharp knife, score a border 1 inch from the edges, being careful not to cut all the way through. Prick the pastry inside the border all over with a fork to prevent it from puffing up too much.
- Spread the herbed ricotta mixture evenly over the pastry, staying within the scored border. Arrange the tomato slices in a single layer on top of the ricotta.
- Brush the exposed border of the pastry with the egg wash. This will give the crust a beautiful golden sheen.
- Bake in the preheated oven for 25 to 30 minutes, until the puff pastry is puffed and golden brown, and the tomatoes are tender.
- Remove from the oven and let cool slightly on the baking sheet. Cut into 6 to 8 squares. Serve warm or at room temperature. Garnish with extra fresh basil or a dollop of ricotta if desired.
Nutrition
Notes
Tried this recipe?
Let us know how it was!Source: Nutritional Information
How do you keep puff pastry from getting soggy in a tomato tart?
Three things work together. Blot the tomato slices dry with paper towels to remove excess moisture. Spread the ricotta mixture as a barrier between the tomatoes and pastry. And use only one layer of tomatoes. That creamy ricotta layer soaks up moisture before it reaches the puff pastry, keeping that crust flaky and golden.
Can I use regular lemons instead of Meyer lemons in this basil ricotta tomato tart?
Absolutely. Regular lemons work fine. Meyer lemons are sweeter and less acidic, but regular lemons will give you a brighter, more tart flavor. Just use the same amount. If your lemon is particularly large and juicy, you might want to start with a little less juice and add more to taste.
What is the best way to slice tomatoes for a puff pastry tomato tart?
Slice them about a quarter-inch thick. Too thick and they won’t cook through properly. Too thin and they’ll turn into mush. Use a sharp knife or a serrated blade. After slicing, lay the slices on paper towels and blot them dry. This removes excess moisture and prevents a soggy crust.
Can I make this tomato ricotta tart ahead of time and reheat it?
Yes, you can assemble it a few hours ahead and keep it in the fridge. Add the egg wash right before baking. For fully baked leftovers, reheat in a 350 degrees F oven for 10 to 15 minutes. The oven brings back some of that crispness. Skip the microwave, it makes the pastry chewy.
What can I substitute for Parmesan cheese in this herbed ricotta tomato tart?
Pecorino Romano or Grana Padano are the best substitutes. They have a similar salty, nutty flavor. If you need a dairy-free option, try nutritional yeast. It won’t taste exactly the same, but it adds that savory, cheesy note. Start with a tablespoon and add more to taste.