Why You’ll Love These Peanut Butter Oreo Bars
It’s July in Los Angeles, and let me tell you, the oven is basically a weapon of mass heat destruction. You want to bake something for the neighborhood potluck, but the thought of turning on that 350°F furnace makes you sweat just thinking about it. I’ve been there. The kids are asking for a treat that isn’t just another scoop of ice cream, and you need something that’ll get you compliments without a kitchen meltdown.
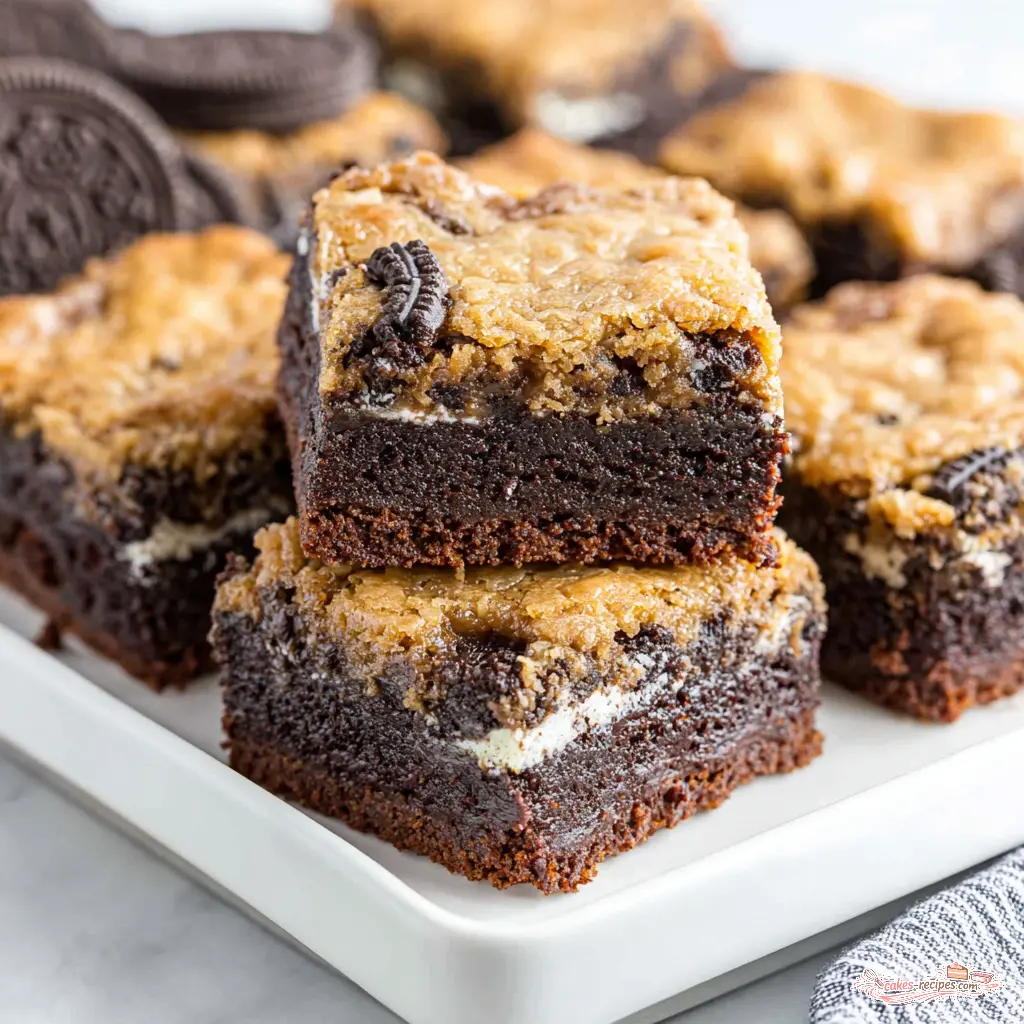
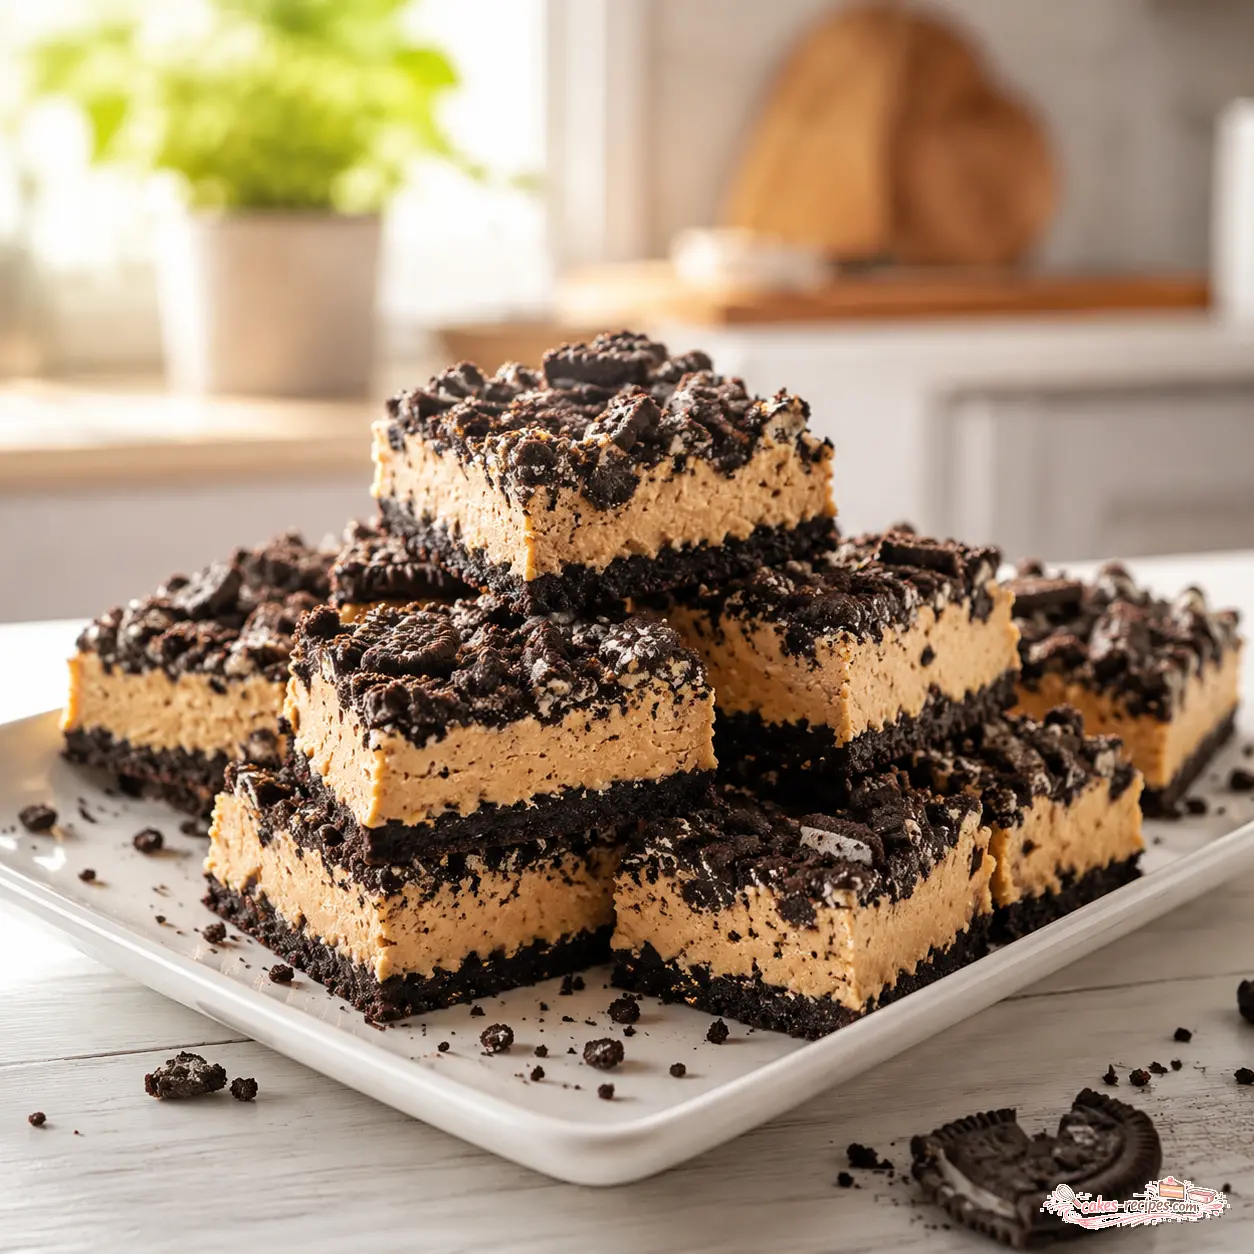
So here’s the deal. These peanut butter Oreo bars are my secret weapon for summer gatherings. They’re a three-layer masterpiece: a chewy peanut butter cookie base, a layer of whole Oreo cookies, and a fudgy brownie top. And the best part? You can make them without ever turning on the oven if you’re really in a heatwave. But even if you do bake them, it’s a quick 50 minutes, and the payoff is ridiculous.
I remember the first time I tried making no-bake bars. I was maybe twenty-two, trying to impress my wife’s family for a Sunday dinner. I thought I could just throw some crushed cookies and melted butter together and call it a day. It was a disaster. The crust was crumbly, the filling didn’t set, and her mother gave me that look. You know the one. So I spent the next few years figuring out what actually works. And these peanut butter Oreo bars? They work.
Honestly, the texture is what gets me. The peanut butter layer is soft and chewy, almost like a cookie dough that didn’t quite make it to the oven. Then you hit that crunch from the Oreo cookies, and the brownie on top is dense and fudgy, not cakey at all. It’s the kind of dessert that makes people close their eyes and go “Mmm.” That’s exactly what you want.
The good news is, this recipe is beginner-friendly. If you can press dough into a pan and spread batter, you can nail these bars. No fancy equipment, no complicated techniques. Just good ingredients and a little patience for the chilling time.
So whether you’re bringing them to a BBQ, a potluck, or just keeping them in the fridge for a mid-afternoon snack, these peanut butter Oreo bars are about to become your new summer staple. Fair enough?
Ingredients You’ll Need
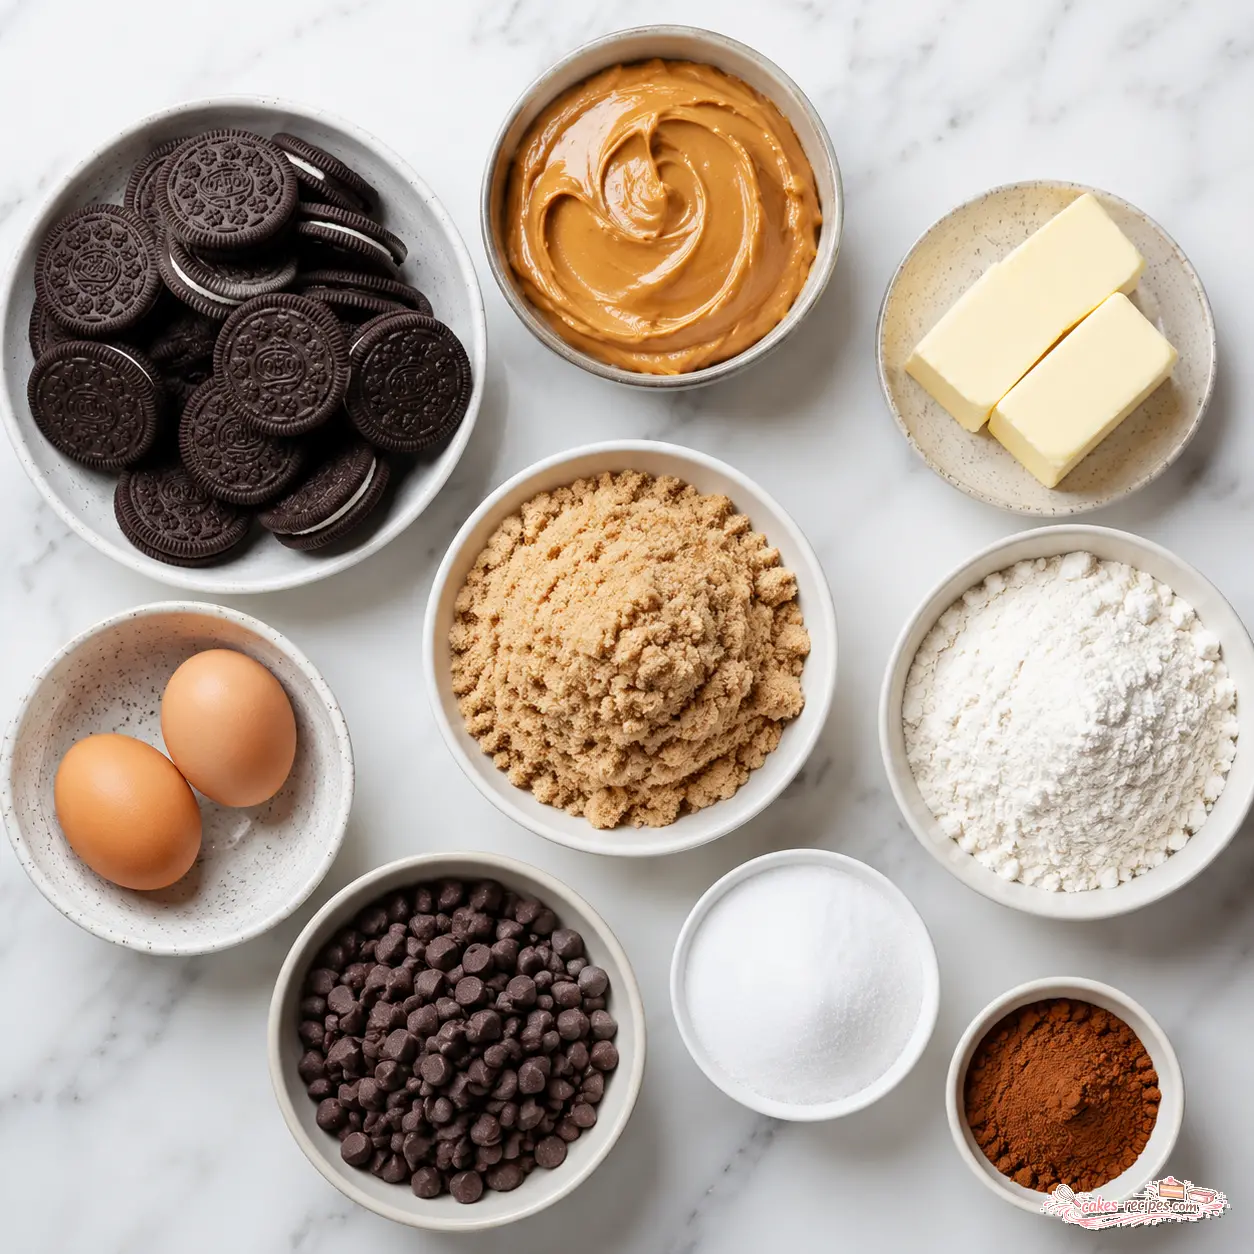
Let’s talk about what goes into these beauties. The ingredient list looks long, but it’s mostly pantry staples. Here’s the breakdown by layer:
For the Peanut Butter Cookie Layer:
- 2/3 cup unsalted butter, softened
- 2/3 cup creamy peanut butter
- 1 1/2 cups light brown sugar, packed
- 1 teaspoon vanilla extract
- 2 large eggs, room temperature
- 2 cups all-purpose flour
For the Oreo Layer:
- 24 Oreo cookies (regular or double stuff, your call)
For the Brownie Layer:
- 2/3 cup unsalted butter, cut into pieces
- 6 ounces semi-sweet chocolate, chopped
- 1 1/2 cups granulated sugar
- 3 large eggs, room temperature
- 1/4 cup unsweetened cocoa powder
- 3/4 cup all-purpose flour
- 1/2 teaspoon salt
That’s it. No weird ingredients, no specialty items you have to hunt down at three different stores. A quick trip to Ralphs or Vons and you’re set. I prefer using creamy peanut butter for the smoothest texture, but we’ll talk about crunchy options later.
One thing I’ll say about the peanut butter: use the good stuff. Not the natural kind that separates, but a classic creamy peanut butter like Jif or Skippy. It has the right consistency and sweetness for this recipe. Trust me on this.
How to Make Peanut Butter Oreo Bars
Alright, let’s get into the actual process. I’ll walk you through each stage. Remember, this is a baked version, but I’ll include notes for a no-bake adaptation if you’re really feeling the heat.
Stage 1: Prep and Peanut Butter Layer
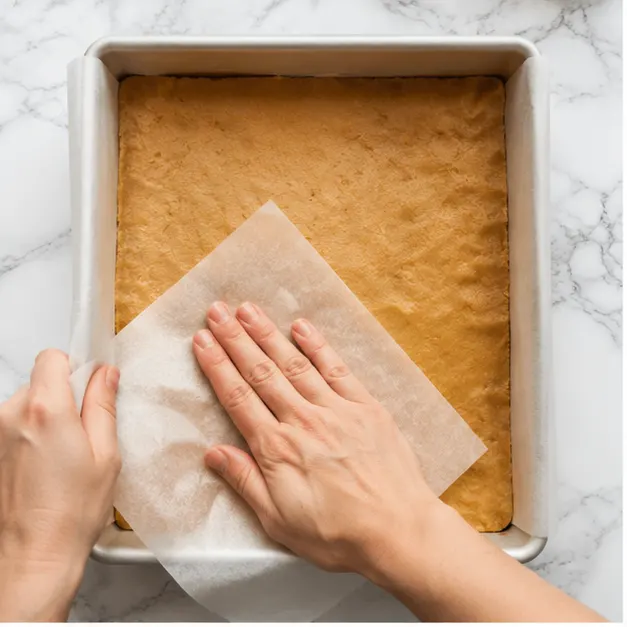
First things first, preheat your oven to 350°F. Line a 9×13-inch baking pan with parchment paper, leaving some overhang on two opposite sides. This is key for lifting the bars out later without a fight. In a large mixing bowl, beat the softened butter, creamy peanut butter, and brown sugar together until light and fluffy. That takes about 2 minutes. Then add the eggs one at a time, beating well after each, and mix in the vanilla. Reduce the mixer speed and gradually add the flour until just combined. Don’t overmix, or the dough gets tough. Press this dough evenly into the bottom of the pan. I use lightly greased hands or a piece of wax paper for this.
Stage 2: The Oreo Layer
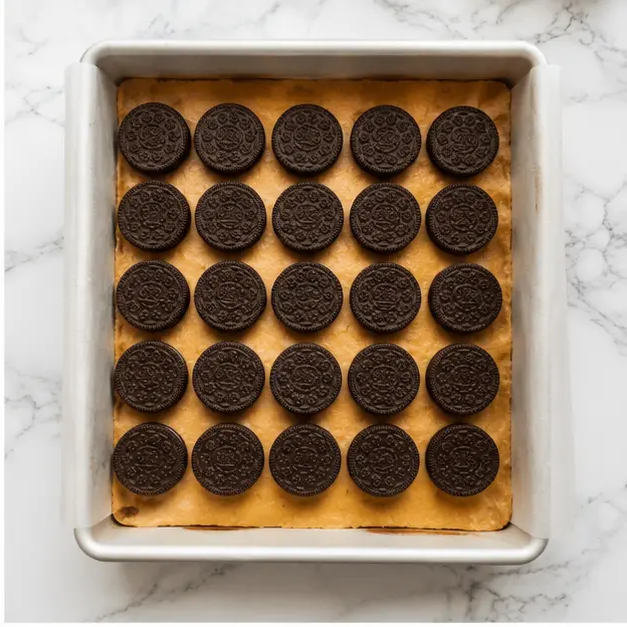
Now for the fun part. Arrange 24 Oreo cookies on top of the peanut butter dough in 6 rows of 4 cookies. Press them in gently so they’re slightly embedded. This creates that perfect crunch layer in the middle. I like using regular Oreos, but double stuff works too if you want extra creaminess. No judgment here.
Stage 3: The Brownie Layer
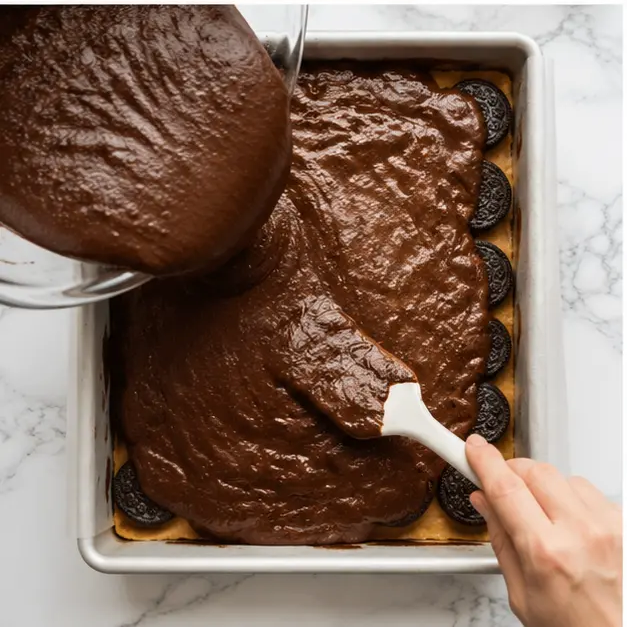
In a large microwave-safe bowl, combine the butter and chopped semi-sweet chocolate. Microwave on medium power in 45-second intervals, stirring between each, until completely melted and smooth. Let it cool for 2-3 minutes, then whisk in the granulated sugar. Add the eggs one at a time, mixing thoroughly after each. Gently fold in the cocoa powder, flour, and salt using a rubber spatula. Mix just until no streaks remain. Pour this batter over the Oreo layer and spread it evenly to cover all the cookies.
Stage 4: Baking and Cooling
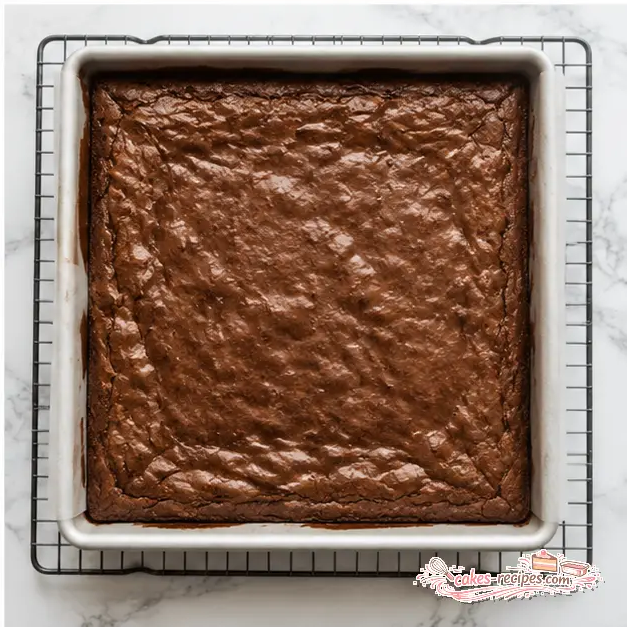
Bake for 50-55 minutes, or until a toothpick inserted into the center comes out with a few moist crumbs. Check at 45 minutes to avoid overbaking. The top should be shiny and slightly cracked. Now here’s the most important part: let the bars cool completely in the pan on a wire rack for at least 4 hours. I know, it’s torture. But this is crucial for clean slices. If you cut too early, you’ll get a mess. Once cooled, lift the bars out using the parchment overhang, transfer to a cutting board, and slice into 18 rectangles.
Tips for Perfect Bars
I’ve made these bars more times than I can count, and I’ve learned a few things along the way. Here are my top tips for getting them right every time:
- Don’t overmix the peanut butter dough. Overmixing develops gluten, which makes the base tough. Mix until the flour just disappears. That’s the move.
- Use room temperature eggs. Cold eggs can seize the butter and chocolate mixture, especially in the brownie layer. Leave them out for 30 minutes before starting.
- Check for doneness early. Ovens vary. Start checking at 45 minutes. You want moist crumbs, not wet batter.
- Cool completely. I cannot stress this enough. Four hours minimum. The bars need to set up properly. Patience is a virtue here.
- For clean cuts, use a sharp knife. Wipe the blade clean between slices. If you want extra clean edges, chill the bars for 30 minutes after cooling.
One common mistake I see is using high heat when melting the chocolate. Go slow. Medium power in the microwave, or use a double boiler. Rushing this step can cause the chocolate to become grainy, and nobody wants that.
Storage and Freezing Instructions
These bars are great for make-ahead desserts. Here’s how to store them:
At Room Temperature: Store in an airtight container for up to 5 days. They’ll stay soft and chewy. Just keep them away from direct sunlight.
In the Refrigerator: For longer storage, pop them in the fridge. They’ll last up to a week. The texture firms up a bit, which some people actually prefer. Serve straight from the fridge on a hot day for a cool treat.
In the Freezer: These bars freeze beautifully. Wrap individual pieces tightly in plastic wrap, then place them in a freezer-safe bag or container. They’ll keep for up to 3 months. To thaw, just leave them at room temperature for about 30 minutes. Perfect for when you need a dessert in a pinch.
Frequently Asked Questions
More Dessert Bar Recipes
If you loved these peanut butter Oreo bars, you might also enjoy some of my other favorites. Check out our classic cheesecake bars for a creamy, tangy option, or try our brownie bites for a quick chocolate fix. There’s a whole world of bar desserts out there waiting for you.
And hey, if you make these, I’d love to see them. Tag me when you make them I want to see your gorgeous bars! You can also find me on Pinterest for more inspiration. I’m always pinning new recipes, so follow along for more no-bake and easy dessert ideas.
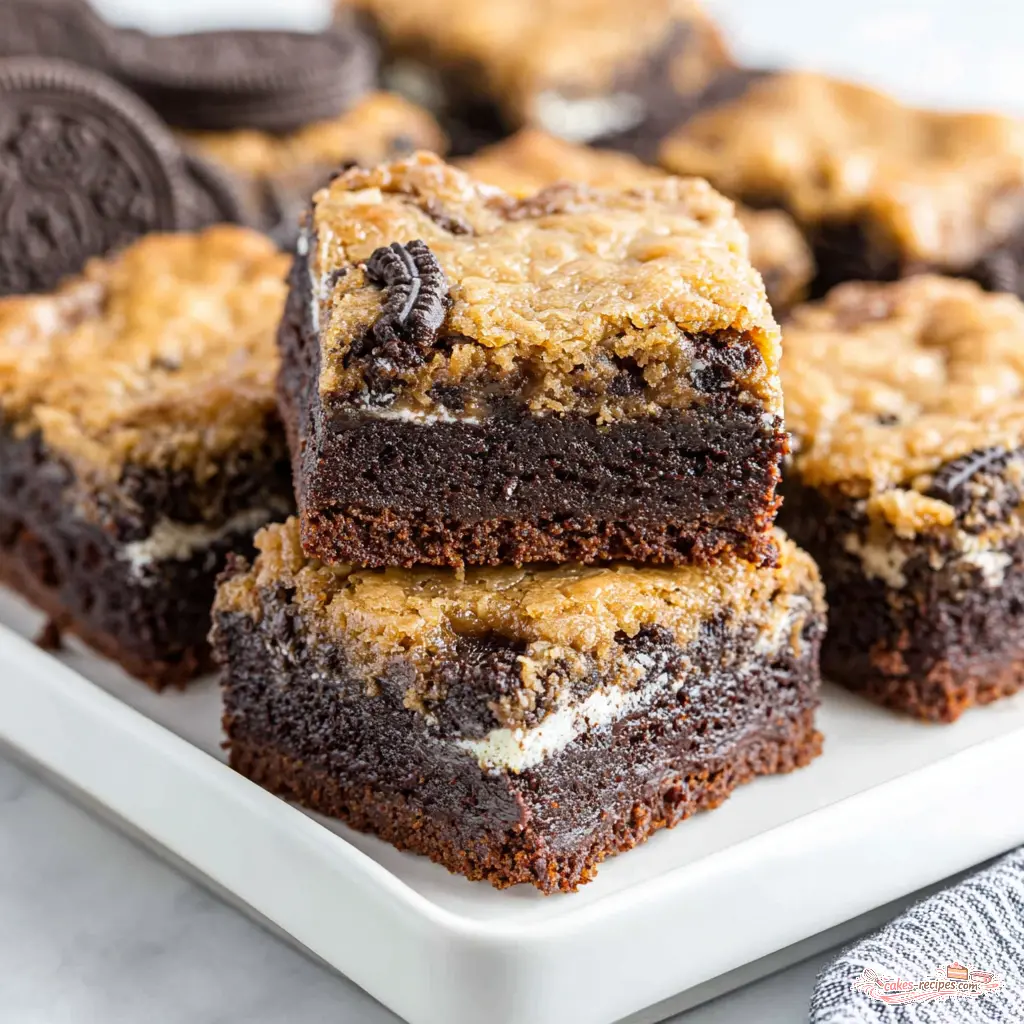
Ultimate Peanut Butter Oreo Bars
Ingredients
Method
- Preheat your oven to 350°F. Line a 9x13-inch baking pan with parchment paper, allowing the paper to overhang on two opposite sides for easy removal.
- In a large mixing bowl, beat together the softened butter, peanut butter, and brown sugar until light and fluffy, about 2 minutes.
- Add the eggs one at a time, beating well after each addition, then mix in the vanilla extract.
- Reduce mixer speed to low and gradually beat in the flour until just combined. Do not overmix.
- Transfer the dough to the prepared pan. Using lightly greased hands or a piece of wax paper, press the dough evenly into the bottom of the pan.
- Arrange the Oreo cookies on top of the peanut butter dough in 6 rows of 4 cookies, pressing them in gently.
- In a large microwave-safe bowl, combine the butter and chopped chocolate. Microwave on medium power in 45-second intervals, stirring between each, until completely melted and smooth.
- Let the mixture cool for 2-3 minutes, then whisk in the granulated sugar until well combined.
- Whisk in the eggs one at a time, mixing thoroughly after each addition.
- Gently fold in the cocoa powder, flour, and salt using a rubber spatula, mixing just until no streaks remain.
- Pour the brownie batter over the Oreo layer, spreading it evenly with a spatula to cover all cookies.
- Bake in the preheated oven for 50-55 minutes, or until a toothpick inserted into the center comes out with a few moist crumbs. Check at 45 minutes to avoid overbaking.
- Remove the pan from the oven and let the bars cool completely in the pan on a wire rack for at least 4 hours. This is crucial for clean slices.
- Once cooled, lift the bars out using the parchment overhang. Transfer to a cutting board and slice into 18 rectangles.
Nutrition
Notes
Tried this recipe?
Let us know how it was!Source: Nutritional Information
How to store these Peanut Butter Oreo Bars?
Store them in an airtight container at room temperature for up to 5 days or in the fridge for a week. For longer storage, freeze individual bars wrapped in plastic for up to 3 months. Thaw at room temperature before serving.
Can I freeze these bars?
Absolutely. Wrap each bar tightly in plastic wrap, then place them in a freezer-safe bag. They’ll keep for up to 3 months. When you’re ready to eat, just let them thaw at room temperature for about 30 minutes. They taste just as good as fresh.
How to serve these Oreo peanut butter bars?
Serve them straight from the fridge on a hot day for a cool, refreshing treat. They’re also great at room temperature with a glass of cold milk or a cup of coffee. Slice into 18 pieces for a party or 12 for larger portions.