Why You’ll Love This Pumpkin Sourdough Bread
Let’s get this out of the way: my first attempt at pumpkin sourdough bread was a total disaster. Dense, gummy, and weirdly orange, with a crumb you could have used as a doorstop. I told myself it was “rustic.” It wasn’t. It was a failed science experiment.
But here’s the thing. I fixed it. And the fix wasn’t complicated. It was about understanding what pumpkin actually does to dough. That understanding turned a hockey puck into the loaf I’m about to share.
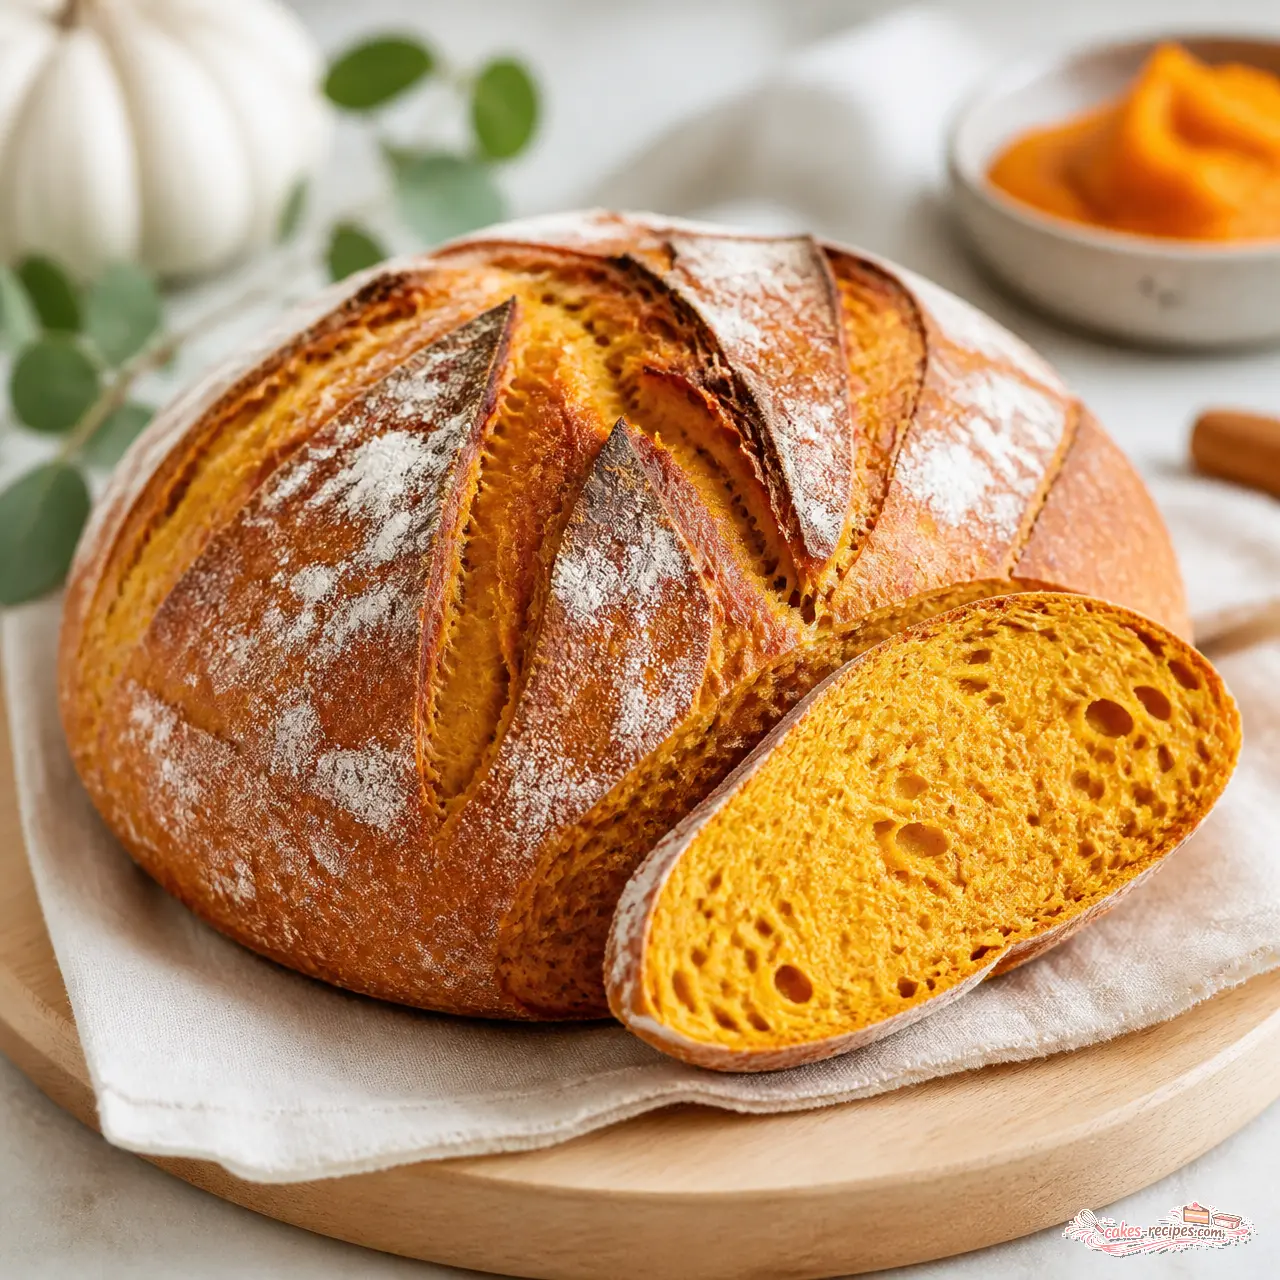
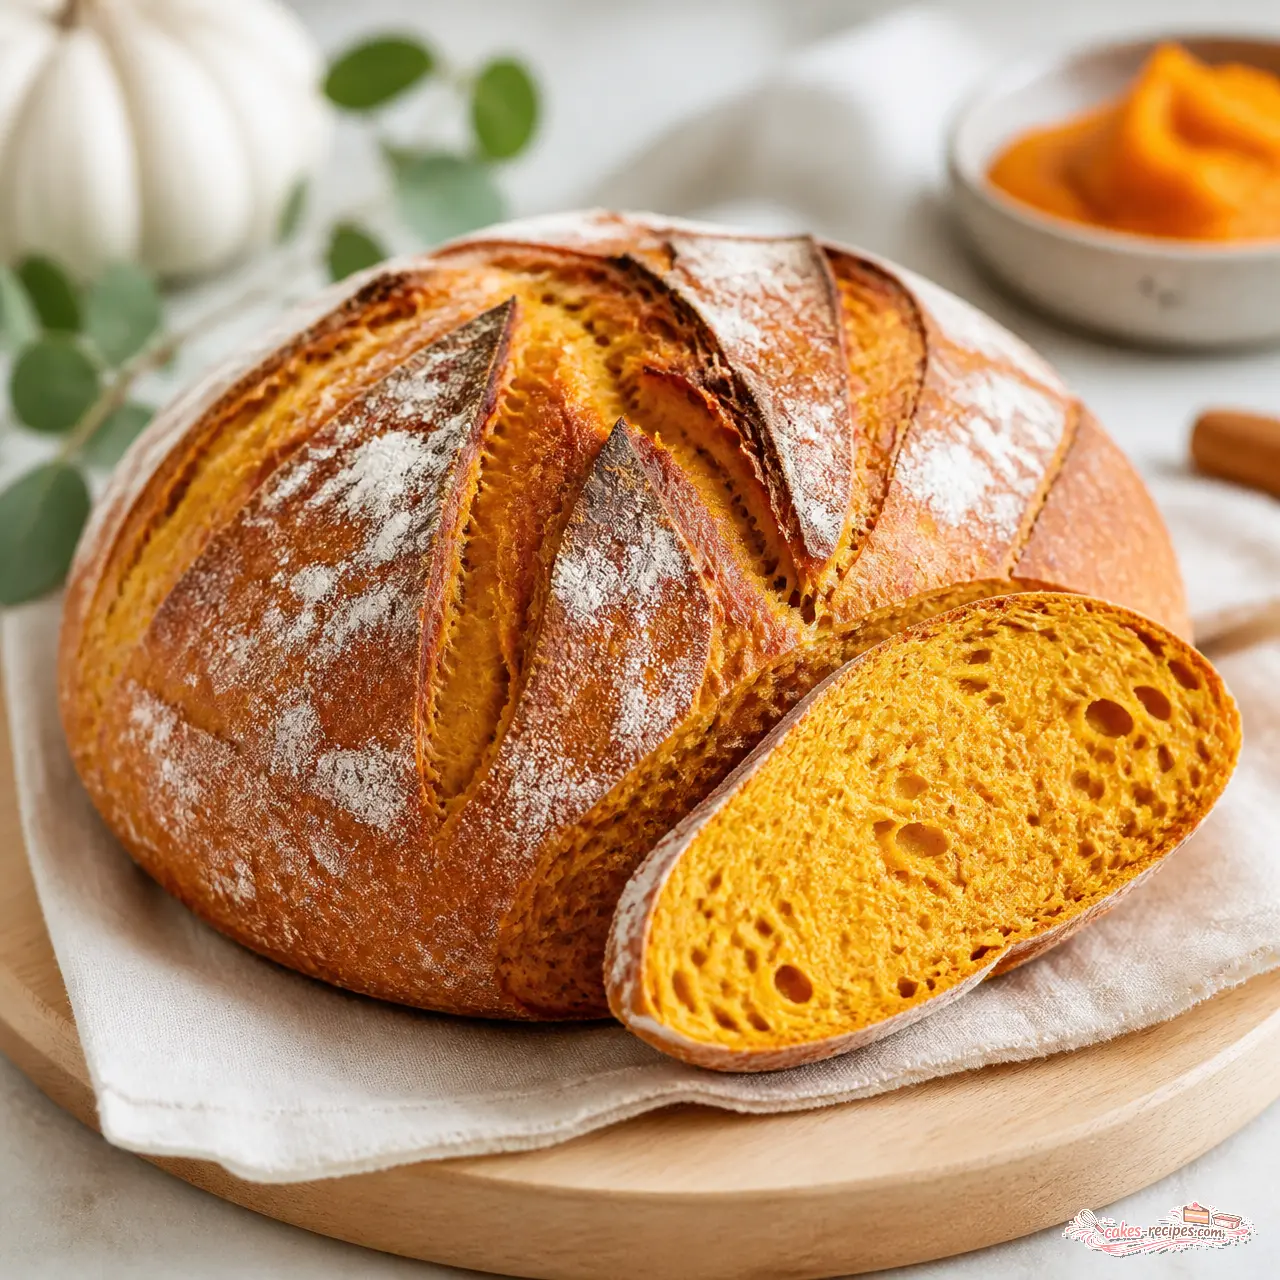
Honestly, this pumpkin sourdough bread is now the loaf I pull out when I want to impress people without breaking a sweat. It’s an artisan boule with a deep golden crust, a soft open crumb with a faint orange tint, and that classic sourdough tang riding on a subtle earthy sweetness from the pumpkin. It is not a sweet quick bread. It is a real, crusty, chewy loaf that just happens to taste like fall.
Why you’ll love it:
- Reliable rise: This recipe manages the extra moisture so you get real oven spring, not a pancake.
- A perfect fall centerpiece: It belongs on a Thanksgiving table or a cozy weekend brunch spread.
- Good for you, too: Each slice runs about 178 calories with 5 grams of protein and 2 grams of fiber, plus the gut-friendly benefits of a slow fermentation.
- No fancy equipment required: A Dutch oven helps, but you can absolutely work around it.
My mom had this rule in her catering kitchen: always make more than they asked for. I think about that rule every time I bake. One loaf of this never lasts long enough.
And hey, if it’s still August when you read this? Perfect. These hot weeks are actually the best time to practice because the heat works with you, not against you. More on that below.
Choosing the Best Pumpkin Puree
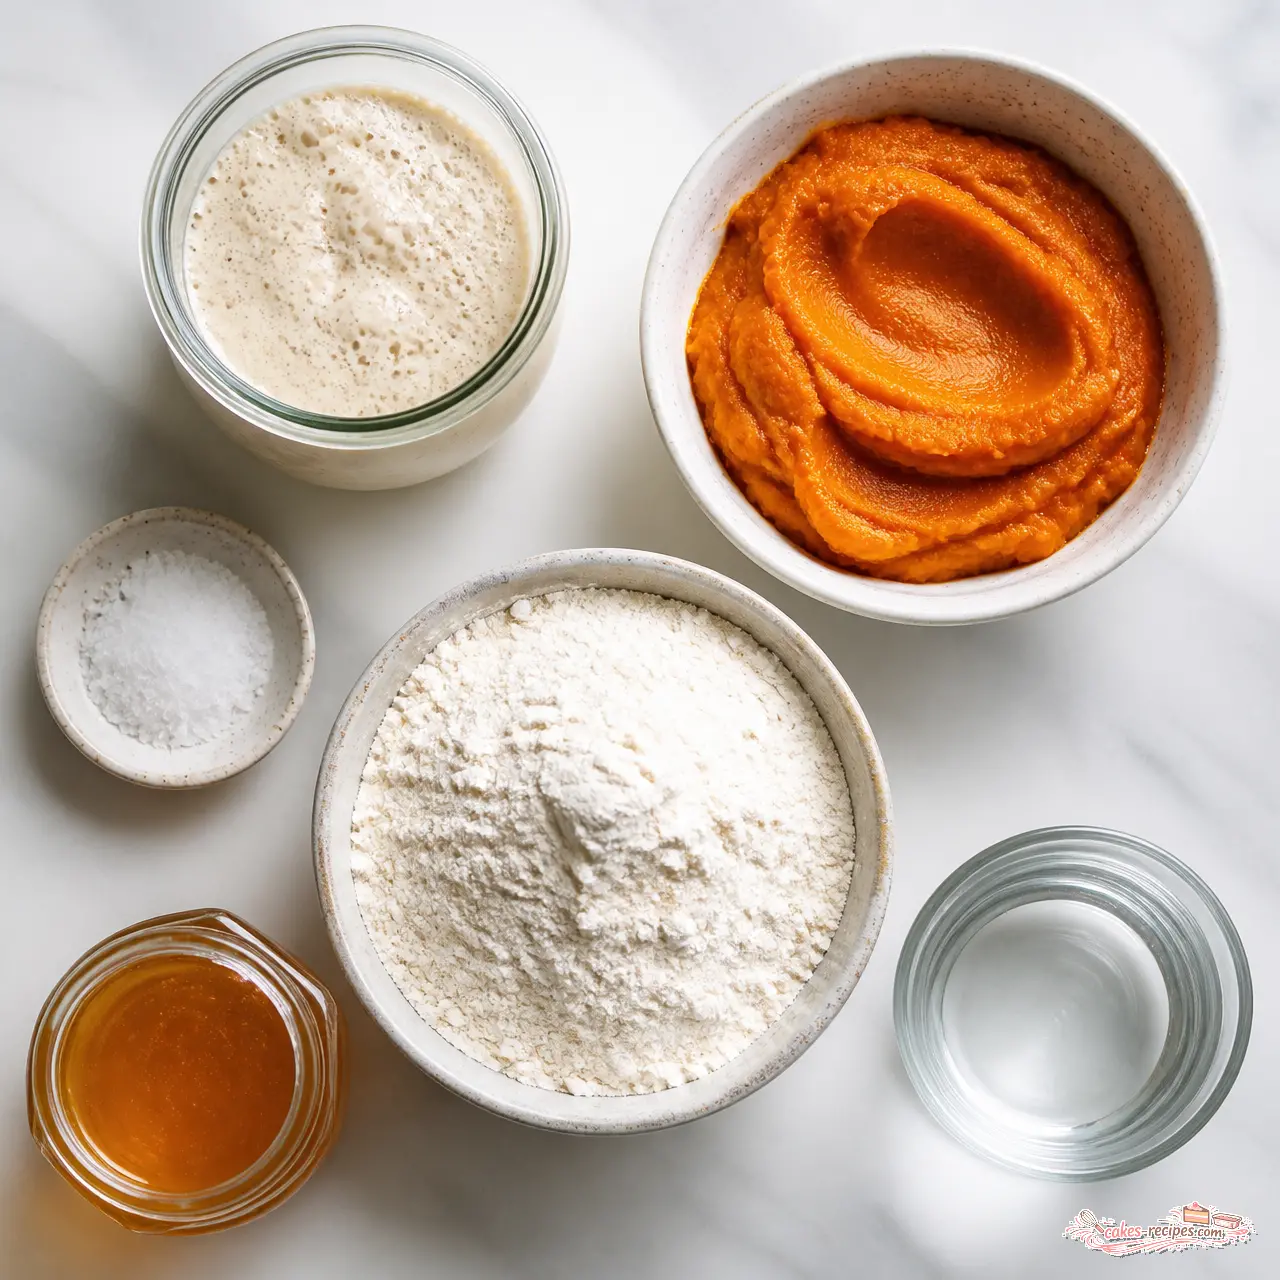
Before you even touch your sourdough starter, let’s talk pumpkin. The single biggest mistake I made in my early attempts was using the wrong kind. You need pure pumpkin puree, not pumpkin pie filling. Pie filling comes loaded with added sugar and spices, which throw off your fermentation and make the dough behave unpredictably.
In my testing, canned pure pumpkin is the most consistent option. Brands like Libby’s, or the store brand at Ralphs or Vons, work wonderfully. It’s easy, it’s shelf-stable, and it has a predictable moisture level. That predictability matters when you’re baking sourdough.
Homemade puree works too, and I’ll walk you through it in the FAQ. The short version: roast a sugar pumpkin, drain it well, and mash it until smooth. Whatever you do, stay away from the big carving pumpkins. They’re watery and bland, and they’ll turn your dough into soup.
One rule I never break: let any homemade puree cool completely before refrigerating, and drain off any excess liquid. Extra water is the enemy of a strong loaf.
Understanding Pumpkin Sourdough Hydration
Here’s the core tension of pumpkin sourdough bread: pumpkin puree is roughly 80 to 90 percent water, and it’s packed with natural sugars. Water makes dough slack. Sugars speed up fermentation. Put those together and you have a sticky, fast-moving dough that can collapse if you don’t manage it.
Let me show you the numbers, because I find this part fascinating. This recipe uses 500 grams of bread flour, 280 grams of water, and 200 grams of pumpkin puree. Since that puree carries close to 170 grams of hidden water, the total hydration lands around 90 percent. That’s very high for a home loaf. Some of that water is trapped in the pumpkin’s fiber, so the dough won’t feel quite as wet as a straight 90 percent dough, but it will still feel alarmingly slack at first.
That’s normal. When your hands look like you’ve been finger-painting with orange glue, you’re exactly on track.
Hot August Kitchen Callout
It’s August and your kitchen is 85°F? Use it to your advantage.
- Cut your bulk ferment time by 25 to 30 percent. Warmth accelerates everything.
- Mix with cold water (65 to 68°F) to slow things down and keep the dough manageable.
- Keep the dough covered between folds, and mist the surface if it starts to dry out.
- Watch the dough, not the clock. The visual cues below matter more than any timer.
To rescue sticky dough, keep a small bowl of water and a bench scraper nearby. Wet your hands before handling the dough, and use the scraper to fold and turn it. Avoid heavily flouring your work surface. It seems counterintuitive, but a lightly misted surface actually works better with this soft dough.
One more hydration tip: start with the full 280 grams of water. If the dough feels tight after the autolyse, you can add up to 20 grams more. If you’re nervous, drop to 250 grams and add more as needed. No stress.
Bakers Schedule for Pumpkin Sourdough
Life is busy. So let’s make this fit your actual week. Here’s the schedule that works for me, built for people with a day job.
- 8:00 AM: Feed your sourdough starter so it’s at peak activity by evening.
- 5:00 PM: Mix the dough and start the autolyse. Dinner happens while it rests.
- 6:00 PM: Do your stretch and folds with 15 to 30 minutes between sets.
- 9:00 PM: Shape the loaf and place it in a banneton proofing basket.
- 9:15 PM: Cold proof in the fridge overnight. Twelve hours is the sweet spot.
- Next morning: Preheat the Dutch oven, score, and bake.
That’s the beauty of overnight fermentation. It turns a multi-day project into a set-it-and-forget-it routine. Your refrigerator does the heavy lifting while you sleep.
One note on timers: dough temperature matters more than the clock. Your bake will shift with your kitchen’s mood, and that’s fine. The dough is the boss.
How to Make Pumpkin Sourdough Bread
This process breaks down into four major stages, and I’ll explain the why behind each one. Master these and you’ll have a pumpkin sourdough bread you can repeat all autumn long.
Stage 1: Mix the Dough and Autolyse
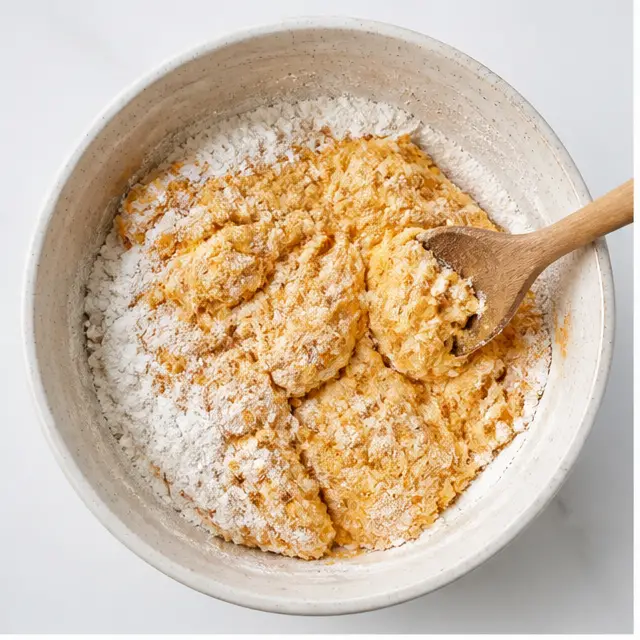
Start by stirring your active starter, water, and honey together until the honey dissolves. Then add the bread flour, pumpkin puree, and salt. Mix with the handle of a wooden spoon until a ragged, shaggy dough forms. This rest period, called the autolyse, lets the flour fully absorb the liquid and begins developing gluten before you even touch it. Cover the bowl and let it rest for a full hour.
Stage 2: Stretch and Fold
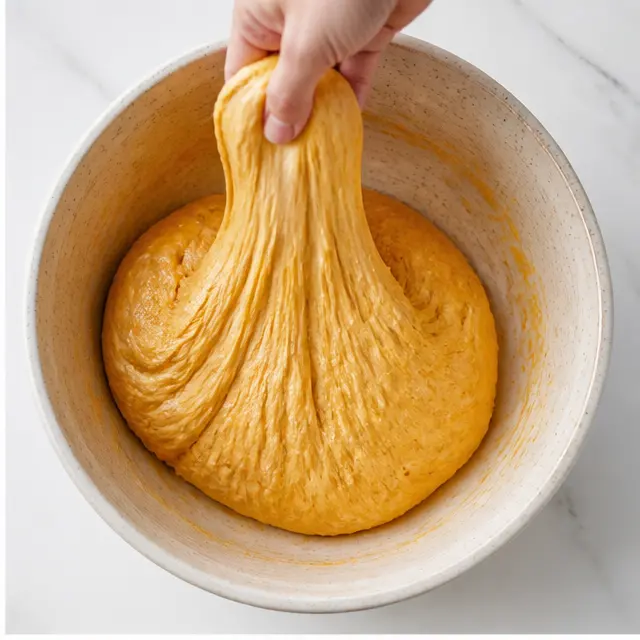
This is where the magic happens. Instead of kneading, you’ll do 4 sets of stretch and folds, spaced 15 to 30 minutes apart. Lift one side of the dough, pull it high, and fold it over to the opposite side. Rotate the bowl a quarter turn and repeat. This builds a strong gluten network, which is exactly what a high-hydration dough needs to hold its shape.
Stage 3: Bulk Ferment
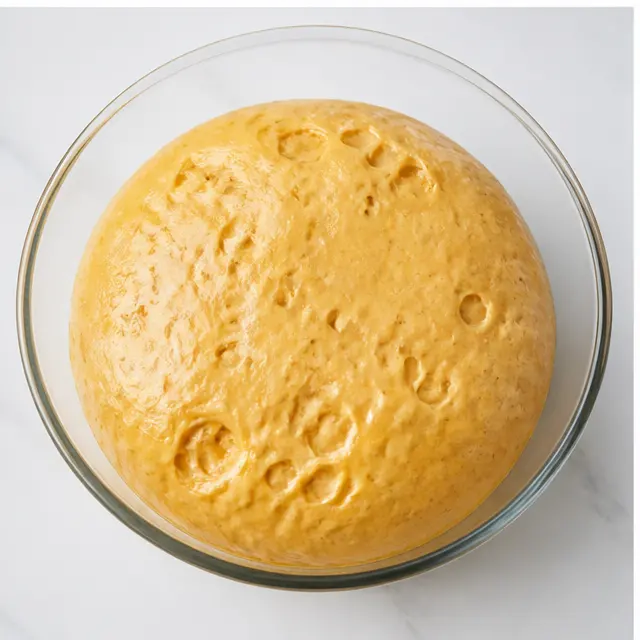
Now you wait. Let the dough ferment at room temperature until it has just doubled in size. It should look wobbly and jiggly, with large air bubbles visible just under the surface. In a warm kitchen that could be just a few hours. In a cooler room it might take overnight. Trust the visual cues, not the clock.
Stage 4: Score and Bake
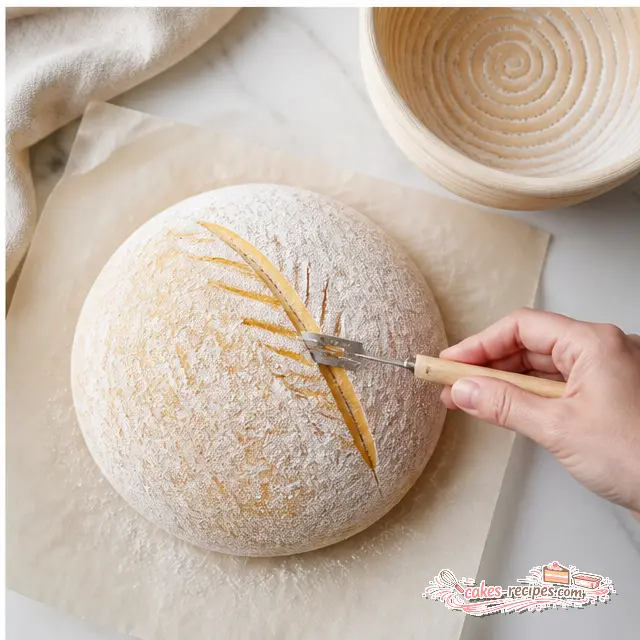
About 60 minutes before baking, place your Dutch oven on the center rack and preheat to 450°F. Take your cold-proofed dough straight from the fridge, turn it out onto parchment, and score the top with a lame or sharp knife. The contrast between the cold dough and the screaming hot pot is what gives you that dramatic oven spring. Bake covered at 450°F for 30 minutes, then drop the oven to 410°F, remove the lid, and bake another 10 to 15 minutes until the crust is deeply browned.
Here’s the reveal moment. When you lift that lid, you hear it first. The crackle of the crust settling, the hiss of trapped steam escaping. Then you see it: a mahogany dome with proud score lines, warm and fragrant. That’s the moment this whole process becomes worth it.
Shaping Your Pumpkin Sourdough Loaf
Shaping a wet, pumpkin-enriched dough can feel intimidating, and I find most people overthink it. Turn the dough out onto a lightly floured surface and preshape it into a rough round or batard. Let it rest for about 15 minutes if it feels very elastic. Then give it a final tight shaping by dragging the dough toward you to build surface tension. That tension is what keeps the loaf tall during the final proof.
Using a Banneton Basket
Flour your banneton proofing basket generously, all the way up the sides. Pumpkin dough is sticky, and nothing deflates a great bake like a loaf that won’t release. Place the dough seam side up. If you want a seeded crust, sprinkle oats or pepitas into the banneton before adding the dough.
Cover the basket loosely with a reusable plastic bag or a damp towel before refrigerating. The cold proof does double duty: it deepens that tangy sourdough flavor and gives the dough a firmer surface for cleaner bread scoring.
Flavor Variations and Serving Ideas
Once you’ve nailed the base loaf, feel free to play. Here are a few ways I like to change it up.
- Warm spices (optional): For a pumpkin spice vibe, add a pinch of cinnamon, nutmeg, ginger, and cloves to the flour before mixing. Keep it light. Heavy spices can slow down your fermentation.
- Seeded crust: Roll the shaped loaf in pepitas or rolled oats before its cold proof. It adds texture and looks gorgeous.
- Herb twist: A few chopped fresh thyme leaves folded into the dough bring an earthy note that pairs beautifully with the pumpkin.
- Sweet swirl: For a treat, flatten the dough before shaping and spread a thin layer of cinnamon sugar across it, then roll and shape as usual.
Pumpkin-Shaped Sourdough Loaf
Want to really show off at Thanksgiving? Shape the dough into a pumpkin. After the final shaping, tie four lengths of food-grade cotton string around the loaf in an X pattern, then again in a second X offset by 45 degrees. This creates the classic pumpkin segments. Let it cold proof and bake as usual, then carefully snip and remove the strings while the loaf is still warm. Add a cinnamon stick or a clean twig as the stem, and you have a showstopper.
Just a warning: use food-grade cotton string, not synthetic twine. I learned that one the hard way.
Serving ideas? Toasted with salted butter is the classic. It’s also incredible under poached eggs, or sliced thick for a fall grilled cheese with goat cheese.
Storage, Troubleshooting, and FAQ
Let’s cover how to keep this loaf fresh, fix the most common issues, and answer the questions I get most often.
How to Store Pumpkin Sourdough Bread
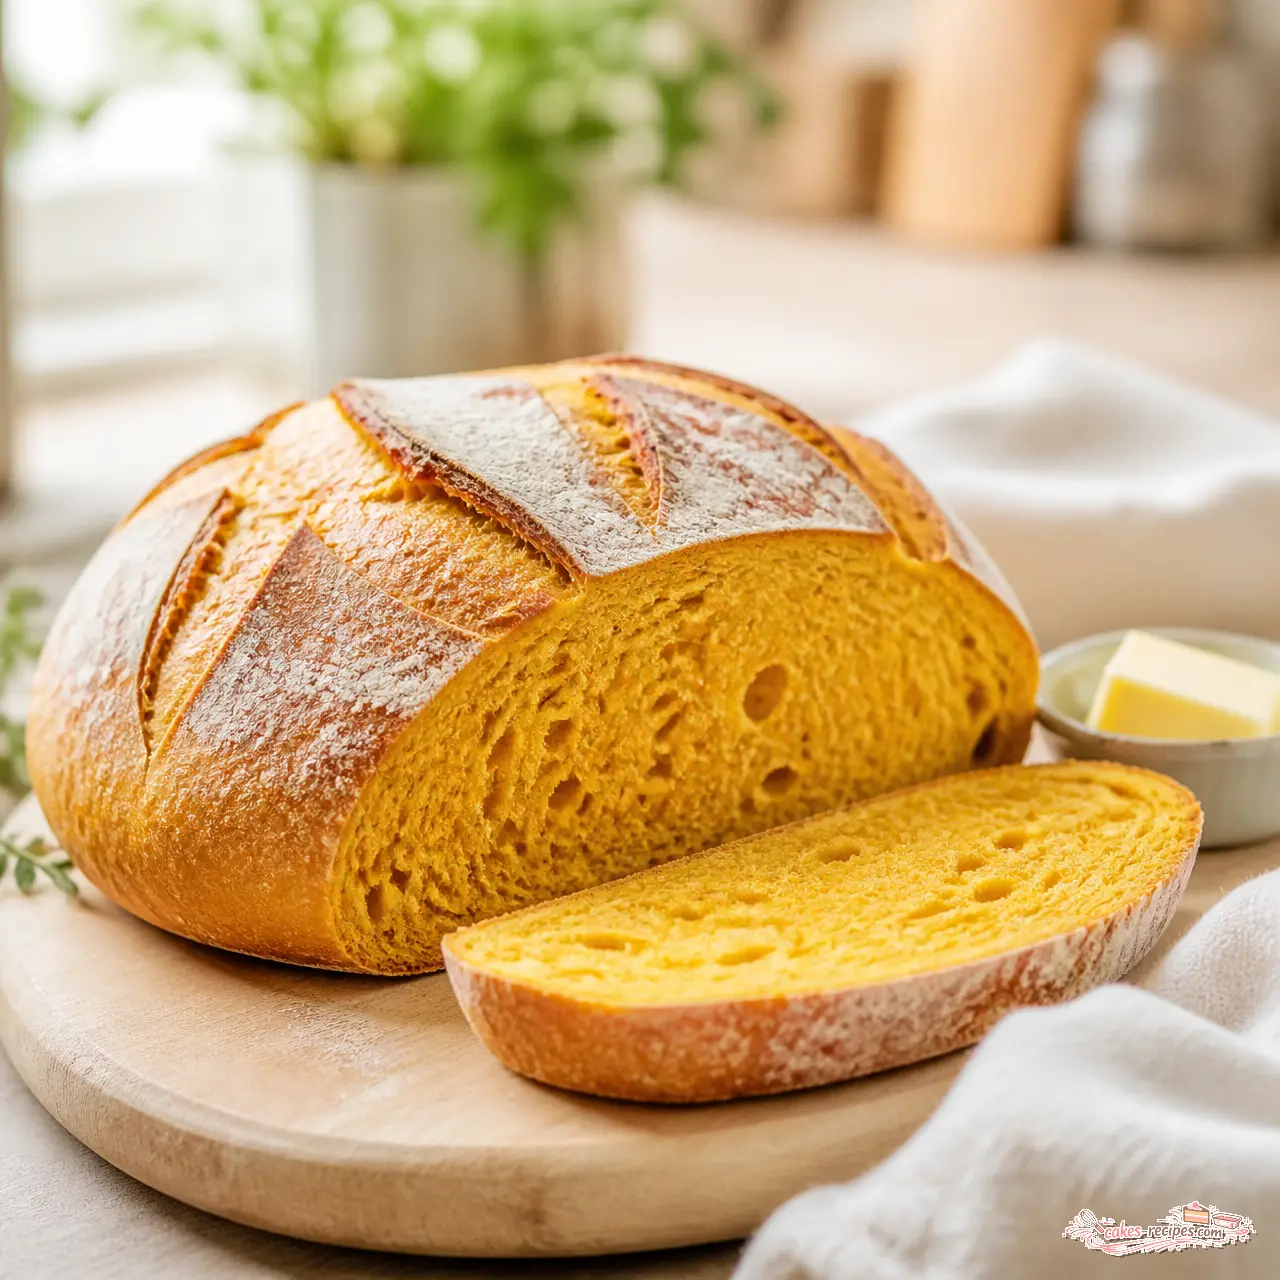
First, let the loaf cool completely. I know it’s hard. But cutting too early traps steam and gives you a gummy, dense crumb, and nobody wants that. Give it at least 4 to 6 hours. Overnight is even better.
Store the cooled loaf wrapped in a clean tea towel or in a bread bag at room temperature for 2 to 3 days. For longer storage, slice the whole loaf, freeze it in an airtight container, and toast slices directly from frozen. It’s a lifesaver for busy mornings.
Troubleshooting Common Issues
- Dense, gummy crumb? You probably cut into it too soon, or your starter wasn’t active enough. Wait the full cooling time and feed your starter until it’s reliably bubbly.
- No oven spring? The dough likely over-proofed during bulk ferment. Watch for that jiggle and those surface bubbles, and check the dough more often during a hot August day.
- Burnt bottom? Place a rimmed baking sheet on the rack below the Dutch oven to deflect the heat. Easy fix.
- Dough sticking to the banneton? Flour it heavily, all the way up the sides. Rice flour or another gluten-free flour works best if you have it.
- Over-fermented dough? If it smells sharply acidic and feels deflated, your bulk ferment ran long. Shorten it next time, especially when your kitchen is warm.
Because the pumpkin gives the crumb an orange tint, the usual golden-brown doneness cues are harder to read. Rely on temperature. The loaf is done when the internal temperature hits 205°F to 210°F. That’s the most reliable signal I know. My first sheet cake taught me to test doneness in several spots, and the same lesson applies here.
When you pull your first pumpkin sourdough bread from the oven, the one with the crackling crust and the faint orange crumb, you’re going to feel like a different kind of baker. I promise. It’s the loaf that gets photographed, the one people ask about at the table, the one that starts your personal fall baking tradition before the leaves even change.
If you make it, I’d love to see how it turns out. Come find me on Pinterest, where I share all my favorite fall baking ideas. And when you nail that score, tag me. Trust me on this: every baker loves a little applause.
California Harvest Pumpkin Sourdough Bread
Ingredients
Method
- Autolyse: In a large glass or ceramic bowl, combine the sourdough starter, water, and honey, stirring until the honey dissolves. Add the bread flour, pumpkin puree, and salt. Mix with the handle of a wooden spoon until a ragged, shaggy dough forms. Cover the bowl with plastic wrap or a damp lint-free towel and let rest for 1 hour.
- Form the dough: Work around the bowl, grabbing the dough from the outside, stretching it up and over itself until a smooth ball forms. This should take about 20 to 25 folds. Re-cover and let rest for 30 minutes.
- Stretch and fold: Perform 4 sets of stretch and folds with 15 to 30 minutes between sets. To stretch, lift one side of the dough, pull it high, and fold it over to the opposite side. Rotate the bowl a quarter turn and repeat until you have gone around the whole dough. This builds structure and gluten.
- Bulk ferment: Replace the cover and let the dough ferment at room temperature until it has just doubled in size. It will look wobbly, jiggly, and you'll see large air bubbles just under the surface. The time depends on your kitchen temperature; in a warm room it may be only a few hours, in a cooler room it could take overnight.
- Shape the loaf: Turn the dough out onto a lightly floured surface and preshape it into a rough batard or round. Let it rest for about 15 minutes if the dough is very elastic. Give it a final tight shaping by dragging the dough toward you to build surface tension. Flour your banneton generously, all the way up the sides, and place the dough in it seam side up. If you are coating the loaf with seeds or oats, sprinkle those into the banneton before placing the dough.
- Cold ferment: Cover the banneton loosely with a reusable plastic bag or a damp towel, then refrigerate the dough for a minimum of 5 hours and up to 36 hours. The longer it chills, the deeper the sourdough flavor and the more blistered the crust. At least 12 hours is ideal.
- Preheat oven and pot: About 60 minutes before you want to bake, put your Dutch oven with its lid on the center rack and heat the oven to 450°F (230°C). Leave the shaped dough in the fridge until the exact moment you are ready to score and bake; the contrast with the hot pot gives excellent oven spring.
- Bake: Take the hot Dutch oven out carefully. Turn the chilled dough onto a sheet of parchment paper, score the top with a lame or sharp knife. Use the parchment as a sling to lower the dough into the pot. If desired, spritz the dough with water before covering. Bake covered at 450°F (230°C) for 30 minutes. Remove the lid, lower the oven to 410°F (210°C), and continue baking for 10 to 15 minutes, until the crust is deeply browned. To protect the bottom from burning, place a rimmed baking sheet on the rack below the Dutch oven.
- Cool: Remove the finished loaf from the Dutch oven immediately and transfer it to a wire rack. Let it cool completely, at least 4 to 6 hours (overnight is even better), before slicing. Cutting too early will give you a gummy, dense crumb.
Nutrition
Notes
Tried this recipe?
Let us know how it was!Frequently Asked Questions
Source: Learn More About This Dish
How do you shape a sourdough pumpkin?
Tie four lengths of food-grade cotton string around the shaped loaf in an X pattern, then a second X offset by 45 degrees. Let it cold proof and bake. Once it cools slightly, snip and remove the strings to reveal the classic pumpkin segments. Add a cinnamon stick or a clean twig as the stem.
How do I know my starter is ready to bake with?
You need an active starter, not sourdough discard. About 4 to 6 hours after feeding, it should look light and airy, have at least doubled in volume, and smell pleasantly tangy. A spoonful should float in water, and you should see lots of tiny bubbles on the surface and sides of the jar.
What kind of pumpkin should I use?
Use pure pumpkin puree, not pumpkin pie filling. Pie filling has added sugar and spices that disrupt fermentation. Canned pure pumpkin is the most consistent choice. For homemade, use sugar pumpkins, roast them until tender, drain well, and mash until smooth.
Can I use homemade pumpkin purée?
Yes, absolutely. Just make sure you cook it down enough and drain any excess liquid before using. Homemade puree can be a bit more watery than canned, so if your dough feels too slack, hold back 20 to 30 grams of water at the mix and add it only if needed.
Do I need a Dutch oven?
It’s the easiest way to get that bakery-style crust because it traps steam during the first half of baking. But if you don’t have one, use a heavy oven-safe pot with a lid, or bake on a preheated baking steel with a tray of boiling water underneath for steam baking.