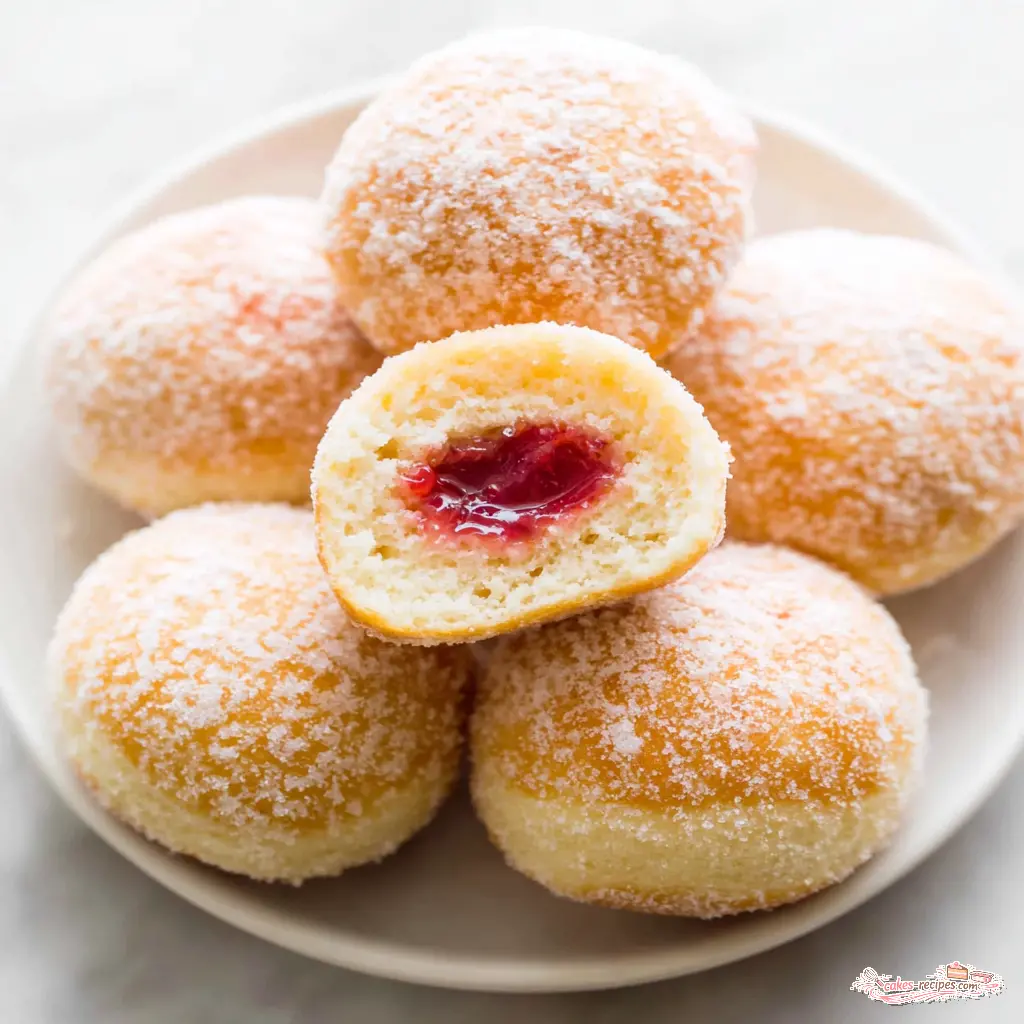
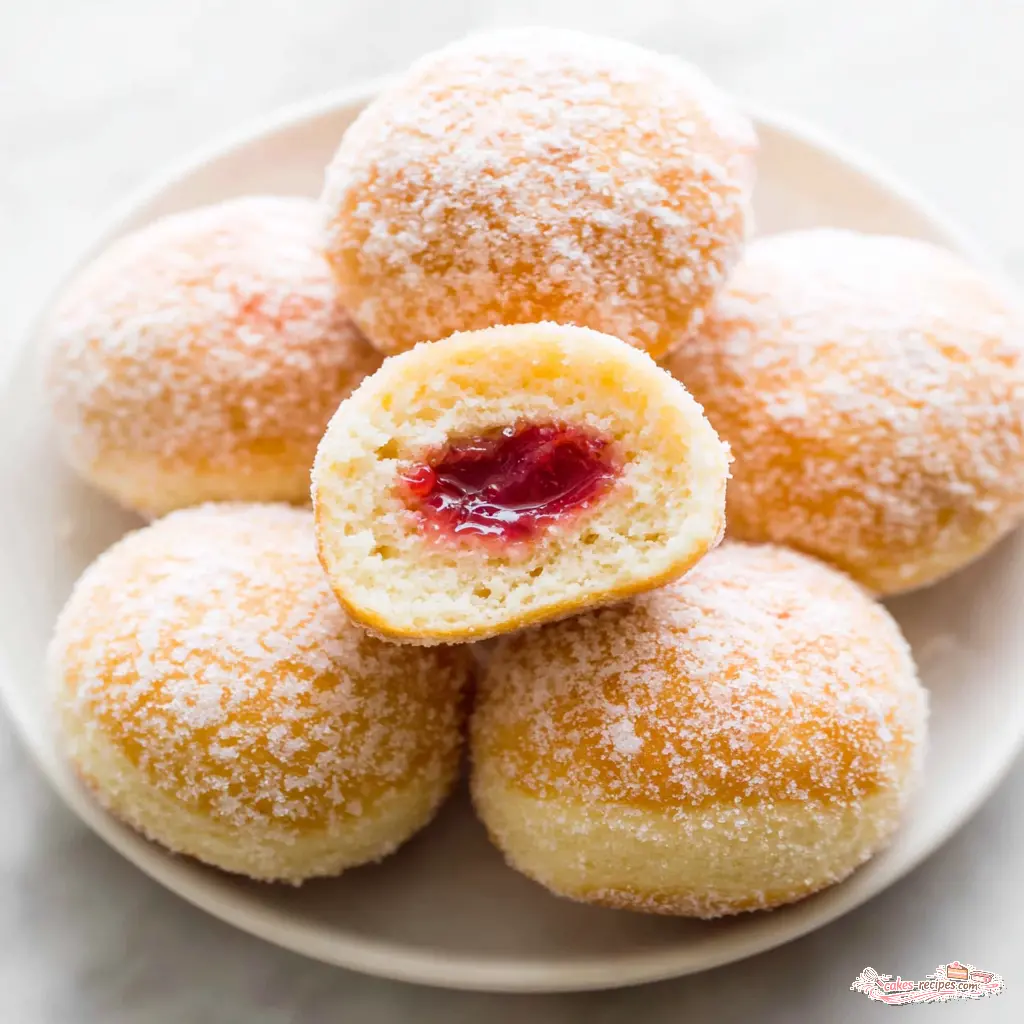
Fluffy Baked Jelly Donuts with California Strawberry Jam
Ingredients
Method
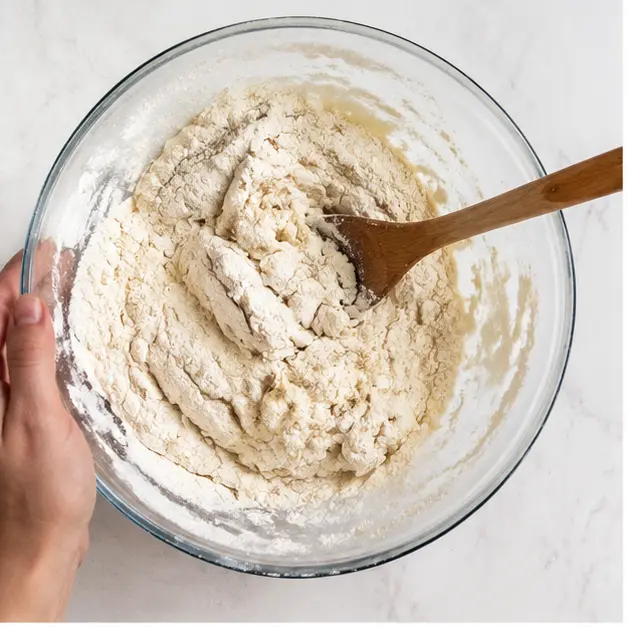
- In a large bowl, whisk together the flour, instant yeast, 2 tablespoons of sugar, and salt. Add the warm milk, 1 tablespoon of melted butter, beaten egg, and vanilla extract. Stir until a shaggy dough forms and no dry flour remains, scraping down the sides of the bowl.
- Cover the bowl with plastic wrap or a clean kitchen towel and let the dough rest at room temperature for 15 to 20 minutes. This rest helps the gluten develop naturally, making the dough less sticky and easier to handle.
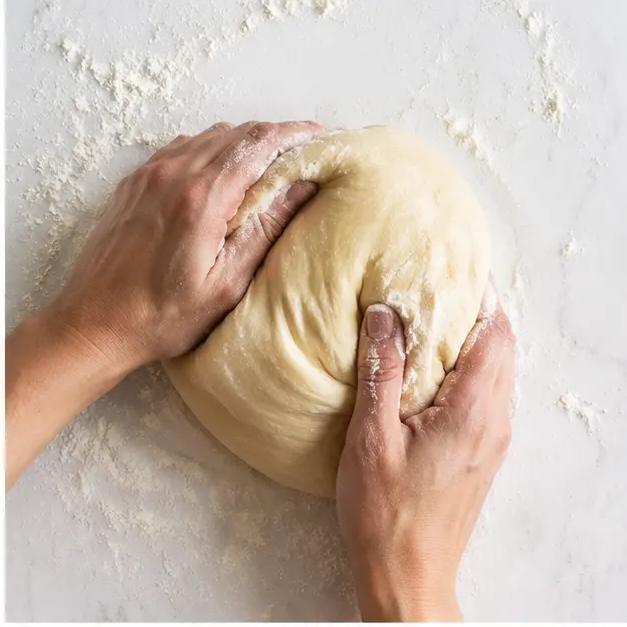
- Turn the dough out onto a lightly floured surface. Knead for 5 minutes, adding a little more flour if the dough is too sticky, but only as needed. Cover the dough with an inverted large bowl and let it rest for 5 minutes.
- Knead the dough for another 5 minutes until it becomes smooth and supple. The dough should be soft and hold its shape; when you poke it firmly, the indentation should spring back quickly. If not, knead for a few more minutes.
- Place the kneaded dough back in the bowl, cover with plastic wrap, and let it rise for 1 hour, or until doubled in size.
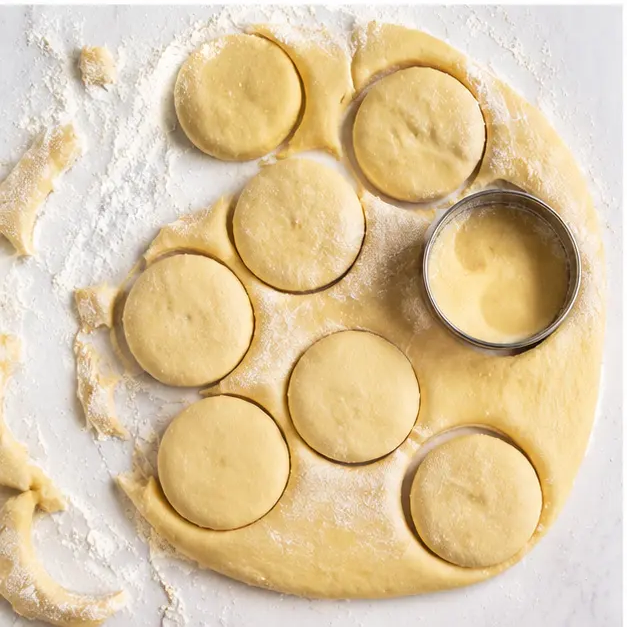
- Turn the risen dough onto a floured surface. Roll it out into an 8 by 10-inch rectangle, about 1/2-inch thick. Use a 2.5-inch round cookie cutter or the rim of a glass to cut out 12 rounds. Gather and re-roll scraps if needed.
- Preheat your oven to 375°F. Line a baking sheet with parchment paper or a silicone mat. Carefully transfer the dough rounds to the sheet using a scraper to keep their round shape. Lightly dust the donuts with flour, cover with a dish towel, and let them rest for 30 minutes at room temperature until nearly doubled in size.
- Bake the donuts for 10 to 12 minutes, or until they are lightly golden. Check them near the end to prevent over-browning.
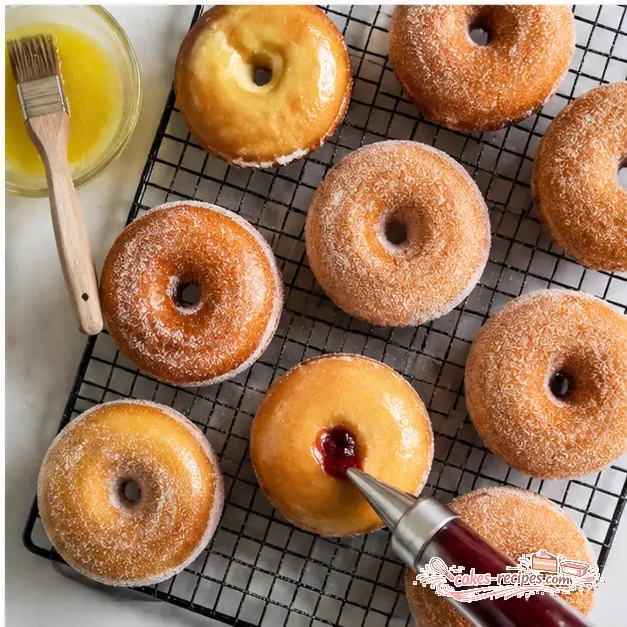
- Place the 1/4 cup of sugar in a shallow dish. As soon as the donuts come out of the oven, brush them with the remaining 1 tablespoon of melted butter. Roll each warm donut in the sugar to coat evenly.
- Fill a pastry bag fitted with a round tip with the strawberry jam. Use a knife to cut a deep slit into the side of each donut. Insert the tip and gently pipe about 2 teaspoons of jam into each donut. Serve warm or at room temperature.
Nutrition
Notes
Tried this recipe?
Let us know how it was!Why I Stopped Frying Donuts (And You Should Too)
I’ll be honest with you. My first attempt at making donuts at home was a disaster. Un desastre completo. I was sixteen, trying to impress my abuela Esperanza, and I thought frying would be the only way to get that soft, pillowy texture I remembered from the panadería. Long story short, I ended up with a batch of greasy, lopsided blobs that looked nothing like donuts. The kitchen smelled like a diner for three days.
That’s when I started experimenting with baked jelly donuts. Mira, I love fried food as much as the next person, but there’s something about summer in San Antonio that makes standing over a pot of hot oil feel like punishment. You want a treat, not a sweat lodge experience. These baked jelly donuts give you that same soft, tender crumb and jammy center without the mess, the smell, or the guilt.
And honestly? Once I figured out the right technique, I realized baked donuts have their own charm. They’re lighter, they don’t leave your hands greasy, and you can eat three without feeling like you need a nap. Así es.
What Makes These Baked Jelly Donuts Special
These aren’t those dry, muffin-like baked donuts you’ve had before. The secret is in the dough. We’re using instant yeast and a short rest period that builds just enough gluten to give you that soft, airy texture you want from a yeast donut. No, it won’t be exactly like a fried donut but it’s close enough that my kids don’t complain.
Here’s what you’re getting with this baked donut recipe:
- No deep frying. No oil splatters, no thermometers, no guessing games.
- Real yeast dough. That means actual rise and fluffiness, not a dense cake donut.
- Strawberry jam filling. Sweet, fruity, and perfectly messy when you bite in.
- Butter and sugar coating. That classic finish that makes every bite satisfying.
I’ve been making these for weekend brunches, lunchbox surprises, and even for my daughter’s class parties. They disappear fast, claro que sí.
Ingredients for the Best Baked Jelly Donuts
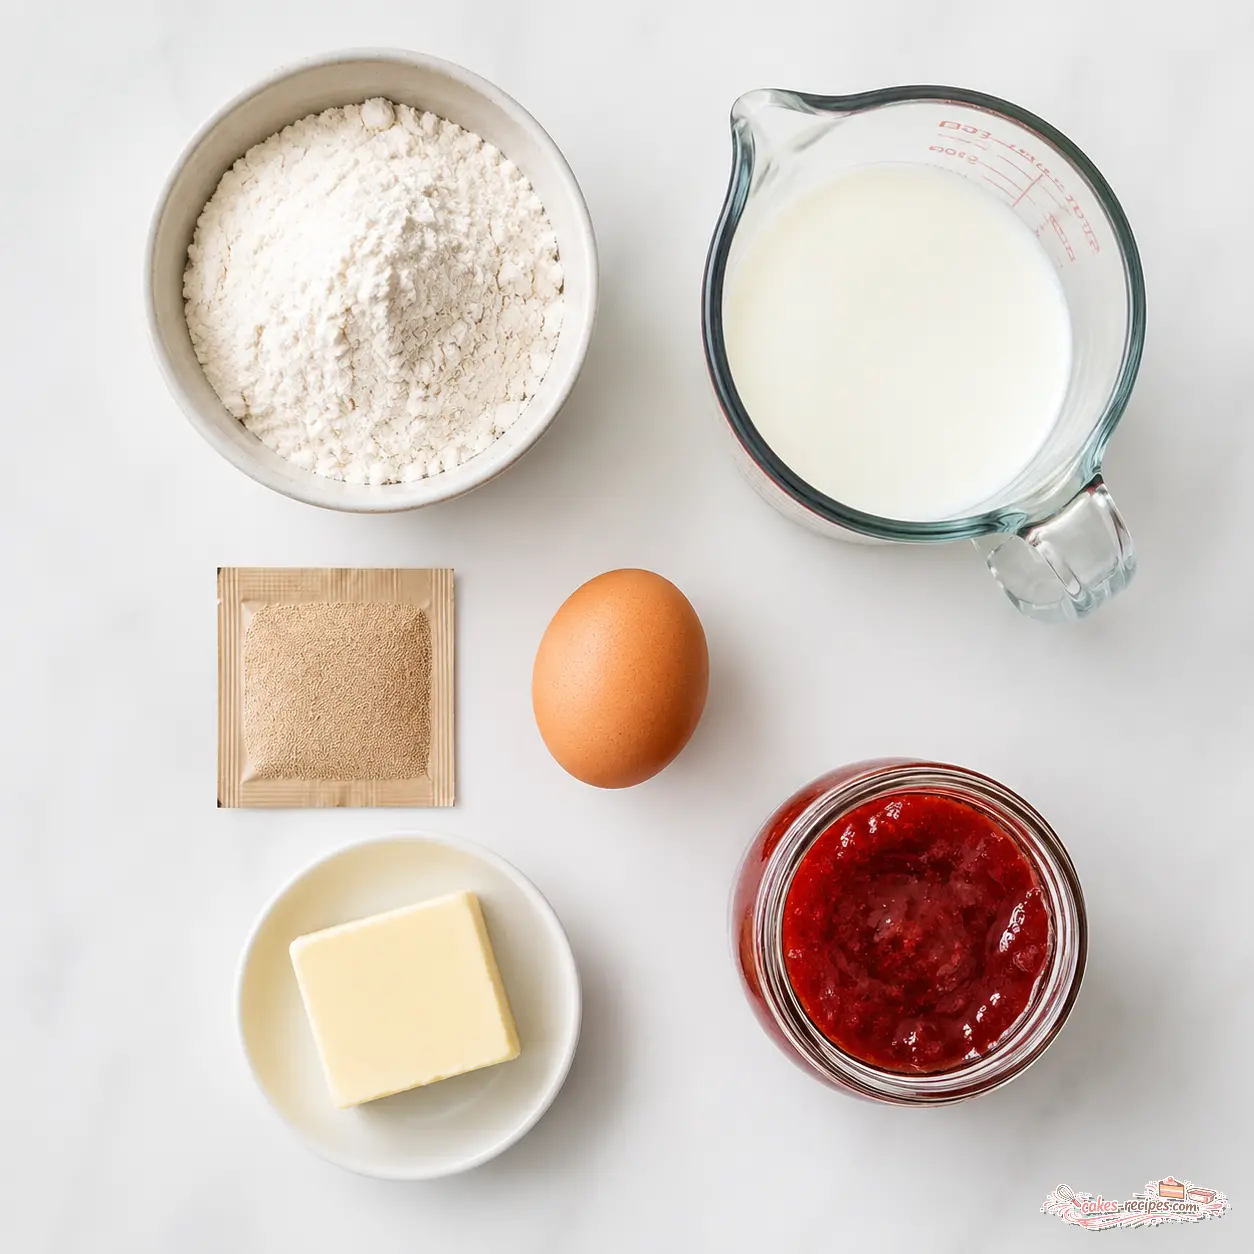
The ingredient list is short and simple. You probably have most of these in your pantry right now. For the jelly donut filling, I recommend a good quality strawberry jam preferably seedless, but honestly, I’ve used both and they’re both delicious. If you can find California-made strawberry jam, even better. The flavor is brighter, more like actual berries.
For the dough:
- All-purpose flour spoon and level it, please. Packing it down is the number one reason for dense donuts.
- Instant yeast no need to proof it, just mix it right in with the dry ingredients.
- Granulated sugar just a little for sweetness and to feed the yeast.
- Salt balances the sweetness, don’t skip it.
- Whole milk warm but not hot. Too hot and you’ll kill the yeast.
- Unsalted butter melted, divided. Some goes in the dough, some goes on top.
- Egg gives structure and richness.
- Vanilla extract that warm, cozy flavor.
For the coating and filling:
- More granulated sugar for rolling the warm donuts.
- Strawberry jam about a third of a cup, but you can use more if you’re generous like me.
How to Make Baked Jelly Donuts Step by Step
Let me walk you through this. I’ve made these so many times I could do it in my sleep, but I remember how intimidating yeast dough can feel at first. No te preocupes. It’s easier than you think.
Stage 1: Mixing the Dough
Start by whisking your dry ingredients together in a large bowl. Flour, instant yeast, sugar, salt just mix them up so everything is evenly distributed. Then add the warm milk, one tablespoon of melted butter, the beaten egg, and vanilla. Stir until you get a shaggy dough. It’ll look rough and uneven, but that’s exactly right.
Cover the bowl and let it rest for 15 to 20 minutes. This rest is important it lets the flour absorb the liquid and starts developing gluten naturally. You’ll notice the dough feels less sticky after this rest. That’s the gluten doing its job.
Stage 2: Kneading to Smooth Perfection
Turn the dough onto a lightly floured surface. Knead for about 5 minutes. You’ll feel it change from sticky and rough to smooth and supple. If it’s sticking too much, add a tiny bit more flour but only as needed. Too much flour makes dense donuts.
Cover the dough with an inverted bowl and let it rest another 5 minutes. Then knead again for another 5 minutes. By now, the dough should be soft and hold its shape. Here’s my test: poke it firmly with your finger. If the indentation springs back quickly, you’re good. If not, knead a few more minutes.
Place the dough back in the bowl, cover it, and let it rise for one hour. It should double in size. This is the first rise for these yeast donuts, and it’s where all the flavor develops.
Stage 3: Shaping and Second Rise
Turn the risen dough onto a floured surface. Roll it into a rectangle about 8 by 10 inches and half an inch thick. Use a 2.5-inch round cookie cutter or the rim of a glass, I’ve done that plenty of times to cut out 12 rounds. Gather the scraps and re-roll if needed.
Transfer the rounds to a parchment-lined baking sheet. Dust them lightly with flour, cover with a dish towel, and let them rest for 30 minutes. They’ll puff up and nearly double in size again. This second rise is what gives you that soft donut texture.
Stage 4: Baking and Finishing
Preheat your oven to 375°F. Bake the donuts for 10 to 12 minutes, until they’re lightly golden. Watch them toward the end ovens vary, and you don’t want over-browned donuts.
As soon as they come out, brush each warm donut with the remaining melted butter, then roll them in sugar. This is my favorite part. The butter melts into the warm donut, and the sugar sticks to form that sweet, slightly crunchy coating.
To fill them, use a pastry bag with a round tip. Cut a deep slit into the side of each donut, insert the tip, and pipe about 2 teaspoons of strawberry jam inside. You’ll see the donut swell a little as it fills. That’s how you know it’s working.
Tips for Perfect Baked Jelly Donuts
After making these dozens of times, I’ve learned a few things that make a real difference. Here’s what I wish someone had told me when I started:
- Measure flour correctly. Spoon it into your measuring cup, then level it off with a knife. Scooping directly from the bag packs the flour and gives you dense donuts.
- Check your yeast. Instant yeast doesn’t need proofing, but it does need to be fresh. If your yeast has been sitting in the pantry for two years, replace it.
- Don’t rush the rises. The dough needs time to develop flavor and structure. A warm spot in your kitchen not hot, just warm is perfect.
- Don’t over-knead. The dough should be smooth and supple, not stiff and tight. When it springs back from a poke, stop.
- Fill generously but carefully. Two teaspoons per donut is about right. Too much and the jam will leak out during storage.
My Favorite Tip
For the coating: If some jam leaks out while you’re filling the donuts, don’t worry. It caramelizes on the outside and tastes incredible. My kids fight over the ones with jam on the outside. I call them “bonus donuts.”
Variations and Fillings
While strawberry jam is my go-to, these filled donuts are versatile. Here are some variations I’ve tried and loved:
- Meyer lemon curd. Bright and tangy, perfect for spring. If you’re in California like me, Meyer lemons are everywhere in season.
- California fig jam. A little more sophisticated, with a deep sweetness that pairs beautifully with the buttery coating.
- Raspberry or blackberry jam. Any berry jam works. Just make sure it’s not too runny.
- Chocolate-hazelnut spread. For when you want a dessert that feels extra indulgent.
For the coating, you can also experiment. Try a cinnamon sugar mix 1/3 cup sugar with half a teaspoon of cinnamon. Or skip the butter and sugar entirely and dip the donuts in a simple glaze made from powdered sugar and milk. The base recipe is flexible, por supuesto.
How to Store Baked Jelly Donuts
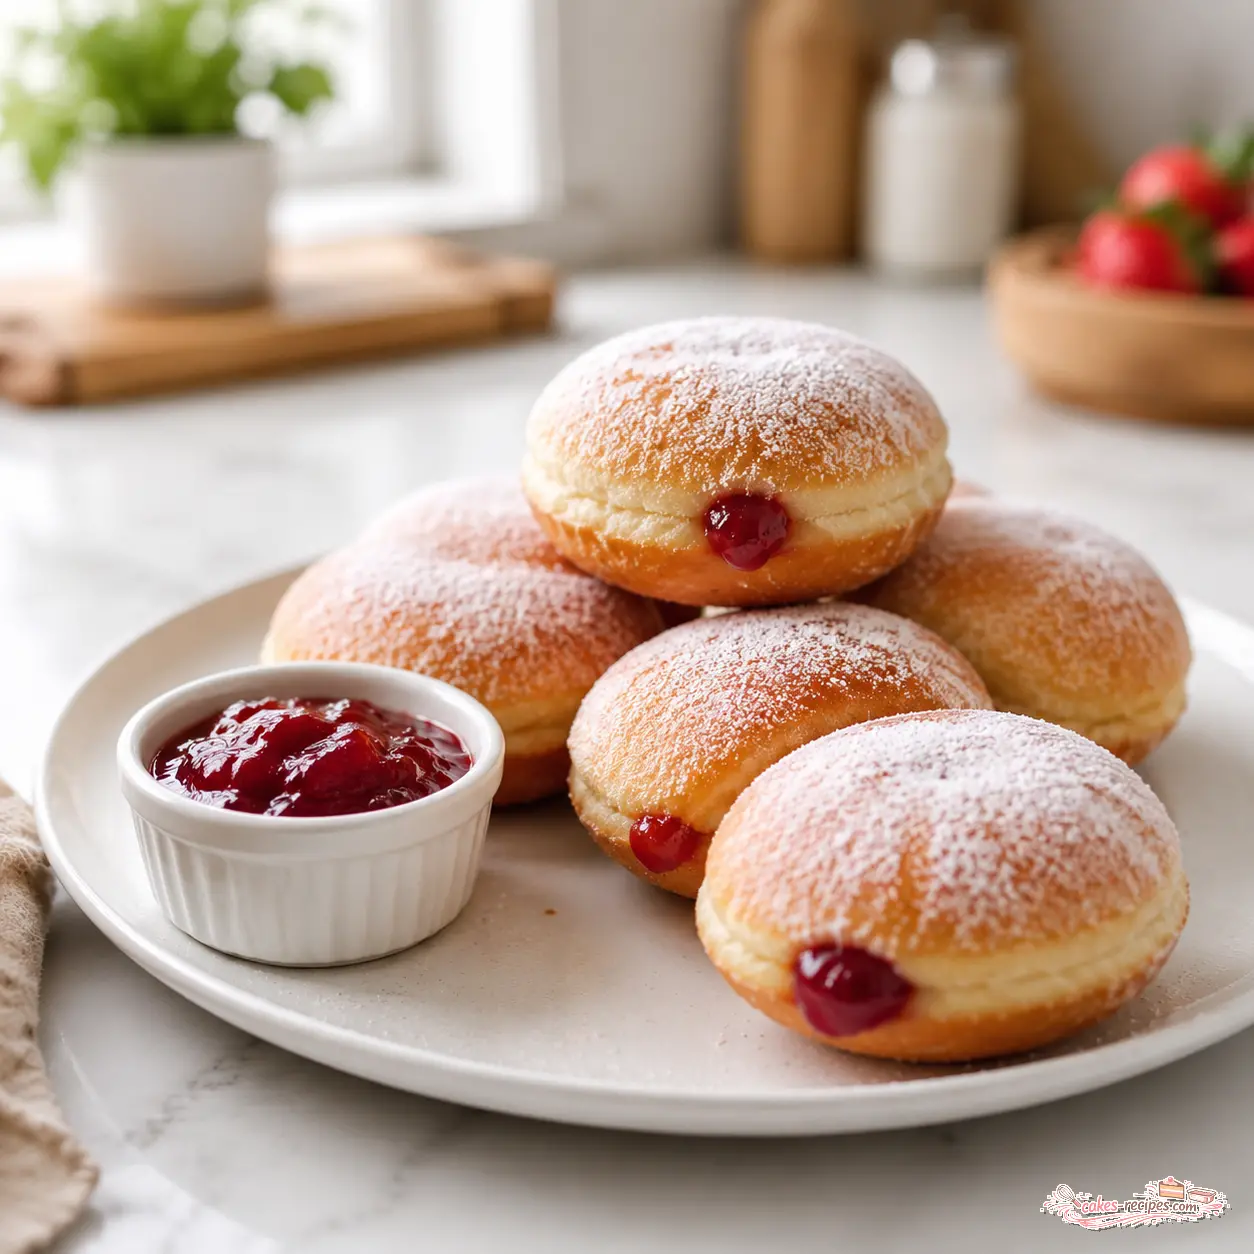
These donuts are best the day you make them. There’s something about that first day texture soft, slightly warm, the jam still bright and fresh. But if you have leftovers (unlikely in my house, but possible), here’s what to do:
- Room temperature: Store in an airtight container for up to one day. The coating might get a little sticky, but they’ll still taste great.
- Make ahead: Prepare the dough through step 5 (after the first kneading), then refrigerate overnight. The next day, let it come to room temperature, shape, and continue with the recipe. This actually develops more flavor.
- Don’t freeze filled donuts. The jam gets icy and the texture changes. If you want to freeze, freeze the unfilled, uncoated baked donuts. Thaw, warm slightly, then brush with butter, coat in sugar, and fill fresh.
Common Mistakes to Avoid
I’ve made every mistake in the book so you don’t have to. Here are the most common issues and how to fix them:
❌ Dense, heavy donuts This usually happens from too much flour. Use the spoon and level method. Also, make sure your yeast is fresh and your milk is warm (not hot).
❌ Donuts that don’t rise Check your yeast. If it’s expired, it won’t work. Also, if your milk was too hot, it killed the yeast. Aim for about 110°F warm to the touch but not uncomfortable.
❌ Jam leaking everywhere Don’t overfill. Two teaspoons is plenty. Also, make sure your piping tip is inserted deep enough into the donut before you squeeze.
❌ Uneven baking Rotate your baking sheet halfway through. Every oven has hot spots, and rotating ensures even browning.
❌ Dry donuts Over-baking is the culprit. Check them at 10 minutes. They should be lightly golden, not dark brown.
Frequently Asked Questions
Final Thoughts
These baked jelly donuts have become a staple in my kitchen, especially during summer when the last thing I want is a pot of hot oil on the stove. They’re the kind of recipe that makes you feel like you’ve pulled off something special, even though it’s actually pretty simple.
My nine-year-old daughter, who takes her donut-testing duties very seriously, gave these a thumbs up. She said they’re “almost as good as the bakery ones.” Coming from her, that’s high praise. Qué padre.
If you make these, tag me. I love seeing your donut victories and even your donut mishaps. We all start somewhere. I should know.
For more inspiration, check out my Pinterest board where I share all my favorite baked treats and Latin-inspired desserts. Happy baking!
Source: Nutritional Information
Is it Donuts or Doughnuts?
Both are correct! u0022Doughnutu0022 is the traditional spelling, but u0022donutu0022 has become the standard in American English. I use u0022donutu0022 because it’s simpler and that’s what most people search for. Either way, they’re the same delicious treat.
Are Baked Donuts Healthy?
Compared to fried donuts, baked donuts have less fat and fewer calories. Each of these baked jelly donuts has about 185 calories and 5 grams of fat. They’re still a treat, but a lighter one. You get the satisfaction of a donut without the grease.
What is the Best Filling for Donuts?
For these baked jelly donuts, I love strawberry jam. It’s sweet, fruity, and has the perfect consistency for piping. Seedless jam works best because it flows smoothly through the piping tip. But raspberry, blackberry, or even lemon curd are all excellent choices.