

Why This Magic Lemon Cobbler Works
You know that moment when you need a dessert, but your brain is fried and it’s hot outside? That’s exactly when this magic lemon cobbler comes to the rescue. I’m not kidding it’s the kind of recipe that feels like a cheat code.
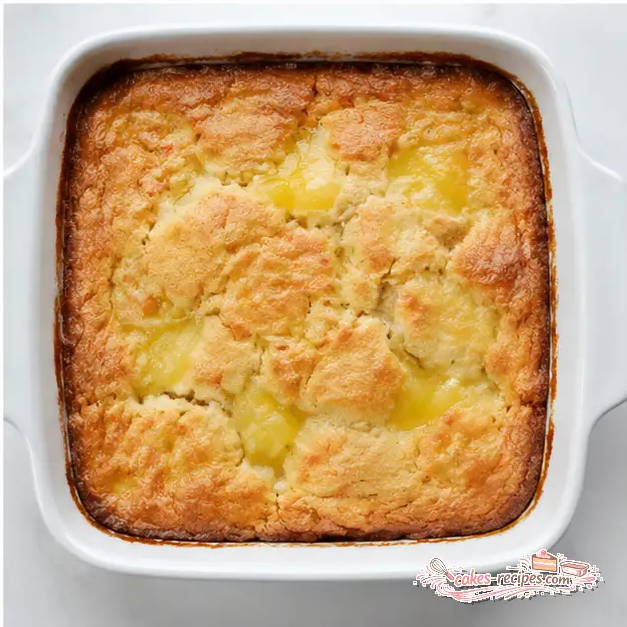
I’ve messed up cobblers before. Trust me, this one forgives everything. The magic part isn’t just a cute name. It’s a real thing that happens in the oven. You pour a simple batter into melted butter, drop spoonfuls of lemon pie filling on top, and bake. That’s it. The batter rises through the filling during baking, creating a golden, shattery crust on top with a tender, almost custard-like lemon layer underneath.
It’s like lemon curd hugged a cloud. Honestly.
Let me walk you through why this works so well. The butter melts in the pan first, creating a hot, buttery base. When you pour the batter over it (without stirring I know, it feels wrong), the butter stays separate. The lemon pie filling on top sinks slightly during baking, and the batter rises up around it. The result? A self-saucing cobbler that’s part cake, part pudding, all lemon.
This is the summer lemon dessert you’ve been looking for. It’s bright without being puckering, sweet but balanced, and it comes together in about 15 minutes of active time. That’s less time than it takes to decide what to watch on Netflix.
And here’s the thing it works every single time. No special equipment, no complicated techniques. Just a bowl, a whisk, and a baking dish.
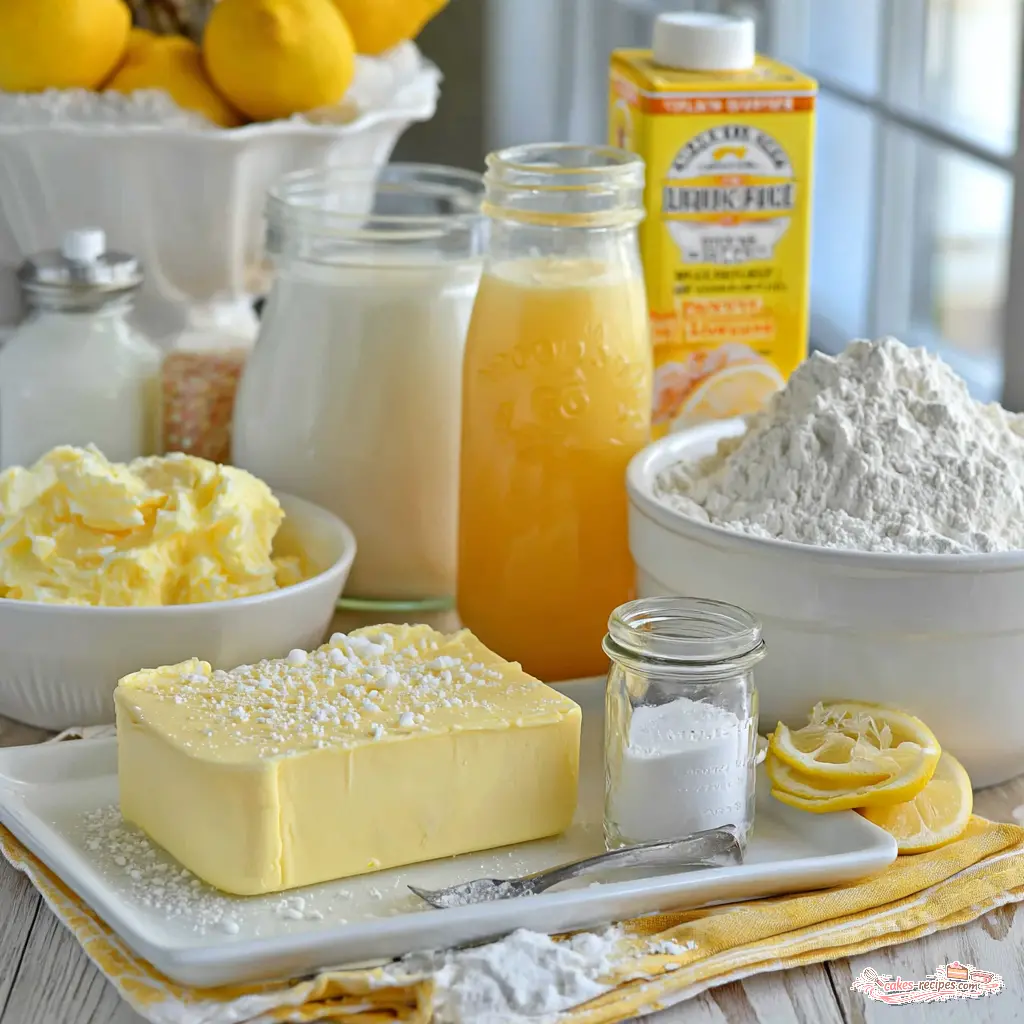
Ingredients for Magic Lemon Cobbler
The ingredient list is short, and you probably already have most of it. That’s by design. I wanted a simple cobbler recipe that doesn’t require a specialty grocery run.
For the crust:
- Unsalted butter – A full stick, melted right in the baking dish. This is what creates that buttery, golden bottom layer.
- All-purpose flour – The base of the batter. Nothing fancy here.
- Baking powder and salt – For lift and balance.
- Granulated sugar – A full cup. It sounds like a lot, but remember the lemon pie filling is tart, so it balances out.
- Buttermilk – This is key. The acidity in buttermilk reacts with the baking powder and helps create that tender, cake-like texture. Don’t skip it.
- Vanilla extract and lemon extract – Double extract action. The lemon extract gives a bright, punchy lemon flavor without needing fresh lemons.
For the topping:
- Lemon pie filling – One 21-ounce can. I use Comstock, but any brand works. This is the shortcut that makes this recipe so easy. It’s thick, tangy, and perfectly lemony.
That’s it. Nine ingredients, and you’re on your way to a lemony summer treat that’ll impress everyone.
How to Make Magic Lemon Cobbler
Let me walk you through the process. It’s straightforward, but a few details make all the difference.
Step 1: Prep the Oven and Pan
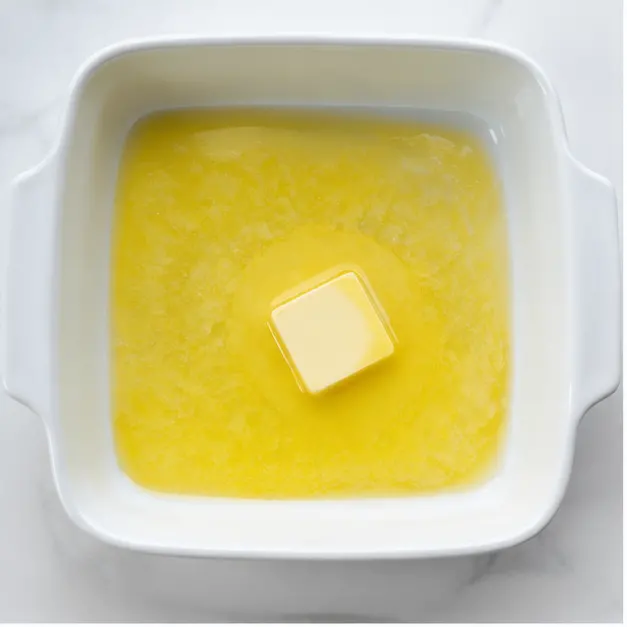
Preheat your oven to 350°F. Place the butter in a 9×9-inch baking dish and pop it in the oven until melted. This takes about 3 to 4 minutes. Watch it carefully you want it melted, not browned. Carefully remove the dish and set it aside. The hot butter is the foundation of the magic.
Step 2: Make the Batter
In a medium bowl, whisk together the flour, baking powder, and salt. Add the sugar and whisk again to combine. Then pour in the buttermilk, vanilla extract, and lemon extract. Stir just until the dry ingredients are moistened. Do not overmix. A few lumps are totally fine. Overmixing develops gluten and makes the cobbler tough, and we want it tender.
Step 3: Assemble the Cobbler
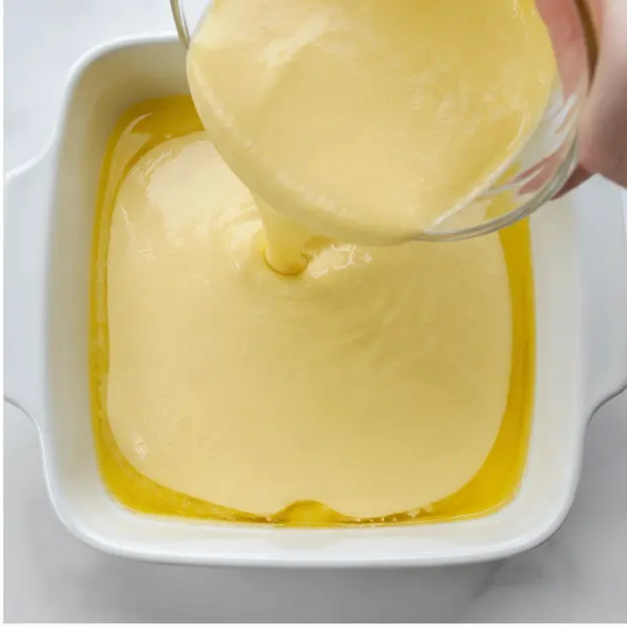
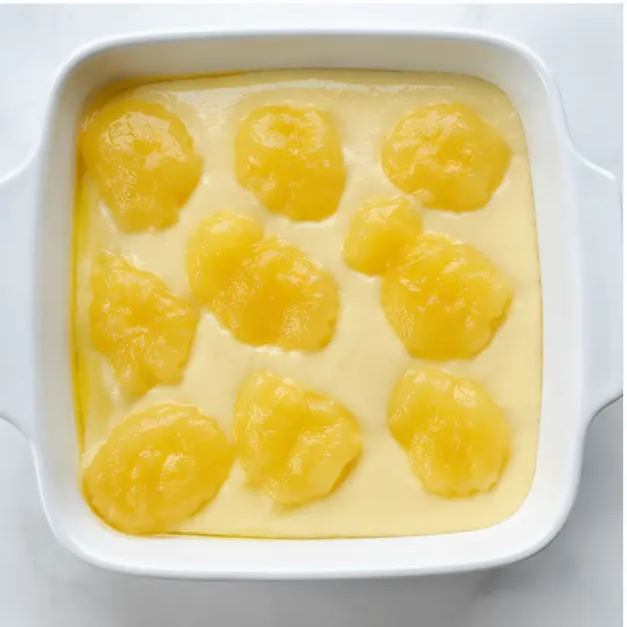
Pour the batter evenly over the melted butter in the baking dish. Do not stir. I repeat do not stir. I know it looks like the butter needs to be mixed in, but trust the process. Then drop spoonfuls of the lemon pie filling over the batter, distributing it as evenly as possible. It’ll look a little messy, and that’s exactly right.
Step 4: Bake and Serve
Bake for 45 to 55 minutes, until the edges are golden brown and the center is set. The top should be golden and shattery, and you’ll see the lemon filling bubbling up through the cracks. Let the cobbler cool for about 10 minutes before serving. This is important the filling needs a few minutes to set so it’s not too runny. Serve warm, and if you really want to make it special, add a scoop of vanilla ice cream.
Tips for the Best Lemon Cobbler
I’ve tested this recipe more times than I can count. Here’s what I’ve learned:
- Don’t stir after layering. This feels wrong but it’s crucial. The batter rises through the filling during baking to create the crust. Stirring ruins the magic.
- Let the butter melt completely. Fully melted butter is essential for the magic layering effect. If it’s not fully melted, the batter won’t separate properly.
- Watch the cobbler toward the end of baking time. Ovens vary, so check at 45 minutes and bake longer if the crust isn’t golden brown yet.
- Cool slightly before serving. This cobbler is best warm, so if you let it cool completely, pop each serving in the microwave for a few seconds before digging in.
- Use a light hand with the batter. Overmixing is the enemy. Stir just until combined, and don’t worry about a few lumps.
Common Mistakes to Avoid
Let me save you from the same mistakes I made the first time:
❌ Stirring the filling and batter together after layering. This prevents the magic separation from happening. The batter needs to stay underneath so it can rise through the filling.
✅ Solution: Drop the filling on top and walk away. No stirring, no swirling, no mixing.
❌ Skipping the step of preheating the baking dish and melting the butter. If the butter isn’t hot when you add the batter, the layers won’t form properly.
✅ Solution: Melt the butter in the dish while the oven preheats. It only takes a few minutes.
❌ Overmixing the batter. This develops gluten and makes the cobbler dense and tough instead of light and tender.
✅ Solution: Stir just until the dry ingredients are moistened. A few lumps are fine.
❌ Not letting the cobbler cool before serving. The filling will be too runny and won’t hold its shape.
✅ Solution: Let it cool for at least 10 minutes. The filling will set into a soft, pudding-like consistency.
Variations and Substitutions
This recipe is flexible. Here are some ways to make it your own:
- Gluten-free: Substitute the all-purpose flour with a 1:1 gluten-free flour blend. I’ve tested this, and it works beautifully.
- Homemade lemon curd: If you can’t find lemon pie filling, use 2 cups of homemade lemon curd instead. It’s a little more work, but the flavor is incredible.
- Berry lemon cobbler: Add a handful of fresh raspberries or blueberries scattered over the lemon filling before baking. The berries burst and create little pockets of jammy goodness.
- Lemon blueberry: Use half lemon pie filling and half blueberry pie filling. The combination is fantastic.
- Different citrus: Try lime pie filling or orange pie filling instead of lemon. Same method, completely different dessert.
- Almond lemon: Add 1/2 teaspoon almond extract to the batter along with the lemon extract. It adds a subtle nutty note that pairs beautifully with lemon.
For a dairy-free version, you can use a plant-based buttermilk alternative. Just mix 1 cup of unsweetened plant milk with 1 tablespoon of lemon juice or vinegar and let it sit for 5 minutes. It works perfectly.
Serving Suggestions
This magic lemon cobbler is wonderful on its own, but a few additions take it over the top:
- Vanilla ice cream – The classic pairing. The cold, creamy ice cream melting into the warm lemon cobbler is pure summer bliss.
- Whipped cream – A dollop of lightly sweetened whipped cream adds a light, airy contrast.
- Fresh berries – A handful of fresh raspberries or blueberries on top adds color and a pop of freshness.
- Powdered sugar – A light dusting just before serving makes it look beautiful.
- Lemon zest – A sprinkle of fresh lemon zest on top brightens the flavor even more.
I like to serve it in shallow bowls with a big scoop of vanilla ice cream melting into the warm cobbler. It’s the kind of dessert that makes people close their eyes and sigh.
How to Store Leftovers
If you have leftovers (which is rare in my house), here’s how to store them:
Refrigerator: Store any leftover cobbler in the baking dish covered tightly with plastic wrap, or transfer to an airtight container. It will keep for about 3 days in the fridge.
Reheating: The best way to reheat is in the microwave. Pop individual portions in for 30-second intervals until warmed through. For a crispier crust, reheat in a 350°F oven for 10-15 minutes.
Freezer: You can freeze the baked and cooled cobbler. Wrap it tightly with plastic wrap or store in an airtight container and freeze for up to 2 months. Thaw overnight in the refrigerator and reheat at 350°F for 10-15 minutes before serving.
Make-ahead: You can mix and layer the cobbler up to 2 days ahead and refrigerate it unbaked. Use melted butter that is slightly cooled in the bottom of the pan since you’re not baking immediately. Bake when you’re ready to serve.

Frequently Asked Questions
More Desserts You’ll Love
If you loved this magic lemon cobbler, you might also enjoy these summer favorites:
- Classic Peach Cobbler
- Lemon Blueberry Bundt Cake
- No-Bake Lemon Cheesecake
- Berry Crisp with Oat Topping
Make this magic lemon cobbler this weekend. Then tell me how it turned out. I’m serious I want to hear about it. Drop me a comment or tag me on social media. There’s nothing better than knowing someone else discovered the magic of this simple, beautiful dessert.
And if you’re looking for more inspiration, come follow me on Pinterest. I’m always pinning new recipes, and this magic lemon cobbler is one of my most popular pins. You’ll find plenty of other lemony summer treats and easy desserts to try.

California Magic Lemon Cobbler
Ingredients
Method
- Preheat your oven to 350°F.
- Place the butter in a 9x9-inch baking dish and put it in the oven until melted, about 3 to 4 minutes. Carefully remove the dish and set it aside.
- In a medium bowl, whisk together the flour, baking powder, and salt. Add the sugar and whisk again to combine.
- Pour in the buttermilk, vanilla extract, and lemon extract. Stir just until the dry ingredients are moistened; do not overmix.
- Pour the batter evenly over the melted butter in the baking dish. Do not stir.
- Drop spoonfuls of the lemon pie filling over the batter, distributing it as evenly as possible.
- Bake for 45 to 55 minutes, until the edges are golden brown and the center is set.
- Let the cobbler cool for about 10 minutes before serving. Enjoy warm, optionally with a scoop of vanilla ice cream.
Nutrition
Notes
Tried this recipe?
Let us know how it was!Source: Research Source
What is a magic lemon cobbler and how does it work?
A magic lemon cobbler is a self-saucing dessert where the batter rises through the lemon filling during baking. The butter melts in the pan first, then the batter and filling are layered on top without stirring. As it bakes, the batter creates a golden crust on top while the lemon filling forms a soft, pudding-like layer underneath.
Can I use fresh lemons instead of lemon pie filling in this lemon cobbler recipe?
You can substitute 2 cups of homemade lemon curd for the canned lemon pie filling. Fresh lemon juice and zest are used to make lemon curd, so you’ll get that bright, fresh lemon flavor. Just make sure the curd is thick enough to hold its shape when dropped onto the batter.
How do I store leftover California Magic Lemon Cobbler?
Store leftover cobbler in the baking dish covered tightly with plastic wrap or in an airtight container in the refrigerator. It will keep for up to 3 days. Reheat individual portions in the microwave for 30-second intervals until warm, or reheat in a 350°F oven for 10-15 minutes for a crispier crust.
What can I substitute for buttermilk in this magic lemon cobbler?
You can make a quick buttermilk substitute by adding 1 tablespoon of lemon juice or white vinegar to 1 cup of regular milk. Let it sit for 5 minutes until it thickens slightly. This works perfectly in this recipe and gives the same tender texture and slight tang.
Is this lemon cobbler recipe gluten-free friendly?
Yes, I’ve tested this with a 1:1 gluten-free flour blend and it works beautifully. Substitute the all-purpose flour with your preferred gluten-free blend. The texture will be slightly different but still delicious. Make sure your baking powder is also gluten-free, as some brands contain wheat starch.
Does the cobbler need to be refrigerated?
Yes, because the cobbler contains dairy (buttermilk and butter) and lemon pie filling, it should be refrigerated after it has cooled completely. Store it covered in the refrigerator for up to 3 days. Reheat individual portions in the microwave or oven before serving.















6 Responses
This looks amazing, but I’m wondering—could I substitute the lemon pie filling with homemade lemon curd? I have a batch in the fridge and would love to use it up. Would the texture still turn out right?
Great question, David! Yes, you can absolutely use homemade lemon curd—just make sure it’s not too runny. If it’s thinner than canned pie filling, you might want to simmer it for a few minutes to thicken it slightly. The texture should still work, though the ‘magic’ rising effect might be a bit different. Let me know how it goes!
I tried this recipe last night and it came out delicious, but the bottom of my cobbler was a bit soggy. I used a glass baking dish—should I have used metal? Or maybe I didn’t melt the butter long enough? Any tips would be appreciated!
Hi Emily! A slightly soggy bottom can happen if the butter isn’t hot enough when you pour the batter over it. Make sure the butter is fully melted and sizzling in a hot oven before adding the batter. Glass dishes can also retain more moisture—try reducing the bake time by 5 minutes and letting it cool longer before serving. Hope that helps!
I made this for a family gathering last weekend and it was gone in minutes! The lemon flavor is perfectly balanced—not too tart, not too sweet. I did add a pinch of nutmeg to the batter on a whim, and it worked beautifully. Thank you for another foolproof recipe!
Made this for a quick weeknight dessert and it was a hit with the kids. I halved the sugar because we prefer less sweet desserts, and it still turned out perfectly. The lemon extract really makes the flavor pop—don’t skip it!